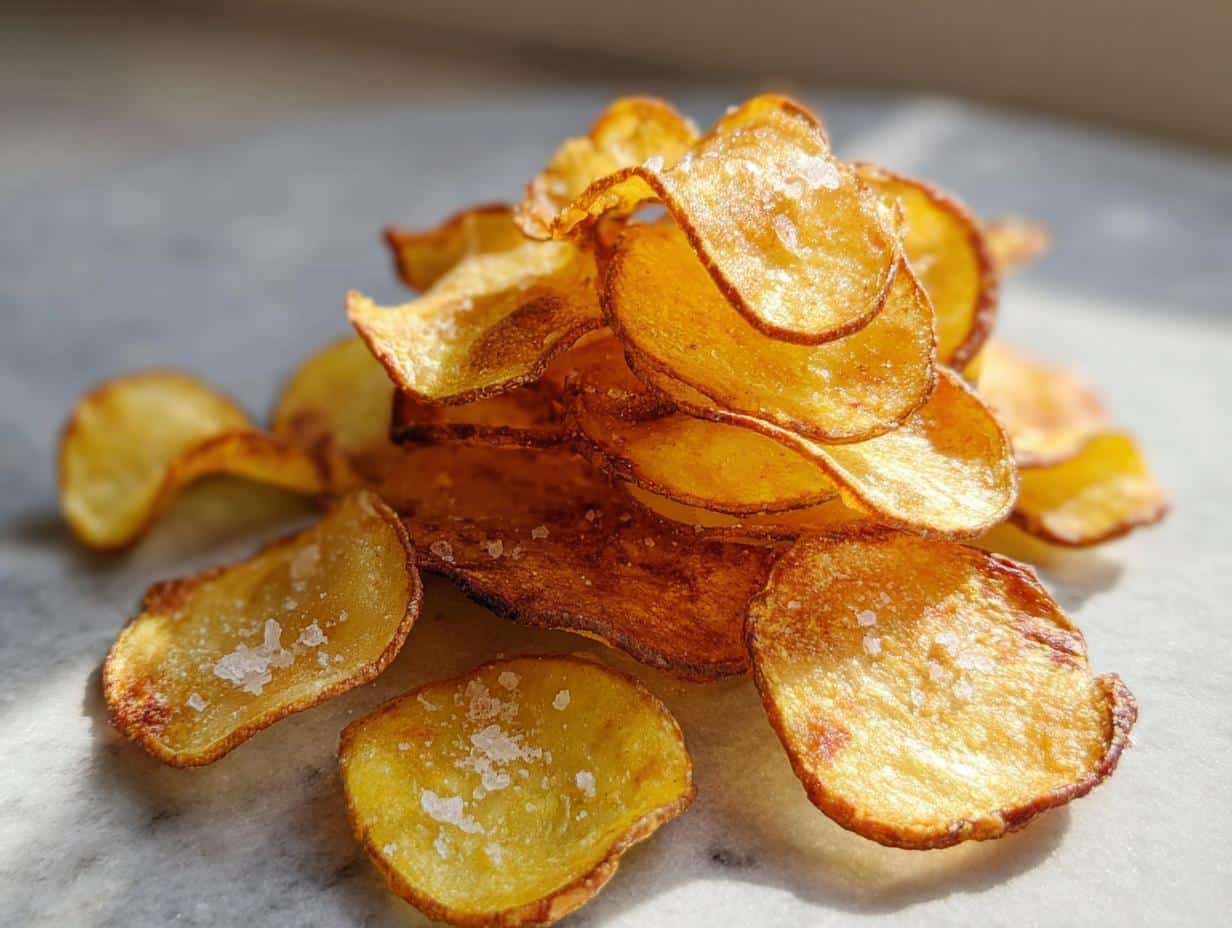
Oh, I totally get it—cravings hit hard, and sometimes only that satisfying *crunch* of a potato chip will do. But as a Registered Dietitian, I always want us to find ways to indulge without derailing our goals. That’s why I poured all my energy into mastering Homemade Baked Potato Chips! I promise, these are lighter, crispier than you think, and only need three main ingredients. The inspiration for this recipe actually struck me during a meal prep workshop I was running in Boston. People kept asking how to make a satisfying snack that wasn’t fried, and it reminded me of my mom baking thin potato slices years ago. After perfecting the slicing and baking time over a few weekends—we’re talking thin, thin slices—I finally nailed the texture. They’re perfectly balanced: crispy edges with just a hint of tenderness in the middle. Trust me, these are my new favorite go-to snack. If you ever have questions about the science behind the nutrition, feel free to check out my full disclaimer page.
Why You Will Love These Homemade Baked Potato Chips
Seriously, ditch the sad snack aisle disappointments! These chips are a game-changer, especially when you need something fast for unexpected guests or when the kids are raiding the pantry. They hit all the right spots without weighing you down. Here’s why I stand by this recipe day in and day out:
- They bake up incredibly crisp—we skip the oil-slicked frying process entirely!
- They are just so quick to assemble; you can have them ready for the oven in under 10 minutes.
- They make phenomenal, quick, kid-friendly snacks that you can feel genuinely good about serving them.
- You control the salt! We know store-bought snacks are loaded, but here you manage every grain.
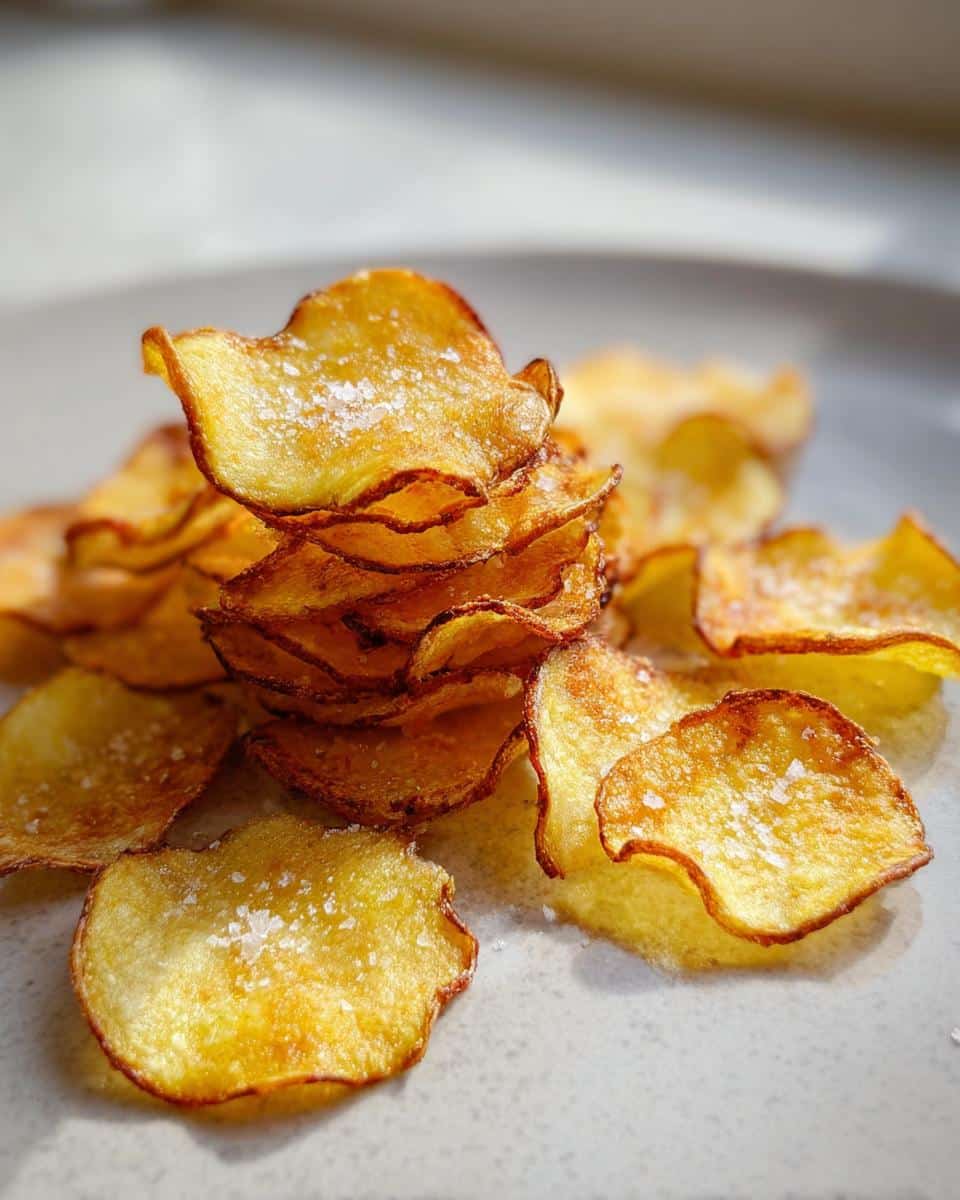
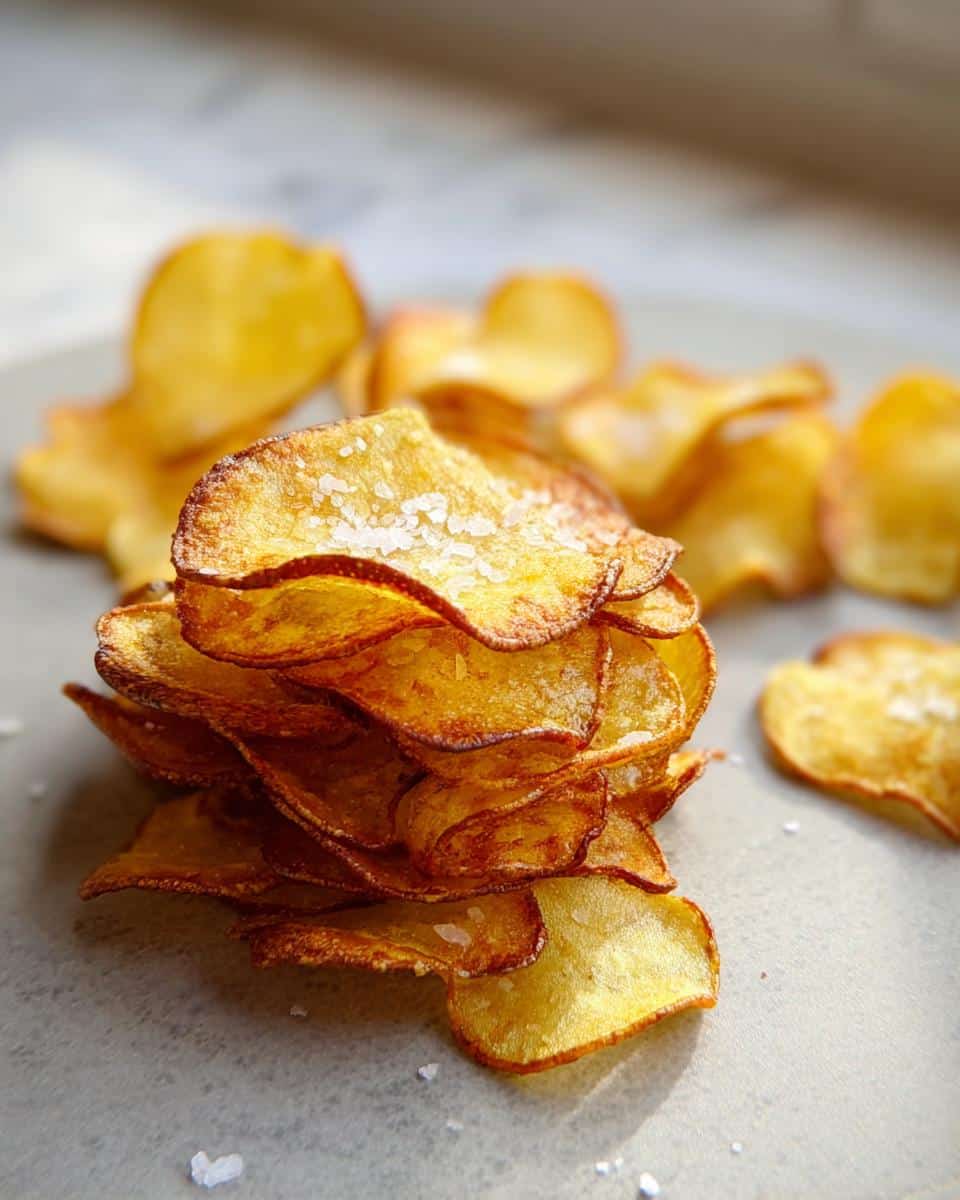
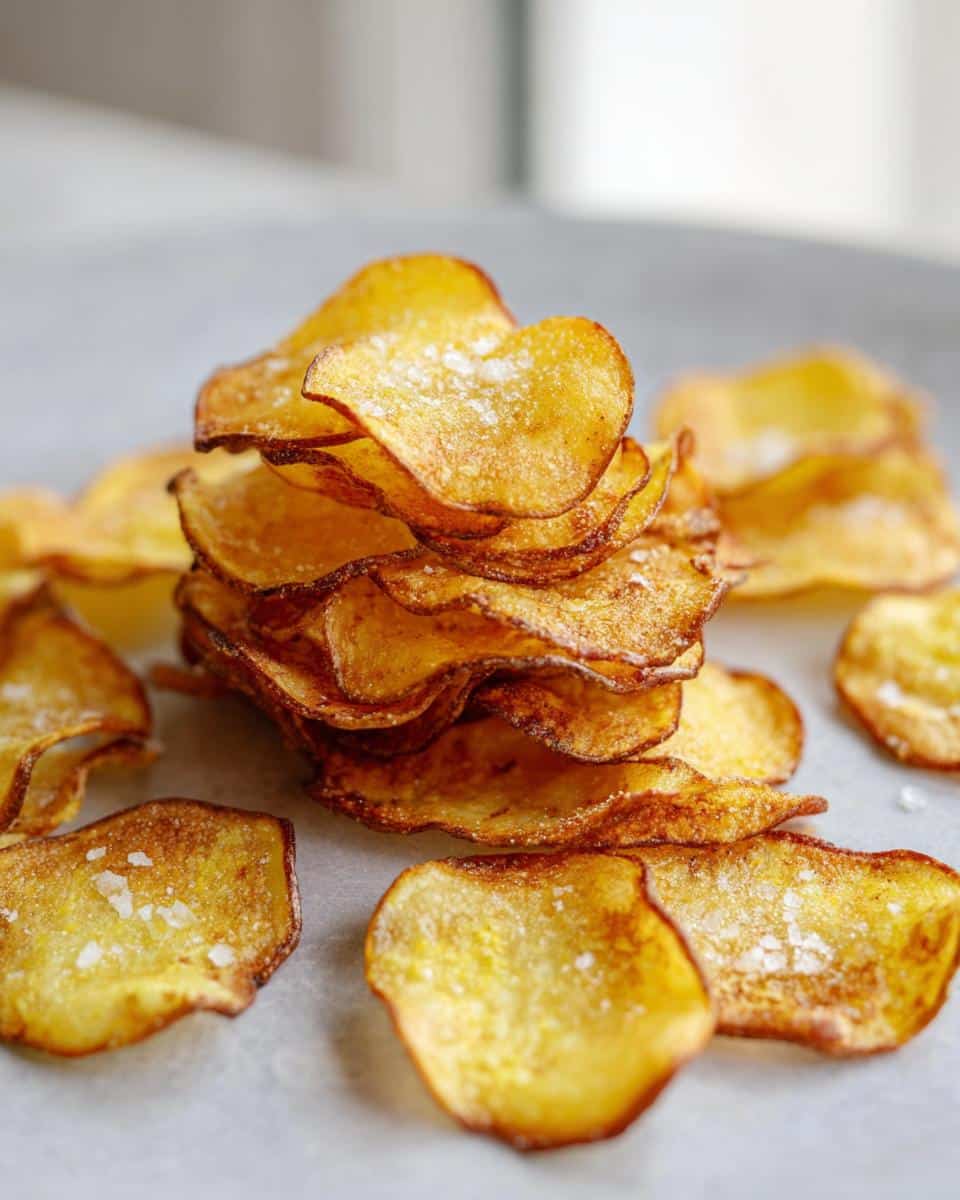
- The texture is just right—croustillant on the edges but not rock-hard, which is so satisfying.
- Since they use such basic components, they are great for spontaneous kitchen adventures or when you need a last-minute light side.
Essential Ingredients for Crispy Homemade Baked Potato Chips
You won’t need a pantry full of specialty items for this snack, which is part of why I love it so much! The beauty of these homemade baked potato chips lies in their simplicity. We are relying on technique over complicated flavor boosters, meaning you probably have everything you need right now. Just two potatoes and a drizzle of oil get us halfway there. Remember, keep your ingredients minimal so these treats shine!
- 2 medium potatoes (I strongly suggest Gold potatoes for the best texture!)
- 2 tsp olive oil (just enough to help them brown nicely)
- Himalayan salt, to taste (Go easy here, they can get surprisingly salty!)
Ingredient Notes and Substitutions for Homemade Baked Potato Chips
When it comes to potatoes, I’m very specific. Gold potatoes are my go-to because they hold their shape well and crisp up beautifully without tasting too starchy. If you must swap, Russets are okay, but they tend to brown faster, so watch them like a hawk! Also, when salting, remember that the salt concentrates as the moisture cooks off. It’s much safer to under-salt initially and then sprinkle a pinch more after they come out of the oven instead of accidentally overpowering them.
Equipment Needed for Perfect Homemade Baked Potato Chips
Okay, before we dive into the actual magic, let’s talk tools. Having the right gear makes this process foolproof, especially when it comes to getting those consistent, perfectly thin slices. If the slices aren’t uniform, some will burn while others are still chewy, and that’s just a recipe disaster! I usually grab my favorite gear the night before so I can get straight to slicing in the morning.
You really only need the basics, but the slicer is key. Don’t even try using a regular knife if you rush—unless you have the steadiest hands in the world!
- The Oven: Needs to hit a nice, hot 400 F. Make sure you set it early so it’s fully heated when you’re ready.
- A Sturdy Baking Sheet: You’ll need space for a single layer, so don’t crowd them!
- Parchment Paper or a Silicone Mat: This is non-negotiable for easy cleanup and preventing sticking. Seriously, don’t skip this layer!
- The Slicer Trifecta: You need something that delivers paper-thin cuts. I switch between a sharp knife (if I’m feeling ambitious), my food processor attachment (which is fast!), or, my personal favorite for true uniformity, the mandolin. Handle those mandolins with care, please!
- A Medium Bowl: Just for tossing those lovely slices in oil and salt until they’re coated just right.
Step-by-Step Instructions for Homemade Baked Potato Chips
Alright, time to make some noise in the kitchen! Getting these chips right is all about timing and making sure every slice gets its own space to shine. First things first: get that oven roaring up to 400 F nice and early. While it’s heating up, line your baking sheet—this is where that parchment paper really earns its keep! If you forget to preheat, your chips will steam instead of bake, and soggy chips are a nutritional tragedy we simply can’t afford.
Next big move: slicing! If you’re using a mandolin, be super careful, please—safety first, always! We are aiming for paper-thin, about that 1/16 of an inch mark. Once those babies are sliced, you *must* pat them completely dry. Use paper towels and press firmly; removing that surface moisture is non-negotiable if you want crunch. Then, give them a light toss in the bowl with your oil and salt, or brush if you prefer laying them out first. Now, here’s the make-or-break moment: lay them on that sheet so they are completely separate. No overlapping allowed! They need individual access to that hot air!
Bake them for 10 minutes on the center rack. When they look slightly set, pull them out, flip every single one over—yes, every one—and slide them back in for another 7 to 9 minutes. Watch closely near the end because they go from perfect to burnt in literally sixty seconds. Once they’re done, take them out and let them cool for just a couple of minutes. You can read more about my professional approach to balanced cooking over on my About Page!

Tips for Success When Making Homemade Baked Potato Chips
Look, I know it’s tempting to just dump all the slices onto one pan to save time, but trust me, crowding them is the enemy of crispiness. If they touch, they steam, and we end up with floppy, sad discs instead of glorious chips. They truly need that single-layer arrangement to allow the hot air to circulate and dehydrate them properly.
Also, that flip halfway through is crucial. Think about it—the bottom side is sitting directly on the pan, so it’s cooking differently than the top. Flipping ensures even browning and that addictive, all-around crunch we are chasing! I often pull off the pieces that have crisped up first—usually the smaller or thinner ones—and toss the rest toward the back of the oven for a few more minutes. This way, you don’t end up with some burnt bites and some undercooked ones! It takes a little more focus, but the payoff is worth it.
Customizing Your Homemade Baked Potato Chips with Seasonings
See? That was easy, right? Now that you’ve mastered the technique for perfectly crisp bases, we get to my favorite part: making these things taste like whatever you’re craving! Since these chips are so simple flavor-wise, they are the absolute best canvas for experimentation. This is where we turn these healthy crisps into amazing, quick, kid-friendly snacks!
My rule of thumb is to add any dry seasoning right before the second bake—or right after they come out of the oven if you’re using fine powders, just so they stick better. I always remind folks of what I mentioned in the notes: paprika, garlic powder, or some dried Italian herbs blend beautifully with the natural earthiness of the potato. These mild options are fantastic for school lunches!
Don’t be afraid to mix up your salty baseline too. For a real treat, try a little nutritional yeast added in with your salt for a ‘cheesy’ flavor that kids absolutely adore. If you’re looking for more fun ways to spice up your weeknight meals, check out some of the trend recipes I’ve been sharing over on the site! Here’s where I post all my latest flavor experiments.
Here are a few winning combos that I use all the time:
- Smoky Paprika Twist: Mix 1/2 teaspoon sweet paprika, a tiny pinch of cayenne (optional!), and your salt. They turn a gorgeous color, too!
- Garlic Herb Crunch: Use garlic powder and dried parsley or dill. Make sure the garlic powder isn’t clumpy before you toss those slices.
- Sweet Heat (For Grown-Ups Only!): A dusting of brown sugar and a whisper of chili powder after they come out of the oven is dangerously good.
Remember, because we are baking them, the seasonings adhere really well, especially if you coat them lightly with oil first. Enjoy making them your own!
Storage and Reheating Instructions for Homemade Baked Potato Chips
Now, this is important: if you manage to have any leftover chips—which is rare in my house—you need to store them correctly, or all that hard work going into that crunch goes right out the window! Baked things don’t hold up as well as their fried, oil-logged cousins. Because we kept these super light, they crave airtight security.
You absolutely must let them cool completely before you put a lid on anything. If you store them warm, that residual heat creates steam inside the container, and guess what? You’ve just made soft, slightly warm potato discs. Nobody wants that!
Once they are totally room temperature—give them a good 15 minutes on the counter—transfer them to an airtight container. I prefer glass containers because I find plastic sometimes retains a bit of moisture, but honestly, any tightly sealed container works great. If you’re getting serious about meal prepping these for the week, make sure the container has a really dependable seal. Stored this way, they honestly stay wonderfully crisp for about three days.
Bringing Back the Crunch: Reheating Tips
If they’ve lost a tiny bit of snap after a day or two—and sometimes they do, especially if the humidity is high—don’t throw them away! We can shock them right back into crispness. You don’t need a toaster oven or an air fryer for this; sometimes the standard oven is just the best tool for the job.
Spread the chips back out in a single layer on your baking sheet—remember that single layer rule we talked about? It applies to reheating, too! Pop them back into a preheated 350 F oven for just about 4 to 6 minutes. Keep your eye glued to them! They heat up super fast when they are already cooked. As soon as you smell that savory potato scent again, pull them out immediately. They harden right up as they cool down for a minute, and suddenly, they taste like they just came out of the oven for the first time. So easy for healthy snacking throughout the week!
Addressing Common Questions About Homemade Baked Potato Chips
I always find that after people try a new healthy recipe, a few natural questions pop up. It’s normal! You want to make sure you get that perfect texture and the best results every single time, especially if you’re making these for a crowd or as those quick, kid-friendly snacks we talked about. I’ve gathered the top things I usually get asked about when folks try my baked version for the first time.
As a dietitian, I love these clarifications because they help you understand the ‘why’ behind the steps. Feel free to reach out if you have another question about balancing flavor and health—you can find my contact form here!
Q: Are these really as crunchy as the fried kind?
That’s the million-dollar question, isn’t it? Honestly, if you follow the slicing and drying steps perfectly, they get *incredibly* close and are satisfyingly crisp. They won’t have that heavy, oily coating that deep-fried chips have, which some people prefer, but they offer a cleaner, sharper crunch. If you are looking for that heavy, almost thick crunch, you might notice a slight difference, but for a healthy alternative that snaps, these are unbeatable!
Q: Which potato type guarantees the best texture?
I’m picky about this one because the starch content really shifts the outcome! I absolutely recommend using Gold potatoes for this recipe. They strike the perfect balance—they aren’t too watery, and they hold their shape beautifully when sliced thin and baked. Russets are often too high in starch for baking thin chips; they can get brittle and break easily, or worse, stick to the pan and burn before they crisp up. Stick to Gold or maybe Yukon Golds for the best results.
Q: Can I make a huge batch for quick, kid-friendly snacks all week?
Yes, you totally can manage a big batch for fantastic meal prep! Since these are a healthier option, they are perfect to have on hand for anytime snacking. Just remember what I said about storage: use an airtight container, make sure they are completely cool first, and try not to stack them too tightly. They should stay delightfully crunchy for about three days. If you notice they feel a little soft on day four, just reheat them for a few minutes! It’s such an efficient way to have healthy chips ready for lunchboxes.
Q: My chips started burning right at the edges but felt soft in the middle. What happened?
Ah, yes, the classic uneven baking struggle! This almost always boils down to one of two things, and it’s usually solved by paying attention during that second bake. First, did you ensure that single-layer arrangement? Nothing should be touching. Second, and this is a big one: ovens aren’t always calibrated perfectly. It means the temperature hitting the edges is hotter than the center. Next time, try rotating the pan halfway through the second bake, or pull the edges off right when they start getting brown and let the centers finish cooking for another minute or two. See? A little attention makes all the difference!
Understanding the Health Benefits of Homemade Baked Potato Chips
Now, let’s put on my Dietitian hat for a moment, because this is where these chips really shine compared to the ones you grab off the shelf. Most store-bought chips are drowning in oil because they’re deep-fried. That means tons of unnecessary added fats and calories that frankly, we just don’t need in our balanced comfort food.
The beauty of taking the time to bake these at home is radical fat reduction. We are only using about two teaspoons of olive oil for an entire batch of chips! When you think about the huge amount of oil needed for frying, you realize you’re slashing the fat content dramatically just by choosing the oven. That’s an easy win for better nutrition right there.
Because we’ve cut out the frying process, the calorie count naturally drops significantly, making this a smart choice when you’re aiming for a satisfying snack without the heavy feeling later. Plus, since potatoes themselves are a whole food—a great source of Vitamin C and potassium, by the way!—we are sticking close to that whole-food goodness.
It really comes down to mindful preparation. You get that salty, crispy satisfaction that you crave, but you do it in a way that aligns perfectly with fueling your body well. It’s mindful eating without sacrificing flavor; that’s the goal I strive for in every recipe here. You get the crunch you want, the flavor you love, and none of the guilt associated with highly processed snacks.
Serving Suggestions for Your Homemade Baked Potato Chips
Okay, so you’ve got this massive, beautiful batch of crispy, savory potato slices cooling on the counter. What now? While they are definitely stellar all on their own (especially when you’re just sneaking one right off the cooling rack—I won’t judge!), they are even better when used as part of a bigger, balanced meal. Think of these as your homemade, healthier sidekick for everything from lunchboxes to casual dinners.
Because we’ve kept the seasoning light and flexible, these chips pair well with almost anything savory. They bring that salty pop you want without overpowering the main dish. They work way better than heavy, greasy commercial chips in almost every scenario.
If you need some inspiration for pairing these little crisps, here are some of my favorite ways to use them up:
- The Lunchbox Upgrade: Skip the plain sides! Pack these alongside a turkey and Swiss roll-up or a simple protein pasta salad for a delightful crunch. They shine next to lighter sandwiches.
- Dip Duty: Serve them up next to a healthy, vibrant dip. Think homemade Greek yogurt ranch, or even a simple hummus batch—they are amazing for scooping!
- Soup Season: Seriously, don’t overlook this one! Crumble a few salty chips right over the top of a creamy tomato soup or a bowl of broccoli cheddar for an amazing textural contrast right before serving. It’s comforting and fun!
- Light Meal Base: If you’re having a really casual dinner, these can serve as the base for a light, savory ‘nacho’ style plate using leftover shredded chicken and a dollop of salsa.
If you’re looking for more ideas that fit into a balanced, flavor-forward approach to eating—even when it comes to breakfast—I’ve collected a bunch of my favorite balanced dishes over on the site. Check out my breakfast category for inspiration that proves ‘healthy’ doesn’t mean boring!
Share Your Homemade Baked Potato Chips Creations
You’ve done the work, you’ve perfected the technique, and now you have a beautiful, crunchy snack free from all the heavy stuff found in the store aisles. I truly hope you’re enjoying that savory taste! This is where my favorite part of this community comes in: I absolutely love seeing what you all create in your own kitchens.
When you make these chips, please snap a picture! Tag me on social media—I want to see those beautifully thin slices and hear exactly which seasoning combination you landed on. Did you try the smoky paprika? Did the kids approve of the garlic herb version? Sharing your successes is huge for me, because it proves that eating well doesn’t mean sacrificing the simple pleasures, like a bowl of crispy, warm potato goodness.
Your feedback, your ratings, and your enthusiasm keep me motivated to develop more recipes that fit seamlessly into a busy, health-conscious life. It’s why I do what I do here at Top Chicken Eats, working hard to blend flavor strategizing with real nutrition science for you. If you’re curious about the foundational rules we follow here on the site, don’t hesitate to look over our site policies.
Jump down to the comments below and let me know how crispiness you achieved! I read every comment, and I’m always here to troubleshoot if your batch came out a little softer than you hoped. Happy snacking, everyone! Come back soon for more easy, wholesome eats!

Homemade Baked Potato Chips
Ingredients
Equipment
Method
- Preheat your oven to 400 F. Prepare a baking sheet by lining it with parchment paper or a silicone mat.
- Slice the potatoes very thinly, aiming for about 1/16 of an inch thick, using a sharp knife, food processor attachment, or mandolin. Pat the potato slices dry to remove extra moisture.
- Place the potato slices in a medium bowl. Toss them with the olive oil and salt. Alternatively, you can lightly coat each slice with oil using a silicone brush while they are on the cookie sheet.
- Arrange the potato slices in a single layer on the prepared baking sheet. Spread them out so that none of the chips are touching.
- Bake on the center rack for 10 minutes. Carefully remove the sheet from the oven, turn each chip over, and bake for an additional 7 to 9 minutes. Watch them closely near the end to prevent overcooking. Remove any chips that look done or are close to burning.
- Remove the chips from the oven and let them cool for 2 to 5 minutes before serving.