If you’ve ever stared mournfully at a floppy, store-bought pizza base and thought, “Why can’t I get that amazing puffy, crispy texture at home?” I totally get you. It used to feel like a secret art form, locked away in those fancy pizza ovens. But guess what? You don’t need a brick oven; you just need the right piece of kitchen equipment you probably already own!
This foolproof Cast Iron Skillet Pizza method is truly the best way to merge stovetop heat with oven blast to create that golden, airy-yet-chewy crust you dream about. As an educator, showing people how to harness the power of cast iron always gives me a thrill. It empowers you to make incredible Italian Food right at your kitchen table. Trust me—once you master this, it’ll become your go-to homemade pizza ideas staple.
Why This Cast Iron Skillet Pizza Technique Works (E-E-A-T)
Okay, let’s talk science, but the fun kind! The reason this Cast Iron Skillet Pizza hits differently is all about that heavy metal. Cast iron is incredible at retaining heat—I mean, seriously intense heat—when you put it on the stove burner.
When the dough meets that piping hot, oiled skillet on the stovetop, the bottom instantly gets this gorgeous, fast shock of heat. That’s how we get that signature crispy crust that usually needs a $1,000 pizza oven. You get the fast sear without waiting for your whole oven to get ridiculously hot first.
From an educator standpoint, this technique is amazing for building confidence. It’s visual! You physically see the crust setting up—that moment is magic. It shows you that achieving pizzeria-quality results isn’t about expensive equipment; it’s about understanding how heat works for your homemade pizza.
Gathering Ingredients for Your Cast Iron Skillet Pizza
We’re keeping this Italian Pizza simple so you can focus on the technique, but quality ingredients really make a difference here. Remember that your pizza dough needs a little nap before we start; let it sit out on the counter for at least 15 minutes until it feels soft and cooperative. Cold dough just fights you!
We’re using standard, comforting ingredients here—nothing too exotic—to make sure your first attempt at this cheese pizza feels like a total win.
Essential Components for the Cast Iron Skillet Pizza
- 1 pound of your favorite homemade pizza dough (about 454 grams). Make sure it’s softened up!
- 2 tablespoons of olive oil—don’t skimp here, this is key for the crisp bottom.
- About 1/4 cup of pizza sauce of your choice.
- 1 cup of shredded mozzarella cheese, and make sure it’s loosely packed (we need about 100 grams).
- Pepperoni slices, just as much as your heart desires.
- A nice dusting of grated parmesan cheese for that final savory touch.
Essential Equipment for Perfect Cast Iron Skillet Pizza
When we talk **Cast Iron Skillet Pizza**, the star of the show HAS to be the skillet itself. Seriously, if you only take one piece of advice from me about this recipe, make it this: use the right pan! Don’t even try to substitute it with a regular frying pan; you won’t get the right heat transfer for that perfect bottom crust.
You absolutely need one specific tool for this whole operation:
- A sturdy 12-inch cast iron skillet. Make sure it’s seasoned well, but don’t worry too much; the olive oil layer we use acts like a non-stick shield anyway.
- Your oven. We need it preheated high, like really high—500°F, because we are aiming for fast cooking to keep everything tender inside while the outside crisps up.
That’s really it! No pizza stones, no fancy peel tools required. This is why I love this method for simple homemade pizza ideas; it uses what you have to make something truly special.
Step-by-Step Instructions for Amazing Cast Iron Skillet Pizza
Alright, put on your apron, because here’s where the magic really happens! This technique relies on two distinct cooking blasts—stovetop heat followed by intense oven heat—to give you that amazing texture. It’s a hands-on process, so take your time, especially when pushing that dough around the pan. Don’t rush this part!
Preparing the Dough and Skillet for Cast Iron Skillet Pizza
First things first, crank that oven up to 500℉. Yeah, it needs to be HOT! While that’s warming up, make sure your pizza dough has actually rested for the recommended 15 to 20 minutes. It should be relaxed and easy to work with.
Take your 12-inch cast iron skillet and spread those 2 tablespoons of olive oil evenly across the bottom. Now gently place your room-temperature dough inside. You’ll need to physically push and pull it out to cover the base, getting close to the edges. If it keeps springing back on you, stop wrestling it for a minute, let it breathe, then try again. And here’s my little authoritative tip: if the dough is getting sticky on your hands, just lightly grease your palms with a little more oil. It helps big time!
Topping and Setting Up the Cast Iron Skillet Pizza
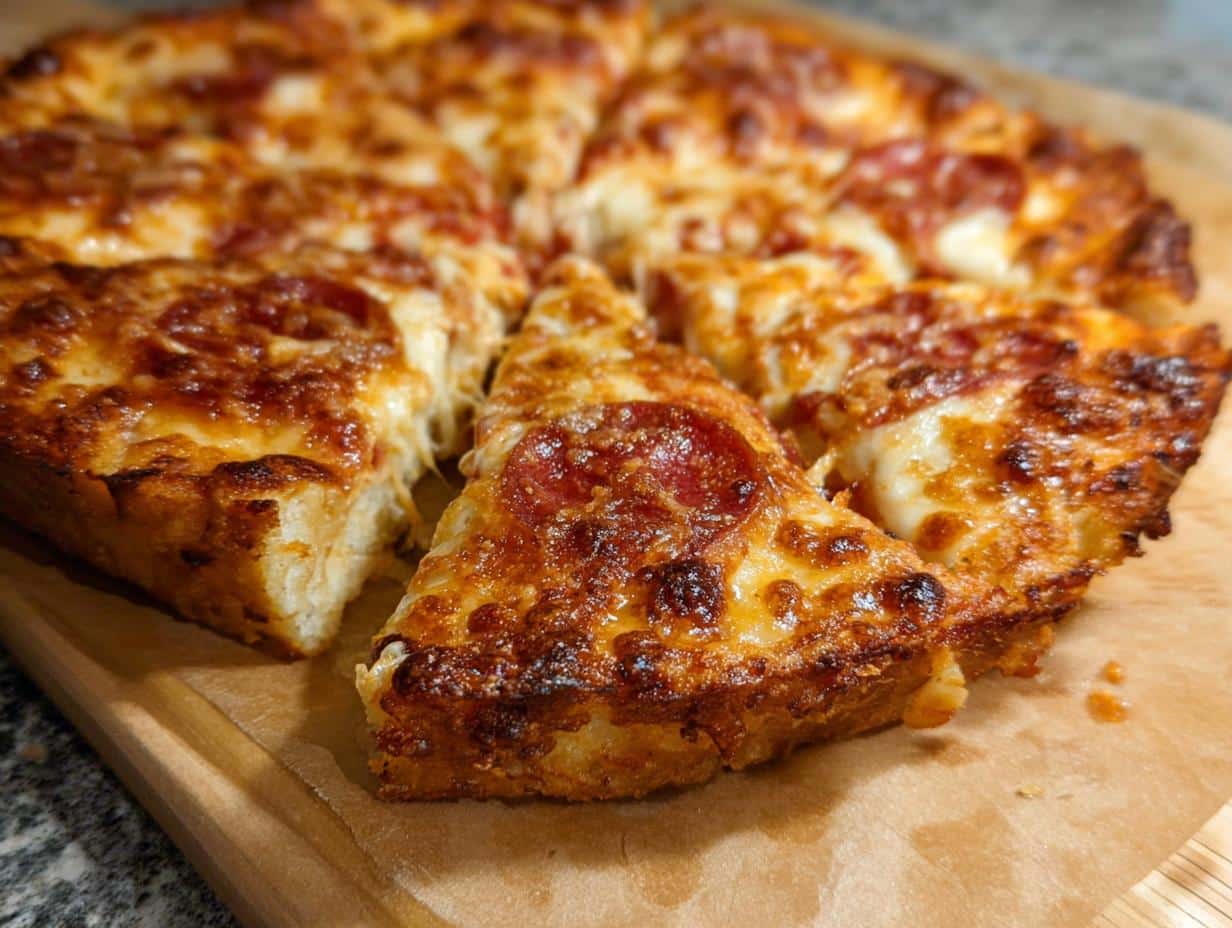
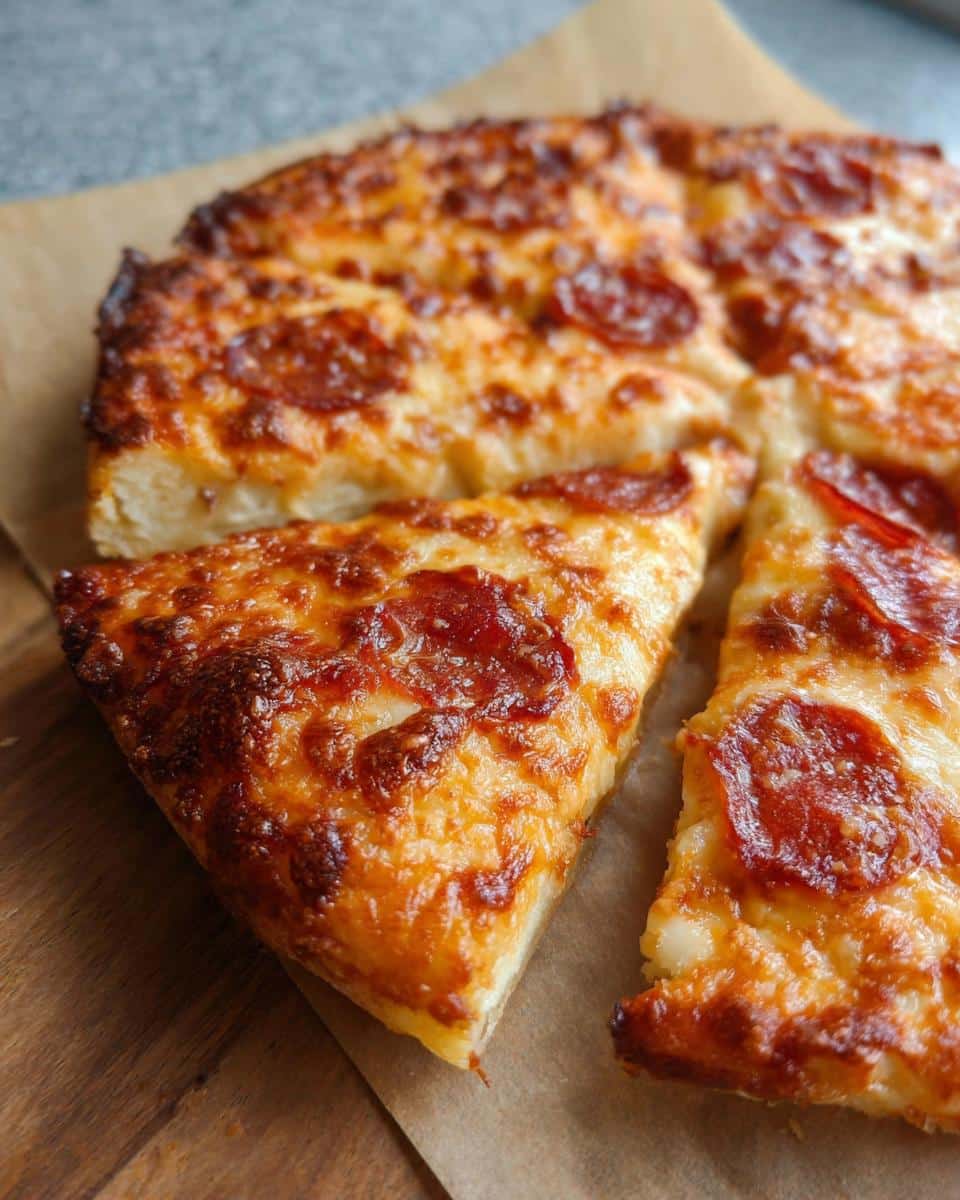
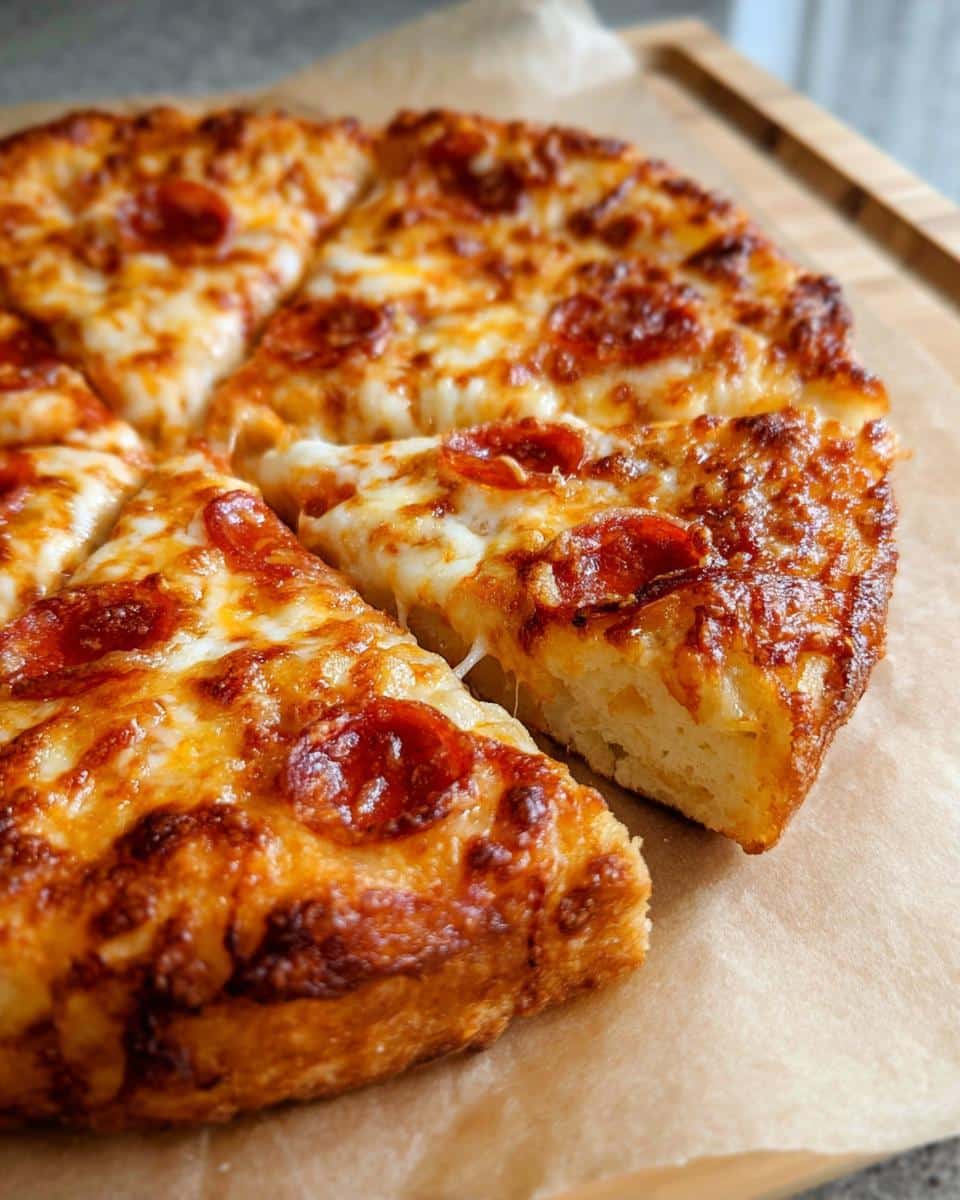
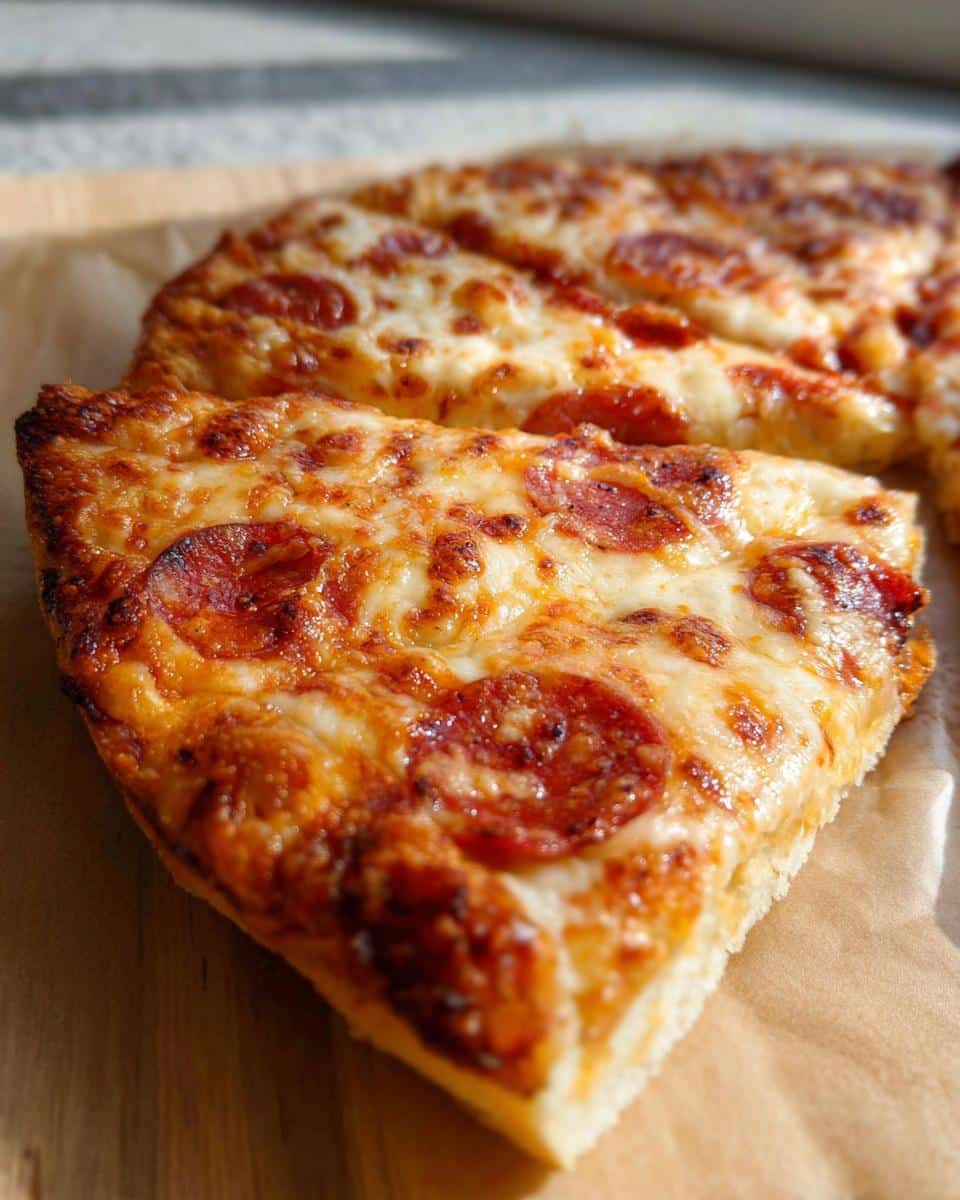
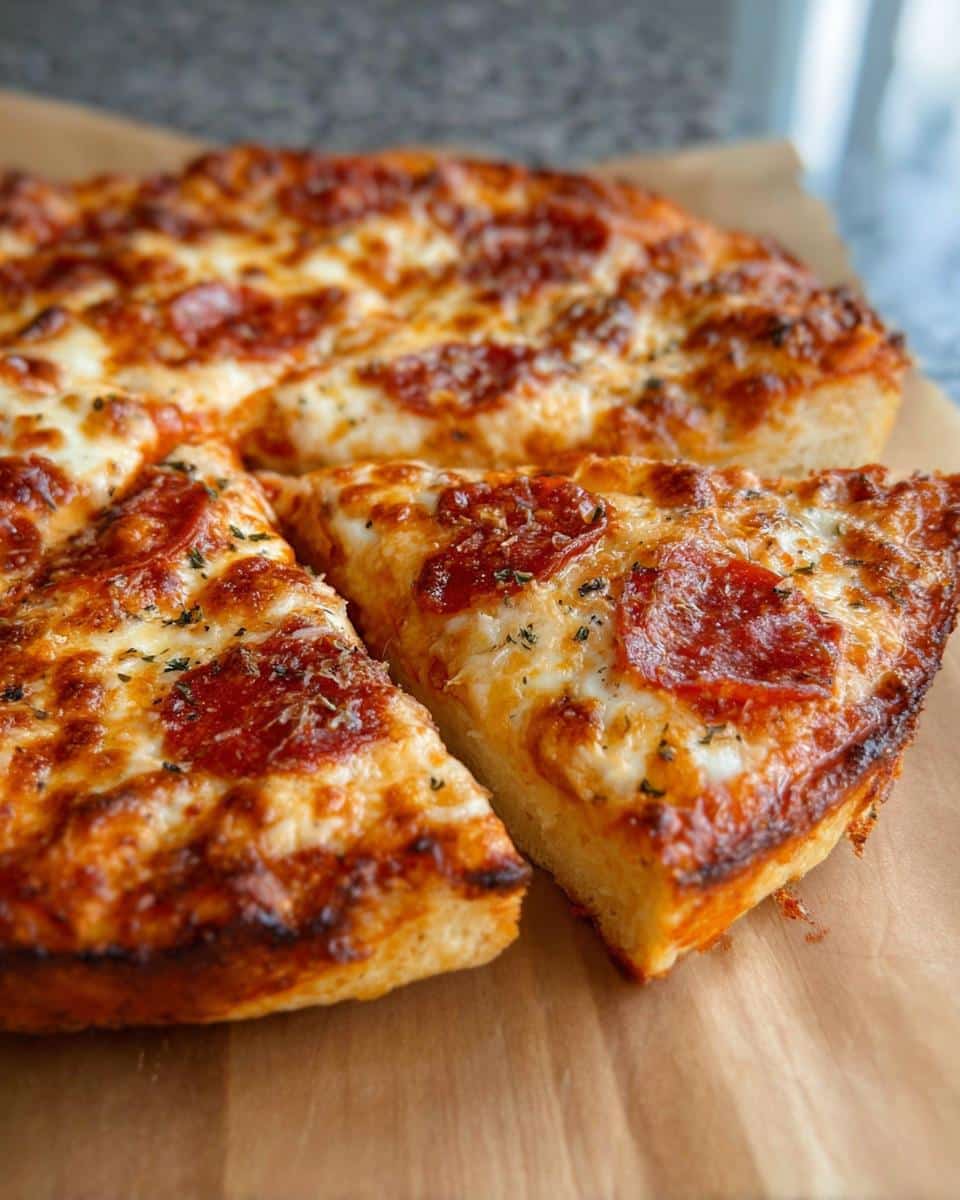
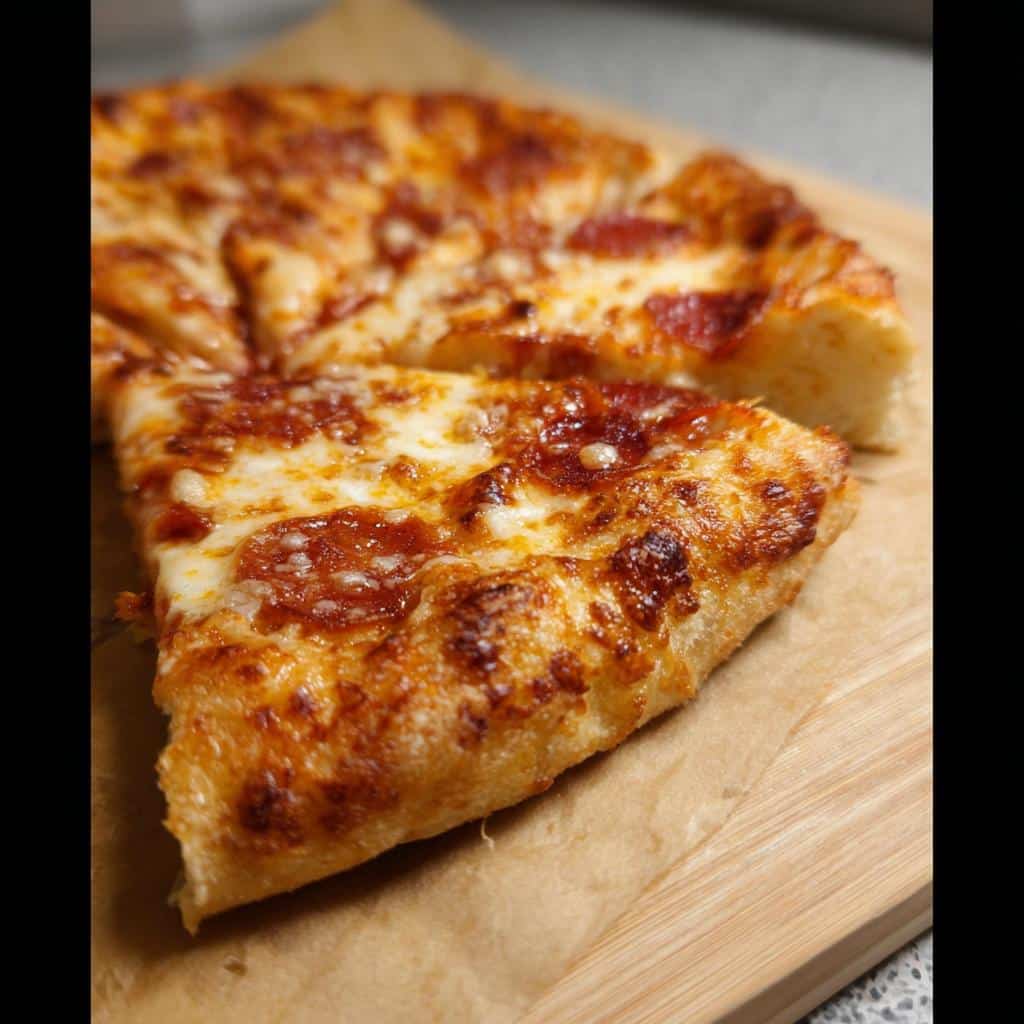
Now it’s time for assembly, but the layering is important for that perfect pizzas aesthetic. Spoon your pizza sauce over the dough, making sure you leave about a half-inch border around the edge—we want a nice, puffy crust border!
Sprinkle about three-quarters of your mozzarella cheese right over that sauce. Lay out your pepperoni slices however you like them, and then sprinkle the rest of that 1/4 cup of mozzarella on top of the meat. Before we move it to the heat, take that grated parmesan and sprinkle it right over the visible crust edge. It toasts up beautifully!
The Dual Cooking Method for Cast Iron Skillet Pizza
This is the non-negotiable step for a truly crisp crust! Place the skillet directly onto your stovetop burner set to medium heat. We are cooking this for about 3 to 5 minutes. You are watching for the bottom crust to finally set—it won’t look done, but it should feel firm—and you’ll see that olive oil starting to bubble gently around the pizza’s edge. We do this first to sear the bottom layer.
Once you see that bubbling action, carefully transfer the entire hot skillet right into the 500℉ oven. Put it on the center rack and let it bake for another 10 to 12 minutes until that cheese is fully melted and starting to brown just a little bit. It’s that one-two punch of heat that seals the deal!
When it comes out, don’t rush it! Let it rest in the pan for 3 to 5 minutes after removing it from the oven—this helps the steam escape and keeps the bottom crisp for when you cut into it. If you check out the steps for family dinner ideas, you’ll often find I use this initial stage to keep young helpers engaged too!
Tips for Mastering Your Cast Iron Skillet Pizza Crust
Okay, you aced the stovetop-to-oven transition, but let’s talk about making that crust absolutely perfect every single time. The biggest fear people have with Cast Iron Skillet Pizza is ending up with a soggy bottom, and we absolutely can’t have that!
First, size matters! For a standard 12-inch skillet, you want your pizza dough to spread out comfortably without being ridiculously thin. If your pound of dough feels like you have to stretch it until it’s near transparent, your pan is probably too big. Think of the dough thickness—you want about a half-inch border—that’s what puffs up nicely.
If you find your dough is tearing when you stretch it, don’t panic! Go back to letting it rest on the counter for ten extra minutes. It really needs to be relaxed. Also, make sure that olive oil you poured in is evenly coating the entire base before the dough goes in. That oil is your shield against sogginess and your secret weapon for achieving that deep golden color on the bottom.
Creative Pizza Topping Ideas for Your Next Cast Iron Skillet Pizza
If you nailed the basic pepperoni and cheese on your first attempt at Cast Iron Skillet Pizza—and I bet you did!—you’re probably wondering what else this amazing crust can handle. Because this base is sturdy and flavorful, it can genuinely handle just about anything you throw at it. It stands up so much better than those flimsy thin-crust varieties!
We all love the classic Italian pizza flavor combo, but don’t be afraid to break out and try some new pizza topping ideas. The rich, almost nutty flavor the skillet imparts pairs wonderfully with bolder ingredients. I’ve collected a few favorites over the years that really shine when baked this way.
If you’re looking for some incredible inspiration for festive bakes, sometimes I look at my holiday baking inspiration to spark savory ideas too—often it’s the spice combinations that translate well!
Here are a few topping profiles I highly recommend trying for your next homemade pizza night:
- Spicy Sausage & Honey Drizzle: Brown good quality, spicy Italian sausage first. After it comes out of the oven, drizzle just a little bit of hot honey over the top. The sweetness cuts that richness perfectly.
- Mushroom Truffle Delight: Skip the red sauce! Brush the dough lightly with olive oil, then layer thin slices of sautéed mushrooms (cremini or shiitake) and a sprinkle of Gruyère cheese. Finish it with just a tiny drop of high-quality truffle oil *after* baking. It smells incredible.
- The Fresh Finish: For a bright, cleaner flavor, keep the initial cheese layer simple—maybe just mozzarella and provolone. Once the pizza is out of the oven, top it generously with fresh arugula tossed lightly in lemon juice, shaved Parmesan, and thin slices of prosciutto.
See? It’s so versatile! The key is remembering that even though the crust is sturdy, you still want to keep the wet ingredients balanced so you don’t introduce unnecessary moisture back into that fantastic golden bottom we worked so hard to create.
Storage and Reheating Instructions for Leftover Cast Iron Skillet Pizza
I know, I know, there’s barely any pizza left after the first night, but if you happen to have any glorious Cast Iron Skillet Pizza remaining, how you treat it matters! We worked hard for that beautifully crisp crust, so we absolutely cannot let it turn into a sad, floppy mess during reheating. That would break my heart, and it should break yours too!
The minute it cools down, you need a solid storage plan. When putting leftovers away, I highly recommend slicing the pizza first, if you haven’t already. Stacking warm slices traps steam, and steam is the absolute enemy of crispiness. If I can manage it, I try to layer the slices with a tiny square of parchment paper or wax paper between them. Then, wrap the whole stack tightly in plastic wrap and tuck it into an airtight container.
It keeps great in the fridge for about three days. Now, for reheating—this is the most important part for any pizza food lover:
- The Oven/Toaster Oven Method (The Best Way): If you have space, use your regular oven preheated to about 350°F. Pop the slices directly onto a baking sheet (no oil needed) and heat them for about 8 to 10 minutes. This brings the heat back into the crust just like the original bake. A toaster oven works wonderfully for just one or two slices!
- The Stovetop Skillet Method (For Ultimate Crisp): If you want that original, golden-brown bottom back, you can reheat it right back in your cast iron skillet! Set the skillet over medium-low heat—no oil this time—and cover it loosely with foil for about 4 to 5 minutes. The bottom gets crisp again while the residual heat melts the cheese.
Please, promise me you won’t use the microwave unless you are truly desperate. Microwaving pizza is a betrayal of all the hard work you put into that perfect crust. Don’t do it!
Frequently Asked Questions About Cast Iron Skillet Pizza
I get so many lovely questions about making this simple pizza! It’s amazing how many variations and techniques people enjoy exploring once they master the basic cast iron method. These FAQs cover the gear, the dough, and how to make sure you get that perfect crust every time for your homemade pizza ideas.
Can I use store-bought dough for this Cast Iron Skillet Pizza?
Oh yes, absolutely! I totally get that making homemade pizza dough from scratch isn’t always an option, especially on a busy weeknight. Store-bought dough works perfectly fine for this recipe. The key reason I stress letting any dough rest is that cold dough shrinks back when you try to push it out into the pan, making you think you need a gallon of dough for your 12-inch skillet!
Even straight from the fridge, make sure you let that store-bought dough sit on the counter, covered with a towel, for at least 20 minutes. A little rest time makes all the difference in stretching it flat without a fight.
What is the best way to get a bubbly Cheese Pizza crust?
The secret to that incredible, bubbly texture, especially if you are just making a simple cheese pizza, is all in that initial stovetop blast. You see, the ambient heat in the oven toasts the top, but the direct, intense heat coming from the burner straight into the bottom of the cast iron causes the tiny moisture pockets trapped in the dough to steam and puff up instantly!
That’s why the 3 to 5 minutes on medium-high heat on the stovetop is non-negotiable! If you skip that step and go straight to the oven, the crust often cooks too slowly and ends up dense instead of light and bubbly. It’s all about that fiery kiss from the burner first.
Do I need to season my skillet before making this Cast Iron Skillet Pizza?
That’s a fair question, especially if your skillet is new or you’re nervous about sticking! A well-seasoned skillet is always preferable for any cooking, but for this specific Cast Iron Skillet Pizza recipe, you are using a generous coating of olive oil spread across the base. That oil is actually doing most of the heavy lifting when it comes to preventing sticking and achieving that crispy bottom.
So, don’t skip the oil! While having a beautiful, dark seasoning helps maintain the pan’s life over the years, the oil in the recipe provides the necessary barrier between the dough and the hot metal during that crucial first cooking stage over the burner. You can check out our full guide on pan care here: Pan seasoning advice.
Understanding the Nutritional Estimate for This Pizza Food
Now, I want to be super upfront with you all. Because this Cast Iron Skillet Pizza recipe is so customizable—you throw on whatever toppings make your heart sing—we can’t give you an exact number for nutrition that works for everyone. What if you load it up with extra sausage, or maybe you go super light on the cheese? It changes everything!
However, as a culinary educator, I always want you to feel informed about what you’re eating. So, what I’ve put together here is a general estimate based on using the standard amounts listed in the recipe—that’s one pound of dough, standard sauce, and just the 1 cup of mozzarella and a few pepperoni slices. This gives you a starting point for an average slice.
Please remember this is just for reference! If you’re tracking calories or macros seriously, you’ll want to calculate based on your chosen pizza topping ideas. We always keep our general estimates transparent here at Top Chicken Eats to make sure you feel supported in your cooking journey, which you can read more about in our full disclaimer.
For one serving (assuming this recipe makes about 8 slices), here is what you can generally expect from this delicious pizza food:
- Calories: Approximately 300–350 Calories
- Fat: Around 14–18g
- Protein: Roughly 15–18g
- Carbohydrates: About 30–35g
This estimate really shows how satisfying a single slice of this homemade pizza can be while still allowing room for those fun additions we talked about earlier. Enjoy every bite!
Share Your Cast Iron Skillet Pizza Creations
Wow, you made it! Seriously, take a minute to admire that glorious, golden-brown crust you created. Whether you went classic with a pepperoni masterpiece or tried one of those wilder pizza topping ideas we talked about, you just mastered a fantastic technique that separates the okay homemade pizza from the *truly* fantastic ones.
This is my favorite part of teaching! I absolutely live to see what everyone creates in their own kitchens. Did you manage to get that beautiful lift on the edges? Did your cheese spread just right?
Please, please don’t be shy! If you loved this recipe for Cast Iron Skillet Pizza, I would be so grateful if you could take a second to leave a rating below and let me know how it went. Your feedback helps other cooks feel confident trying this method out, and honestly, hearing your success stories keeps me inspired!
If you took any amazing photos—I know I love taking mine!—feel free to tag me on social media. Seeing those rustic, beautiful pizzas popping out of your oven makes my entire week. Thanks for cooking with me today. Happy baking, and I can’t wait to see what delicious thing you come up with next!
Cast Iron Skillet Pizza
Ingredients
Equipment
Method
- Preheat your oven to 500℉.
- Let the homemade pizza dough sit at room temperature for 15 to 20 minutes.
- Spread olive oil in a 12-inch cast iron skillet. Place the room temperature dough in the oiled skillet. Gently push and pull the dough to fit the skillet. Be patient; cold dough will spring back. Keep pushing and spreading the dough with your hands and fingers. Grease your fingers or palms with olive oil if the dough is sticky.
- Spread pizza sauce on the dough, leaving about a 1/2-inch border around the pizza edge. Sprinkle about 3/4 of the mozzarella over the sauce. Arrange pepperoni slices on top, then follow with the remaining 1/4 mozzarella. Season with black pepper or crushed red pepper, if you prefer.
- Sprinkle parmesan cheese over the exposed pizza crust.
- Place the skillet over the stovetop set to medium heat. Warm up the cast iron skillet. Cook the pizza for about 3 to 5 minutes until the bottom of the crust has set and the oil is bubbling along the outer rim of the pizza.
- Transfer the hot skillet to the preheated oven. Place the pizza on the center rack. Bake for 10 to 12 minutes until the cheese has melted.
- Remove the skillet from the oven and let the pizza sit for about 3 to 5 minutes before removing it from the pan. Place the pizza on a cutting board. Use a sharp knife or pizza wheel to cut into slices. Garnish with additional parmesan cheese, if desired.