Some nights, you just need the familiar hug of a truly classic comfort food, right? That’s why I always come back to this **Classic Cheese Pizza Recipe**. It’s the ultimate no-fuss staple, proving that when you nail the fundamentals—the crust, the bright sauce, the gooey cheese—you don’t need fancy toppings. I remember those childhood pizza nights: paper plates, sticky fingers, and everyone reaching for just one more slice. That memory is exactly what I tried to capture here. Developing recipes taught me that the simplest dishes are often the most soulful. This pizza is that reliable, wonderful dish meant to bring everyone to the table. You can read more about my culinary philosophy over on the About Page.
Why This Classic Cheese Pizza Recipe Works Every Time
You see, this isn’t about tricks; it’s about trusting the ingredients. When we keep this recipe pure, we celebrate genuine flavor. It’s reliable because we focus on ensuring every component is of the highest quality before it even reaches the oven.
- The slow dough resting time makes the crust airy yet sturdy—a major flavor booster!
- We use simple, bright sauce that lets the tomatoes shine through.
- The cheese melts perfectly without getting oily or tough.
The Soul of the Classic Cheese Pizza Recipe: Crust, Sauce, and Cheese
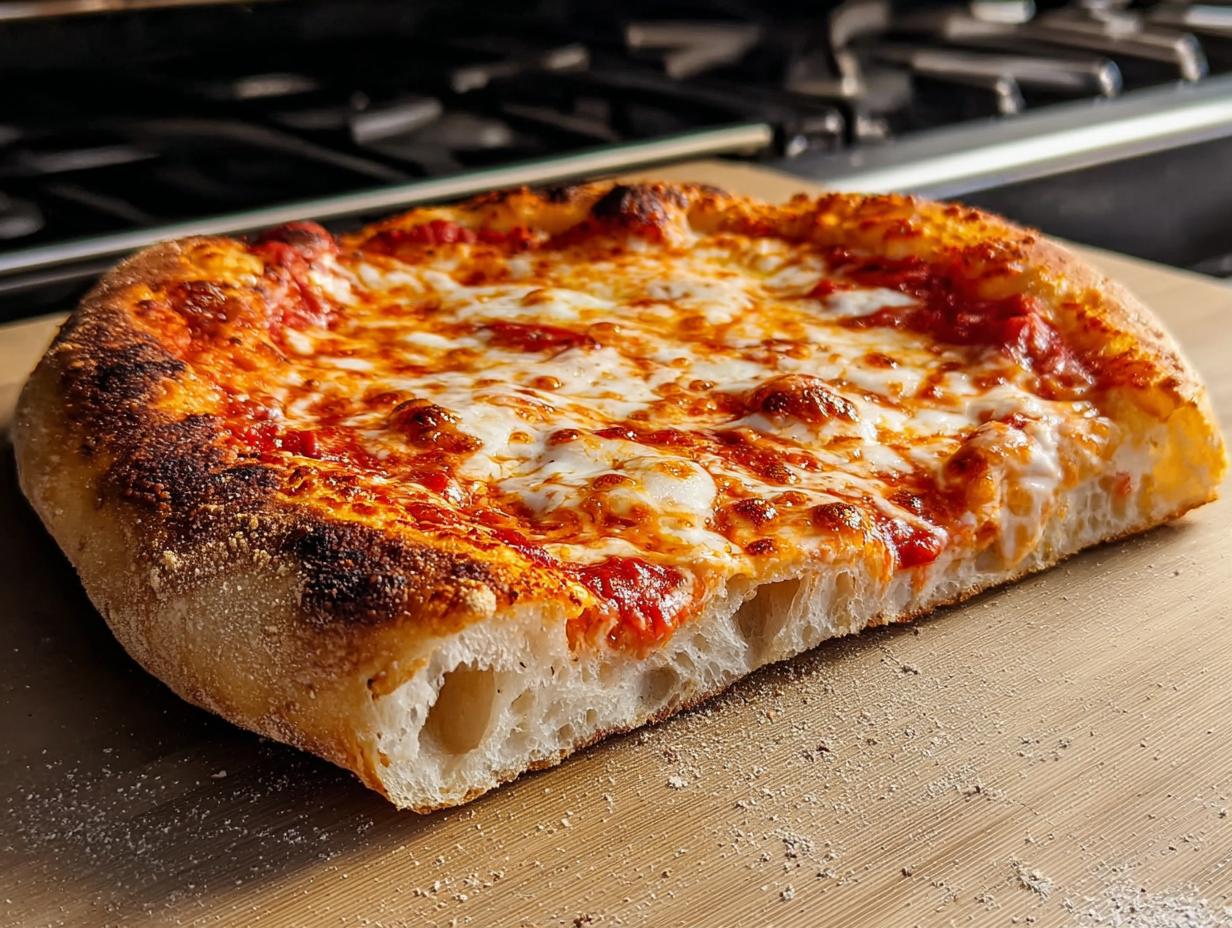
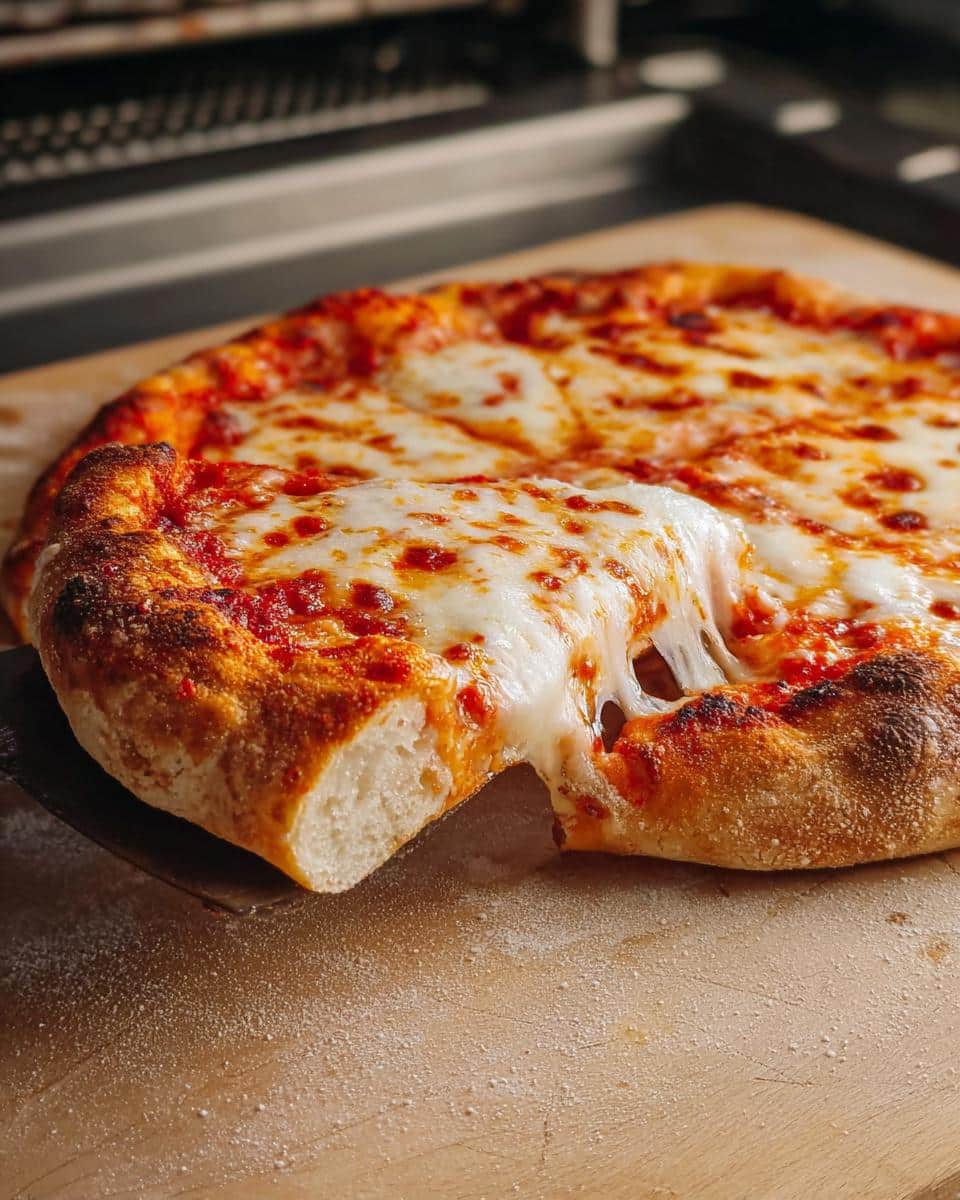
When you are making a true **Classic Cheese Pizza Recipe**, you have to respect the big three! The whole magic is in how the crust—which needs that time to hang out at room temperature—provides the foundation. It holds up the bright sauce. Then, the low-moisture mozzarella melts just right on top. It’s a perfect, comforting, and never-fail balance.
Gathering Ingredients for Your Classic Cheese Pizza Recipe
Okay, friend, before we even think about stretching dough, we need to talk about what we’re putting on it. Since this is a **Classic Cheese Pizza Recipe**, every single ingredient has to sing! We aren’t hiding anything under a mountain of toppings here, so quality matters. Trust me, taking an extra second to grate something fresh or use the right kind of cheese makes all the difference between a good pizza and something that tastes like it came straight from a tiny shop in Naples. We divide things up into two simple groups.
For the Basic Pizza Sauce
This sauce comes together in about five minutes, so don’t be tempted to skip it for jarred stuff! I swear by Muir Glen Organic Tomato Sauce—they have the best clean flavor. You’ll want to stir this up first:
- One 15-ounce can of Muir Glen Organic Tomato Sauce
- Two tablespoons of good extra-virgin olive oil
- Two medium garlic cloves, and listen closely—you must grate these on a Microplane until they are practically liquid!
- One and a half teaspoons of fresh oregano, chopped nice and fine
- Fine sea salt and black pepper to taste
For the Classic Cheese Pizza Dough Assembly
This is where the magic really happens, especially with the dough. You absolutely must take your Artisan Pizza Dough out of the fridge and let it stand at room temperature for a good one to two hours before you even touch it. It needs to relax! You’ll also need your dusting materials ready to go:
- One ball of that perfectly rested Artisan Pizza Dough
- Plenty of all-purpose flour AND semolina flour for dusting (don’t skimp on the semolina for the peel!)
- Your prepared Basic Pizza Sauce
- Three ounces of low-moisture mozzarella, shredded. Keep it low-moisture so your crust stays crisp!
Essential Equipment for Making the Best Classic Cheese Pizza Recipe
You know, making amazing **homemade pizza ideas** isn’t just about the recipe itself; it’s about giving that dough what it needs to thrive when it hits the fire. Because we are cooking this at very high heat—we’re talking 500°F high!—you need the right tools ready to go before you even start stretching.
A lot of people try to make pizza on a cookie sheet, and honestly, you’re just setting yourself up for sadness. The secret weapon for that blistered, professional crust is a solid piece of metal that holds heat like nothing else. You absolutely need one of these:
- A baking steel or a large, round cast-iron pizza pan—I use a 15-inch one myself. Putting this in the oven while it preheats is non-negotiable!
- A pizza peel. This is how you gently slide your beautiful creation onto that screaming-hot surface. Have it dusted and ready!
- A bench scraper. Handy for those moments when the dough sticks just a tiny bit to the peel, or when you need to clean up that flour mess.
- A sturdy cutting board for when your masterpiece comes out of the oven and needs slicing.
Get this stuff organized first. When the dough is perfectly proofed, you don’t want to be scrambling looking for a peel! Making sure you have the right equipment is half the battle for this perfect **Classic Cheese Pizza Recipe**.
Step-by-Step Instructions for Your Classic Cheese Pizza Recipe
Alright, now for the fun part! This is where we bring everything together. Because we took the time to rest the dough and make that bright sauce, these steps move pretty fast once you get into the rhythm. Remember, we are aiming for a genuine **Italian Pizza** experience right here in your kitchen!
Preparing the Sauce and Bringing Dough to Temperature
First things first, whip up that sauce we talked about. Just mix every sauce ingredient in a small bowl. If you’re not using it right away, cover it up and stick it in the fridge. Now, go back to that precious dough ball. It needs that time—that’s why we let it hang out—until it’s cool, but definitely NOT cold. When you poke it, it should leave a soft little fingerprint behind. Get your oven totally cranked up to 500°F with that baking steel inside; you need that pan to preheat for a good 30 minutes!
Stretching the Dough for the Classic Cheese Pizza Recipe
Take that relaxed dough ball and put it on a surface that’s absolutely drowning in flour. Press gently all over with your fingertips, leaving that half-inch border untouched. That border is going to become your gorgeous puffy crust! Then, I use my knuckles to gently push up that ring to define the edge perfectly. Now, lift the dough onto your knuckles and let gravity do the heavy lifting—just gently rotate it until it stretches out into a nice 10-inch circle. Dust your pizza peel generously with that semolina flour mixture before laying your stretched circle onto it.
Assembling and Baking the Classic Cheese Pizza Recipe
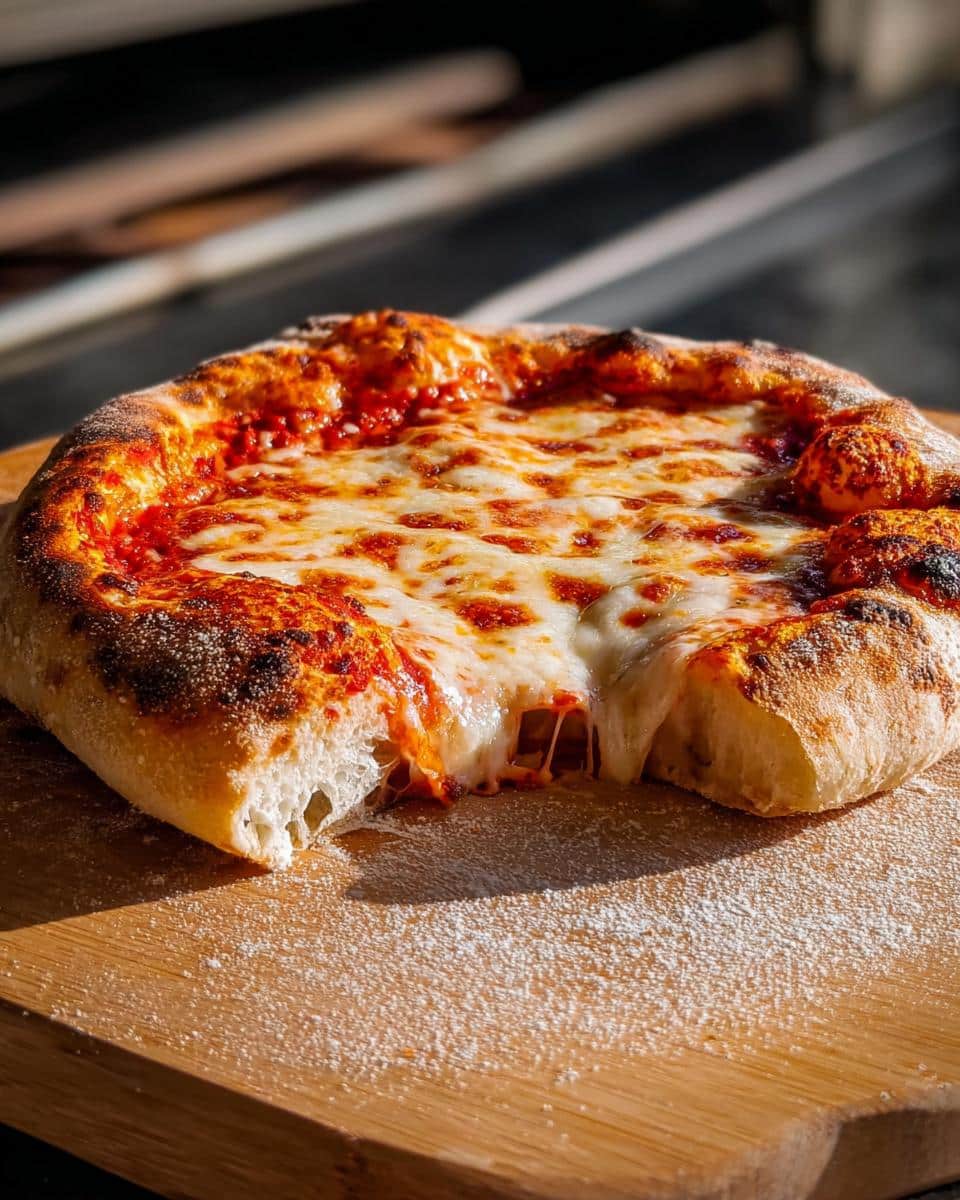
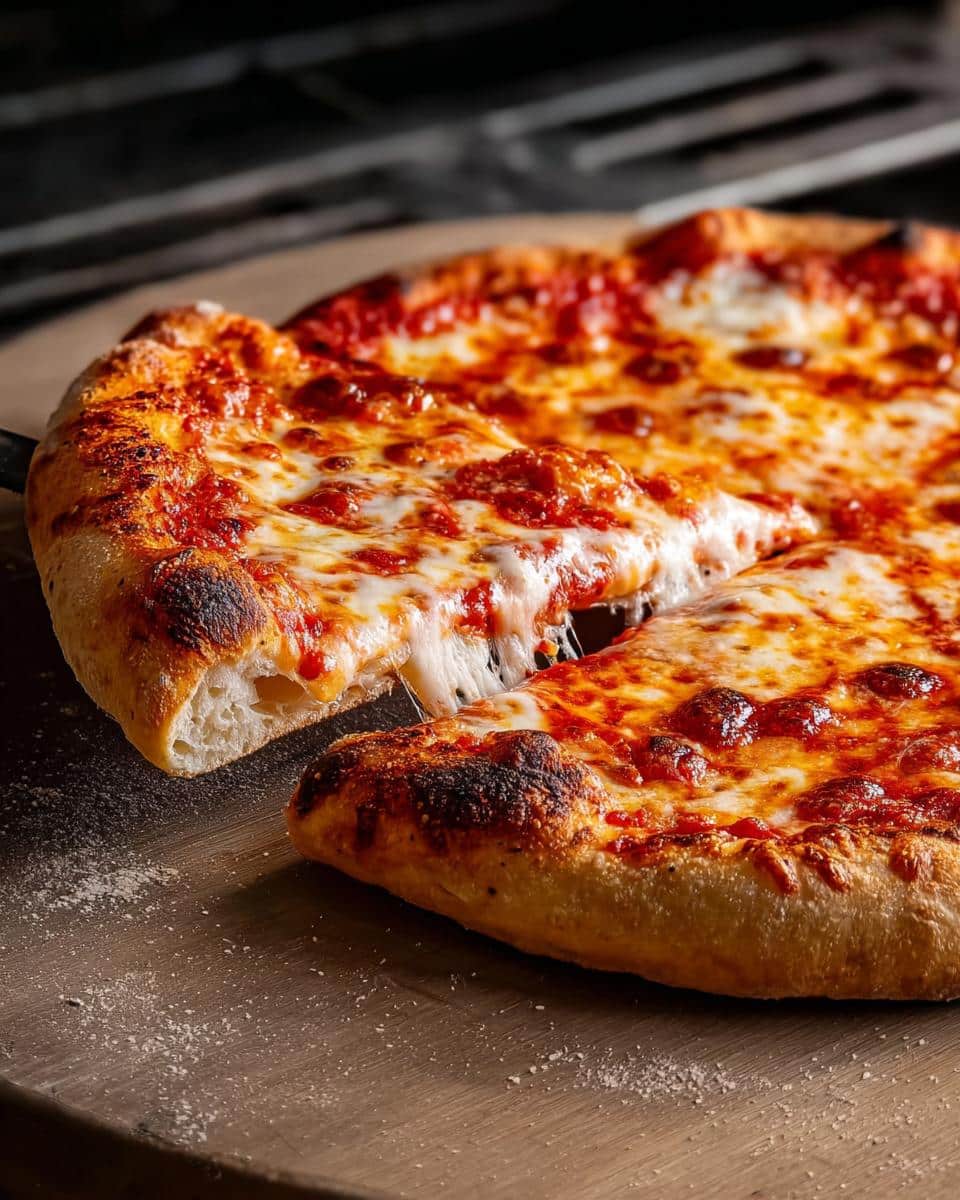
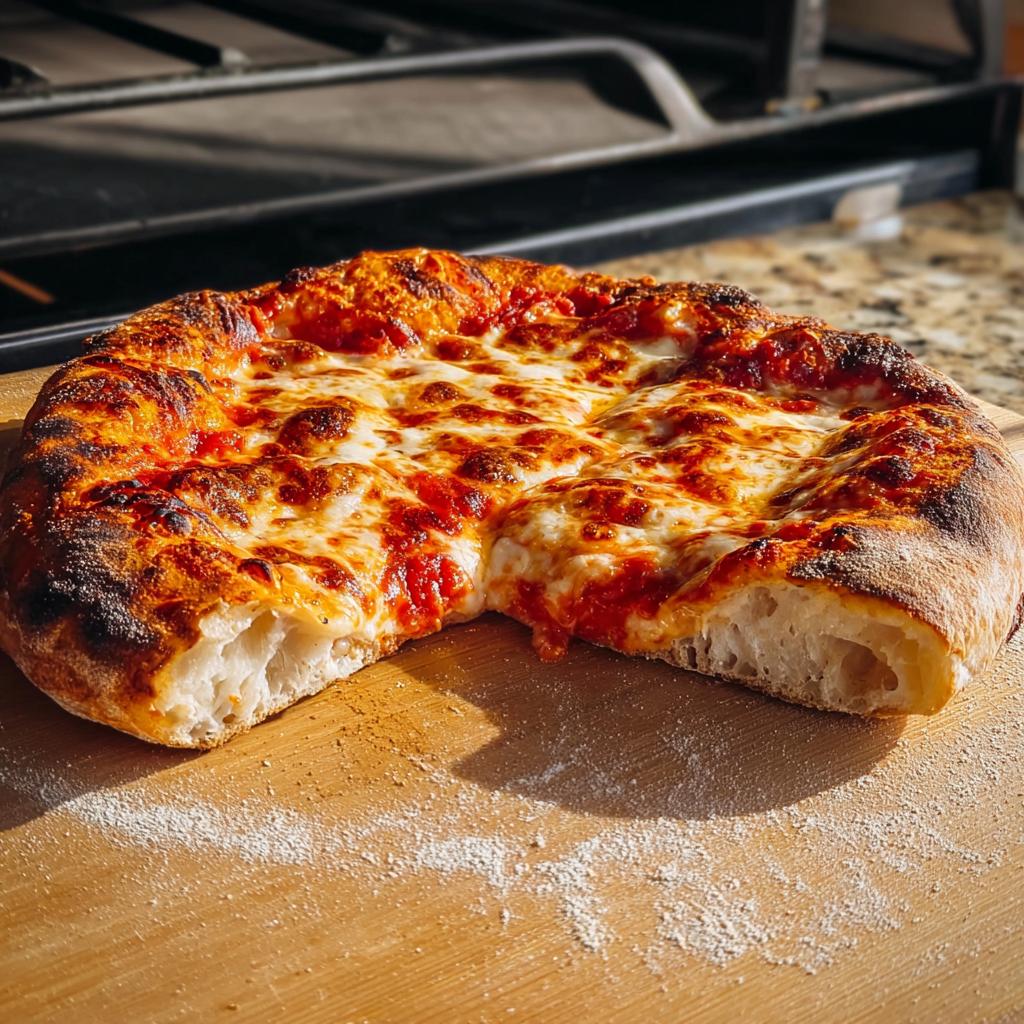
Time to top it! Spread about a quarter cup of that simple sauce right across the dough, leaving some space for the crust. Then sprinkle on your low-moisture mozzarella evenly. Now, here’s the move that separates the pros from the newbies: gently shake the peel to make sure the pizza slides freely. If it catches, stick your bench scraper under the sticky spot and dust a little more semolina underneath. To unload, angle the peel about 20 degrees onto your screaming-hot steel and pull the peel back quickly. Bake at 500°F for about 3 minutes until the edges puff up. Then, crank the heat to broil for 3 to 6 minutes until the cheese is bubbly and the crust has those beautiful brown spots. This quick blast of direct heat is what you want for making great homemade pizza ideas.
Expert Tips for a Perfect Classic Cheese Pizza Recipe Crust
I always say that Lilya Lawson built her reputation on knowing that simple food cooked exceptionally well is the best food. When we’re talking about this **Classic Cheese Pizza Recipe**, the crust is the star, and it needs respect! We already talked about putting that baking steel in while the oven heats up, but let’s really lean into that heat retention. That hot metal is what shocks the dough just enough to make it puff up beautifully underneath—that’s our oven spring, darling!
Don’t get nervous when it’s time for the transfer; speed and confidence are your best friends there. A quick, decisive movement is always better than hesitating over the hot steel. Remember, we are aiming for that beautiful, slightly charred look you get with a real **Italian Pizza** from a wood-fired oven, even if we’re just using our home range!
Achieving Great Oven Spring and Browning
The biggest game-changer for that gorgeous puff is the preheating. I mean it—30 full minutes at 500°F, minimum. You want that steel or cast-iron pan surface to be absolutely searing hot. When the dough hits it, that immediate blast of heat causes the water in the dough to turn to steam instantly, forcing that beautiful puff around the edges.
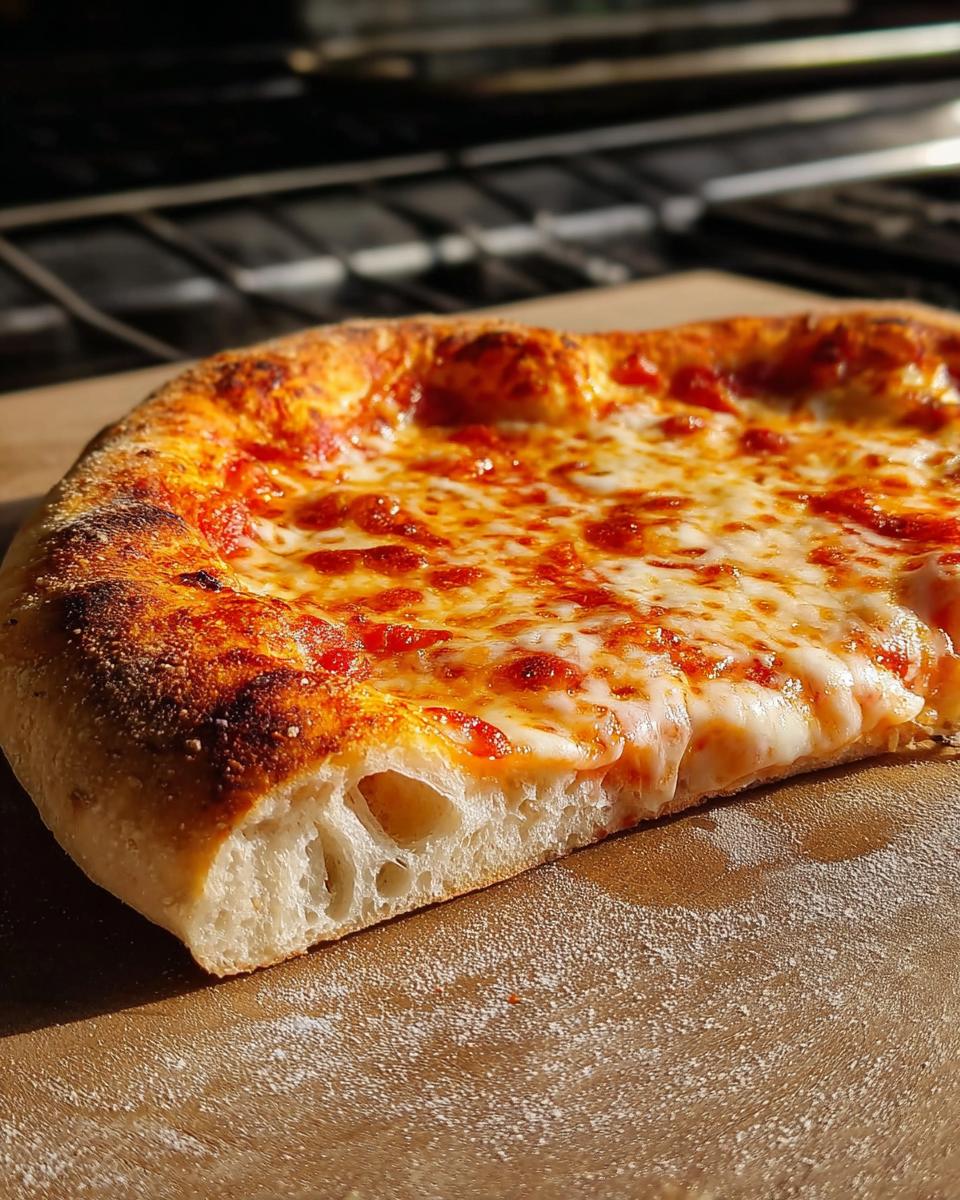
But the browning? That comes from the final step. Once the bottom crust is set (about three minutes in the regular heat), switch it straight to the broiler for those last few minutes. That direct top heat caramelizes the cheese really fast and gives those crust bubbles those gorgeous, dark brown spots. We aren’t looking for pale pizza here; we want color that shows it was cooked with intention. If you want to explore more recipes that focus on big, bold dinner flavors, check out the Dinner category!
Customizing Your Cheese Pizza Food: Simple Variations
Now, I know I keep preaching about how perfect this **Classic Cheese Pizza Recipe** is all by itself—and I mean that! Seriously, give it a shot exactly as written the first time. But when you come back to it a second or third time, you might want to explore just one little addition, right? I love that this simple base is the perfect canvas for a little extra flavor without turning it into a pizza overload.
When I think about easy additions, I look for things that are going to enhance the creaminess of the cheese or add a little salty pop. We’re keeping things light, focused, and delicious. Here are a few **Pizza Topping Ideas** that I use when the mood strikes, but never overshadow the crust itself:
- A light sprinkle of good-quality Parmigiano-Reggiano after it comes out of the oven. It just adds that sharp, nutty finish that screams quality **Italian Food**.
- A few thin slices of spicy soppressata or pepperoni, added right before the final broil. They curl up perfectly and release just enough savory oil onto the cheese.
- After it’s baked, a drizzle of good chili crisp or a little swirl of hot honey. Wow! That spicy-sweet kick against the melted mozzarella is heavenly.
See? We’re just adding a punctuation mark to the flavor, not writing a whole new sentence. It keeps the focus squarely on your amazing crust and that bright sauce. When you are looking for something fast that can double as an easy weekday lunch later, check out my easy lunch ideas for inspiration!
Storing and Reheating Your Homemade Pizza Ideas
Phew, after all that work building the perfect **Classic Cheese Pizza Recipe**, sometimes you have a slice or two leftover—which is a rare treat, honestly! But we have to treat those leftovers right so they taste almost as good as they did fresh out of the oven. The microwave? Absolutely not! That’s how you get soft, steaming discs of disappointment. We want crispy bottoms, not sad noodles.
For storing, you need to protect that beautiful crust and let the cheese breathe just a little. Once the pizza has cooled down completely (don’t seal it hot, please, or you’ll steam it!), I wrap the leftovers tight in plastic wrap, or better yet, tuck them into an airtight container. If I’m stacking a couple of slices on top of each other, I sneak a little square of parchment paper between them. This stops the cheese from welding itself permanently to the topping of the slice above it. This method keeps things fresh for about three days, easily.
The Best Way to Revive That Perfect Crust
When you get the craving for that leftover pizza again, you have to bring it back to life! Forget microwaving; it ruins the texture instantly. The oven is your best friend for reviving the integrity of that crust we worked so hard on. Preheat your oven or toaster oven—a toaster oven is actually fantastic for just one or two slices because it heats up super fast—to about 350°F.
Lay the slice directly onto the rack if you can, or use a little piece of foil. You’re letting the heat gently warm the cheese through while crisping up the dough underneath. It takes about 5 to 8 minutes, but watch it closely! You’ll know it’s ready when the edges feel rigid again and the cheese is just starting to look glossy. It’s honestly foolproof and brings you right back to that beautiful moment when you first pulled your **homemade pizza ideas** out of the oven!
Frequently Asked Questions About the Classic Cheese Pizza Recipe
Whenever I share this **Classic Cheese Pizza Recipe**, I get the same wonderful questions. It’s natural! Since we’re aiming for that authentic, beautiful **Pizzas Aesthetic**, we want to make sure every step is just right before we launch it into that hot oven. Here are a few things I hear most often from folks trying to nail this perfect basic **Cheese Pizza**.
Can I use store-bought dough for this recipe?
Oh, absolutely! I love having my own dough recipe up my sleeve, especially since we let it hang out for two hours, but life happens! If you need a shortcut, please—use store-bought dough. The most important thing here is making the sauce well and getting your oven hot enough. Just make sure you let that store-bought dough come up to room temperature according to package directions, or at least for an hour. Cold dough is impossible to stretch, and you’ll just get frustrated.
What if I don’t have a baking steel or cast iron?
This is a fair question! A baking steel or stone is my go-to for that super crisp, blistered bottom crust, but if you don’t have one, don’t stress. You still need high heat! Preheat a heavy, upside-down aluminum baking sheet in the oven while it heats up just like you would the steel. It won’t perform quite as well at transferring that intense heat instantly, but it’s a fantastic substitute for achieving a decent crust while you work toward getting a steel. Just make sure that the cookie sheet is fully preheated before sliding your pizza on!
What is the best cheese blend for this recipe?
For this specific, simple **Classic Cheese Pizza Recipe**, I insist on low-moisture, whole-milk mozzarella that you shred yourself. Pre-shredded cheese is coated in starches that stop it from melting as smoothly. If you want to add a little extra something, I enjoy grating just a touch of sharp Provolone in with the mozzarella for a saltier bite. A tiny shaving of Pecorino Romano sprinkled on top *after* baking adds a lovely finish, too. Fewer cheeses used well is always better than lots of mediocre cheese!
My dough keeps sticking to the peel! What’s the solution?
This is the most common problem, and it usually means you need more dust! When you are making **Homemade Pizza Ideas**, the semolina flour is your non-stick secret weapon—it acts like tiny little ball bearings under the dough. If your dough relaxes and starts spreading while sitting on the peel, it’s sticking for sure. Always dust right before you top it. If you see it sticking while you’re topping, stop! Lift the edge carefully with a bench scraper and dust more semolina underneath. A quick, gentle shake right before you launch it is the final check before it goes onto the steel!
If you have any other burning questions about technique or want to see my latest recipe disclaimer notes, feel free to click on through!
Sharing Your Beautiful Pizzas Aesthetic
Now, that’s the best part of sharing food, isn’t it? Seeing the results! Even though this **Classic Cheese Pizza Recipe** is simple, when you get that crust right—when those edges puff up beautifully, and the mozzarella is just slightly browned and bubbling—it looks spectacular. Seriously, take a minute before you slice it to snap a picture. That simple, honest look of great **Pizza Aesthetic** is something worth celebrating.
This is what cooking is all about for me: connecting those simple, wonderful flavors with the people around you. I absolutely live to see your creations! When you’ve got your perfect pizza laid out on the counter, maybe next to a checkered napkin or a basil plant, please snap a photo and tag me on Instagram or Pinterest. When you make something from my kitchen, you become part of the Top Chicken Eats family, and I want to see how you made this classic your own.
Leaving a comment below letting me know how the dough stretched and how much the family loved it helps me, too! It keeps me motivated to share more honest, soulful recipes like this one. If you need to reach out directly with feedback or a question about technique, you can always use the Contact Us page. Now go enjoy that perfect, comforting slice!
Classic Cheese Pizza Recipe
Ingredients
Equipment
Method
- Make the Basic Pizza Sauce: Stir together all sauce ingredients in a bowl. Use immediately, or cover and refrigerate up to 2 days.
- Let the chilled dough stand at room temperature until it is cool (not cold) and a fingerprint remains when pressed, 1 to 2 hours. Transfer 1 dough ball to a heavily floured surface.
- Using floured fingertips, firmly press all over the dough, leaving a 1/2-inch border.
- Preheat your home oven to 500°F with a baking steel or large round cast-iron pizza pan on the middle rack. Let the pan preheat in the oven for about 30 minutes.
- Form a C-shape with the outer edge of your hand, and press firmly inside the dough border to define a 1/2-inch wide ring around the edge of the dough.
- Lift the dough onto the knuckles of both hands, and gently stretch it, rotating the dough after each stretch to maintain its round shape. Continue gently stretching the dough, allowing gravity to help it expand, until a 10-inch circle of even thickness forms, with a slightly thicker outer ring.
- Lay the dough round on a semolina-dusted pizza peel, reshaping as needed to form a circle. Spread the dough round with Basic Pizza Sauce. Top with shredded mozzarella.
- Gently shake the pizza peel with the prepared pie to loosen it. If the pizza feels stuck in any areas, carefully lift the pizza edge with a bench scraper, and dust the peel with a 1:1 mixture of semolina and bread flour.
- Unload the pizza onto the preheated pan using quick, decisive movements: Set the peel edge on the pan at about a 20-degree angle, and quickly pull back the peel to slide half of the pizza onto the pan. Gently shake the peel side to side while pulling it back to slide the rest of the pizza onto the pan, allowing it to stretch slightly.
- Bake at 500°F until the edges of the crust have puffed slightly, about 3 minutes. Rotate the pan 90 degrees, and increase the oven temperature to broil. Broil until the pizza is cooked through and the crust is browned, 3 to 6 minutes.
- Using the peel, transfer the pizza to a cutting board. Garnish with fresh basil or oregano, if you like, and cut into wedges.