You know those moments when you just need something chocolatey, sweet, but you don’t want to derail your entire day? I totally get it. That’s exactly why I developed these amazing Date & Cocoa No-Bake Cookies.
These little bites are the perfect proof that a sweet treat doesn’t need to feel heavy or overly indulgent to be completely satisfying. We’re talking about instant gratification here—no oven required! My philosophy, the one I use as a Registered Dietitian and Flavor Strategist, is that healthy eating means choosing foods that make you feel good, both physically and emotionally.
Dates bring all the natural sweetness and a wonderfully chewy texture, while the cocoa adds that deep, rich flavor we all crave. They come together so quickly—a real win for busy afternoons. This recipe lets you enjoy simple, wholesome ingredients in a cookie that truly feels like a treat.
Why These Date & Cocoa No-Bake Cookies Are Your New Favorite Quick Sweet Treats
If you’re like me, you want delicious snacks without a huge time commitment or a laundry list of strange ingredients. Trust me, these cookies check every box!
They fit right into a balanced approach to eating because we use real food to hit that sweet spot. If you’re looking for truly easy cookie recipes that feel good to eat, you’re in the right place.
- They are some of the best healthy cookies because you control the sweetness completely!
- These are fantastic quick sweet treats—seriously, they’re ready faster than you can preheat your oven.
Natural Sweetness from Medjool Dates
We rely on Medjool dates to bring that deep, caramel-like sweetness. This means we skip the refined white sugar, but you absolutely don’t sacrifice flavor or texture. Dates keep things wholesome while providing that satisfying chewiness we all look for.
Zero Baking Time for Easy Cookie Recipes
The best part? No oven! This makes cleanup a breeze and means you can whip these up even when it’s scorching hot outside. If you are looking for truly easy cookie recipes, the ‘no-bake’ factor here is unbeatable for speed and convenience.
Gathering Ingredients for Date & Cocoa No-Bake Cookies
I love that this recipe lives up to the ‘5 Ingredient Desserts’ tag, because it seriously only needs a few things to shine! We’re keeping this list short so you can get to the dipping and freezing part ASAP. It’s all about simplicity here.
Cookie Base Ingredients (Pitted Dates)
For the base, you just need 10 Medjool dates. And listen, the absolute most important thing is that you make sure they are pitted! If you buy them unpitted, take the time to split them open—it saves a lot of frustration later on, trust me.
Chocolate Topping Ingredients for Date & Cocoa No-Bake Cookies
For the rich topping, you’ll grab 1 cup of dark chocolate chips and 1 tablespoon of creamy peanut butter. A quick note: for the peanut butter, stick to one that lists only peanuts and salt as ingredients. If you want to make them look extra fancy, have some sea salt ready for a little sprinkle right after topping them.
Ingredient Notes and Substitutions for Healthy Cookies
While I really stand behind the Medjool dates and specific peanut butter in this recipe, I know life happens! Sometimes the store is out, or maybe you have a nutty allergy to contend with. Don’t stress! Because we want these to be great healthy cookies for everyone, let’s chat substitutions. Showing readers how to adapt a recipe is how we build real kitchen confidence.
Date Alternatives if Medjool Dates are Unavailable
If you can’t find the big, soft Medjool types, don’t panic. You can use regular dried Deglet Noor dates, but here’s the catch: they are much drier. You will need to soak them!
I suggest soaking about 15 of those smaller dates in boiling water for a good 10 minutes. Drain them really, really well, and then proceed with mashing them. They might not mash quite as smoothly as the Medjools, but they will still provide that wonderful natural sweetness we need.
Another fun swap, though it will change the flavor profile a little, is using dried figs. Again, be sure to soak them until they are super pliable before trying to flatten them.
Peanut Butter Swaps
That creamy peanut butter we use for the chocolate topping is vital because it helps the chocolate melt smoothly and keeps the topping from getting rock hard. If you have a peanut allergy, we have simple solutions!
You can easily swap this for smooth almond butter or cashew butter. They both melt beautifully alongside the chocolate chips. If you need to avoid tree nuts entirely, sunflower seed butter (SunButter) is usually my go-to recommendation.
Just be aware that sunflower seed butter can sometimes introduce a slightly more intense flavor that might peek through the cocoa. Also, it can sometimes seize up faster when melting, so heat it in 15-second bursts rather than one 45-second jolt.
Step-by-Step Instructions for Date & Cocoa No-Bake Cookies
Okay, here’s where the magic happens so fast! Since these are Date & Cocoa No-Bake Cookies, we skip the fussy oven work. We’re moving quickly because these snacks are ready to chill almost as soon as you start mixing them.
Grab your baking sheet and lay down that parchment paper first. Trust me, this step makes cleanup unbelievably easy later on. Parchment paper is your best friend when making quick sweet treats like this!
Preparing the Base for Your Date & Cocoa No-Bake Cookies
First things first: check those dates. If they aren’t pitted, you must split each one open and pull out that pit. Once they are ready, spread them out on the lined sheet, leaving a good 2 inches between each one—they need space to breathe before we press them!
Now for flattening! Grab a glass or a small mason jar—make sure you spray the bottom lightly with cooking spray so nothing sticks to the glass. Gently press down on top of each date until it turns into a nice, flat disk. If a date decides to cling to the bottom of your glass, just use a butter knife to gently coax it off. Repeat until all 10 dates are flattened and ready for their chocolate blanket.
Melting and Spreading the Chocolate Topping
Time for the rich, decadent part! Put your dark chocolate chips and that tablespoon of creamy peanut butter into a microwave-safe bowl. Pop it into the microwave. I found that 45 to 60 seconds is usually the sweet spot—don’t rush it, or the chocolate can burn!
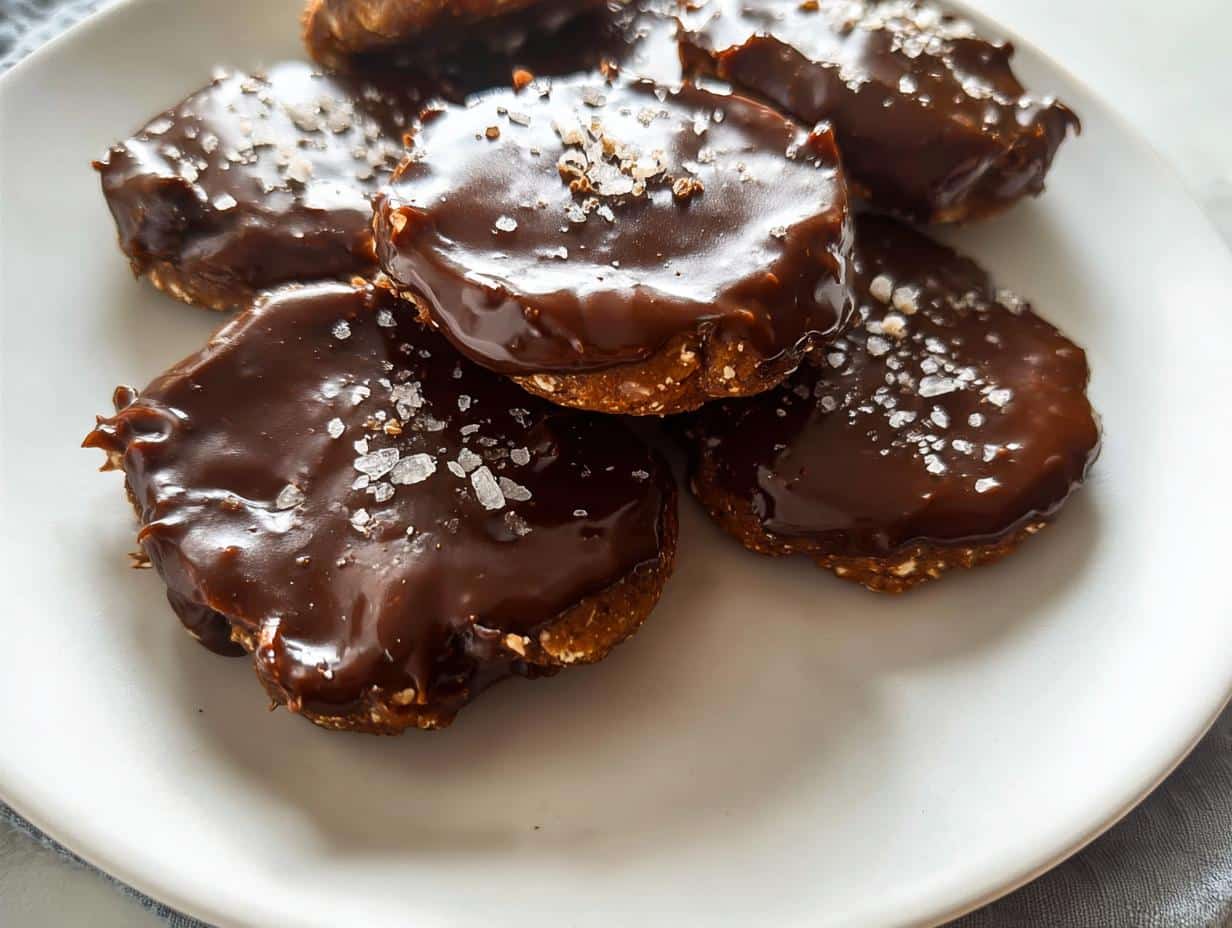
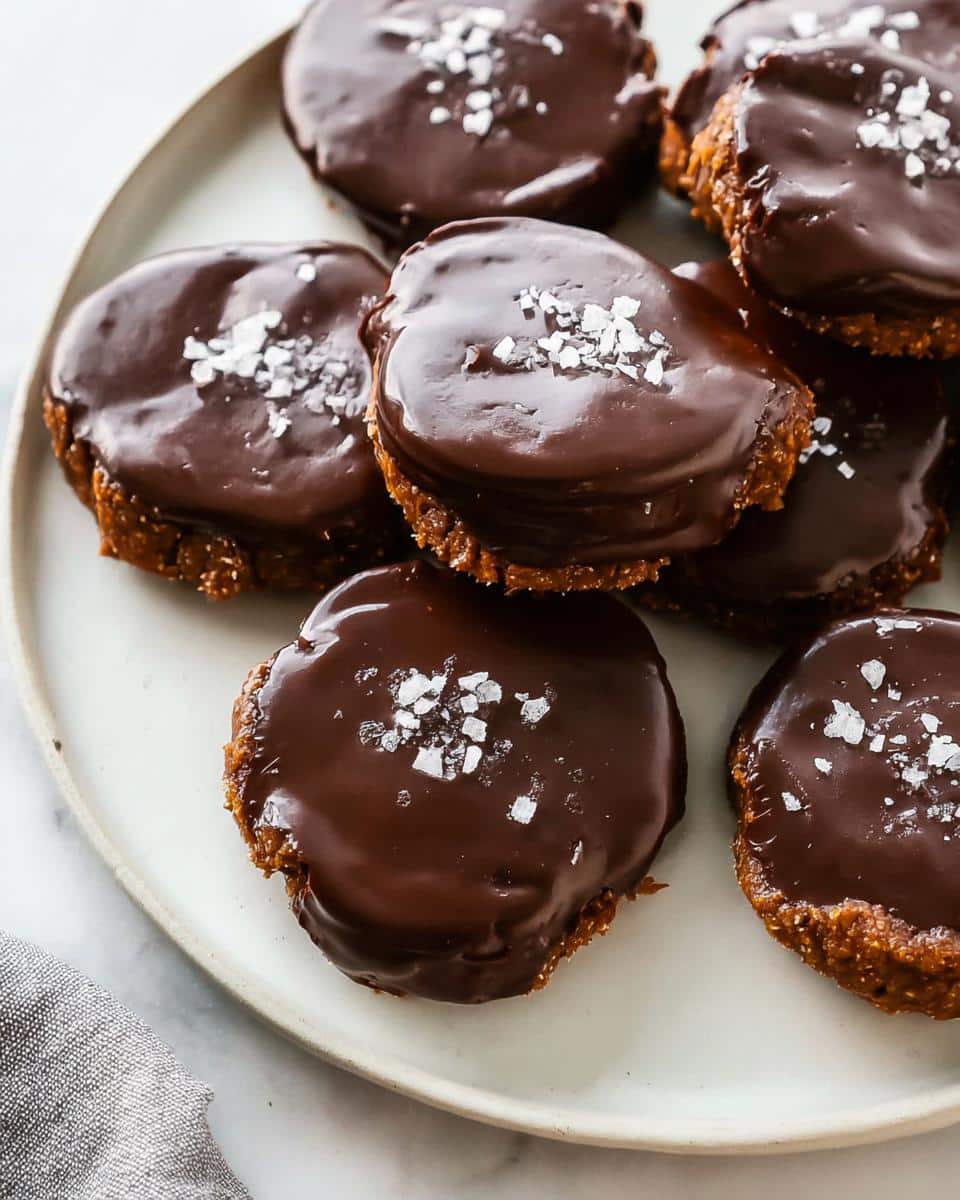
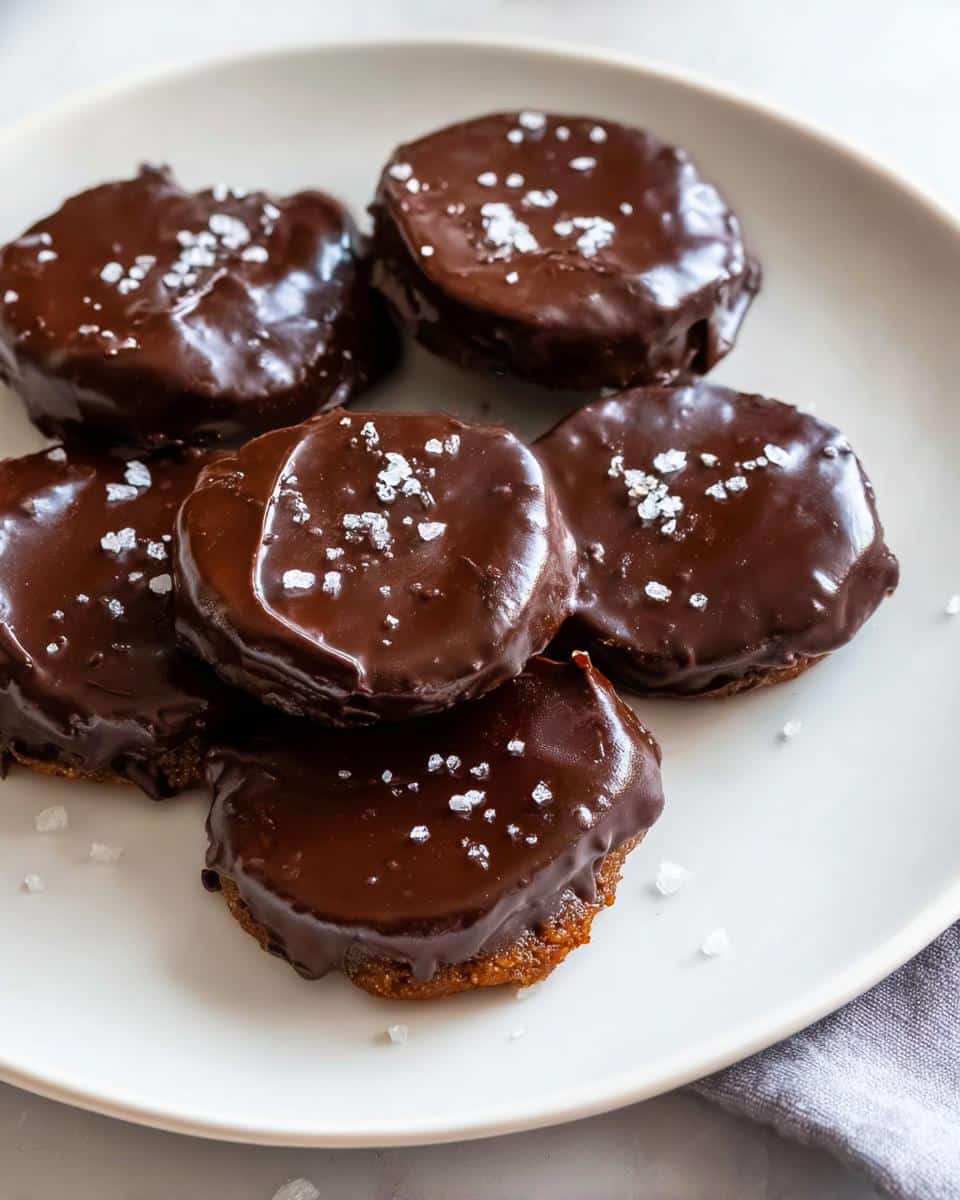
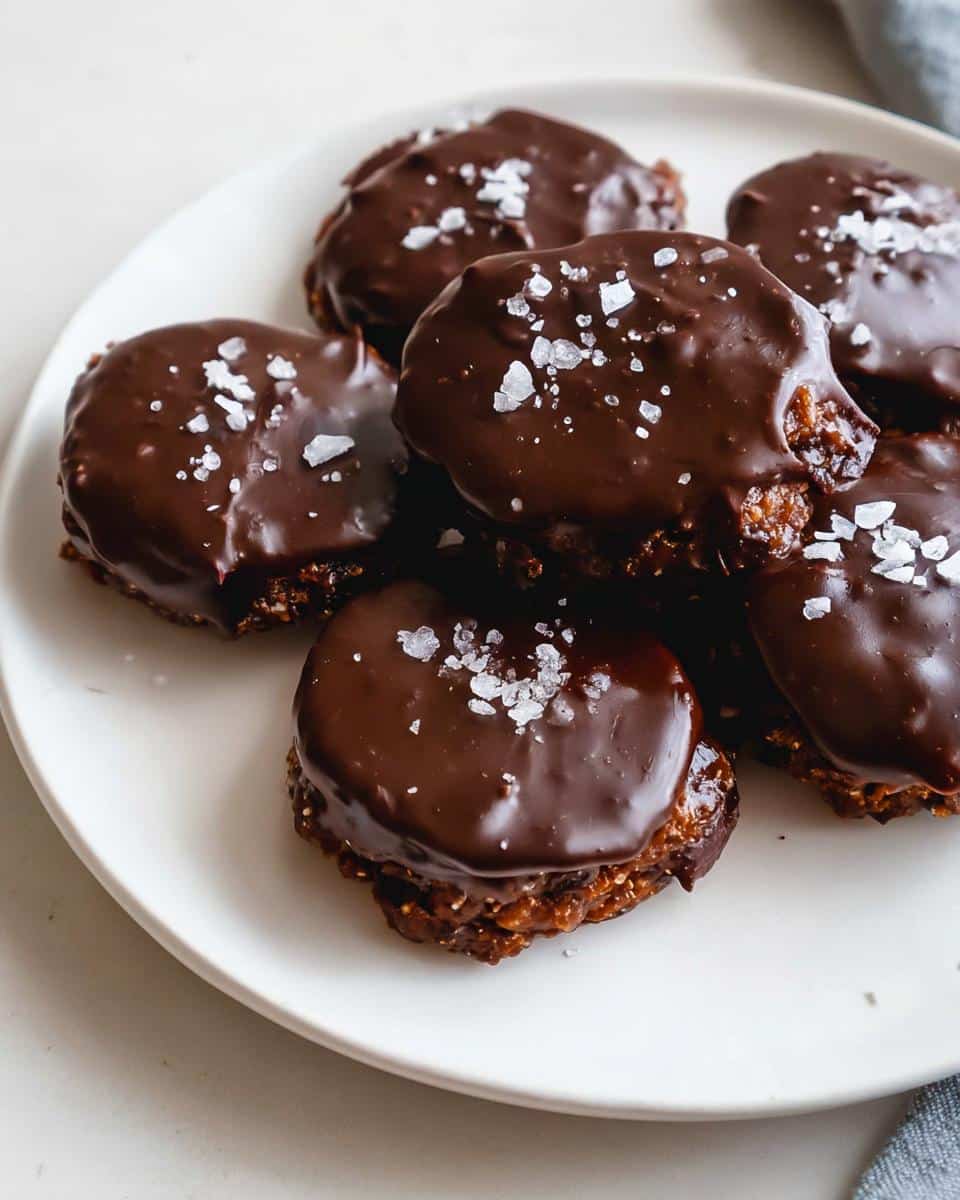
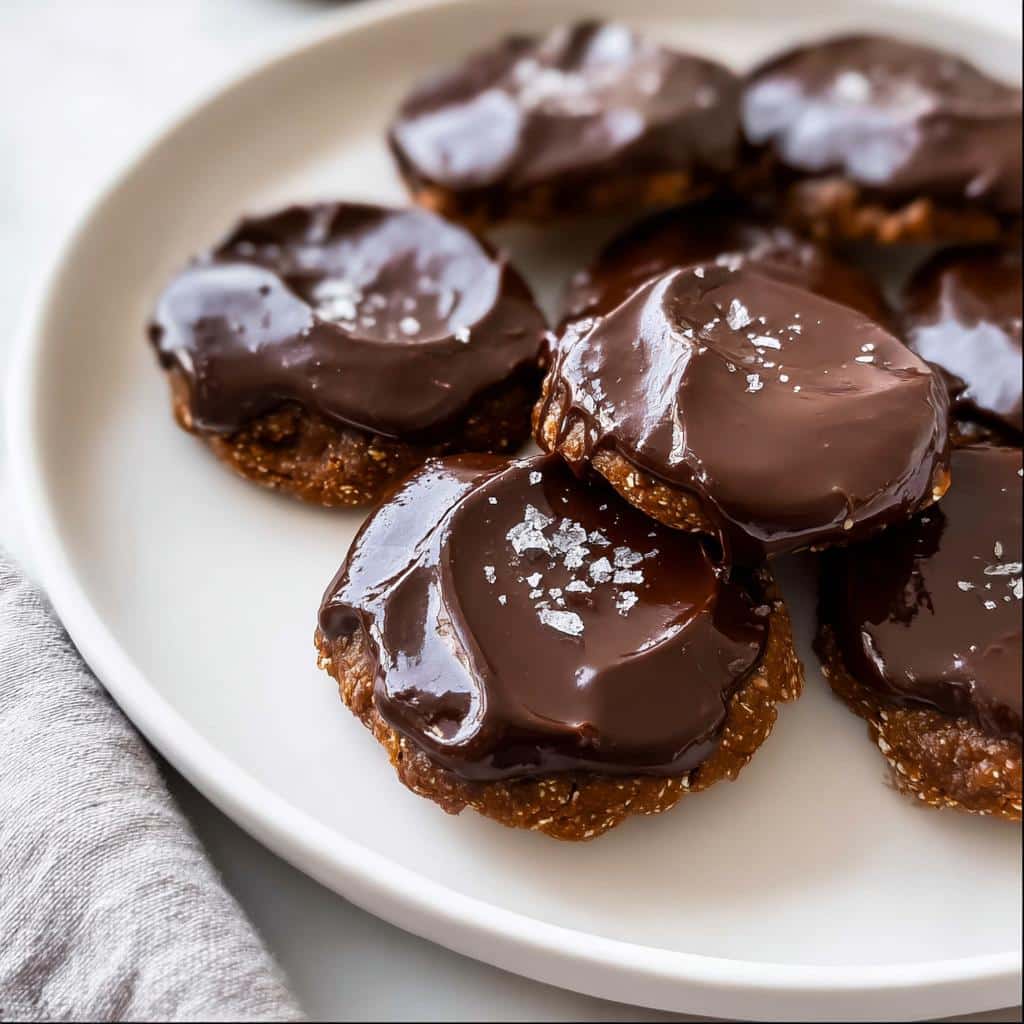
Once melted, stir until it’s completely smooth and glossy. Then, use a small spoon to drop about 1 or 2 teaspoons right over the center of each date, spreading it out so it covers that sticky base nicely. If you planned ahead, sprinkle a tiny pinch of sea salt over the wet chocolate right now!
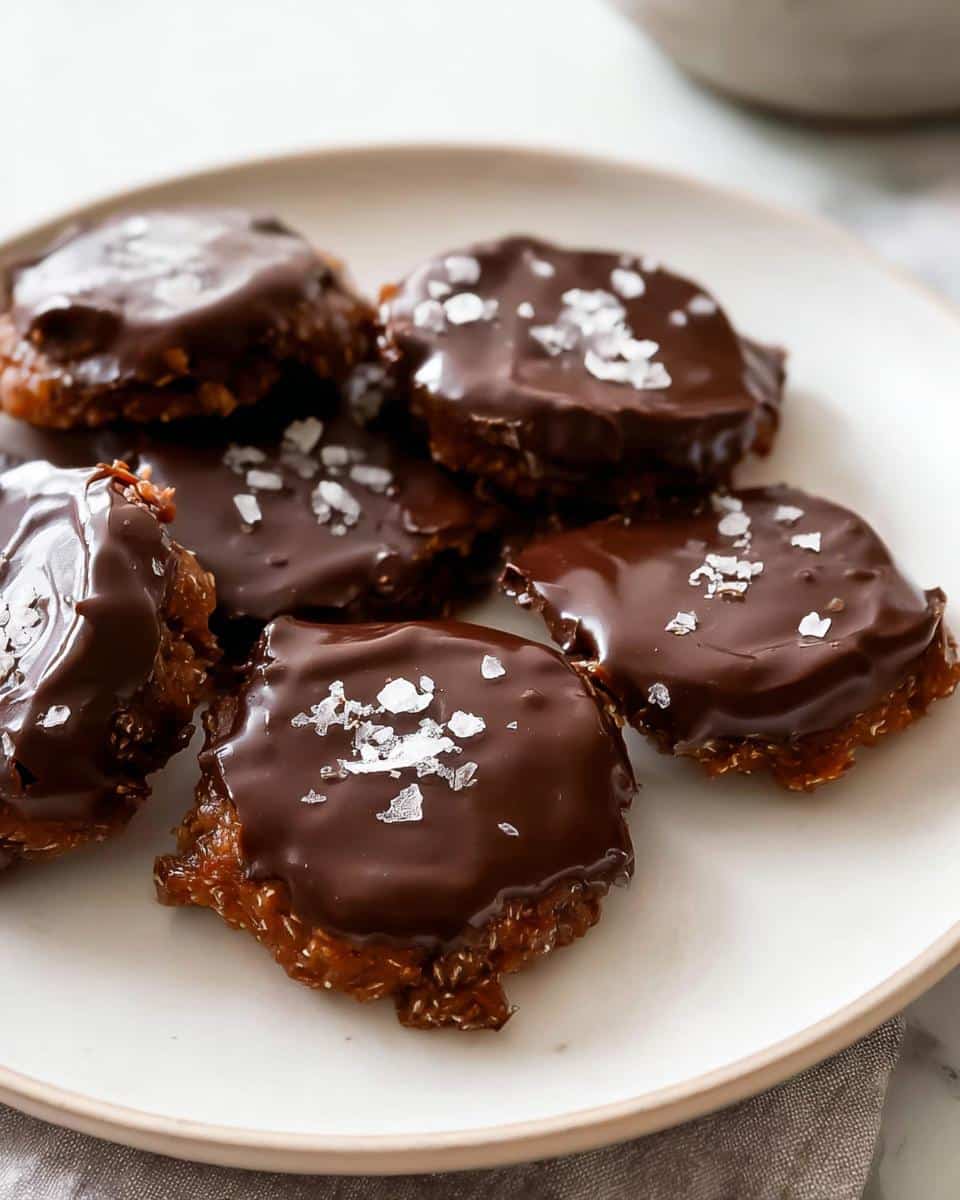
Setting the No Bake Desserts
These are our no bake desserts, which means they need to firm up! Transfer that whole baking sheet into the freezer. You only need about 30 minutes of freezing time for the chocolate to set hard.
Once the chocolate is solid to the touch, you can move them to the fridge or just eat them immediately! Seriously, that’s it. Enjoy your perfectly quick snack.
Tips for Perfect Date & Cocoa No-Bake Cookies
Even though this recipe is wonderfully simple, there are a couple of little tricks I’ve picked up over the years that ensure you get that perfect texture every single time. Since we aren’t baking, we have to rely on physical preparation to make these the best no-bake treats possible. I want your chocolate topping to be glossy and your base to hold up beautifully! These tips really help when you’re making quick sweet treats for the kiddos, if you check out some of my other easy recipes for kids.
Managing Date Stickiness
Dates are naturally sticky, which we love because it helps them hold their shape, but they can make a bit of a mess when you’re pressing them down. If you’re finding that your dates are sticking terribly to the glass you’re using to press them flat—even after spraying it—try this tip I use when I’m dealing with older, drier dates.
Lightly dampen your fingertips with cool water before handling the dates before pressing them. You don’t want them wet, just barely damp. This tiny bit of moisture acts as a barrier against the date’s natural sugars. For the pressing tool, if a light spray of cooking oil isn’t cutting it, try wiping the bottom of the glass with a tiny amount of a neutral oil using a paper towel. It sounds counterintuitive, but it often prevents tearing when you lift the glass!
Achieving the Right Chocolate Consistency
The chocolate topping dictates how these look when they set, and we want them looking perfect! The biggest mistake people make when melting chocolate chips is overheating them, especially when you mix in the peanut butter.
If you microwave your chocolate mixture for too long, it can scorch, or worse, it can get grainy and seize up before you even get it spread. Always use short bursts—15 seconds is better than 30 if you’re worried. After the full 45-60 seconds is up and it looks *mostly* melted, pull it out! Stirring vigorously is what finishes the job, smoothing out any last lumps of chocolate or peanut butter. That vigorous stirring incorporates air just enough to keep it glossy, which is exactly what you want when topping those little date bases.
Storing and Serving Date & Cocoa No-Bake Cookies
Since these Date & Cocoa No-Bake Cookies technically don’t bake, storage is key to making sure they taste just as fresh later on as they do right out of the freezer. Trust me, you’ll want to keep a batch on hand because they make such satisfying energy bites for a midday slump!
The chocolate topping is the main component that determines how you store them. We want that chocolate to stay firm but not shatter when you bite in, so there’s a little science to keeping your date cookies perfect.
Best Practices for Storing Date & Cocoa No-Bake Cookies
The absolute best place for these is the refrigerator. Once the chocolate is completely solid from the freezer (after those 30 minutes), transfer the cookies to an airtight container.
In the fridge, they’ll keep very well for about one week. The texture stays lovely—the date base softens just enough while the chocolate stays firm. If you need to keep them longer, the freezer is your friend.
To freeze them, place a piece of parchment or wax paper between any cookies stacked on top of each other so the chocolate doesn’t stick them together. They freeze beautifully for up to two months! When you want one, pull it out, let it sit on the counter for about five minutes so it’s not rock hard, and enjoy.
Frequently Asked Questions About Date & Cocoa No-Bake Cookies
I always get questions when readers try a new way to satisfy a craving! That’s wonderful because it means you’re paying attention to what you put into your body. Since these are naturally sweetened, folks often have specific questions about making substitutions or how to best store them as no bake desserts.
Can I make these Date & Cocoa No-Bake Cookies nut-free?
That’s a great question, especially if you have allergies to navigate! Yes, you absolutely can. As I mentioned earlier, the peanut butter in the chocolate topping is mainly there as an emulsifier to help the chocolate melt smoothly, not necessarily for a ton of flavor. To make these entirely nut-free, just swap that creamy peanut butter for sunflower seed butter. It works like a charm! You just need to watch it closely when melting, as seed butters can sometimes heat up a tiny bit faster than nut butters.
What is the best way to soften dates for this recipe?
If you happen to buy dates that feel a bit dry—which happens sometimes, especially if they’ve been sitting out for a while—you’ll want to plump them up before pressing them. The very best way is using the hot water soak I mentioned in the substitutions section. I like to check in with my own nutritional guidelines over at my bio page if I have any doubt about ingredient adjustments!
I suggest soaking about 15 of those smaller dates in boiling water for a good 10 minutes. Drain them incredibly well—squeeze out any excess water with a paper towel. They will be soft, pliable, and ready to mash into that perfect base for your cookie shape. If you use fresh Medjool dates, though, they should be soft enough straight out of the package!
Are these considered good Energy Bites for a quick snack?
Oh, they are perfect Energy Bites! That’s exactly what I designed them to be—a satisfying snack that gives you real fuel, not just empty calories. Because we are relying on the natural sugars from the dates and the healthy fats from the small amount of peanut butter, they provide sustained energy that helps stabilize your blood sugar longer than eating something processed. They are fantastic for that pre-workout boost or when you hit that 3 PM wall, and they make amazing snack recipes for the whole week!
Nutritional Information for Date & Cocoa No-Bake Cookies (Estimated)
Now, I always want to be upfront with you all: because this recipe relies on whole foods like dates and specific types of dark chocolate, the exact nutritional breakdown can shift, especially if you use slightly different peanut butter or date sizes. I’m a Registered Dietitian, so accuracy matters, but these aren’t lab-tested, so treat this as an estimate!
This section is just an approximation of what one cookie should look like based on my measurements. When I share these guidelines on my site, I always want readers to know that these numbers are based on using 10 total cookies for the recipe yield.
If you are tracking macros closely, remember that the lion’s share of the carbohydrates comes from the natural sugar in those Medjool dates. Here is what we generally see per one cookie:
- Calories: Around 120-140 calories
- Total Fat: Approximately 6-8 grams
- Protein: About 3 grams
- Total Carbohydrates: Near 15-18 grams
- Dietary Fiber: Generally 2-3 grams
See? It fits right into a balanced snack plan! Because of the fiber and the fat content from the chocolate and peanut butter, these don’t just spike your energy and send you crashing down like some refined sugar treats do. They give you that little boost you need!
Share Your Date & Cocoa No-Bake Cookies Experience
I really hope you fell in love with these simple treats just as much as I do! Making something inherently good for you that tastes this indulgent is the whole point of balanced eating.
If you whipped up this batch of Date & Cocoa No-Bake Cookies, please come back and leave a rating! Did you give them 5 stars? I’d love to see your photos—tag me or drop a comment below and let me know how these delightful, no-bake snacks worked for you. You can always reach out to me directly through my contact page, too!
Date & Cocoa No-Bake Cookies
Ingredients
Equipment
Method
- Line a baking sheet with parchment paper. If your dates are not pitted, split each date down the middle without cutting it in half and remove the pit.
- Spread each date out with your fingers and press each one into the lined pan, spacing them 2 inches apart.
- Spray the bottom of a glass or mason jar with cooking spray to prevent sticking. Lightly press the glass on top of each date to flatten it.
- Use a metal spatula or butter knife to remove the date from the bottom of the glass if it sticks. Repeat this until you have flattened all the dates.
- Place the chocolate chips and peanut butter into a microwave-safe bowl. Heat it in the microwave until melted, then stir well. This took me 45 to 60 seconds.
- Use a spoon to spread 1 to 2 teaspoons of the chocolate mixture over the top of each date, covering it completely.
- Sprinkle each cookie with a little sea salt, if you want to use it.
- Place the cookies into the freezer or the refrigerator to set the chocolate until hard. Enjoy your treat.