
Oh my goodness, let’s talk about indulgence, shall we? Sometimes you just need a dessert that wraps you up like a cozy blanket on a chilly afternoon, and this rich treat is exactly that. I first tasted a version of this salted caramel cheesecake at a fall festival way up in the North Carolina mountains. It was rustic, sweet, and honestly, it almost felt too decadent for a paper plate!
That memory stuck with me, and when I started developing recipes using my own kitchen tools, I knew I had to capture that cozy feeling. That’s where the magic of the Thermomix comes in. Believe me when I say that this Thermomix Salted Caramel Cheesecake achieves an unbelievably smooth texture—the kind that used to take me hours of careful beating by hand. Watching the ingredients blend into that velvety filling without a single lump? It’s pure joy. It’s soulful cooking that feels luxurious but truly simplifies the process!
Why This Thermomix Salted Caramel Cheesecake Works So Well (E-E-A-T)
You want results, and I want you to have foolproof success! That’s why I rely on the precision of my Thermomix for this decadent dessert. Honestly, it takes away all the guesswork that usually comes with creamy fillings.
- The Ultra-Smooth Texture of Your Thermomix Salted Caramel Cheesecake: Forget fighting with your mixer! The blades in the Thermomix whip everything into a truly lump-free, velvety texture that’s just divine. But remember, that structure needs time—don’t rush the mandatory 180 minutes of chilling. That wait time is non-negotiable for a perfect slice of Thermomix Salted Caramel Cheesecake.
- Comfort Food Elevated: The Flavor Profile: This isn’t just sweet; it’s balanced. We pair that deep, satisfying caramel with just the right hint of salt, all resting on a warmly spiced gingernut crust. It’s Southern comfort food, yes, but made elegant enough for serving at any gathering!
Gathering Ingredients for Your Thermomix Salted Caramel Cheesecake
Okay, sweetheart, let’s get organized! We’re making six servings of pure decadence here, so making sure you have every little piece ready before we start is half the battle won. Working with the Thermomix is brilliant because it chops and mixes so fast, but you can’t go running to the pantry mid-step!
We have four main groups, and I want you to treat each one like its own little project. Following these distinct sections ensures that when the Thermomix calls for the filling, you aren’t scrambling to soften cream cheese. Precision here guarantees that gorgeous, smooth finish we talked about in your Thermomix Salted Caramel Cheesecake!
Ingredients for the Gingernut Biscuit Base
For the foundation, we want that lovely warm, spicy note from the gingernuts—it cuts through the richness of the caramel so beautifully. Make absolutely sure your 70 gm of salted butter is sitting out on the counter until it’s perfectly at room temperature. You’ll need 150 gm of gingernut cookies, and don’t forget that teaspoon of ground cinnamon; it really wakes everything up!
Ingredients for the Creamy Cheesecake Filling
This is the heart of the cheesecake flavor! You must use the full 400 gm of Philadelphia Cream Cheese, and please ensure it’s softened a bit, too. The star, of course, is the 380 gm of “Nestles” Caramel Top & Fill. The critical step here is the gelatin: you have to dissolve 1 teaspoon of gelatin completely in 60 ml of boiling water before adding it to the machine. It’s what gives this filling structure for those lovely layers!
Ingredients for the Homemade Caramel Sauce
This sauce is the one you’ll want to sneak spoonfuls of! When you buy your brown sugar, know that 1 cup weighs roughly 215g—I’ve written the weight down just in case your measuring cup is acting tricky. Grab 60 gm (which is about 2 ounces) of salted butter, and don’t skip the half teaspoon of salt. It’s what makes it *salted* caramel, after all!
Ingredients for the Chantilly Cream and Garnish
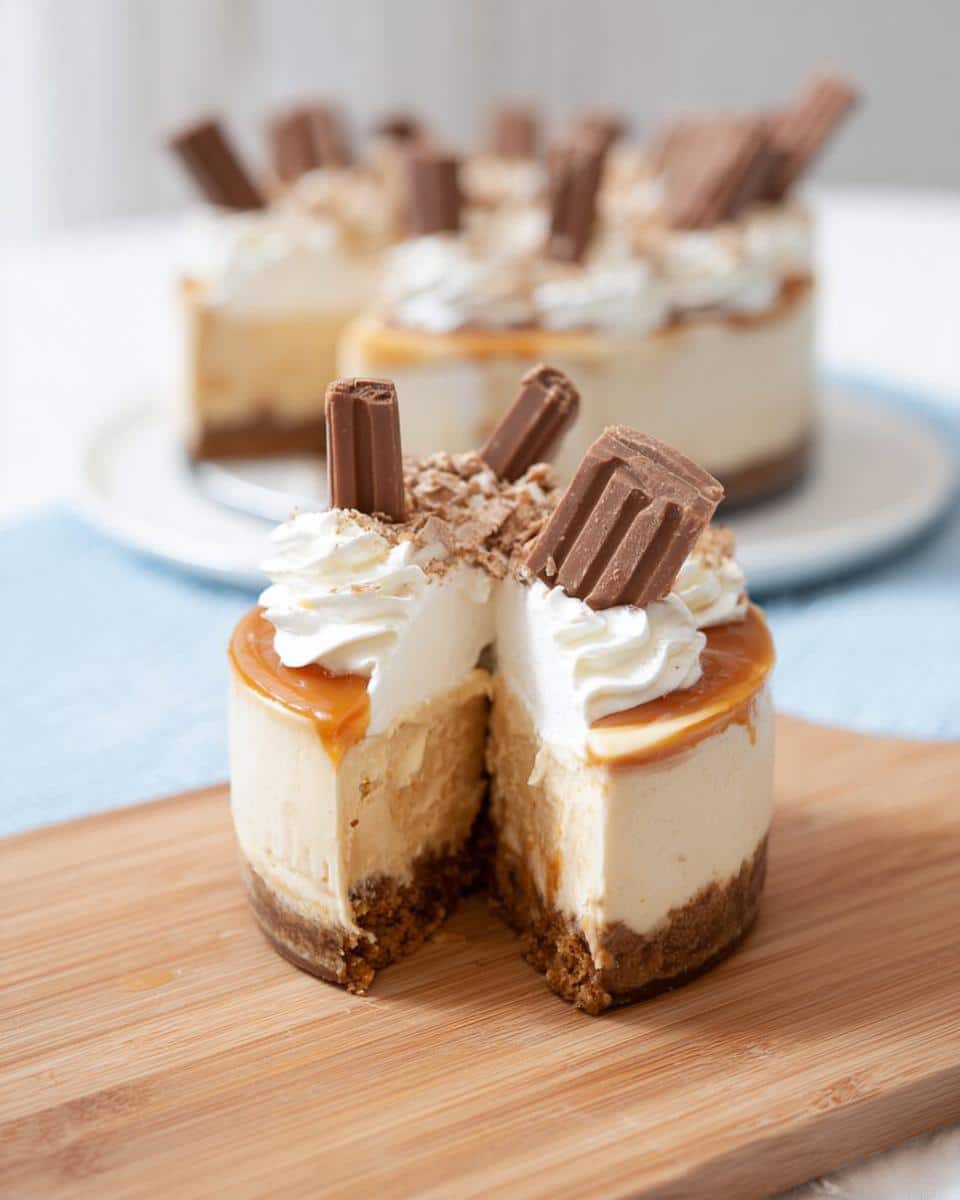
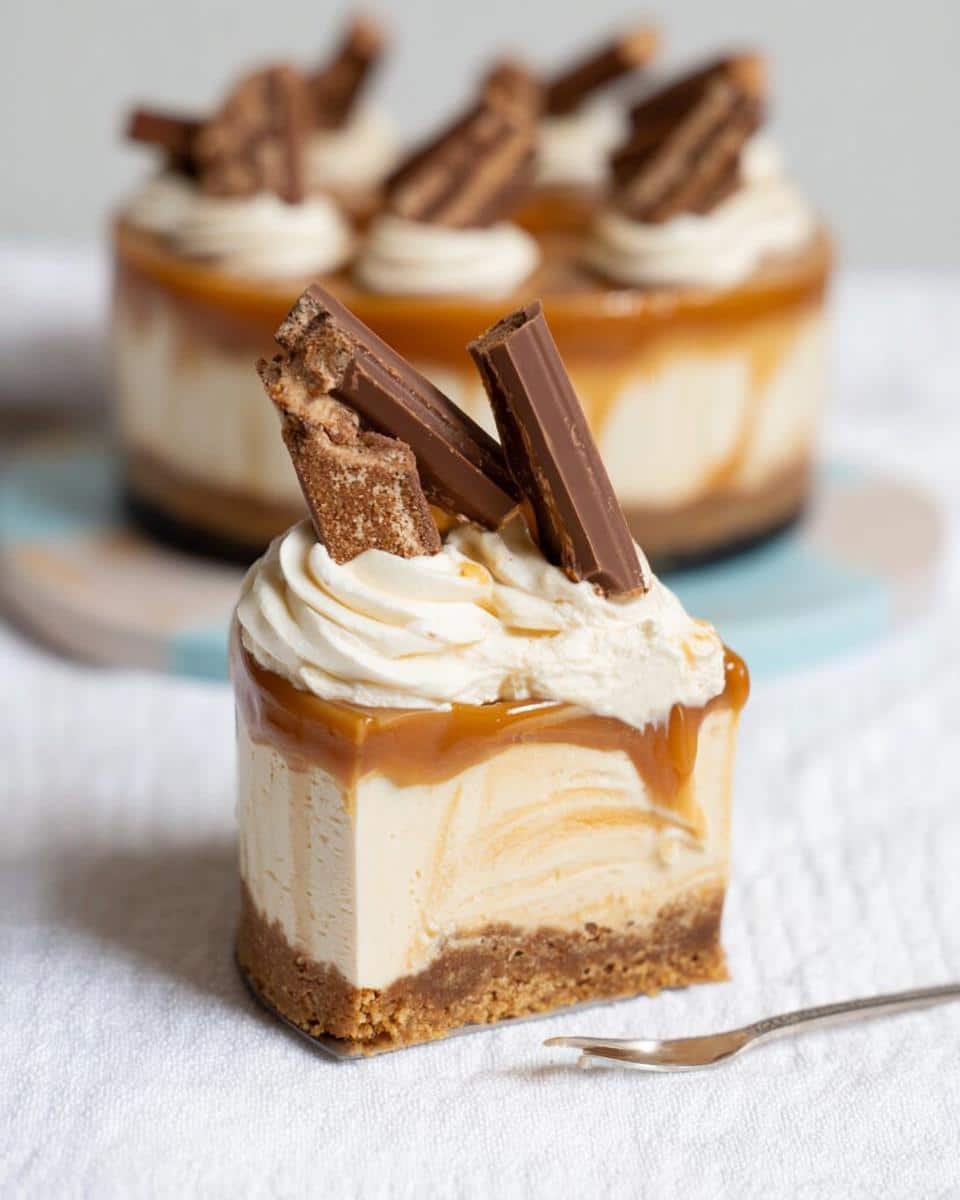
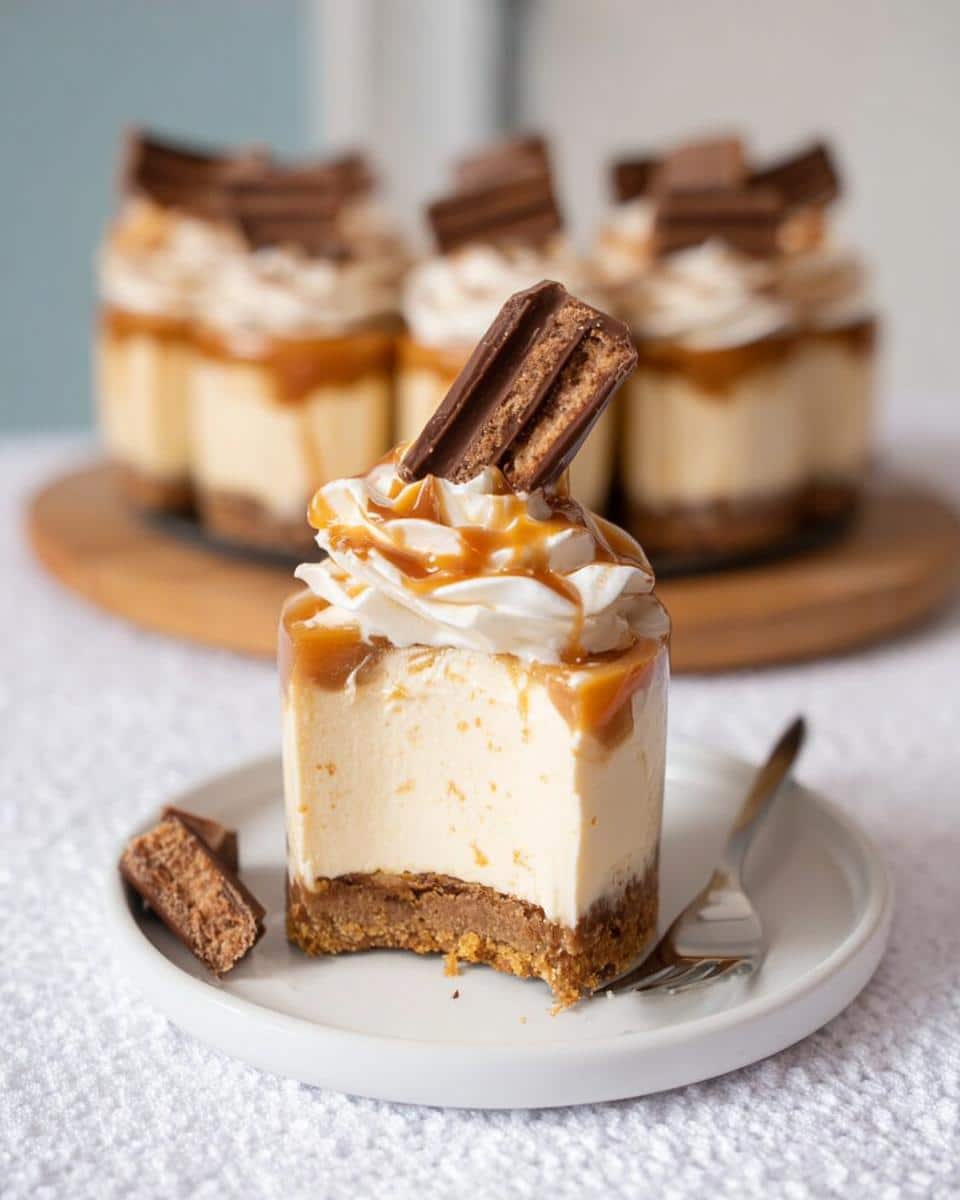
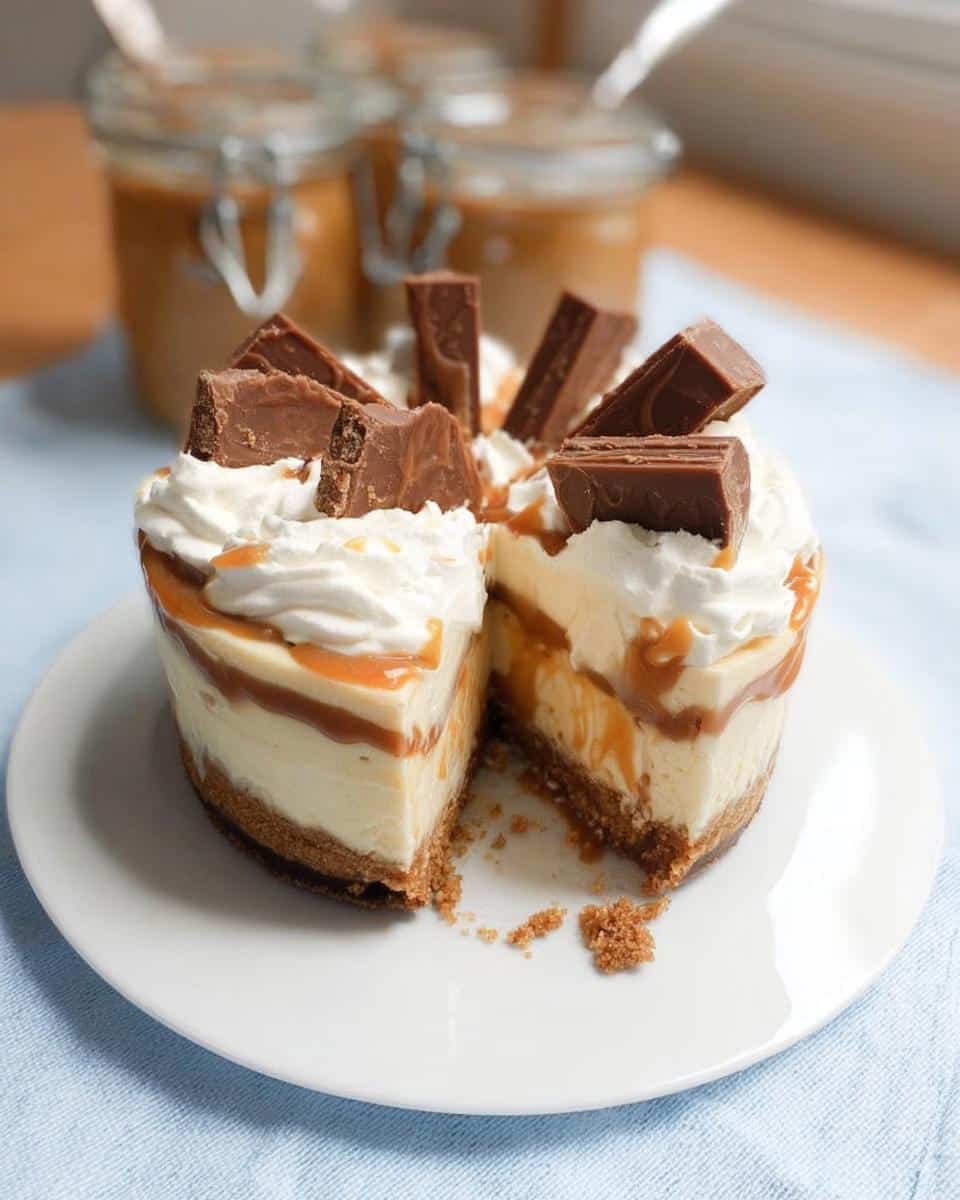
For the topping, you need 300 g of heavy cream, and it has to be ice-cold straight from the fridge to whip up right! We’ll sweeten it lightly with just 1 TBS of icing sugar and a teaspoon of good vanilla paste. For the final flourish—the fun part—you’ll need 6 Twix sticks, ready to be sliced carefully on the diagonal. They look so elegant perched on top!
Step-by-Step Instructions for the Thermomix Salted Caramel Cheesecake
Alright, let’s turn those ingredients into that stunning layered dessert we dreamed about! Remember, our total time commitment is about 220 minutes, but most of that is the machine doing the heavy lifting while you relax. The key to this Thermomix Salted Caramel Cheesecake is moving systematically through these layers.
Preparing and Setting the Biscuit Base
First things first, let’s get that gingernut crust sorted. Pop those cookies right into your Thermomix bowl along with that cinnamon we talked about. Blitz it for 12 seconds on Speed 9 until it’s crumbly. Now, add the room-temperature butter and melt it for 1 minute at 100 degrees on Speed 3. Don’t pack this base down too hard when you spoon it loosely into your individual serving glasses—we want it crumbly, not compact!
Mixing the Silky Cheesecake Filling in the Thermomix
Before we mix the filling, you have to handle the gelatin. In a separate little glass, mix that 1 teaspoon of gelatin with 60 ml of boiling water until it’s completely smooth. No clumps allowed! Once that’s ready, add your Nestle caramel, cream cheese, lemon juice, and that dissolved gelatin to the Thermomix bowl. Mix it for 10 seconds at Speed 6. Stop, scrape down the sides—this is important!—and repeat that mix for another 5 seconds at Speed 6 to ensure it’s utterly flawless and silky.
Chilling the Filling and Making the Caramel Sauce
Time for patience! Carefully pour that lovely filling over the biscuit base in each glass. Now, put them in the fridge—you need them to chill for at least 2 to 3 hours before we touch them again. While they set, we make the sauce. Place all your caramel sauce ingredients into a clean Thermomix bowl and cook for 6 minutes at 120 degrees on Speed 3. Once it’s done, pull it off the heat and let it cool down completely to room temperature. If it’s warm, it’ll melt your beautiful filling!
Finishing Your Thermomix Salted Caramel Cheesecake with Cream
Once the base layer is firm, drizzle a thin layer of the cooled caramel over the top of the filling. Back into the fridge it goes until that caramel layer sets hard—don’t skip this setting time! For the topping, attach the butterfly whisk attachment. Add your cold cream, icing sugar, and vanilla paste. Just watch it like a hawk on Speed 3.5; stop the second it holds soft peaks; we don’t want butter!
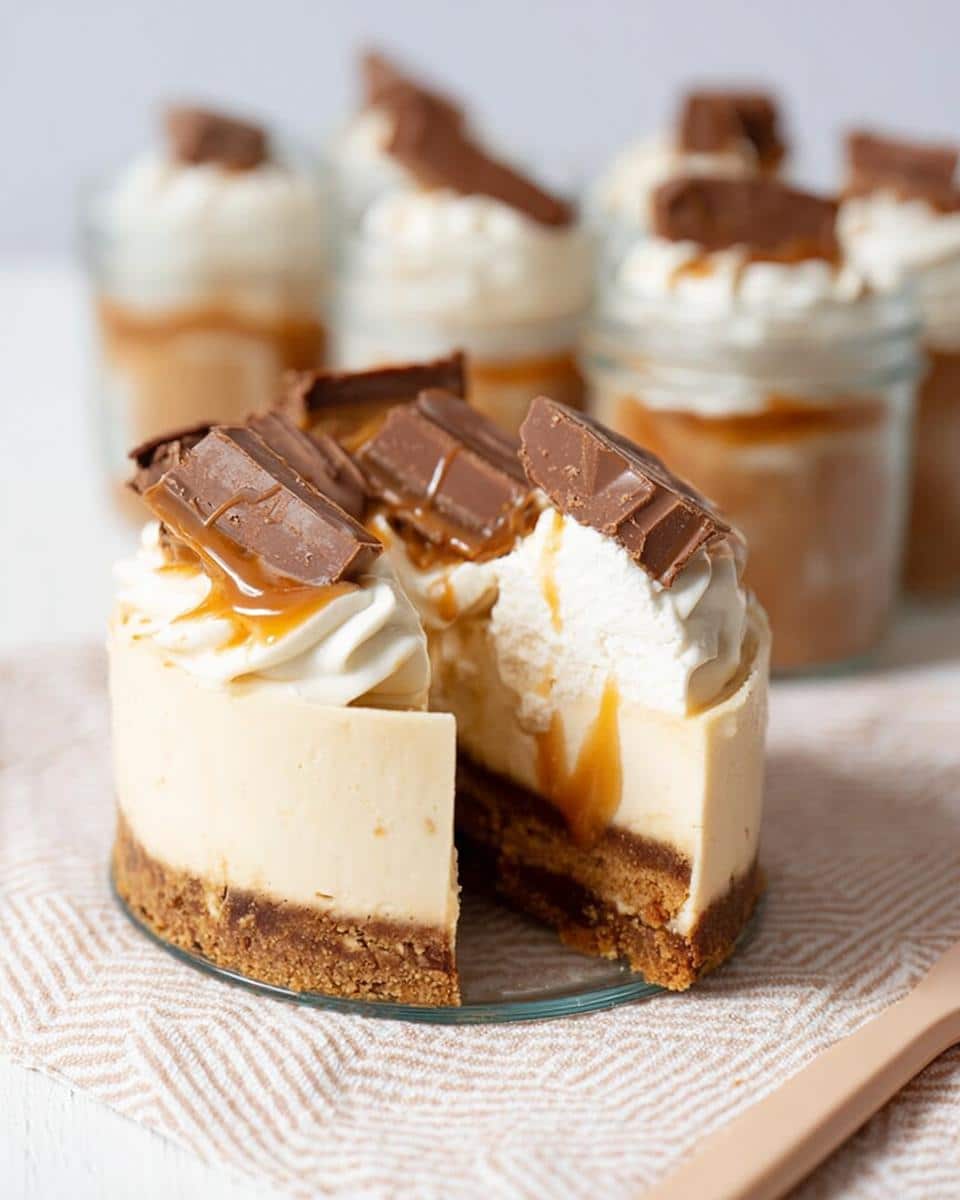
Finally, load that gorgeous Chantilly cream into a piping bag and pipe a lovely swirl on top of each set cheesecake. Finish each one with half a diagonally cut Twix stick. And there you have it—the most stunning Thermomix Salted Caramel Cheesecake!
Tips for Perfect Thermomix Salted Caramel Cheesecake Layers
Even with the mighty Thermomix doing most of the work, there are just a couple of little quirks in this recipe you need to watch out for, especially relating to temperature and texture. These little pointers are what separate a good dessert from the show-stopping Thermomix Salted Caramel Cheesecake I served at that family Sunday dinner.
Avoiding Caramel Seizing or Burning
When you cook that beautiful caramel sauce, keep an eye on it through the lid, even though you’re on Speed 3. If you see it starting to bubble too violently right at the end, just tap the temperature control down briefly. Also, make sure you stir the sauce gently while it’s cooling on the counter; this stops the sugar from crystallizing and keeps that glorious, smooth consistency we love. This rich dessert is honestly perfect for those cozy Autumn Recipes gatherings!
Ensuring Cream Cheese is Ready for Your Thermomix Salted Caramel Cheesecake
This seems obvious, but please, please, let that cream cheese sit out on the counter for at least 30 minutes before you start the filling. If the cheese is fridge-cold when it hits those blades, the Thermomix has to work way too hard, and you risk those tiny lumps we are trying desperately to avoid. Warm cream cheese blends instantly with the caramel into one single, luxurious stream. It’s crucial for the best version of this Thermomix Salted Caramel Cheesecake!
Serving Suggestions for Your Indulgent Dessert
Now that you’ve poured all that love into your stunning dessert—even though this recipe carries those fun Italian cuisine tags—it is undeniably a show-stopper for any occasion! Since this is already such a rich treat, you don’t need much more on the plate.
I love serving these chilled, exactly as they are, maybe with just a tiny sprinkle of flakey sea salt right before handing them over. If you want a pairing, keep it light! A strong, dark espresso or a digestivo after dinner is perfect. It won’t fight that beautiful caramel flavor; it’ll just cut right through the richness. People will think you spent all day fussing!
Storage and Make-Ahead for Thermomix Salted Caramel Cheesecake
This is the absolute best part about making a stunning dessert like this: it practically begs you to make it ahead of time! Having this gorgeous Thermomix Salted Caramel Cheesecake waiting in the fridge is the key to being a relaxed host. You already know it needs that minimum 180 minutes—or three hours—of chilling time for the filling and the top caramel layer to properly set up. Honestly, if you can leave them overnight, that’s even better because the flavors really marry together then!
Because we’re finishing this rich treat with Chantilly cream and those chocolate candy pieces, storage is slightly different. The cheesecake base and filling layers will keep beautifully airtight in the fridge for up to four days. That’s four days of pure, decadent dessert waiting for you! However, the whipped cream on top doesn’t do quite as well.
My advice is to complete everything *except* the Chantilly cream right away. You can make the base, the filling, and the caramel sauce, layering them all up right to the top of that caramel layer. Cover those glasses tightly with plastic wrap right up to the edge to keep everything fresh. Then, when you’re ready to serve—maybe 30 minutes before you plan to bring them out—pipe on that gorgeous whipped cream swirl and add your Twix garnish. This approach keeps the cream looking perfectly stiff and beautiful. It cuts down your day-of work to mere minutes, which is exactly what makes this Thermomix Salted Caramel Cheesecake such a lifesaver for parties!
Frequently Asked Questions About This Thermomix Recipe
I completely understand that when you see a recipe this rich, you’re going to have questions! Especially when using specialized equipment like the Thermomix, you want assurances. I’ve gathered the most common things folks ask me about these elegant Kitchen Recipes.
Can I make this Thermomix Salted Caramel Cheesecake without a Thermomix?
Oh, I wish I could say yes without hesitation! This recipe is designed around the powerful, consistent blending of the Thermomix, especially for that super-silky filling. If you don’t have one, you must use a very high-powered blender—think like a Vitamix Recipes level of power—to get that same velvety filling. If you use a standard food processor or hand mixer, you’ll likely end up with grainier cream cheese. The base and the caramel are easy to make manually, but that filling needs serious horsepower for perfection!
What is the best way to achieve UK Recipe measurements for this dessert?
I love hearing from my UK readers! While the Thermomix itself is usually set to grams, I know cup measurements can throw folks off. The main place this matters is the brown sugar for the caramel sauce. Remember what I noted? That 1 cup of brown sugar is precisely 215g, and the 0.75 cup of cream is 190g. Stick to the gram measurements as closely as possible for the sauce; the machine handles the conversions beautifully once you input the weight!
Is this considered one of the healthier Thermomix Recipes Healthy options?
Bless your heart, no! Let’s be honest; this is pure, soulful indulgence, and we aren’t pretending otherwise! This is a full-fat, full-sugar, glorious treat. If you are looking for true Thermomix Recipes Healthy options, I have tons elsewhere on the site. However, if you *must* make this one lighter, your best bet is to stick to the very small 6-serving size listed, and perhaps use a 50/50 mix of light cream cheese and full-fat cream cheese for the filling—but I can’t promise that texture will be quite as decadent!
Nutritional Estimates for Your Thermomix Salted Caramel Cheesecake
Now, this is a quick little note before we get to the fun stuff, because I always owe you total honesty in my kitchen. This Thermomix Salted Caramel Cheesecake is definitely on the indulgent side of things—it’s rich, it’s creamy, and it’s built for celebration!
Because every brand of cream cheese or caramel sauce you buy is slightly different, the real numbers can swing around quite a bit. So, please take these figures as a fun guideline rather than gospel truth. This recipe makes 6 servings, and based on the typical ingredients we use, here’s what you might expect:
- Approximate Calories: 750–850 per serving
- Approximate Fat: 45–55g per serving
- Approximate Protein: 10–12g per serving
- Approximate Carbs: 70–80g per serving
Remember, these are estimates! Cooking should always be about pleasure and sharing, not strict counting. But if you’re tracking, this beautiful dessert will certainly count as a special occasion treat!
Share Your Thermomix Salted Caramel Cheesecake Creations
When you’ve poured all that love into making a dessert this rich and memorable, the absolute best part is seeing it come to life on your table! I truly believe that food tastes better when it’s made with love, and I want to celebrate every single delicious Thermomix Salted Caramel Cheesecake you create.
Once you’ve chilled it perfectly and added that final swirl of cream, please don’t keep the magic to yourself! Head over to the recipe card and give it a rating—five stars if it brought that moment of quiet joy to your family table, just like it did for mine. Don’t be shy about leaving notes or comments about how you adapted things; I absolutely love hearing from you and learning new kitchen tricks!
And if you snap a gorgeous photo of your layered, Twix-topped masterpiece? Tag me on social media so I can share in the glory! Seeing your culinary creations is what makes all this recipe developing worthwhile. It’s how my journey, which started with my grandmother’s old recipes, keeps growing into a global kitchen community. Go on now, show off that incredible dessert!
Thermomix Salted Caramel Cheesecake
Ingredients
Equipment
Method
- Place the gingernut cookies and cinnamon into the Thermomix. Blitz for 12 seconds at Speed 9.
- Add the butter. Melt for 1 minute at 100 degrees on Speed 3.
- Spoon the base mixture loosely into your serving glasses.
- Combine the gelatin and boiling water in a small glass. Stir until the gelatin is smooth.
- Place the Nestle Caramel Top & Fill, cream cheese, lemon juice, and dissolved gelatin into the Thermomix. Mix for 10 seconds at Speed 6.
- Scrape down the bowl and repeat the mixing for 5 seconds at Speed 6.
- Pour the filling into the serving glasses to form the second layer over the biscuit base.
- Refrigerate the cheesecakes for at least 2 to 3 hours before adding the cooled caramel sauce.
- Place all caramel sauce ingredients into a clean Thermomix bowl.
- Heat for 6 minutes at 120 degrees on Speed 3.
- Remove the caramel from the heat. Allow the caramel to come to room temperature.
- Pour a thin layer of cooled caramel over the set cheesecake filling in each glass.
- Refrigerate and allow the caramel layer to set completely.
- Add the butterfly whisk attachment to the Thermomix bowl.
- Add the cream, icing sugar, and vanilla paste to the Thermomix bowl. Whisk while watching on Speed 3.5.
- Stop whisking when the cream holds peaks. Watch carefully to avoid over-whisking.
- Add the whipped cream to a piping bag.
- Pipe a swirl of cream on top of the set caramel layer on each cheesecake.
- Place half a Twix bar piece into the top of the cream on each cheesecake for garnish.
- Serve the cheesecakes chilled.