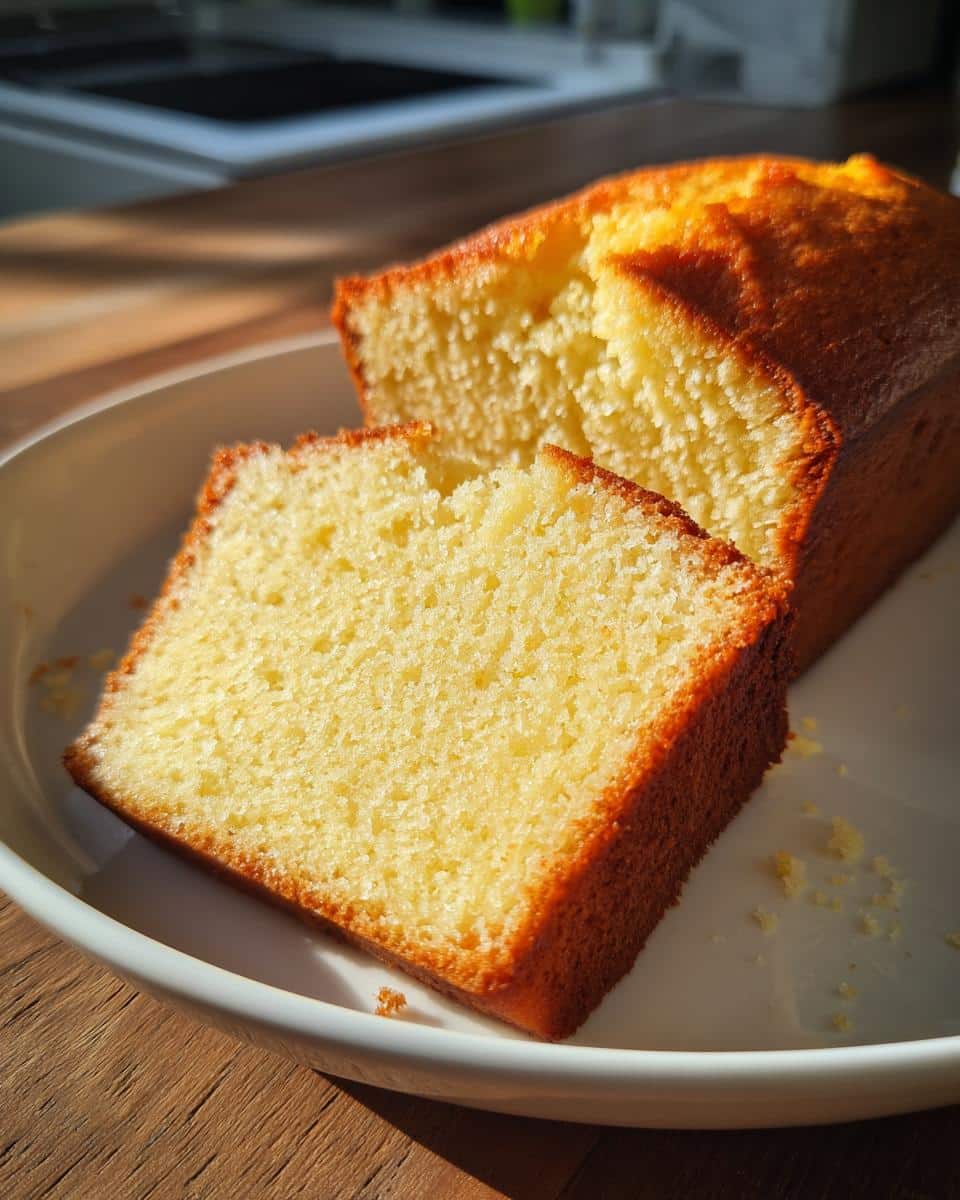
There’s just something about a classic vanilla butter cake, isn’t there? It reminds me instantly of quiet Sunday afternoons and feeling completely taken care of. Those simple, soft bakes are the true heart of home cooking. When I set out to create the perfect fuss-free version, I knew the **Thermomix Vanilla Butter Cake** had to be my masterpiece—reliable, incredibly rich, and utterly smooth.
This cake takes me right back to my childhood kitchen; the smell of pure vanilla and melting butter was my favorite scent memory. Now, making it feels like cheating because the Thermomix does all the heavy lifting! Forget lumpy batter—this machine creams the butter and sugar so perfectly that the resulting cake is unbelievably tender. It’s the nostalgic flavor you crave, delivered with modern ease.

Emma Brooks is a Registered Dietitian and Flavor Strategist for Top Chicken Eats. Based in Boston, she brings a fresh perspective to comfort food—showing readers how to enjoy every bite while nourishing the body with balance and flavor.
If you want to see more of my favorite quick baking ideas, you should check out my roundup of all the latest trend recipes!
Why This Thermomix Vanilla Butter Cake is Your New Go-To Recipe
Honestly, once you try this method, any other butter cake recipe will feel tedious! My goal with the Thermomix is to give you bakery-quality results without spending an hour doing manual creaming. Trust me, your arms will thank you.
This recipe just *works* every single time. We’re focusing on quality results with minimal fuss:
- Speedy Batter: The Thermomix mixes butter and sugar flawlessly in minutes, creating the essential airy base fast!
- Unbeatable Texture: Because the machine controls the mixing speed perfectly, you get that incredibly moist, tender crumb without fear of overmixing.
- Total Reliability: This is the perfect base cake. It’s dependable for celebrations or just when you need a guaranteed win for your easy family treats.
- Pure Flavor: It highlights that beautiful, classic vanilla taste without relying on fussy additions.
It’s the ultimate blend of comfort, simplicity, and perfect texture!
Essential Ingredients for the Perfect Thermomix Vanilla Butter Cake
You know, the magic of this cake really starts before you even turn the machine on. If you aren’t gathering quality ingredients, that perfect vanilla flavor just won’t shine through! The most important thing I need you to remember for this recipe, especially when using the Thermomix, is temperature. Everything needs to be at room temperature!
If your butter is cold, or your eggs are straight from the fridge, the creaming stage won’t work properly, and you’ll end up with a grainy batter—we absolutely cannot have that with this technology. Take everything out at least an hour before you plan to start mixing. It makes all the difference for that beautifully smooth texture!
For the Cake Batter Components
Here is what you’ll need from your pantry. Make sure you have everything ready to go so you can move straight into mixing!
- 250g Unsalted butter, softened (Make sure this is truly room temperature!)
- 200g Caster sugar
- 4 Large eggs (Also room temperature, please!)
- 1 tsp Vanilla extract (Use the good stuff here—it’s the key flavor!)
- 250g Self-raising flour (Remember to sift this properly!)
- 1 tsp Baking powder
- 100ml Whole milk (Room temperature is a must!)
Equipment Needed for Your Thermomix Vanilla Butter Cake
This recipe is designed specifically for those of us lucky enough to have a Thermomix, and honestly, it’s the only way to get this cake perfect without an arm workout!
The machine is the star here. Its precision heating and mixing power ensure that when we cream the butter and sugar, we get incredibly fine air pockets. That’s what makes the cake tender and light, not heavy like some traditional butter cakes can be. If you’re using a different mixer, just be aware you might need to cream manually for a bit longer to achieve that pale, fluffy stage!
For this recipe, you will only need two main items:
- The Thermomix machine itself—it handles our creaming, mixing, and gentle folding.
- A standard 20cm round cake pan. Don’t stress about special springform tins here; a basic pan lined well is all you need for this sturdy batter.
Having that specific pan size helps tremendously with the baking time too—remember, consistency is everything in baking!
Step-by-Step Instructions for Making the Thermomix Vanilla Butter Cake
Okay, let’s get this gorgeous batter mixed! This is where the Thermomix truly shines and makes us look like professional bakers. Because we prepped our ingredients correctly—remember, everything warm and ready to go—this process moves along so quickly. You’ll be shocked how fast you go from ingredients to pouring perfection. Don’t worry if you’ve never used a Thermomix for baking before; just follow these steps precisely, and you’ll see why I love this machine for my Thermomix Recipes Dinner line!
Preparation and Creaming the Butter and Sugar
First things first: we need to get the oven hot! Preheat that baby to 175°C (350°F). Then, take a moment to grease and line that 20cm round cake pan. A properly prepped pan is the insurance you need for a clean release later on.
Now, place your softened butter and that beautiful caster sugar right into the Thermomix bowl. You are going to mix this on medium speed for a full 3 minutes. Watch it! It should turn pale yellow and look wonderfully creamy when that timer dings. That’s the foundation of our amazing texture right there.
Incorporating Eggs and Vanilla in the Thermomix Vanilla Butter Cake
This step requires a bit of patience, but it is essential for that super smooth batter. Add your room-temperature eggs one at a time. You need to mix for about 30 seconds after *each* egg goes in. Seriously, wait for the beep before adding the next one. If you dump them all in at once, you risk splitting the mixture!
Once all four eggs are happy in the bowl, toss in your vanilla extract and give it a quick zip just to combine everything smoothly.
Mixing the Dry Ingredients and Milk Gently
In a separate little bowl, go ahead and whisk together your sifted self-raising flour and baking powder—we want those leavening agents evenly distributed.
We alternate here to keep things happy! Add half of your dry mixture to the creamed bowl and mix gently for just 10 seconds on low speed. No more! Next, pour in that room-temperature milk and mix for 5 seconds. Finally, add the rest of the dry ingredients and mix for another quick 10 seconds until you see *just* combined. I mean it, stop when you can still see a tiny bit of flour streaking—overmixing develops gluten, and we want tender, not tough!
Baking and Cooling the Thermomix Vanilla Butter Cake
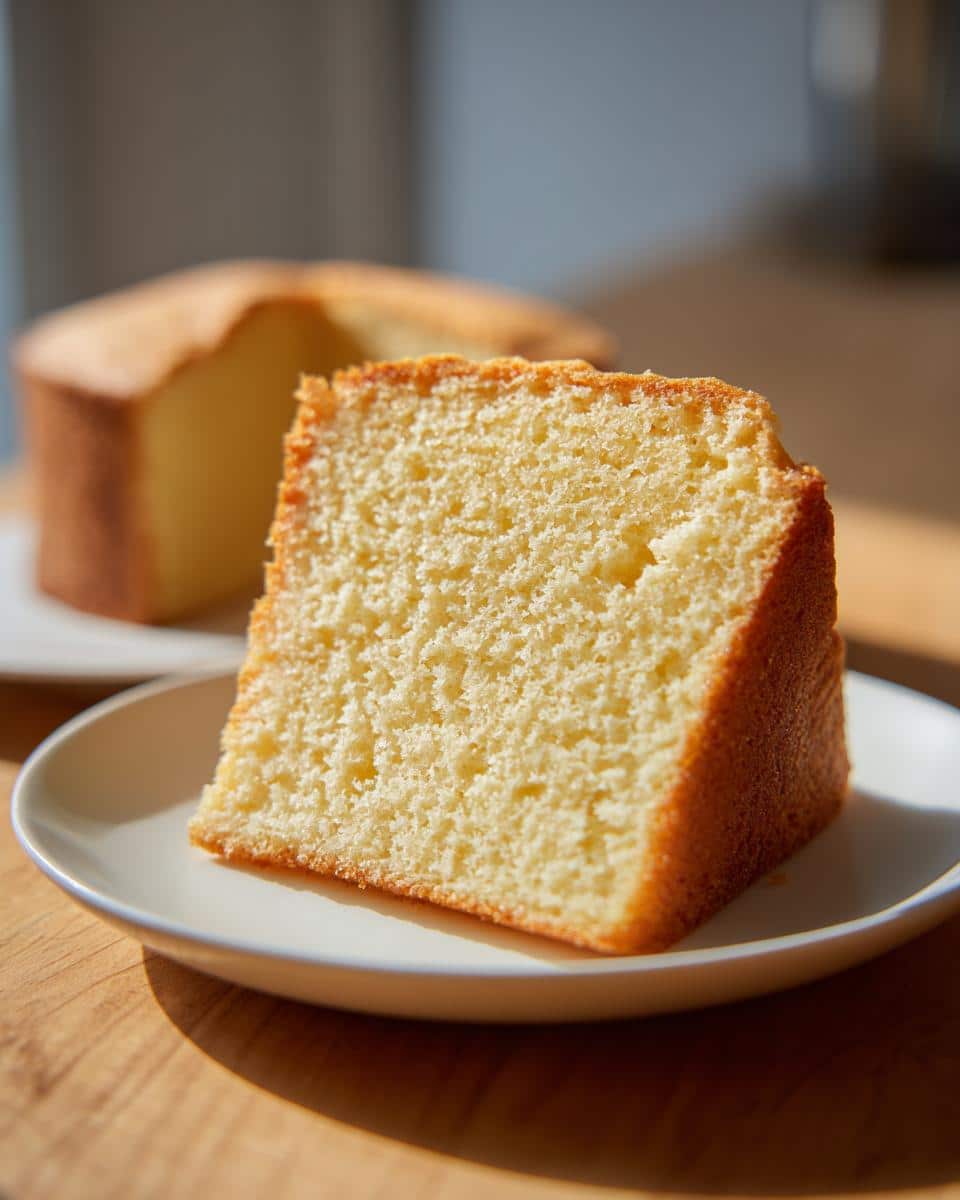
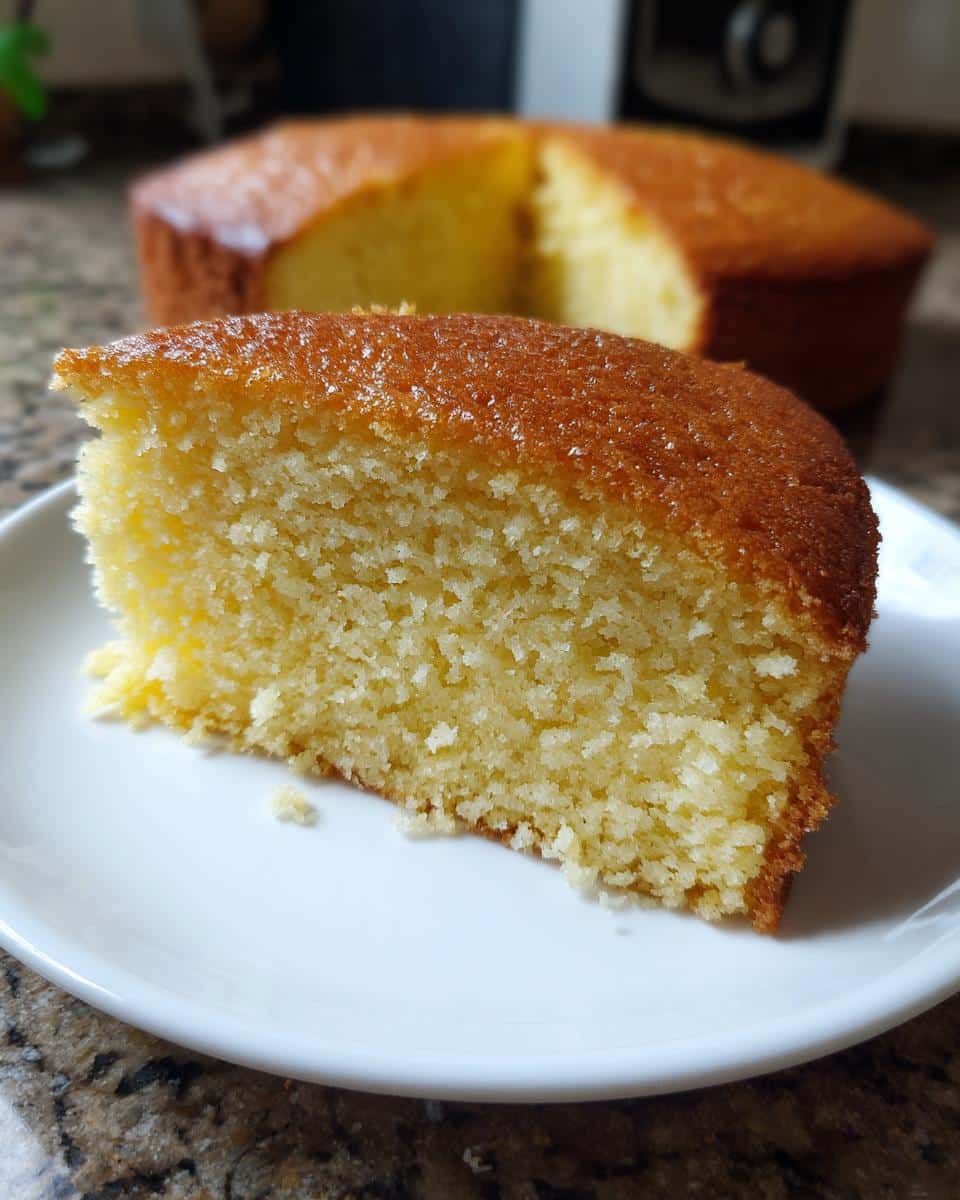
Scrape any remaining batter into your prepped cake pan and smooth the top with your spatula. Into the 175°C oven she goes for 35 to 40 minutes. You know the drill: test it with a clean skewer inserted right into the centre. If it comes out clean with just a few moist crumbs clinging to it, she is done! It should look perfectly golden on top.
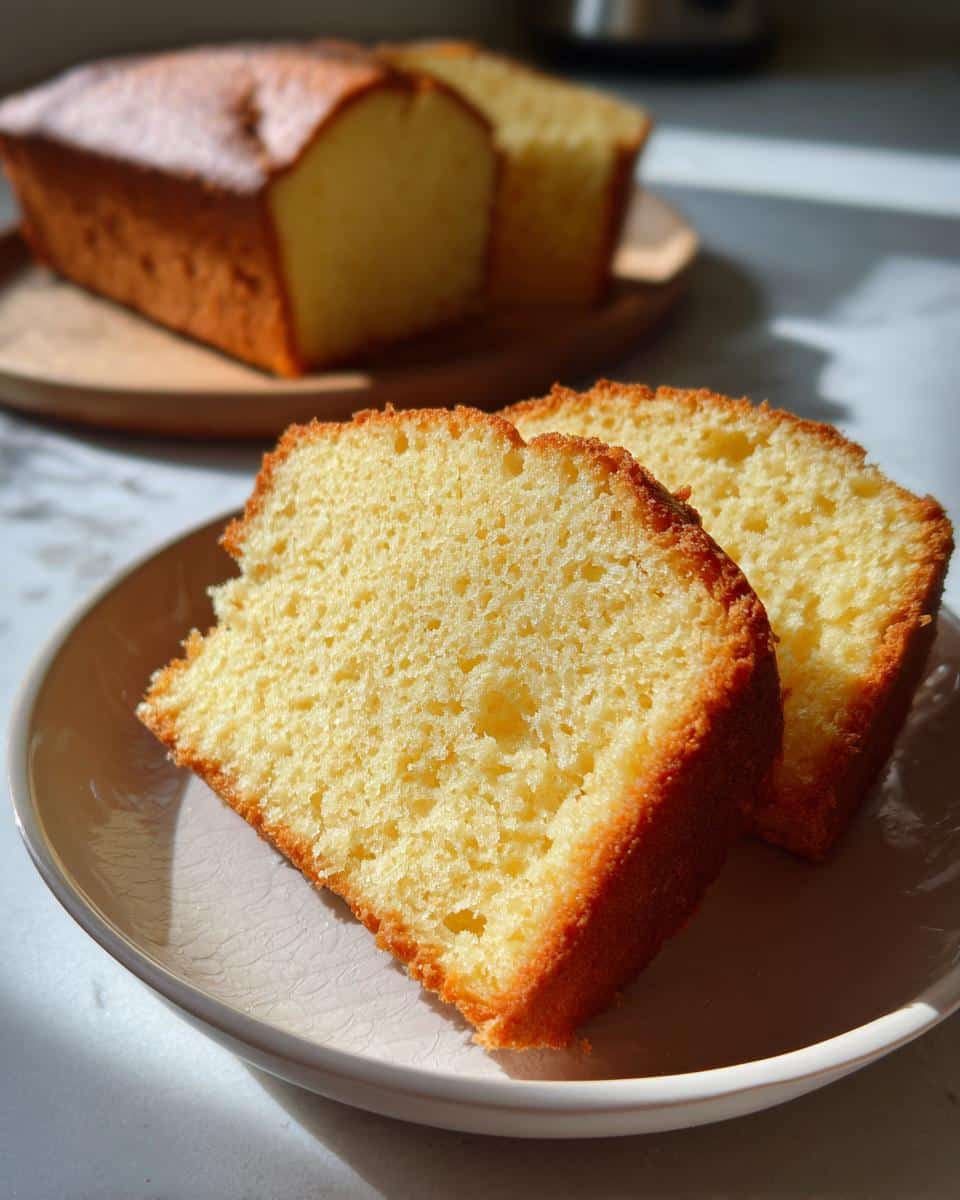
The final, often frustrating, waiting game: let the cake cool in the pan for a full 10 minutes. This lets it set up slightly before you try to unmold it onto a wire rack to cool completely. Resist the urge to cut it warm!
Tips for Achieving the Best Thermomix Vanilla Butter Cake Texture
Even with the amazing power of the Thermomix, baking success always comes down to a couple of little habits. I’ve learned over the years that if you skip these seemingly small details, your cake texture can end up flat or dense, and we certainly don’t want that!
When I test new recipes, I always return to these fundamental points because they ensure that gorgeous, tender crumb that makes a butter cake a showstopper. We want that perfect melt-in-your-mouth experience every single time, and it all starts before you even hit ‘start’ on the machine.
If you want to see how I apply these concepts to other easy bakes, check out my recipe for Kid-Friendly Cheerio Granola Bars!
Here are my three unwavering rules for texture perfection:
- Your Ingredients Must Be Warm: I know I harp on this, but please listen to me! Soft, pliable butter and room-temperature eggs are non-negotiable. Cold ingredients cause the creamed butter and sugar to seize up and won’t incorporate air properly. This means your cake will be heavier, plain and simple. Give them an hour on the counter.
- Sift, Sift, Sift That Flour: Self-raising flour can clump up easily, and those little clumps get mixed into your batter, creating small pockets of dense flour in your final slice. Sifting the flour and baking powder together breaks up any lumps and lightens the mix before it even hits the Thermomix bowl. It’s crucial for even baking!
- Respect the Low Speed: When you add the flour and milk, the machine does the work, but you have to control yourself! The moment flour goes in, we switch to the lowest speed, and we stop as soon as it disappears. Overmixing at this stage activates the gluten in the flour, which turns your beautiful, soft cake into something sturdy—more like bread than cake. Be gentle; the Thermomix is powerful, so use that low speed setting carefully!
Oh, and one final thing that truly lifts this cake: use a high-quality vanilla extract. Since this is just a vanilla cake, the extract is the main performer. A good, fragrant extract gives you that deep, warm bakery aroma that fake vanilla just can’t touch!
Variations for Your Thermomix Vanilla Butter Cake
While I truly believe this cake is perfect as written—a beautiful, simple tribute to classic bakery vanilla—I absolutely love hearing about how you all put your own spin on things! Because the structure of this **Thermomix Vanilla Butter Cake** is so solid and reliable, it takes variations beautifully. You don’t need to worry about messing up the crumb structure if you just add a little something extra during the final mixing stage.
The key is to keep additions to around 50g total if you are adding dried fruit or nuts, or just ensuring any liquid additions don’t exceed what’s already listed in the recipe. This lets you customize it for different seasons or moods!
We aren’t jumping into anything too complicated here; we are keeping it accessible, just like the original recipe intended. Think small upgrades that make a big impact on flavor!
Here are a couple of fun, simple ways to shake things up next time you make a batch:
- Zesty Lift: Add the zest of one large lemon or one orange right in with the butter and sugar during that first creaming step. The citrus oil perfumes the whole cake beautifully when it bakes. It’s my favorite way to freshen this up for spring or summer baking!
- Nutty Depth: If you want a slightly richer, almost toffee-like note (without having to brown the butter—let’s be honest, that’s too much work sometimes!), try reducing the vanilla extract slightly and adding 1 teaspoon of high-quality almond extract. It pairs unbelievably well with the vanilla base. It’s a subtle change, but wow, what a flavor boost!
- Hint of Spice: If you are looking to transition this into a lovely comfort bake for cooler months, simply add 1/2 teaspoon of ground cinnamon along with your sifted flour. It won’t taste like a spice cake, but it gives that background warmth that feels so lovely, especially served warm with a cup of coffee.
Remember, even these small tweaks still rely on the core strength provided by the Thermomix mixing process. You’ll get that same tender, moist cake, just with a little personalized flair!
Serving Suggestions for Your Classic Thermomix Vanilla Butter Cake
This gorgeous, tender cake is truly a blank canvas, which is one of the reasons I love it so much. It fills that cozy spot where you want something delicious but don’t want to spend an hour on high-fuss decoration. We are aiming for wholesome indulgence here, not pastry-chef stress!
Since the vanilla flavor is so pure and the texture is already spot-on, you don’t *need* much. In fact, cutting into this cake while it is still slightly warm and dusting it with powdered sugar is peak comfort food for me. It takes 30 seconds, and it looks so effortlessly beautiful on a cake stand! That’s how my mom always served it, and I’m sticking to that tradition.
However, if you are serving this for a special occasion or just want to dress it up a tiny bit, here are a few simple ways to let your vanilla cake shine. Remember, these pairings are designed to complement, not hide, that beautiful buttery crumb you worked so hard to achieve in the Thermomix.
If you are interested in trying another comforting baked treat that’s easy to manage, you absolutely have to see my recipe for Brownie Bites with Christmas Sprinkles!
- Simple Powdered Sugar Dusting: As I mentioned, this is my favorite. Use a fine-mesh sieve to gently dust the top right before serving. It keeps the look clean and lets the flavor lead.
- Fresh Berries and Cream: If you have ripe raspberries or a mix of strawberries and blueberries, pile them on top! The tartness of the fruit cuts through the richness of the butter beautifully. A dollop of unsweetened or lightly sweetened whipped cream on the side is all you need.
- Lemon Drizzle Glaze: If you didn’t take my advice earlier about adding lemon zest into the batter, you can make a simple glaze right now! Whisk together 1 cup of powdered sugar with 2-3 tablespoons of fresh lemon juice until it’s a thick but pourable consistency. Drizzle it over the cooled cake for a bright, zingy lift.
- A Spoonful of Jam: Don’t overthink it! If you have a really lovely quality apricot or strawberry jam, warm it slightly on the stove until it’s runny, and spoon it lightly over the top. It gives a gorgeous, slightly chewy, sweet layer that reminds me of old-school tea cakes.
No matter how you serve this **Thermomix Vanilla Butter Cake**, the joy comes from the fact that the inside texture is already perfect, thanks to our machine work!
Storage and Reheating Instructions for Thermomix Vanilla Butter Cake
Listen, one of the biggest wins for this recipe is how long it stays genuinely moist! Because we used high-quality butter and made sure not to overmix the delicate batter, this cake doesn’t go dry overnight like some sponge cakes tend to do. That’s the real payoff for using the Thermomix correctly!
We want to keep that fantastic, tender crumb intact, and that means protecting it from the air. No one wants a stale slice of perfection come Tuesday morning, right?
Here are my absolute rules for keeping this **Thermomix Vanilla Butter Cake** tasting bakery-fresh for days:
- Airtight is Everything: Once the cake is completely cool—and I mean *completely* cool, otherwise you steam it inside the container—wrap it tightly first in plastic wrap. Then, place the wrapped cake into a good quality, airtight container. This double layer protection is key to locking in that beautiful moisture.
- Room Temperature Rule: Because this cake relies on butter rather than heavy soaking syrups, it actually prefers to stay out on the counter. You can easily keep this cake perfectly moist stored tightly at room temperature for 3 to 4 days. It’s ready to grab whenever that vanilla craving hits!
- The Fridge Warning: I generally tell people to avoid putting rich butter cakes in the fridge unless absolutely necessary—like if your kitchen is shockingly hot. Cold air dries out baked goods faster than you can blink. If you *must* refrigerate it (say, for longer storage), make sure it’s wrapped extremely well.
If you do end up storing it in the fridge, make sure you take it out at least an hour before serving. That cold temperature hardens the butter inside, and you lose that melt-in-your-mouth quality.
A Quick Reheat Trick
If your cake has been chilled, or you just want an extra cozy slice, I have a super simple reheating trick. You don’t need the Thermomix for this part—just a microwave! Take a single slice and zap it for about 8 to 10 seconds on 50% power. It warms the butter just enough to make it taste fresh-from-the-oven tender again. Seriously, try it; it brings all that gorgeous vanilla aroma right back to life!
Frequently Asked Questions About This Thermomix Recipe
Whenever I share a recipe that relies on a specific piece of equipment, like my beloved Thermomix, I always get questions about flexibility—and that’s totally normal! You want to be able to make this **Thermomix Vanilla Butter Cake** work with what you have on hand. Plus, sometimes we just want to tweak the flavor profile!
I’ve gathered the questions I get most often below. Whether you’re adapting the flour, wondering about seasonal flavors, or curious about the machine itself, I’ve got you covered so you can bake with confidence. If you still have questions, don’t hesitate to reach out on my contact page!
Can I make this Thermomix Vanilla Butter Cake without self-raising flour?
Oh, absolutely! Don’t worry if you’ve run out of self-raising flour. That’s an easy fix! For every 250g of self-raising flour the recipe calls for, you can simply substitute it with 250g of regular all-purpose flour PLUS 2 teaspoons of baking powder mixed in. Make sure you still sift them together really well before adding them to the bowl, though, so those leavening agents are evenly distributed throughout your batter base!
Is this cake suitable for Autumn Recipes?
It is perfect for any season, but you can definitely give it an autumn spin! Since the texture of this **Moist Vanilla Cake** is so beautiful, a little spice goes a long way. I would suggest adding just a half teaspoon of ground cinnamon and maybe a tiny pinch of nutmeg right along with the sifted flour. It’s subtle enough that it doesn’t turn into a spice cake, but it adds that lovely warmth we crave as the weather cools down. It makes a wonderful pairing with those cozy Autumn Recipes you might be planning!
How does the Thermomix prevent lumps in this cake batter?
This is where the Thermomix really shows off! The main lump culprit is usually butter that hasn’t creamed properly with the sugar, or dry ingredients being added too fast. Because the Thermomix mixes at a very controlled speed for a set time (like that 3-minute creaming phase), it forces the butter and sugar to incorporate air beautifully before you even introduce the flour. Then, when we add the dry ingredients, we use the gentle, low-speed setting. That slow, controlled action mixes everything just enough to combine without creating those tough, dense pockets of gluten that cause lumps and a heavy texture!
Nutritional Estimates for Your Thermomix Vanilla Butter Cake
You know, as much as I love baking comforting treats, I always want to be mindful of what we’re putting into our bodies. And since I’m a dietitian, that means keeping an eye on balance—even when we’re eating cake! I ran the ingredients for this rich **Thermomix Vanilla Butter Cake** through the system to give you a ballpark idea of what one slice might contain.
It’s a rich cake, no doubt, thanks to all that butter and sugar, but it’s completely satisfying, making those 12 servings all the more enjoyable. This is comfort food made with quality ingredients, and understanding the estimates helps you plan!
Please remember that these figures are just estimates, and they will definitely shift based on your specific brand of butter, dairy choices, and exact measurements. For the most accurate reads, always check the labels of the ingredients you are personally using. You can always check out my full disclaimer right here if you have deeper concerns about nutrition tracking!
Based on the recipe details, here is the breakdown per slice:
- Calories: Around 350 kcal
- Carbohydrates: Approximately 45g
- Fat: About 16g (Keep an eye on that saturated fat at 10g!)
- Protein: A modest 5g
- Sugar: Roughly 25g
- Fiber: Low, around 1g
It’s a classic butter cake, so we expect those numbers to be higher, but that richness is exactly what makes it so delicious and comforting for those special moments!
Share Your Perfect Thermomix Vanilla Butter Cake Experience
Well, we did it! We transformed simple, quality ingredients into what I truly believe is one of the most comforting and flawlessly textured cakes you can make at home—all thanks to that amazing Thermomix!
Now that you’ve pulled that golden cake out of the oven and let it cool, the very best part of my job begins: hearing all about *your* experience. Sharing food is such a joy, and I want to see how this classic **Thermomix Vanilla Butter Cake** turned out in your kitchen!
Did you manage to resist eating the whole thing while it was cooling? Did you try the simple powdered sugar dusting, or did you sneak in that lemon zest variation I mentioned? I truly want to know the details of your bake!
Your feedback helps me keep developing recipes that are both nourishing and delicious. Please take a moment to come back here once you’ve given this cake a taste and let me (and the rest of the baking community!) know how it went.
Head down to the comments section below and tell me:
- Rate the Recipe: Give it a star rating so others know what you thought!
- Share Your Twist: Did you try a variation? Tell us how it worked out.
- Snap a Picture: If you snapped a photo of your perfectly tender slice, please share it on social media and tag me! Seeing your beautiful bakes brightens my day more than you know.
Thank you for trusting me with this classic recipe. I hope this **Easy Butter Cake** brings as much comfort and joy to your table as it does to mine. Happy baking, and don’t forget to check out my privacy policy if you need to look up anything about site usage!

Thermomix Vanilla Butter Cake
Ingredients
Equipment
Method
- Preheat your oven to 175°C (350°F). Grease and line a 20cm round cake pan.
- Place the softened butter and caster sugar into the Thermomix bowl. Mix on medium speed for 3 minutes until the mixture is pale and creamy.
- Add the eggs one at a time, mixing for 30 seconds after each addition. Scrape down the sides of the bowl as needed.
- Add the vanilla extract and mix briefly.
- In a separate bowl, whisk together the sifted self-raising flour and baking powder. Add half of the dry mixture to the Thermomix bowl. Mix on low speed for 10 seconds.
- Add the milk and mix for 5 seconds on low speed. Add the remaining dry mixture and mix on low speed for another 10 seconds until just combined. Do not overmix the batter.
- Pour the batter into the prepared cake pan and smooth the top with a spatula.
- Bake for 35 to 40 minutes, or until a skewer inserted into the center comes out clean. The top should be golden brown.
- Let the cake cool in the pan for 10 minutes before turning it out onto a wire rack to cool completely.