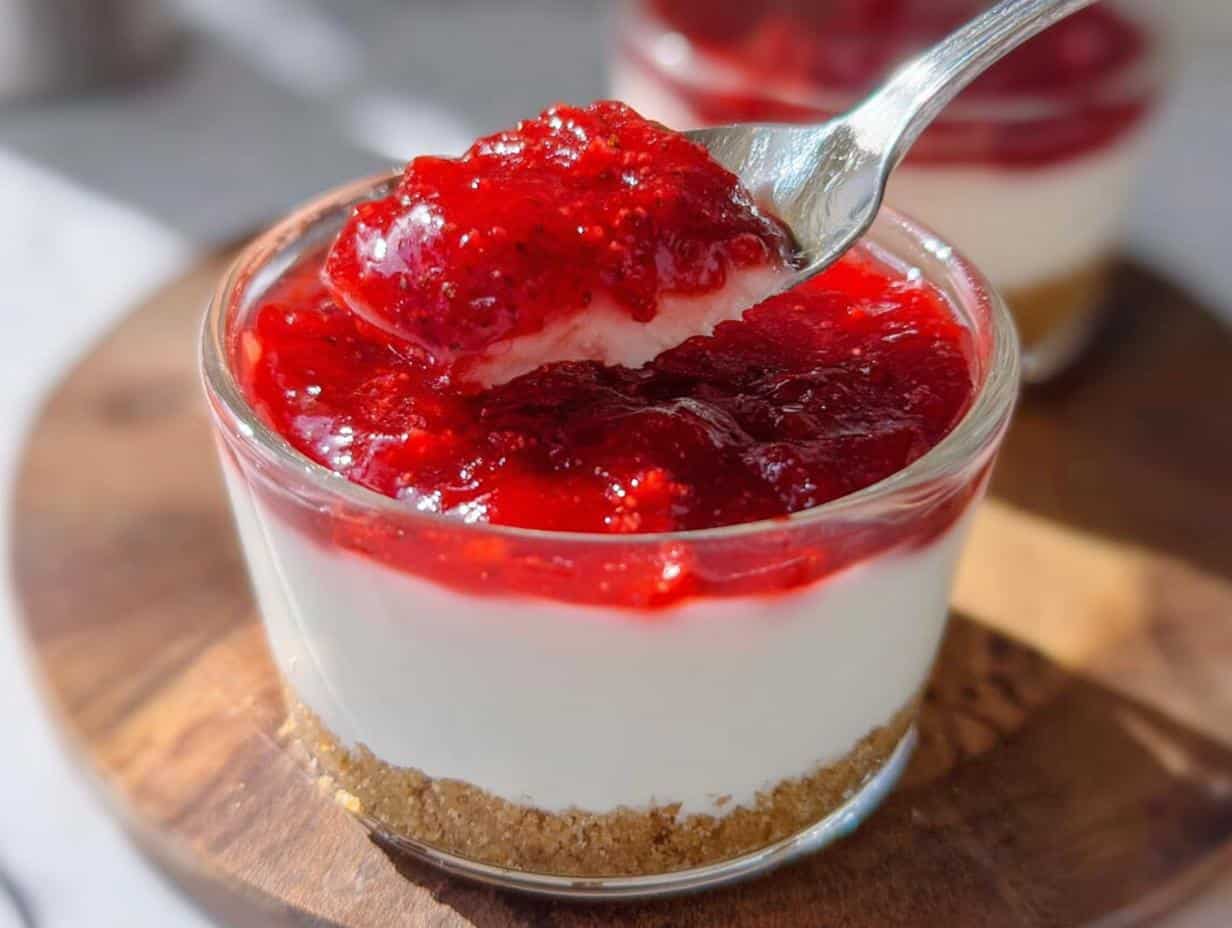
Okay, let’s be real for a second. Sometimes you’re totally crushing your wellness goals—maybe you’re making great progress with your Healthy Lunch Recipes or prepping for Weight Loss Meals—but that craving for something rich and creamy just hits. Cheesecake, right? I know the feeling. That’s exactly why I developed these Weight Loss Cheesecake Cups. My philosophy is that food is meant to bring comfort and connection, not restriction. These cups give you zero guilt satisfaction in a perfect, easy-to-manage single serving. We swapped out the heavy cream cheese load for lighter ingredients, proving that saying no to dessert is totally optional in a balanced life!
Why You Will Love These Weight Loss Cheesecake Cups
I get asked all the time how I manage to eat dessert while sticking to a plan, and truthfully, it’s all about making smarter swaps that still taste exactly like the real deal. These cups are the answer, making them perfect companions for anyone serious about their journey toward Weight Loss Recipes!
- They are perfectly portioned! Serving them solo in cups is a fantastic way to practice Portion Control Recipes without ever having to measure out a slice.
- No baking required, which means less fuss and faster dessert gratification. These are wonderful for those busy weeknights!
- We’re using Greek yogurt to keep things smooth and creamy while bumping up the protein—huge win for staying satisfied longer.
- They taste shockingly indulgent! Seriously, you won’t believe these qualify as Healthy Dessert Recipes.
- Prep time is practically nothing—just 10 minutes of mixing and whisking stands between you and bliss.
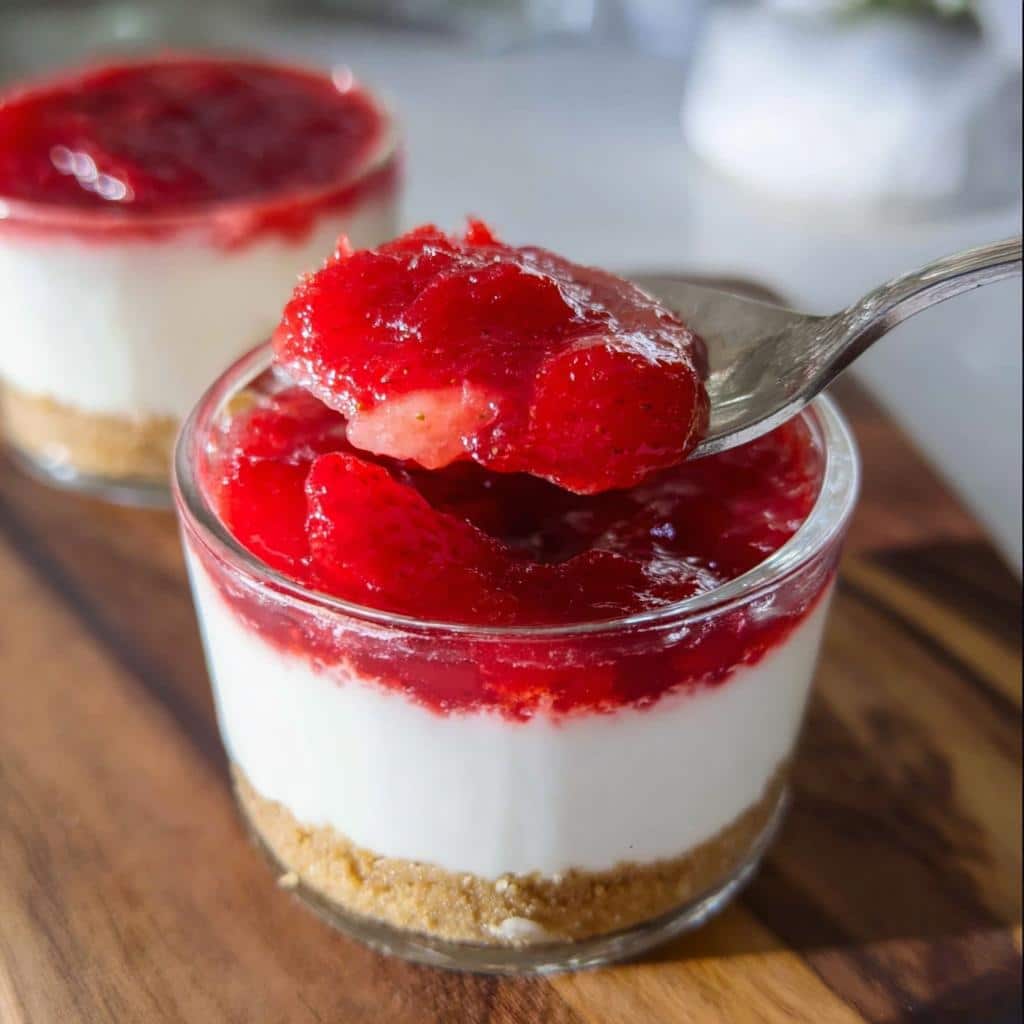
- A truly controlled environment for your sweet tooth; you grab one cup, and that’s your delicious, planned treat for the day.
Essential Equipment for Making Weight Loss Cheesecake Cups
One of the best parts about keeping desserts light for weight management is that you don’t need a ton of specialized tools! Seriously, this recipe is all about simplicity. You won’t be messing around with water baths or complicated springforms here, which is awesome when you’re trying to keep your Healthy Meal Prep simple.
You mostly need things you probably already have sitting on your counter. If you’re making the two-serving batch, you’ll need two specific glasses or small bowls to serve them in. Just make sure they’re sturdy enough to handle a little mixing if you do the final assembly right in the dish!
- You absolutely must have a stand mixer or hand mixer. This is crucial for getting that fluffy, cloud-like texture when you cream the (lightened-up) ingredients together.
- Two serving glasses are what the recipe calls for, but don’t panic if you don’t have matching ones! I sometimes use small mason jars or even nice teacups if I want to feel extra fancy.
Lilya’s Pro-Tip: If you don’t have cute little serving glasses, just grab a couple of standard ceramic ramekins. They work perfectly, chill like a dream, and you can top them right in the ramekin before eating. It’s all about making it work for your kitchen!
Ingredients for Your Weight Loss Cheesecake Cups
When we’re talking about making Low Calorie Recipes that still taste incredible, the ingredients list needs to be accurate. I’ve broken this down so you can shop smart and get right to the mixing. I’m not going to lie—the quality of your cream cheese really impacts the final texture here, so grab something you love!
For the Base and Filling
Okay, for the actual star of the show—the creamy, dreamy part—the secret handshake here is using real cream cheese, but pairing it with Greek yogurt. That yogurt is what cuts the calories drastically and boosts the protein, making these cups much more aligned with your High Protein Low Calorie goals without sacrificing that classic cheesecake tang. Remember, the cream cheese needs to be softened because we are not trying to work out our arms trying to mix cold cheese!
- Graham Crackers: You’ll need 1/4 cup, crushed up fine, for the base. This gives you that essential crunch.
- Cream Cheese: 3 ounces total, and it absolutely must be softened to room temperature.
- Sweetener: 2 tablespoons of Truvia. If you have a major sweet tooth, feel free to add an extra tablespoon, but start slow!
- Flavor Boosters: 1/2 teaspoon of lemon juice (brightens everything up!) and 1/4 teaspoon of vanilla extract.
- Salt: Just a tiny pinch to balance out the sweetness—don’t skip it!
- Greek Yogurt: 3/4 cup. This is our secret weapon for making these the best Weight Loss Cheesecake Cups without the heavy cream.
Topping Suggestion
This is where you make it completely your own! Since we are trying to keep these balanced, I usually stick to fresh fruit, but you should use whatever helps you manage your dietary targets. Think of the topping as the cherry on top of your successful Diet Recipes success.
- A dollop of berry jam (look for low-sugar options!).
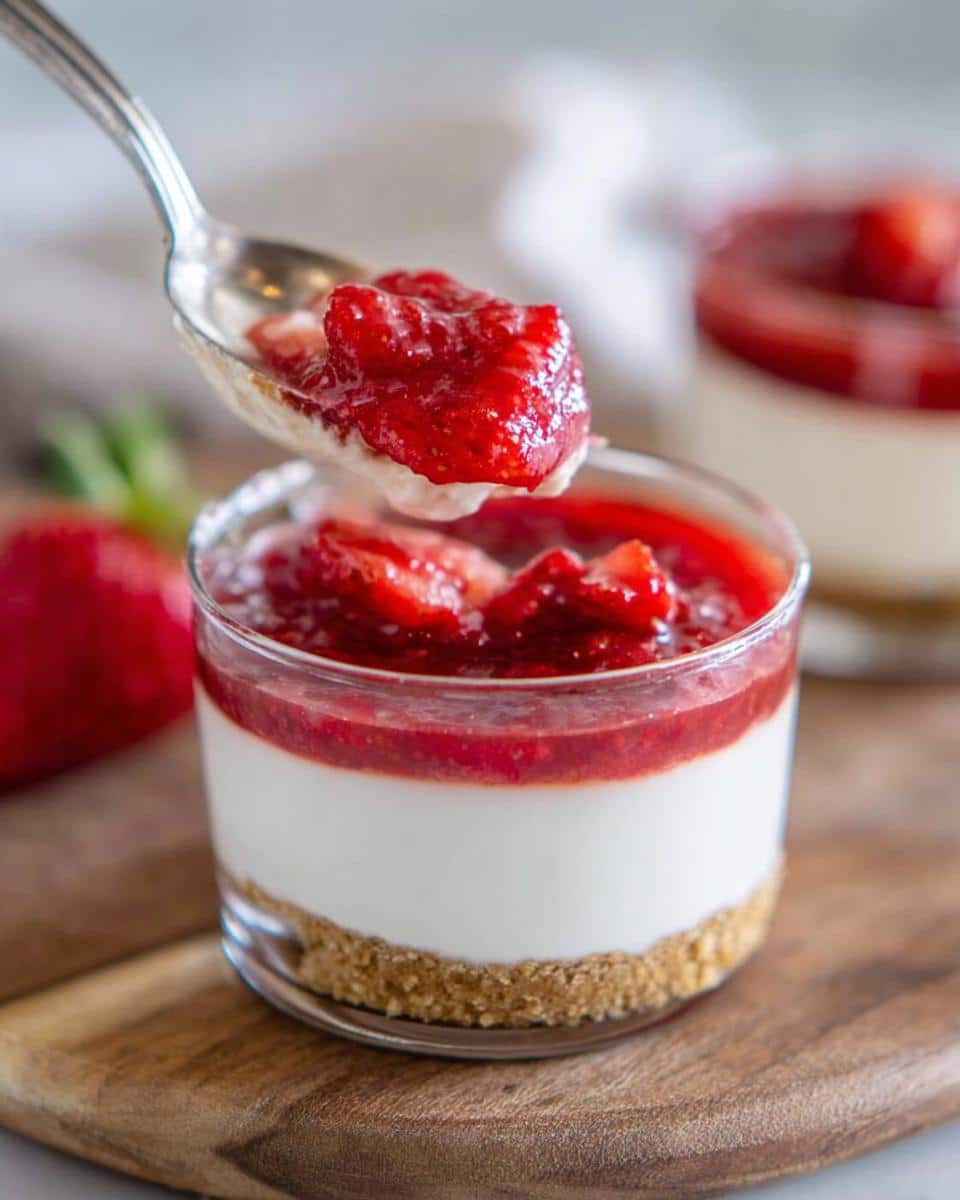
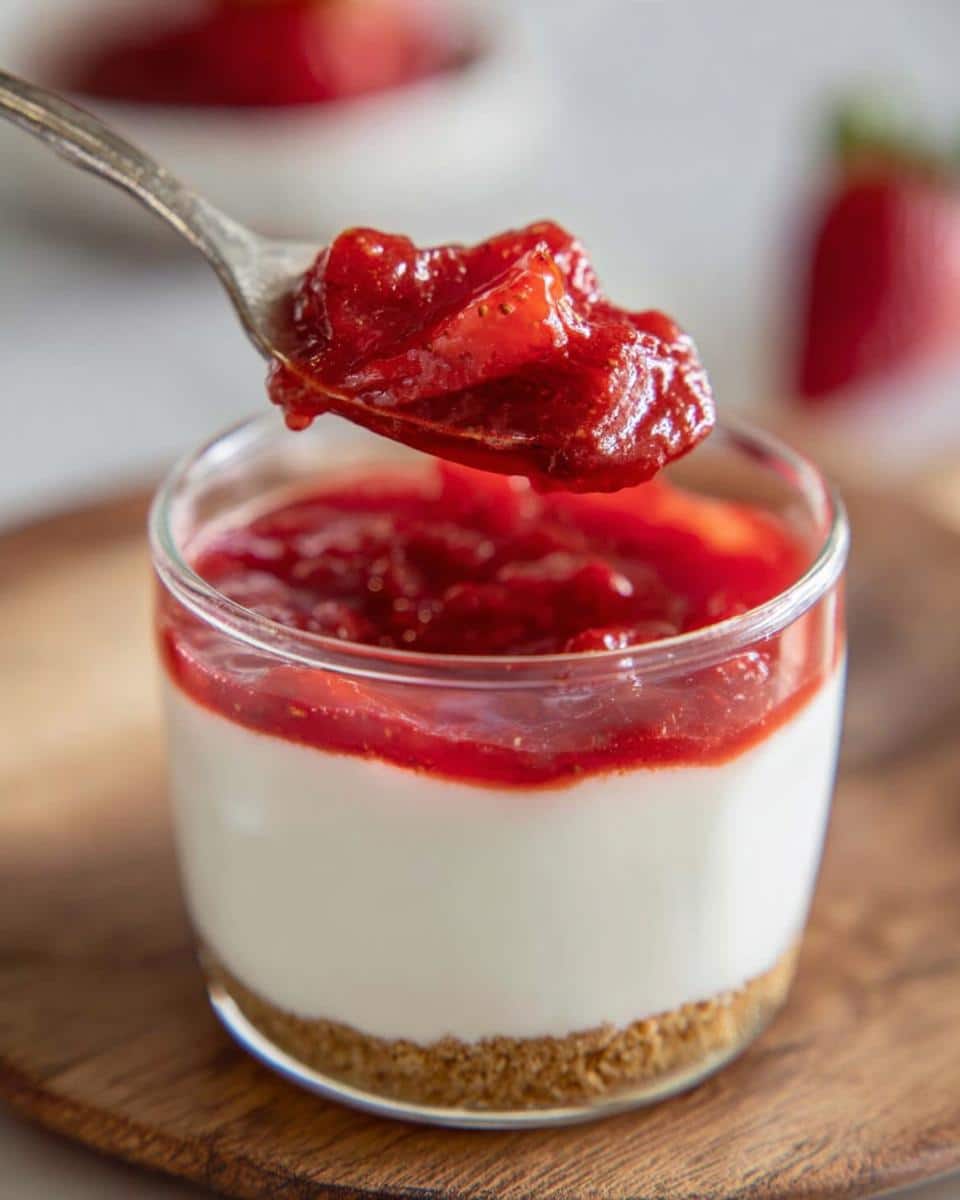
- Fresh sliced strawberries or other seasonal berries.
- A sprinkle of cinnamon if you’re feeling adventurous!
Step-by-Step Instructions for No-Bake Weight Loss Cheesecake Cups
This no-bake magic is exactly why I love creating Weight Loss Cheesecake Cups for you all! Since we aren’t baking off any structural issues, the prep work is key to ensuring that perfect, smooth texture once they chill. Don’t rush the mixing; a little patience here pays off hugely in the final creamy result. Trust your mixer!
Preparing the Base Layer
First things first, get those graham crackers ready. You want them nicely crushed—fine crumbs work best for a solid base. You’re going to divide them between your serving dishes. If you are making the two larger servings the recipe calls for, use 2 tablespoons of crushed graham crackers in the bottom of each glass. If you decide to make four smaller, snack-sized cups (a great Light Meals idea!), just use 1 tablespoon per cup. Press them down gently, maybe using the back of a measuring spoon, just to make a nice little crust layer.
Mixing the Creamy Cheesecake Filling
Time to get mixing! Grab your softened cream cheese and put it in your mixer bowl. Add your Truvia sweetener, that tiny pinch of salt, the lemon juice, and the vanilla extract. Beat this together until it looks really smooth and fluffy—you want absolutely zero lumps in that cream cheese base. Once that’s perfect, gently pour in your Greek yogurt. Keep mixing for another minute or two until the yogurt is completely, seamlessly incorporated and the filling looks like the silkiest dream. That’s how you know these Weight Loss Cheesecake Cups will turn out right!
Setting and Finishing Your Weight Loss Cheesecake Cups
Now, carefully spoon that luscious filling right on top of your graham cracker bases. Divide it evenly between your chosen dishes. Take the back of your spoon and just smooth the tops out a little bit—you want a nice flat surface for your toppings later. This is the hardest part: they must go into the refrigerator for at least one full hour. That chilling time sets everything up perfectly! Once they are firm, go ahead and dollop on your berry jam or fresh fruit.

Enjoy!
Tips for Perfect Weight Loss Cheesecake Cups Every Time
Even though these are super simple Diet-Friendly Sweet Treats, there are tiny chef secrets that make the difference between good and *wow*. Since we ditched the heavy baking steps, the temperature and mixing are everything! If you follow these simple guiding lights, your cups will be perfectly creamy every single time, guaranteed.
Soft Cheese Is Non-Negotiable
I mentioned it briefly above, but I have to hit this home again because it is the number one place people stumble, especially when making low-fat desserts! If your cream cheese is straight out of the fridge, it will fight your mixer. You end up with little chunks that refuse to blend smoothly with the yogurt. That means lumps, not that luxurious, smooth texture we want in our yogurt-based Low Calorie Recipes.
Set it out on the counter for at least an hour before you plan to start. It should be truly soft—if you press your finger lightly on the block, it should indent easily without resistance. This ensures it creams beautifully with the Truvia first!
Don’t Over-Mix the Yogurt
We love Greek yogurt because it’s thick and high in protein, which is fantastic for Fat Loss Meals. However, Greek yogurt has tight proteins. Once you add it to the cream cheese mixture, you only need to mix until it’s *just* combined. Seriously, one minute, maybe two at the most. Why? If you beat it too long after adding the yogurt, those proteins start to toughen up, and your creamy cup will turn out slightly grainy or chewy after chilling.
I always switch to a spatula scrape-down after the yogurt is added. Mix with the mixer on low speed just until you don’t see white streaks anymore, then stop! Texture is sacred in cheesecake!
Taste While You Taste
Because we are using a sugar substitute like Truvia instead of regular granulated sugar, the flavor profile changes slightly, and things like lemon juice and vanilla can really pop. Please, before you spoon the mixture into the cups, take a tiny dip with a clean spoon and taste it. Does it need that extra half-tablespoon of sweetener I mentioned earlier? Maybe it needs a tiny drop more vanilla?
Once it sets in the fridge, the cold mutes flavor slightly. Make sure it tastes *perfectly* sweet and bright right there in the mixing bowl. It’s much easier to adjust now than after it’s chilled!
Ingredient Notes and Healthy Substitutions for Weight Loss Cheesecake Cups
When you are aiming for Healthy Recipes that feel luxurious, you definitely need to pay attention to the ingredients you swap! I totally get it if you don’t have Truvia on hand, or if you’re trying to keep that cream cheese fat content even lower. Luckily, these Weight Loss Cheesecake Cups are very forgiving, which is why they are such an excellent staple for anyone dedicated to Balanced Meals.
The beauty of making your own Low Carb Recipes (if you swap the base!) or just low-calorie treats is customizing the sweetness level. Don’t feel locked into just one option. Think of these notes as my personal permission slip for you to tweak things based on what you have!
Sweetener Swaps for Portion Control Recipes
If you’re not into Truvia, no problem at all! The key here is using a granular, zero-calorie sweetener that measures similarly to sugar. Stevia or Monk Fruit blends are generally fantastic, but you might need slightly more volume than the Truvia amount depending on the brand.
- Monk Fruit: This is my next favorite backup! It measures almost 1:1 with sugar, so start with 2 tablespoons and taste-test thoroughly. The flavor is really clean.
- Erythritol: If you have this on hand, it works well, though sometimes it can leave a slight cooling sensation in the mouth, so don’t pile it on too high.
Remember, since these are Weight Loss Cheesecake Cups, adjusting the sweetener up or down is the easiest way to fit them perfectly into your daily calorie counting!
Making Cream Cheese Lighter: The Neufchâtel Magic
The recipe calls for standard cream cheese, but if you want to shave off a little more fat while keeping that essential cheesy mouthfeel, reaching for Neufchâtel cheese is my number one go-to substitution.
Neufchâtel is essentially a lower-fat cream cheese option—it has about 1/3 less fat, but it holds its structure beautifully during mixing. It blends seamlessly with the Greek yogurt, so no one is going to know the difference except you and your wellness goals! Just swap the 3 oz of cream cheese for 3 oz of Neufchâtel, and you are good to go toward those Fat Loss Meals.
What About the Base?
For those following low-carb plans, I know graham crackers are a no-go. If you need true Low Carb Recipes, you can easily swap that 1/4 cup of crushed graham crackers for crushed almonds or almond flour mixed with a tiny bit of melted coconut oil or butter substitute. It gives you the necessary firm base without the carbs!
Storing and Reheating Weight Loss Cheesecake Cups
Since these amazing Weight Loss Cheesecake Cups are a no-bake treat, storage is super straightforward! That creamy Greek yogurt filling needs a little chilly structure to really set up perfectly and stay scoop-ready. Think of these less like a baked good and more like a delicious, healthy pudding that solidified its resolve!
Keeping Them Fresh in the Fridge
These cups are designed to be made ahead, which is a lifesaver when you’re planning out your Balanced Meals for the week. Because they are single-serving, you just cover them up and pop them right into the refrigerator. I recommend using a small piece of plastic wrap secured over the top of the individual glass or ramekin.
They will stay tasting perfectly fresh and creamy for about 3 to 4 days. Honestly, they usually don’t last that long in my house! The only thing to watch out for is if you add fresh, sliced fruit on top. If you use fresh berries, try to eat those cups within the first two days, as the fruit will start weeping a little juice onto the cheesecake top.

Can I Freeze These Portion Control Recipes?
This is a really common question! Since these are filled with yogurt and cream cheese that we didn’t bake, freezing them totally changes the texture when they thaw. I really advise against freezing them if you want that luxuriously smooth mouthfeel we worked so hard to achieve in the mixing step.
When frozen items thaw, water crystals expand and the structure breaks down. So, if you freeze your yogurt-based cheesecake cups, you’re likely going to end up with a watery, slightly separated puddle when they warm up. For the best experience with these Portion Control Recipes, please stick to preparing only what you plan to eat within the next four days and keep them properly chilled!
Do I Need to Reheat My Cups?
Nope! Absolutely not, sweet friend! Since these are entirely no-bake, they are served cold straight from the fridge. In fact, I find that they taste even better after they’ve had a full day to chill—the flavors meld together, and the filling firms up just a touch more. If you take them out 10 minutes before serving, they are the perfect temperature for a satisfying, light treat at the end of your Healthy Dinner Ideas.
Frequently Asked Questions About Weight Loss Meals and Desserts
I know you might have a few lingering thoughts, especially when you’re making sure every single thing you eat fits into your larger wellness picture. It’s smart to ask questions when you’re looking for recipes that support your Weight Loss Meals journey!
Are these Weight Loss Cheesecake Cups actually suitable for strict low-calorie diets?
They totally are! These were designed specifically to be friendly for both low-calorie and fat loss goals. Because we’re using Greek yogurt to replace a lot of that heavy, high-fat cream, they become fantastic Low Calorie Recipes that still deliver that decadent mouthfeel. If you stick to the recipe as written, especially with just a small topping of berries, you’ve got a satisfying treat that won’t derail your day. You deserve a treat that supports your long-term success!
I don’t like Truvia. What’s the best swap for this kind of recipe?
That’s a common question, especially since artificial sweeteners vary so much in taste. If you’re making Diet Recipes, you need a zero-calorie option that blends well. My absolute favorite backup is a Monk Fruit/Erythritol blend, like Lakanto, which measures very closely to sugar. Use the same 2 tablespoons to start. Just taste the mixture before chilling, because Monk Fruit can sometimes require a tiny bit more to hit that sweet spot you’re looking for in your Clean Eating Recipes. Just avoid liquid stevia unless you reduce the liquid content elsewhere, as it’s super concentrated!
How do these compare to other low-carb or keto desserts?
That’s a great way to frame it! While these aren’t strictly keto because of the graham cracker crust, they are significantly lower in sugar and fat than a traditional cheesecake. If you swapped that crust for almond flour, they lean much closer to a Low Carb Recipes option. The Greek yogurt base keeps the carbs/sugar lower than if we had used traditional heavy whipping cream, making them a brilliant ‘in-between’ treat for general wellness and Fat Loss Meals.
Can I skip the lemon juice? It sounds a little odd in dessert.
Oh, trust me on this one! I used to think the same thing years ago when I first stumbled upon this technique, but that wee little bit of acid is seriously important! It doesn’t make the cup taste like lemon; what it does is interact with the cream cheese and the sweetener to brighten up the entire flavor profile. It mimics the complexity you get from real sugar, making our Weight Loss Cheesecake Cups taste richer than they actually are. If you leave it out, the flavor can taste a little flat, so I highly recommend keeping that half-teaspoon in there to maximize the impact of these Low Calorie Recipes!
Sharing Your Experience with These Weight Loss Cheesecake Cups
Now that you’ve whipped up a batch of these perfectly portioned, guilt-free Weight Loss Cheesecake Cups, I genuinely want to hear all about it! Getting these kinds of Diet Recipes right takes practice, and your feedback really helps me know what’s working for your own health journey.
Did you stick with the simple strawberry topping, or did you get creative? Maybe you added a sprinkle of cocoa powder or used a different zero-calorie sweetener? Don’t keep those delicious secrets to yourself!
- Could you take a quick second to leave a star rating at the top of this page? It means the world to me and helps other folks looking for simple, satisfying Healthy Desserts find the recipe.
- Head over and tag me on Instagram or Pinterest! Seeing your beautiful individual servings makes my day, especially when I know you’re enjoying dessert mindfully as part of your overall wellness plan.
I’m Lilya Lawson, and bringing you soulful food that fits your life—goals and all—is why I started Top Chicken Eats. Happy eating, and I can’t wait to see your creations!
Weight Loss Cheesecake Cups
Ingredients
Equipment
Method
- Add 2 tablespoons of crushed graham crackers to the bottom of each serving glass if you are making 2 servings. If you make 4 smaller servings, use 1 tablespoon of graham crackers per cup.
- Using a mixer, cream the cream cheese, Truvia, salt, lemon juice, and vanilla together until smooth.
- Add the greek yogurt to the cream cheese mixture. Mix for one to two minutes until the yogurt is fully incorporated.
- Spoon the cheesecake mixture evenly into your serving glasses. If making 2 servings, divide between two cups; if making 4 servings, divide between four cups. Use the back of a spoon to flatten the top surface.
- Place the cheesecake cups in the refrigerator for at least one hour to allow them to set.
- Top your cheesecake with berry jam, sliced strawberries, or your preferred topping before serving.