There’s just something about that old-fashioned soda fountain fizz that whisks you right back to childhood, isn’t there? I’m talking about that perfect sweet, bubbly hit of classic flavor, and today, we’re making it shine right in your kitchen. Forget those artificially flavored store bottles; we are making real, nostalgic Cherry Vanilla Soda from scratch with a super simple syrup. Here in Asheville, my cooking philosophy is all about comfort and heart, and this recipe proves that the simplest flavors are often the most memorable. Trust me, this homemade approach is ridiculously easy and tastes like pure happiness.
Why This Homemade Cherry Vanilla Soda Recipe is a Keeper
If you need a show-stopping fizzy drink for a party or just a sweet treat for a cozy night in, this syrup is your answer. It’s so much fresher than anything you can buy! We’re talking about capturing that iconic diner flavor but making it better, obviously.
Honestly, this syrup is fantastic for making romantic drinks without alcohol, or just a simple, sweet drink for valentine gatherings. It’s quick, it delivers on nostalgia, and the results feel truly special. If you’re planning for Valentine’s menus, this is a must-have!
- It’s totally customizable—you control how sweet you want it!
- It makes your house smell incredible while it simmers.
- It’s a fantastic way to make festive valentine beverages that everyone loves.
- The vibrant color makes it instantly appealing.
Creating the Perfect Cherry Vanilla Soda Flavor Profile
The magic here is the tango between the bright, slightly tart burst from those cherries and the smooth, comforting hug of real vanilla. Commercial sodas often lean too far one way or the other, or they taste fake, right? When you make this syrup, you get a true balance. We’re using just enough sugar to round out the cherry’s acidity without making it syrupy sweet. I promise, this homemade quality blows those bottled versions out of the water every single time.
Equipment Needed for Your Cherry Vanilla Soda Syrup
You don’t need complicated gadgets to make this dreamy cherry vanilla soda syrup, which is part of why I love it so much! We are keeping it simple, focusing on what actually gets the job done well.
You’ll want a small saucepan, of course, since we are simmering everything down. Then, you’ll need something to smash those cherries—I just grab a potato masher, but the back of a sturdy wooden spoon works in a pinch!
Make sure you have a fine sieve ready for straining later, and grab a clean jar for storage. My little tip? Use a saucepan that isn’t too wide. If it’s too big, the liquid spreads out too much, and you won’t get that nice concentrated simmer we need!
Gathering Ingredients for Rich Cherry Vanilla Soda
Okay, gathering the supplies is where the trust really starts to build, because using the right stuff makes all the difference in getting that classic, comforting flavor. We break our ingredient list into two parts: what goes into the flavor-packed syrup, and what you need to make the final fizzy moment.
For the syrup itself, we’re keeping it clean and simple. You need exactly 12 cherries—and listen closely, they must be halved and pitted before they hit the pot! Then we add 1/2 cup of water, 1/2 cup of granulated sugar, and one teaspoon of pure vanilla extract. That’s it for the core flavors!
When it’s serving time, the only other thing you absolutely must have ready is plenty of really cold soda water. That’s what brings the fizz and turns that intense syrup into true Cherry Vanilla Soda.
Ingredient Notes and Substitutions for Cherry Vanilla Soda
Let’s talk cherries for a minute. If you can get hold of fresh ones, great! But if it’s the off-season, frozen pitted cherries actually work perfectly fine for a syrup base—just don’t thaw them first. The biggest thing I can stress? Don’t cheat the vanilla! You must use pure vanilla extract here. Imitation flavoring just tastes flat and dulls that beautiful cherry brightness.
If you use sour cherries instead of sweet, you’ll just notice you need to bump that sugar up by maybe another tablespoon to keep our nice sweet-tart balance, but honestly, the quality of that vanilla is what unlocks the classic soda flavor we’re chasing.
Step-by-Step Instructions for Making Cherry Vanilla Soda Syrup
Putting this together is so straightforward, but timing is everything to get that depth of flavor for your Cherry Vanilla Soda. First things first, make sure those cherries are prepped—halved and pitted, that’s step one done. Then, everything goes into the saucepan: cherries, water, sugar, and your vanilla extract. Set the heat to medium and get ready to watch the magic bubble up!
We let this simmer for about five minutes until it gets happy and steamy. This is when we bring out the masher for a good, thorough press! After you’ve mashed those cherries well, keep simmering for another ten minutes. That total simmer time really coaxes all that cherry goodness into the sugar water. Remember, we’re making a powerful base here!
Mashing and Simmering the Cherry Vanilla Soda Base
Once that mixture starts a gentle boil, grab your potato masher. Don’t be shy; you really need to break down those cherry halves to release their juices and color. After a good minute or two of mashing, look for the mixture to have visibly thickened up a bit. That’s your cue that you’ve hit the five-minute simmer mark. Then, just let it chill out on medium heat for the final ten minutes to really concentrate those robust cherry and vanilla notes.
Cooling and Straining Your Homemade Cherry Vanilla Soda Syrup
When the total cooking time is up, immediately pull the pan off the heat. Patience alert! You have to let it cool in the pan for a full 15 minutes before you even think about touching the strainer. This cooling period is crucial; it keeps you from getting burned by super-hot steam when you pour it, and honestly, it helps the liquid filter cleaner.
After that wait, pour the entire mixture slowly through a fine sieve right into your clean storage jar. Don’t press on the solids too hard in the sieve; we want liquid gold, not pulp! We link to some of my favorite easy baking tools, like the best kinds of jars, here: the best kinds of jars. Once strained, let it cool completely on the counter before sealing it up for the fridge.
Serving Suggestions for Your Cherry Vanilla Soda
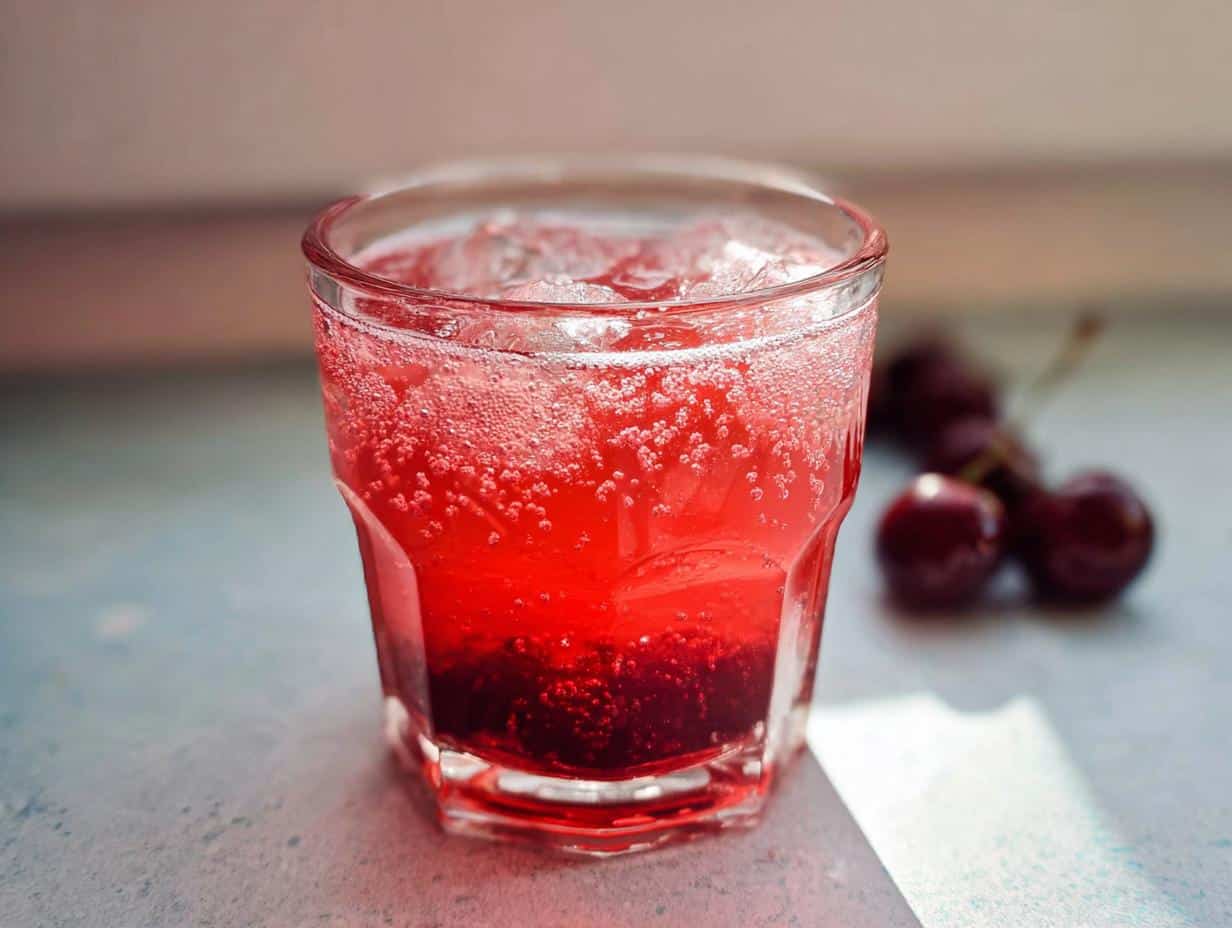
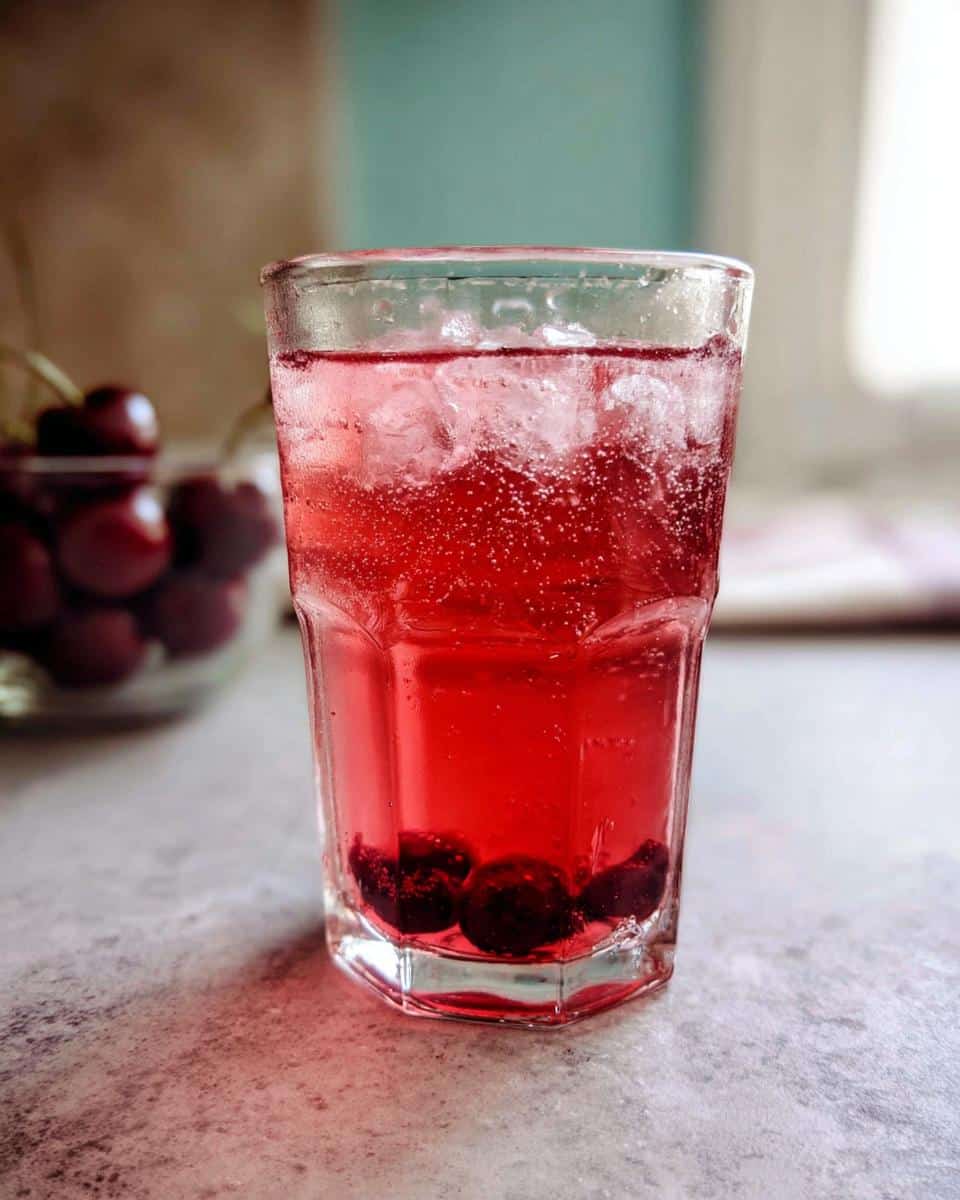
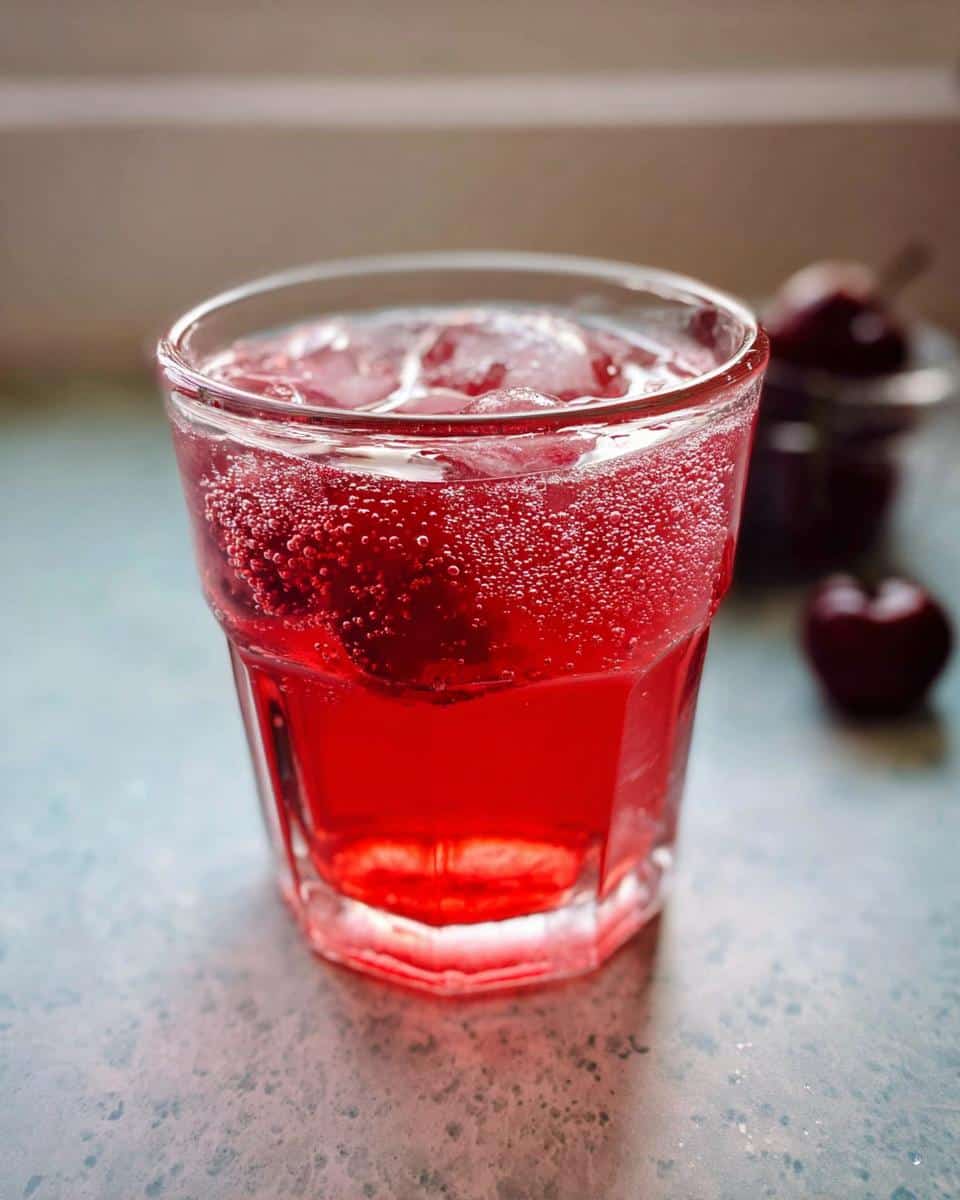
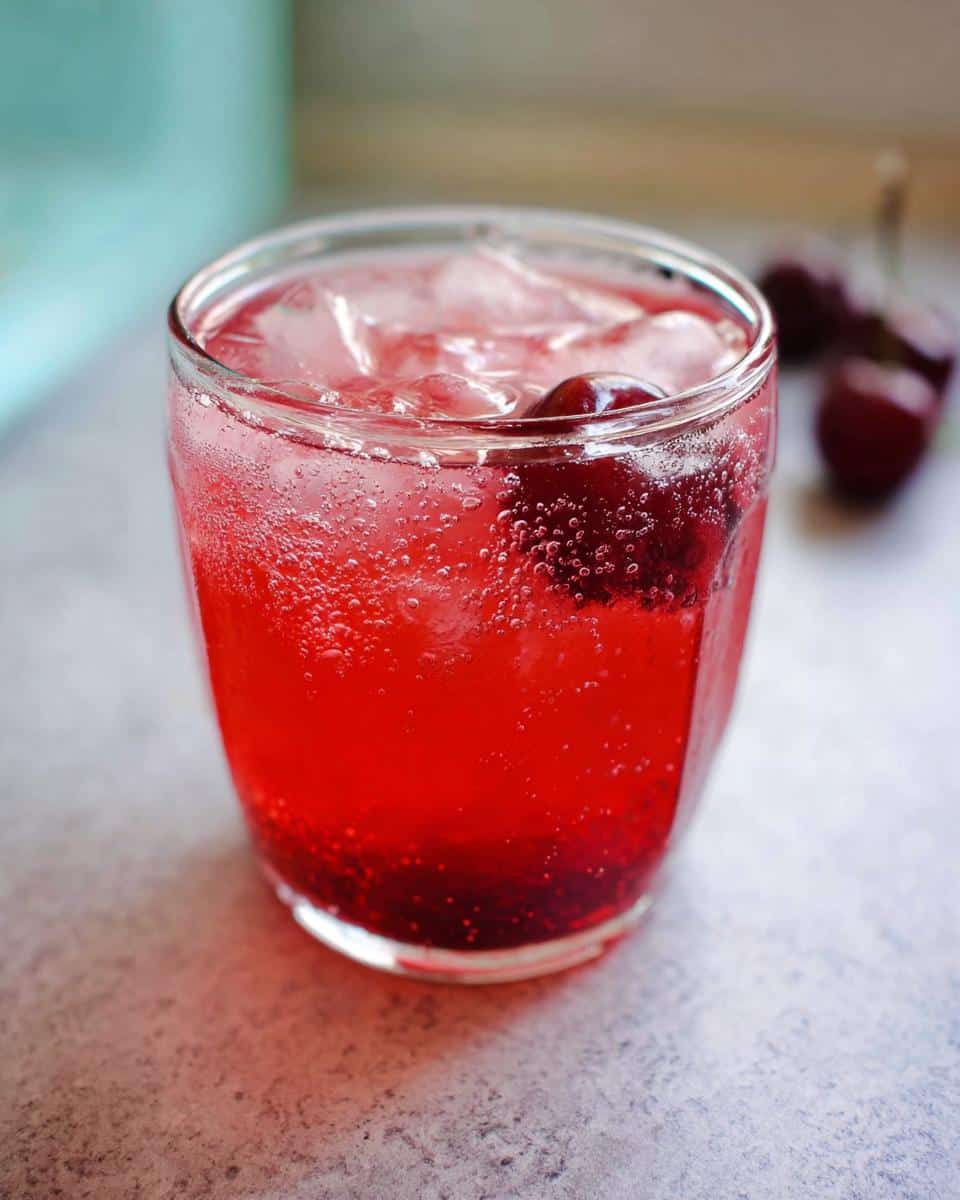
Now for the fun part—turning that gorgeous, intensely flavored syrup into a bubbly, refreshing drink! When I assemble mine to photograph, I usually aim for about 6 teaspoons of syrup per glass. But seriously, taste as you go! If you like it zingy, use less, and if you want it sweeter, just drop in another teaspoon or two. It’s your soda, after all!
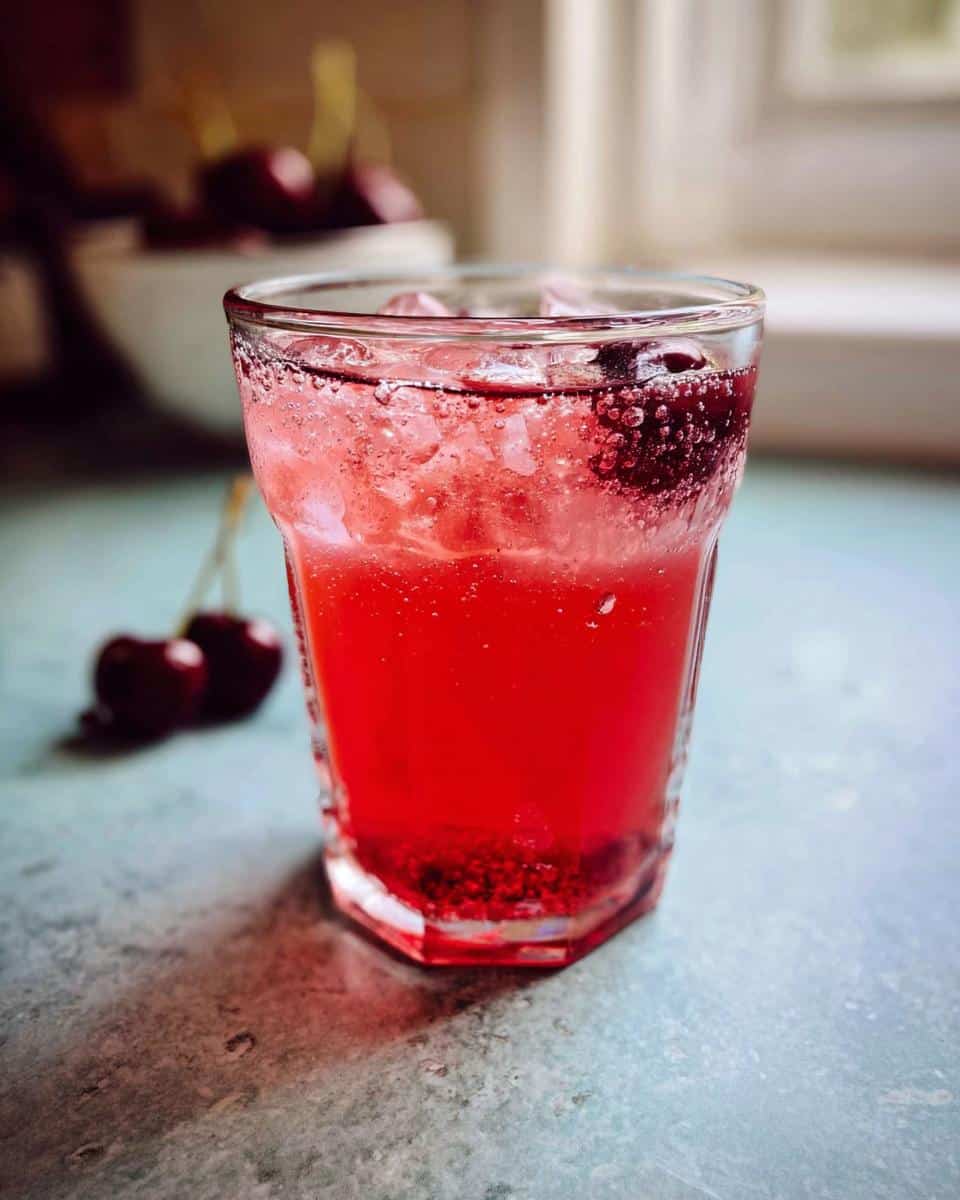
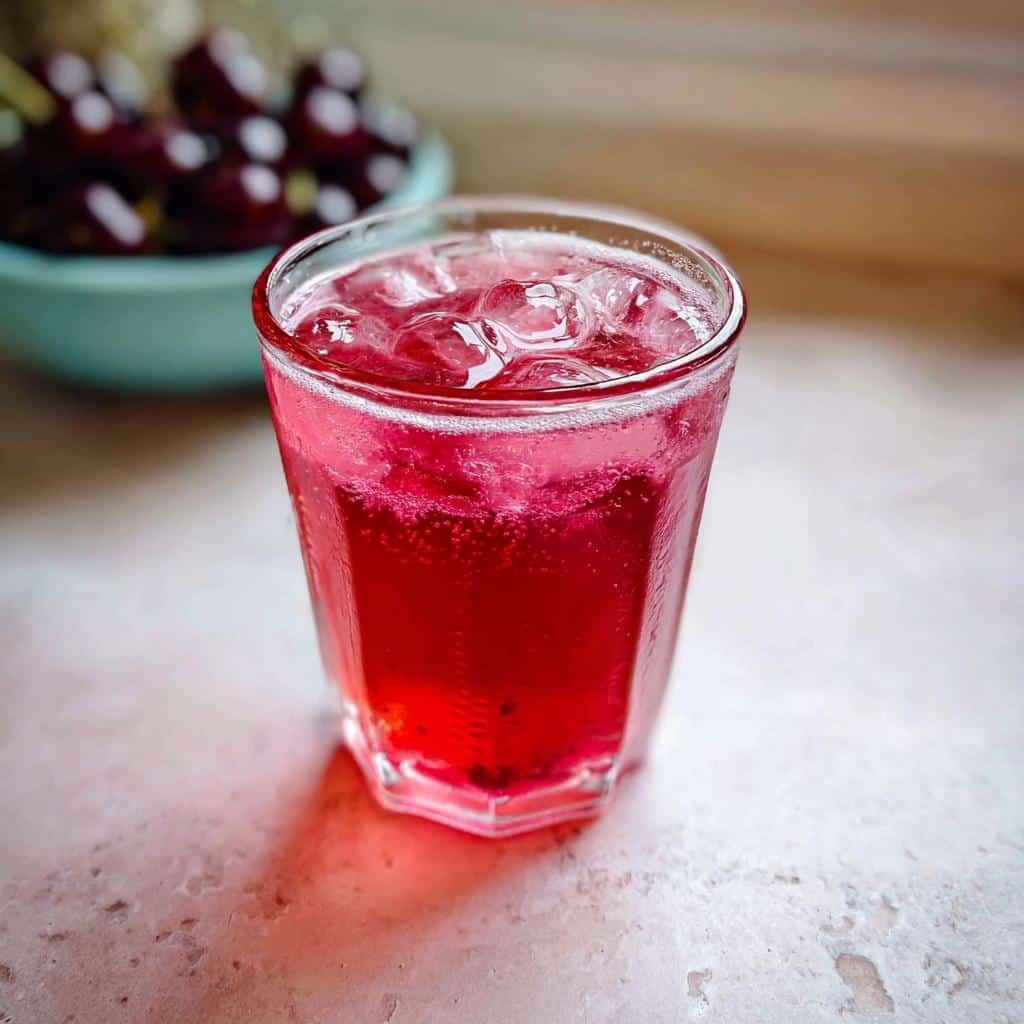
Fill your fanciest tall glass with ice—crushed ice seriously elevates the experience, making it feel more like a vintage soda fountain treat. Pour in that syrup slowly, then top it off gently with very cold soda water. This makes such a fantastic color—perfect for serving up as one of your pink drinks for valentine celebrations. Garnish is mandatory, guys! A few fresh cherries or a real vanilla bean stick makes these festive valentine beverages feel instantly elegant.
If you’re making a big batch for a cooler or hosting a casual get-together, I’ve found that setting up a DIY soda bar is a total hit. Lay out the syrup, the soda water, and different garnishes like limes or maybe even a scoop of vanilla ice cream if you want to go full float! For other easy entertaining ideas, you can browse some of my favorite easy dinner pairings for parties!
Tips for Success with Homemade Cherry Vanilla Soda
Since we want this homemade Cherry Vanilla Soda syrup to be absolutely perfect every time, I’ve collected a few little secrets that aren’t in the official steps but make a huge difference. The main thing is tasting while you go, as I mentioned. Don’t be afraid to add another teaspoon of sugar if your cherries were leaning tart, or maybe another tiny dash of vanilla if you want that flavor to really pop forward.
The color should be a beautiful, rich ruby red—if it looks a bit duller than you hoped, don’t worry! That color concentrates beautifully once the syrup cools down in the fridge. Also, when you mix it with the soda water, always pour the soda water into the syrup slowly over ice. This helps the carbonation mix gently rather than dissolving too quickly!
For truly over-the-top flavor, you can let the strained syrup sit overnight before you use it; it seems to deepen the vanilla notes. You can find some of my other favorite quick flavor boosters in my guide to easy dessert recipes!
Storage and Reheating Instructions for Cherry Vanilla Soda Syrup
This homemade syrup is a real treat because the intense flavor lasts for days! Once your syrup has cooled completely after straining, pour it into a really clean, airtight jar. I prefer glass jars because they don’t hold onto flavors, but plastic works too if it’s totally sealed. You should easily get about one week of perfect, vibrant syrup stored safely in the back of your refrigerator.
The best part? You almost never need to reheat it! Since we are mixing the syrup with ice-cold soda water, keeping the syrup chilled works perfectly to maintain maximum fizz. If you happen to forget your jar out on the counter for a bit before serving, just pop it back in the cold before mixing your next soda.
Frequently Asked Questions About Cherry Vanilla Soda
You know I love hearing from you all! Whenever I share a favorite recipe like this Cherry Vanilla Soda, I always get the same few questions popping up. I figured it’s easier to just put the answers right here so everyone can get sparkling!
A big one I hear is about flavoring. Please, please stick to pure vanilla extract if you can. Artificial stuff just doesn’t deliver that rich, warm background note that makes this taste like true comfort food in a glass. Another common query is how to make it taste like a proper cream soda. Easy peasy: just swap out half of your soda water for chilled half-and-half or even a splash of canned evaporated milk when you assemble the drink!
You can definitely use this syrup in cocktails, too! It’s so versatile, and the flavor profile mixes wonderfully with clear liquors. For more resources on my Southern-inspired cooking philosophy, you can always read a bit more about me over at the About page.
Other folks ask if they can use frozen cherries. Yes, absolutely! Just don’t thaw them first.
Can I make this recipe into Valentine Mocktails?
Oh, definitely! This syrup is naturally perfect for creating gorgeous valentine mocktails. While soda water is light and fun, swap it out for chilled sparkling white grape juice or sparkling cider to get a bit more complexity and sweetness. Garnish with a lime wheel or a fancy sugared rim to really lean into those pink drinks for valentine vibes!
Sharing Your Homemade Cherry Vanilla Soda Experience
Now that you’ve bottled up that sweet, fizzy magic, I genuinely hope you give this Cherry Vanilla Soda a try!
It means the world to me when you make one of my recipes. If you whip up a batch, please snap a photo and tag me on social media so I can see your beautiful bubbly creation! You can send any questions or love notes right through my contact page!
Cherry Vanilla Soda
Ingredients
Equipment
Method
- Cut the cherries in half and remove the pits.
- Add the cherries, water, sugar, and vanilla extract to a small saucepan over medium heat.
- When the mixture bubbles for about 5 minutes, mash the cherries using a potato masher or another suitable tool.
- Continue simmering on the same heat for another 10 minutes.
- Remove the pan from the heat. Let the mixture cool for 15 minutes before straining it through a sieve into a jar.
- Allow the syrup to cool further, or add some syrup to a glass with ice and top it with soda water to serve immediately. The syrup keeps in the refrigerator for about one week.