You know those drinks that just wrap you up in a warm hug? For me, that’s always been strawberry milk. It takes me right back to elementary school lunch trays, but let’s be honest, the store-bought kinds are often mostly sugar and artificial flavorings. As someone who loves food that nourishes the body *and* the soul—that’s my job as a Registered Dietitian—I knew we needed a better version.
This Creamy Strawberry Milk recipe fixes that sad, artificial flavor completely. We’re using real, plump strawberries to create a vibrant syrup, so you’re getting actual fruit goodness in every sip. Trust me, the difference between this homemade version and the cartons in the fridge is night and day. It’s comforting, naturally sweet, and honestly, it comes together so easily. Get ready for the best fruit milk you’ve ever tasted!
Why You Will Love This Creamy Strawberry Milk Recipe
Making this with real fruit just hits different, doesn’t it? It’s the wholesome comfort food I always advocate for. Here’s why this creamy strawberry milk is about to become your new favorite quick fix:
- It captures that perfect childhood nostalgia but uses recognizable, real ingredients—no weird stuff here!
- The syrup is ridiculously easy to make on the stovetop and packs a massive, fresh strawberry punch.
- You control the whole situation! Adjust the sweetness or the creaminess to exactly your liking.
- It’s great for everyone; parents love it because it’s simple enough for even the pickiest little eaters, but fancy enough for dessert.
Gathering Ingredients for Homemade Creamy Strawberry Milk
Okay, the beauty of using real fruit is that we don’t need a huge stockpile of fancy items. We are making a homemade syrup first, and then we mix that magic into milk. Everything here is super simple, which means you can likely whip this up without an extra trip to the store. Remember, using quality ingredients—especially the strawberries—makes this recipe shine, which is why I always stress using the best you can find.
For the Strawberry Syrup
This is where the flavor foundation gets laid down, friends. Don’t be shy with the strawberries!
- 3 cups sliced strawberries (I cheated this time and used a whole 16-oz bag of frozen sliced ones—shhh!), fresh or frozen works beautifully here.
- 3/4 cup granulated sugar. This helps pull the liquid out and preserves our syrup nicely.
- 2/3 cup water. Just enough to get things simmering nicely.
For Serving the Creamy Strawberry Milk
This part is all about assembly and customizing that perfect creamy texture. We want it rich!
- 3/4 cup milk. You absolutely need something with some fat here for that creamy factor—whole milk or 2% is my go-to, but feel free to swap in oat or almond if you prefer.
- 3–4 tablespoons strawberry syrup—and this is important: this amount is to taste! Start small and add until it’s perfect for you.
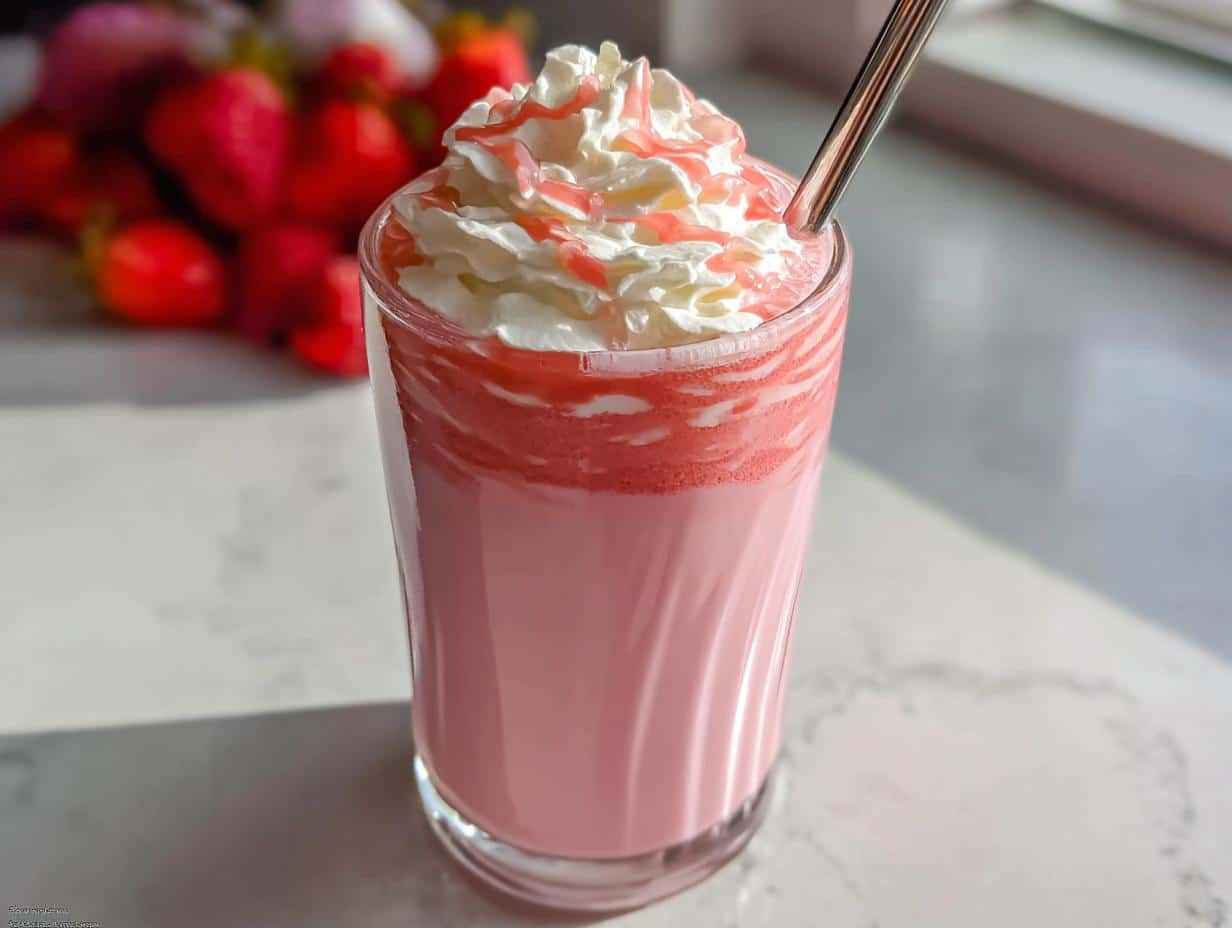
- A dollop of whipped cream for topping (totally optional, but highly recommended for feeling luxurious!).
Step-by-Step Instructions to Make Creamy Strawberry Milk Syrup
Making the syrup is the best part, honestly. It smells absolutely incredible when those cooked strawberries start bursting! This is where we turn simple fruit, sugar, and water into liquid gold. Don’t rush this stage; the simmering is what concentrates that unbelievable fresh flavor. You can check out some of my other favorite quick comfort foods, perfect for when you get impatient waiting for this syrup to chill, right here!
Cooking Down the Strawberries for the Syrup
Grab your saucepan and get everything—those 3 cups of sliced strawberries, the 3/4 cup of sugar, and that 2/3 cup of water—right in there. Set it over medium heat. We need to let this gentle simmer for about 10 to 12 minutes. Keep an eye on it and stir occasionally so the sugar doesn’t start sticking to the bottom. You want those berries to totally break down and the syrup to look just a little bit thicker than when you started.
Straining and Extracting the Best Strawberry Syrup
This step decides if your final milk is clear pink bliss or chunky! Set up your fine mesh strainer over a clean bowl. Pour the whole hot mixture right into the strainer. Now, this is important: take your spoon and press down hard on those cooked strawberries against the mesh. You want to squeeze out every last bit of sweet liquid. Scoop off any bubbly foam that rises to the top of the syrup—it just keeps things cleaner and prettier!
Chilling Time for Perfect Creamy Strawberry Milk
Patience is key here, even though I know you want to mix it with milk immediately! Once the syrup is strained, you need to let it chill completely. Pop that bowl covered into the fridge for a solid 60 minutes. Why the wait? If the syrup is warm, it will melt the milk fat too quickly, and you won’t get that luxurious, even creaminess when you serve it. Cold syrup mixes into cold milk perfectly!
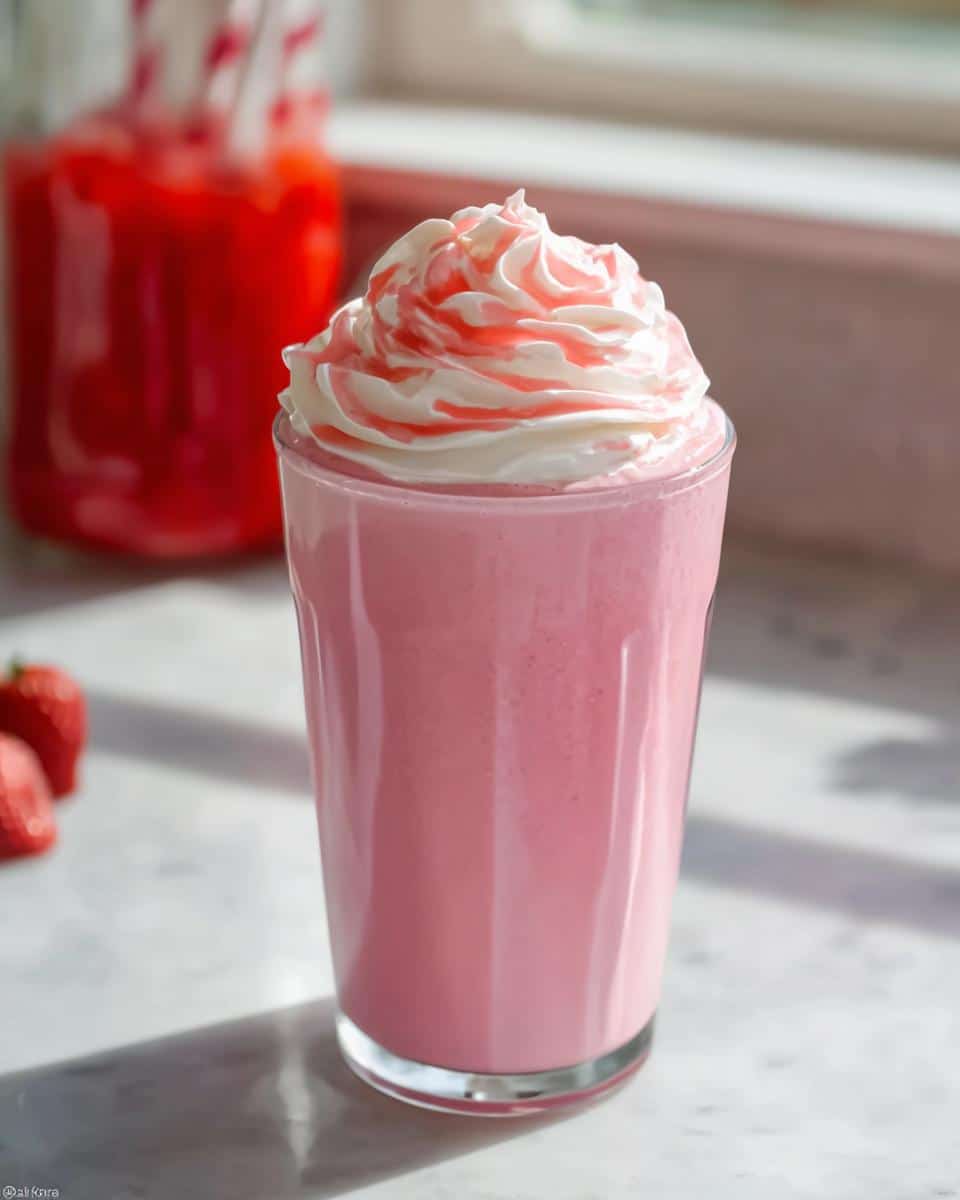
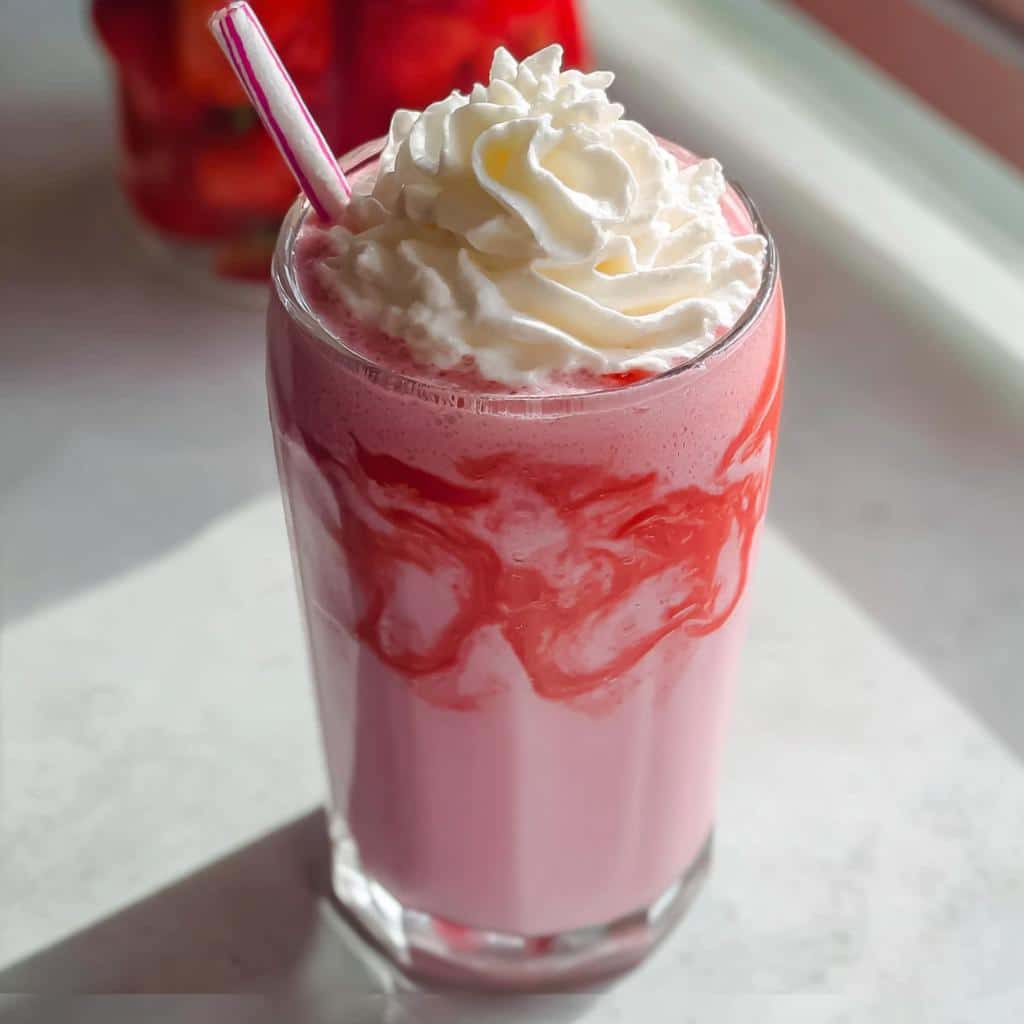
Assembling Your Perfect Glass of Creamy Strawberry Milk
The moment we’ve been waiting for! After that syrup has chilled down beautifully—which usually takes about an hour, but do your best to wait—it’s time to turn that syrup into actual creamy strawberry milk. This assembly process is incredibly fast, which is why this recipe is so fantastic for busy afternoons or when you need a quick, aesthetically pleasing treat.
If you are making this for a special night, like Valentine’s Day, this is when you pull out your real nicest glassware! These beautiful pink drinks for valentine feel so much more romantic when served fancy.
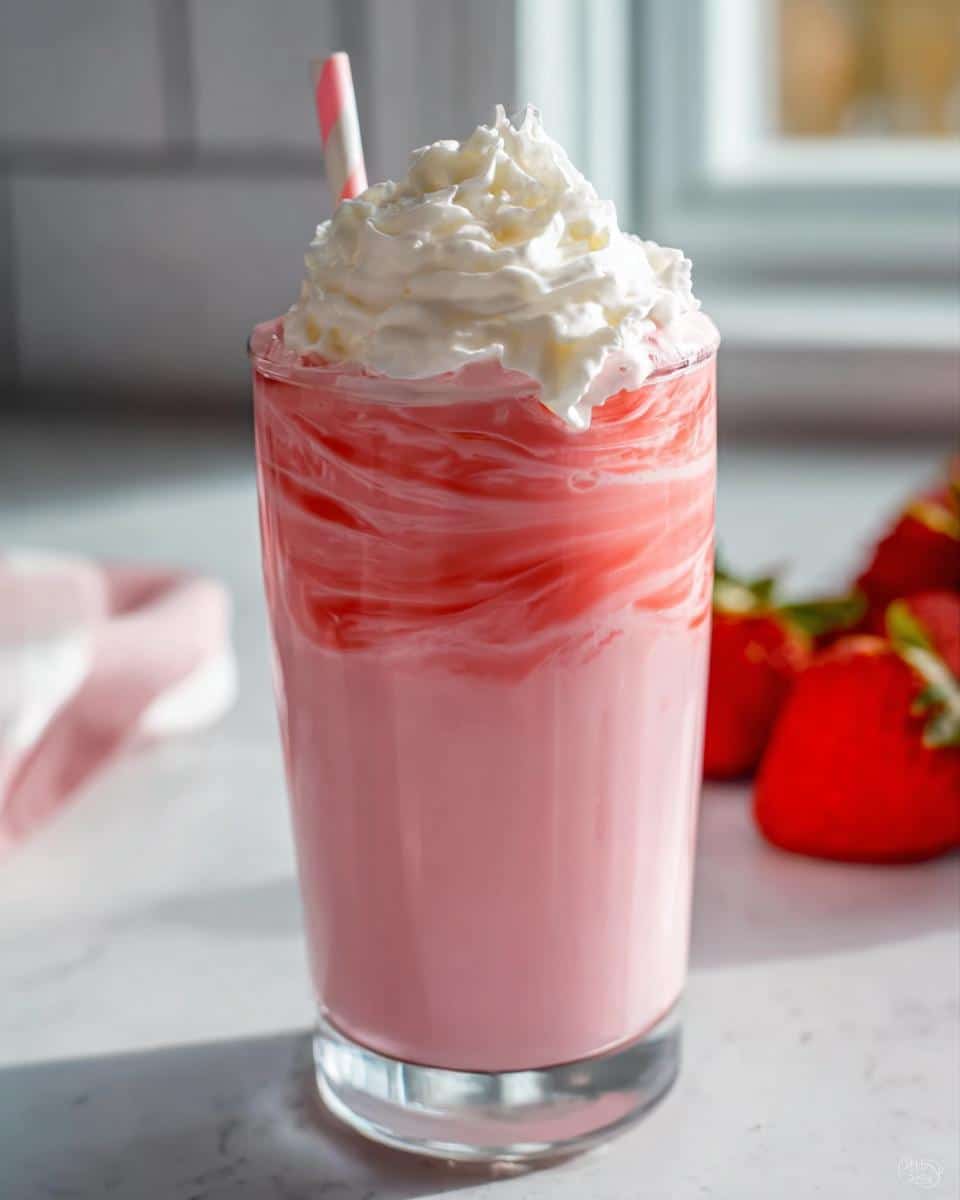
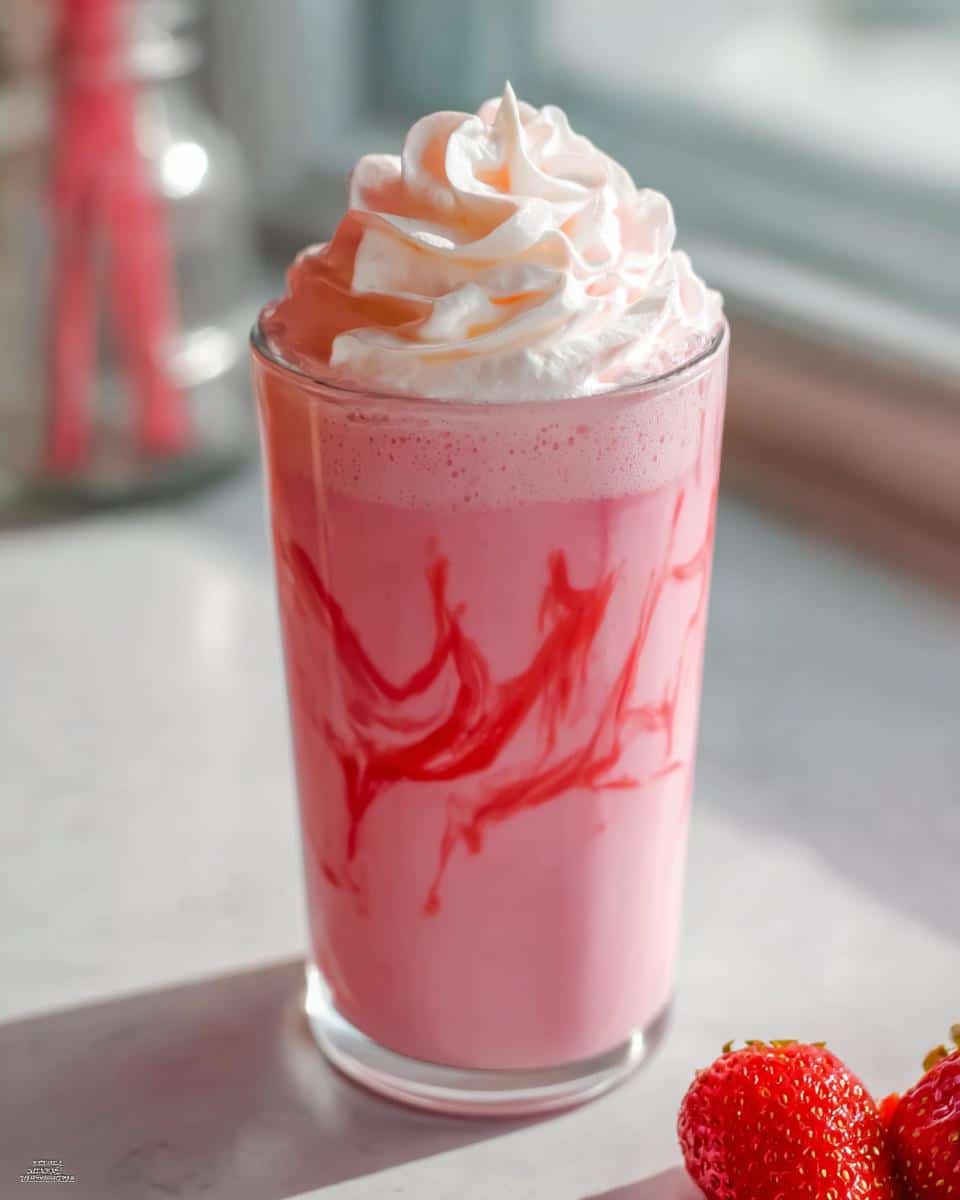
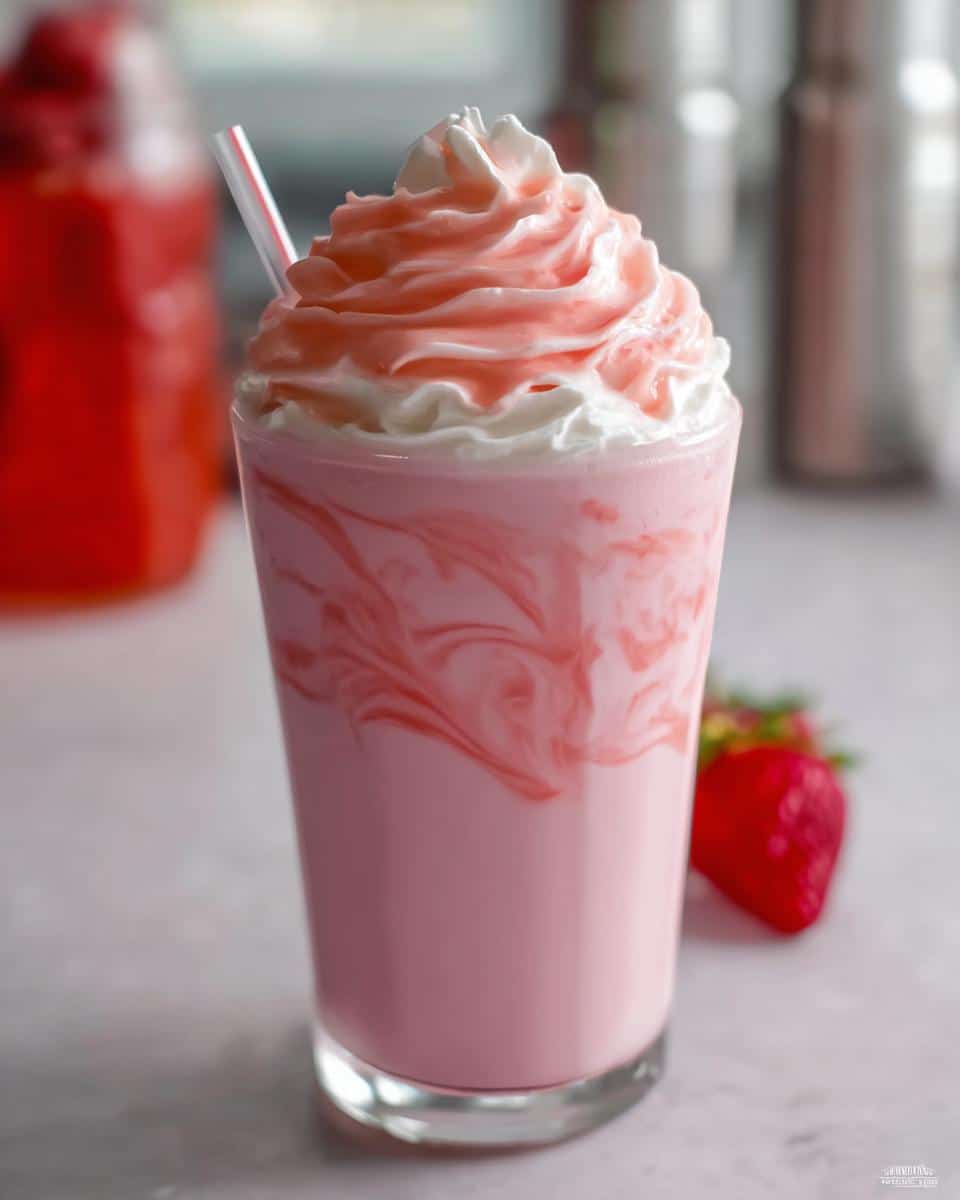
Start by grabbing your favorite glass. Pour in about 3/4 cup of your chosen milk—remember, more fat equals more creaminess, so don’t skimp if you want that luxurious mouthfeel!
Next, add the strawberry syrup. I suggest starting conservatively with just 3 tablespoons. Since our syrup is intensely flavored from all those strawberries we cooked down, you might find that’s plenty. Slowly stir the syrup into the cold milk. Watch how quickly that beautiful pink color blooms through the white milk—it’s magic!
Give it a taste. Too subtle? Add that fourth tablespoon (or maybe even a splash more!). Too sweet for your liking? Just top it off with a tiny splash more plain milk to dilute it slightly. Once you find your sweet spot, don’t forget that optional whipped cream topping! That final peak of white cream over the gorgeous pink drink? Perfection.
Tips for Success Making Creamy Strawberry Milk
Since I’ve made this strawberry syrup more times than I can count, I’ve learned a few tricks to make absolutely sure you get the creamiest, most flavorful milk possible every single time. This isn’t just about following directions; it’s about understanding *why* we do things!
First up: syrup yield. When you’re pressing those cooked strawberries in the strainer, really put your back into it! I try to shake the strainer a bit and then use the spoon—don’t be gentle. Those last few drips are super concentrated flavor waiting to come out, and that’s what guarantees you won’t need much syrup per glass.
Next, let’s talk creaminess. If you want that dreamy, rich texture reminiscent of classic diner strawberry milk, you must use whole milk or 2% milk. Lower-fat options, like skim, just won’t emulsify the same way with the syrup, so you end up with a thinner, more watery pink drink. If you’re avoiding dairy, use oat milk—it has natural fats that mimic whole milk texture surprisingly well!
Finally, manage that sweetness during the assembly stage, not the cooking stage. Never dump in the expected 4 tablespoons right away! Taste it first after 3 tablespoons. If you over-sweeten the syrup batch, you can’t really take it back when mixing into the milk without watering down the flavor. Starting conservative guarantees a perfect match every time. Enjoy that perfectly balanced sweetness!
Ingredient Notes and Substitutions for Creamy Strawberry Milk
One of the great things about making things from scratch is the control you get over what goes into your food. As an RD, I always hear questions about sugar, and yes, you absolutely can pull back on the granulated sugar when you’re making the syrup! I’ve reduced mine by a quarter cup when the strawberries are super ripe in the middle of summer, and it honestly tasted just as great and felt lighter.
The other big substitution question I always get centers around the milk itself, since how creamy this drink feels depends entirely on what liquid you choose. If you are avoiding dairy, don’t panic! You can definitely use plant-based milks, but you have to be strategic about the kind you grab.
Almond milk tends to be very thin, and while it will absorb that gorgeous strawberry color beautifully, the final product won’t have that rich, classic “creamy” mouthfeel we are aiming for. It turns more into a strawberry-flavored juice, which is fine, but not what we set out to make here.
If you’re going the non-dairy route, I highly, highly recommend reaching for oat milk. Oat milk, especially the barista blends, has natural fats and starches that help create a beautiful, velvety texture when mixed with our thick syrup. It truly mimics whole milk better than any other substitute I’ve tried for these sweet drinks.
Remember, the sugar in the syrup is important for structure and preservation, but if you’re watching consumption, testing with a little less sugar during the simmering stage is a smart move. Just make sure you taste the syrup before you chill it so you know what you’re working with when you go to mix your glass!
Making Valentine Mocktails with Creamy Strawberry Milk
Okay, let’s elevate this from a great everyday drink into something truly special! Because this creamy strawberry milk is naturally sweet and beautifully colored, it is absolutely perfect for setting a romantic mood without needing an ounce of alcohol. If you are looking for delightful easy dessert recipes that fit a special evening, look no further than these festive valentine beverages.
This recipe serves as the ultimate base for gorgeous valentine non alcoholic drinks. You don’t need fancy mixology skills, just a little creativity to transform this simple beverage into one of those stunning pink drinks for valentine that looks like it belongs in a fancy café.
Here are my favorite little tricks for turning this into a showstopper!
For that extra bit of warmth, which is lovely in romantic drinks without alcohol, try adding just a tiny splash—maybe just 1/4 teaspoon—of real vanilla extract to your milk before stirring in the syrup. It deepens the background flavor of the strawberries beautifully.
Presentation is everything for that aesthetic vibe! Ditch the regular glasses and pull out some champagne flutes or coupe glasses. When you layer the milk mixture in, you get those lovely, swirling pink ribbons that look so impressive. If you are serving this to the kids, it instantly becomes one of the best valentine drinks for kids because it looks so festive.
Don’t forget the final garnish! Instead of basic whipped cream, maybe top it with a light sprinkling of pink sanding sugar or a few tiny sliced strawberries balanced right on the rim. That little bit of sparkle truly makes this feel like one of those special sweet drinks for valentine that everyone adores. It’s simple, it’s real fruit, and it’s incredibly romantic!
Storage and Reheating Instructions for Strawberry Syrup
This is where we talk about making life easier for yourself! The best part about this whole process is that the strawberry syrup is entirely self-contained and keeps beautifully in the fridge. If you make a big batch, you’re set for multiple days of fresh, creamy strawberry milk whenever the craving hits. I love having this on hand because it means instant nostalgia without the cooking time!
Once your syrup has completely cooled after straining, it’s ready for storage. Pour it into an airtight container. I usually use a clean glass mason jar because they seal up tight, but any glass container with a tight-fitting lid works perfectly. Make sure you use glass, though; plastic can sometimes absorb the fruit scent over time.
You can keep this homemade strawberry syrup refrigerated for up to two full weeks. Seriously, two weeks! The sugar content acts as a natural preservative, so as long as it’s kept cold, you’re going to be enjoying that concentrated strawberry flavor for a while. If you see any separation later on, that’s totally normal—just give the jar a brisk shake before you measure out your serving.
Now, a very important tip: only mix the syrup with the milk right before you drink it! Do not store the prepared strawberry milk. Once the milk is added, even if the syrup was cold, you introduce bacteria faster, and that lovely fresh flavor starts to degrade quickly. So, enjoy the convenience of the syrup storage, but always mix the final glass fresh for the best taste and texture.
If you pull the syrup out of the fridge and it seems a little thick or stiff—totally normal, especially if you left it in the back corner for a few days—don’t worry about reheating it for serving. Just let it sit on the counter for 10 minutes to soften slightly before measuring it. If you absolutely must use it immediately and it’s very firm, you can gently warm just the portion you need in a tiny bowl in the microwave for about 10 seconds. But honestly, if you are planning ahead, the syrup chills down fast enough that you can usually just plan for that little bit of counter time!
Frequently Asked Questions About Creamy Strawberry Milk
It’s funny how the simplest recipes always bring up the most questions! Since we are trying to achieve that perfect nostalgic flavor, but with much cleaner ingredients, I wanted to quickly clear up some things people often ask me about this creamy strawberry milk.
Can I make this Creamy Strawberry Milk recipe vegan?
Oh, absolutely! That’s one of the joys of making things yourself—you pick the ingredients! You can totally use non-dairy milk like oat, soy, or almond in place of dairy milk when you assemble the finished drink. Just keep in mind what I said earlier about creaminess: the texture really depends on the thickness of the milk substitute.
For the richest experience, look for a full-fat oat milk or a soy milk, as they have more body to them than something like skim or standard almond milk. You’ll still get that gorgeous flavor, even if the texture is just slightly different from traditional dairy milk. It works great for everyone!
How long does the homemade strawberry syrup last?
This is where making a batch ahead of time really pays off. Because of the sugar content, this homemade strawberry syrup stores surprisingly well in the refrigerator! If you keep it tightly sealed in a jar—I prefer glass for this—it should stay fresh and flavorful for a good two weeks. That means you can just pull it out whenever the craving for a quick, sweet drink hits.
If you notice the syrup thickening up after a few days, that’s just the sugar settling in! Just let the sealed jar sit on the counter for about 10 minutes before you measure out what you need, or give the jar a good shake. My advice, especially regarding health and safety, is always to make sure you are using clean utensils when scooping out the syrup, as that helps avoid introducing anything that could shorten its shelf life. You can read more about my general safety approach in my official disclaimer, but really, two weeks is a safe window for this fruit syrup!
Is this recipe suitable for kids or should I use less sugar?
This is my favorite question! I developed this recipe thinking about my nieces and nephews—it’s one of my favorite valentine drinks for kids because it tastes so fun and special! When serving it to younger kids, I highly suggest you start with less syrup.
The recipe calls for 3 to 4 tablespoons of syrup per glass, but for little ones, start with just one or maybe two tablespoons, stir well, and taste it first. Since our syrup is cooked down and naturally sweet from the fruit, you might find that a smaller amount hits the perfect sweetness level for them without needing as much added sugar overall. It’s all about adjusting that final blend!
Creamy Strawberry Milk
Ingredients
Equipment
Method
- Place the strawberries, sugar, and water in a saucepan set over medium heat. Simmer for about 10 to 12 minutes, stirring occasionally, until slightly thickened.
- Set a fine mesh strainer over a bowl. Pour the strawberry mixture through the strainer. Use the back of a spoon to press the strawberries against the strainer, extracting as much juice or syrup as possible. Scoop off any foam on top of the syrup.
- Chill the syrup.
- To serve, pour 3/4 cup of milk into a glass. Add the strawberry syrup to taste, stir, and serve. Add whipped cream if you want a topping.