There’s something magical about food that plays tricks on your eyes, right? I’m Sarah Bennett, and as a Culinary Educator, my whole mission is making those show-stopping visual moments feel totally achievable in your home kitchen. We’re diving headfirst into illusion cooking today with my absolute favorite surprise dish: the Faux Fried Chicken Dessert. This isn’t some complicated pastry; it’s creative fun that looks like comforting savory food but delivers a sweet, wonderful punch. Trust me, you’re going to want to see the look on people’s faces when they take that first bite! If you love these kinds of surprises, be sure to check out more of my best trend-setting recipes for inspiration.
Why You Will Love This Faux Fried Chicken Dessert
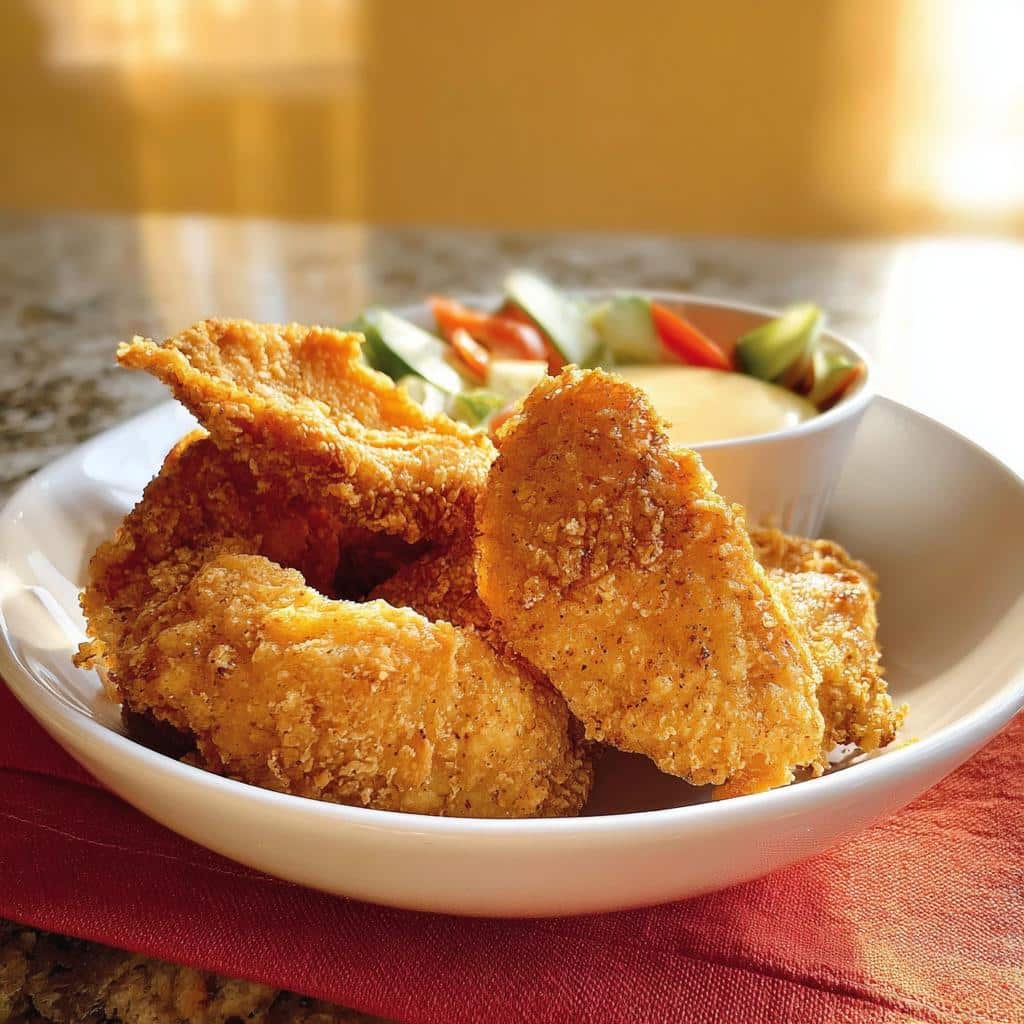
Honestly, this dessert is pure joy packed into a crispy-looking coating. It’s all about that initial shock and awe factor. I’ve seen this trick done dozens of times, and the laughter never gets old!
Here’s why you need this on your next party menu:
- Total visual drama: It looks exactly like the real deal!
- Surprisingly simple execution means the “wow” factor doesn’t mean hours of work.
- It’s an instant conversation starter for any gathering.
Serving up this kind of fun is why I love cooking, and you can find more of my quick, fun ideas over in my easy dessert recipes section.
Equipment Needed for Your Faux Fried Chicken Dessert
Okay, let’s talk tools! Because this visual trick relies on baking rather than frying, we keep our equipment list super simple. You won’t need any fancy deep fryer or splatter guards, which is a huge win in my book as a busy home cook.
First up, you absolutely need your standard kitchen gear: a reliable oven, of course, and a couple of decent mixing bowls—one for your marinade mess and one for your breading setup.
Now for the real secret to keeping things clean and ensuring that coating looks perfect: you need two baking sheets. One of those sheets will be oiled and heated in the oven before you start; that’s our magic trick for getting that crispy look from the oven. The second sheet is purely for holding your breadcrumbs. Trust me, separating the wet dipping from the dry coating on two different surfaces makes all the difference in how convincingly realistic these look!
Ingredients for the Faux Fried Chicken Dessert Components
Alright, let’s gather our bits and pieces! Because this visual trick has two main parts—the dipping element that helps create the ‘crust’ and the sauce on the side—we need to keep things organized. I know the ingredient list looks a bit like a savory recipe, and that’s intentional! Remember, the chicken breast here is just the structure to carry the sweet coatings we are about to apply. It helps hold the shape perfectly. For more fun assembly ideas similar to this, don’t forget to check out my thoughts on kid-friendly granola bars—we love making things look like one thing but taste like another around here!
For the Yogurt Sauce
This sauce actually needs time to chill out and let those flavors marry, so mix this first. Think of this as the bright, tangy dip that makes the whole illusion pop!
- 1/2 cup plain 10% yogurt
- 2 tbsp Dijon mustard (Don’t panic! We adjust the sweetness later, but this adds necessary body right now.)
- 1 tbsp chives, finely chopped
- To taste Tabasco sauce (Just a drop or two for visual interest, we aren’t making it spicy!)
For the Marinade and Coating of the Faux Fried Chicken Dessert
This part gets messy, so get those hands ready! This mixture is what gives our structure that ‘seasoned’ look before it hits the crunchy outer layer that will eventually become sweet.
- 1/4 cup plain 10% yogurt
- 1/4 cup Dijon mustard
- 2 tbsp flour
- 2 tsp chili powder
- 1/2 tsp ground ginger
- 3 egg whites
- 1.5 lb boneless, skinless chicken breasts, cut into strips about 1 inch wide (Remember, this holds the shape, the flavor enhancement comes in the coating!)
- 2 tbsp vegetable oil (For heating the pan)
- 2 cups dried breadcrumbs (These are essential for the crispy texture!)
Step-by-Step Instructions for the Faux Fried Chicken Dessert
Okay, it’s showtime! I want you to think of this assembly process like painting a very delicious picture. Follow these steps precisely, and you’ll land that perfect, convincing crust everyone expects. If you’re looking for recipes to tackle with the kids, these steps are surprisingly fun for little helpers who love getting messy! You can see more creative fun food ideas right over in my guide to easy recipes for kids.
Preparing the Sauce and Preheating
First things first, make that yogurt sauce if you haven’t already, cover it up, and pop it in the fridge. It needs that chill time! Next, we need heat. Set your oven right up to 350°F (180°C). Make sure that middle rack is ready to go. Also, take that one baking sheet we talked about—the one that’s going to create our crispy base—and carefully drizzle about 2 tablespoons of vegetable oil over it. We’re heating this pan up right away so the coating gets an instant blast of heat when it hits the metal.
Marinating and Coating the Faux Fried Chicken Dessert Pieces
Now, grab your chicken strips from the marinade bowl. You don’t want them dripping wet, so gently shake off any big puddles of liquid. We need good adhesion, not a soggy mess! Roll each piece carefully through your dry breadcrumbs. You really want to pat the crumbs on so they stick everywhere. Once they are fully coated, lay them out on your *second* baking sheet. This is the part you can’t skip: let these coated pieces sit out for about 5 minutes. Trust me, letting that breadcrumb surface dry slightly is the secret to getting that rough, crispy, authentic-looking crust when it bakes.
Baking for the Perfect Appearance
Carefully pull that hot, oiled baking sheet out of the oven—watch your fingers! Quickly arrange your dried, breaded pieces onto that hot surface. They should sizzle just a tiny bit as they make contact. That immediate heat transfer is what helps mimic the look of deep frying. Pop the whole tray back into the 350°F oven and let them bake for about 15 minutes. You’re looking for a deep golden color that screams savory chicken, not pale sweet dough!
Tips for Making Your Faux Fried Chicken Dessert a Success
You’ve nailed the technique, but now we want the final presentation to be absolutely flawless, right? Since Sarah Bennett, your friendly Culinary Educator, focuses heavily on the visual story of food, here are my little insider tricks to make this look less like ‘baked good’ and more like the best picnic chicken you’ve ever seen.
If you’re worried about the coating sticking or looking too pale, don’t be! The success of this illusion comes down to two key assembly steps we discussed, but let’s nail them down one more time.
First, that 5-minute drying time for the breadcrumbs is non-negotiable. If you skip it, the crumbs absorb moisture and just sort of melt instead of hardening into that beautiful, craggy, fried look. They need to feel just slightly tacky—like they are ready to grab onto the heat perfectly.
Next, let’s talk color. That hot, oiled pan is our biggest helper here. When those breaded pieces touch that hot surface, you get immediate browning on the bottom, which is exactly what happens when you fry. If you notice some spots are a little light after 15 minutes, don’t panic! You can carefully flip them over for the last two minutes of cooking just to bump up the color on the other side. Keep an eye on them so they don’t get too dark, though, because we want golden brown, not burnt!
If you want to learn more about my teaching philosophy and how I approach visual cooking, you can always peep my bio page over on the About section. Happy tricking!
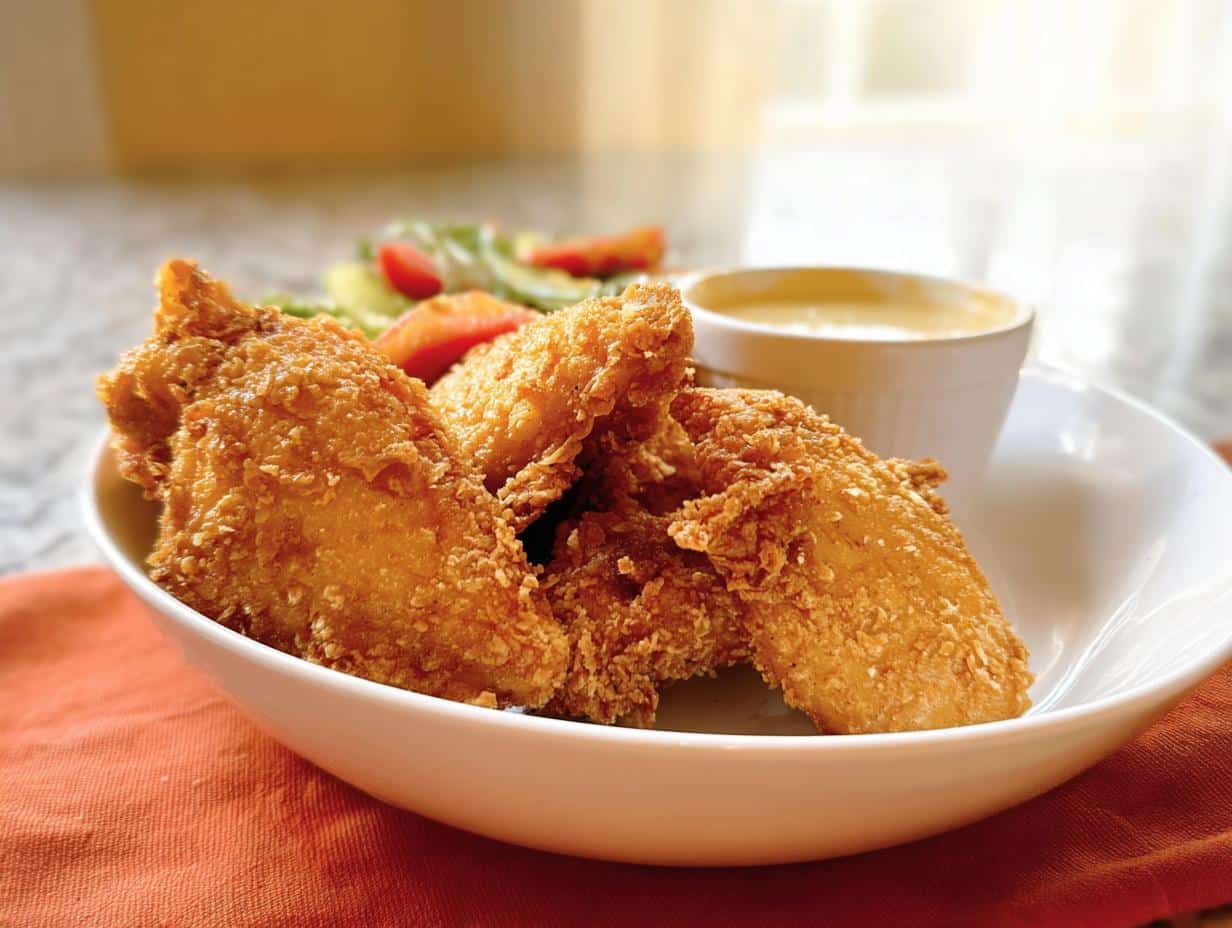
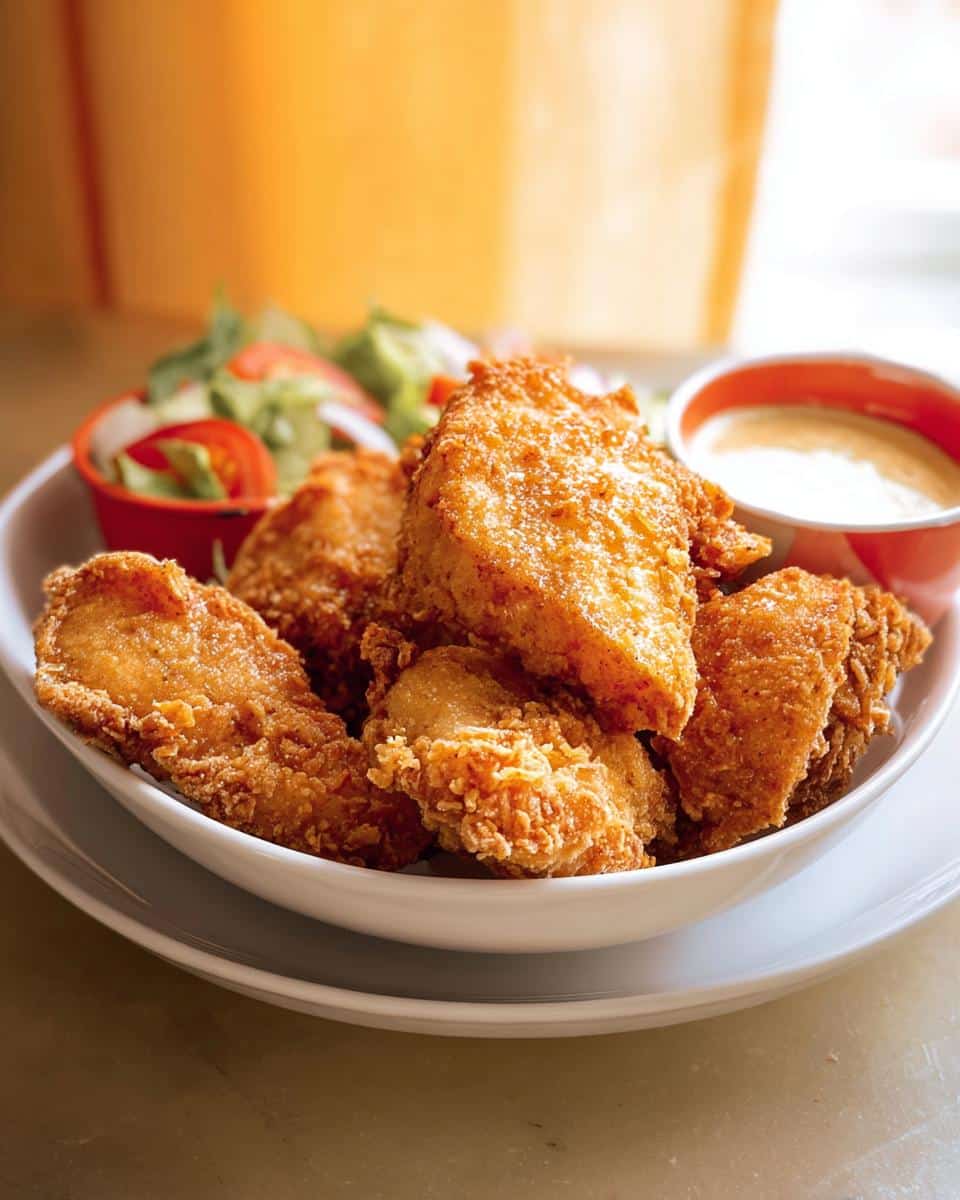
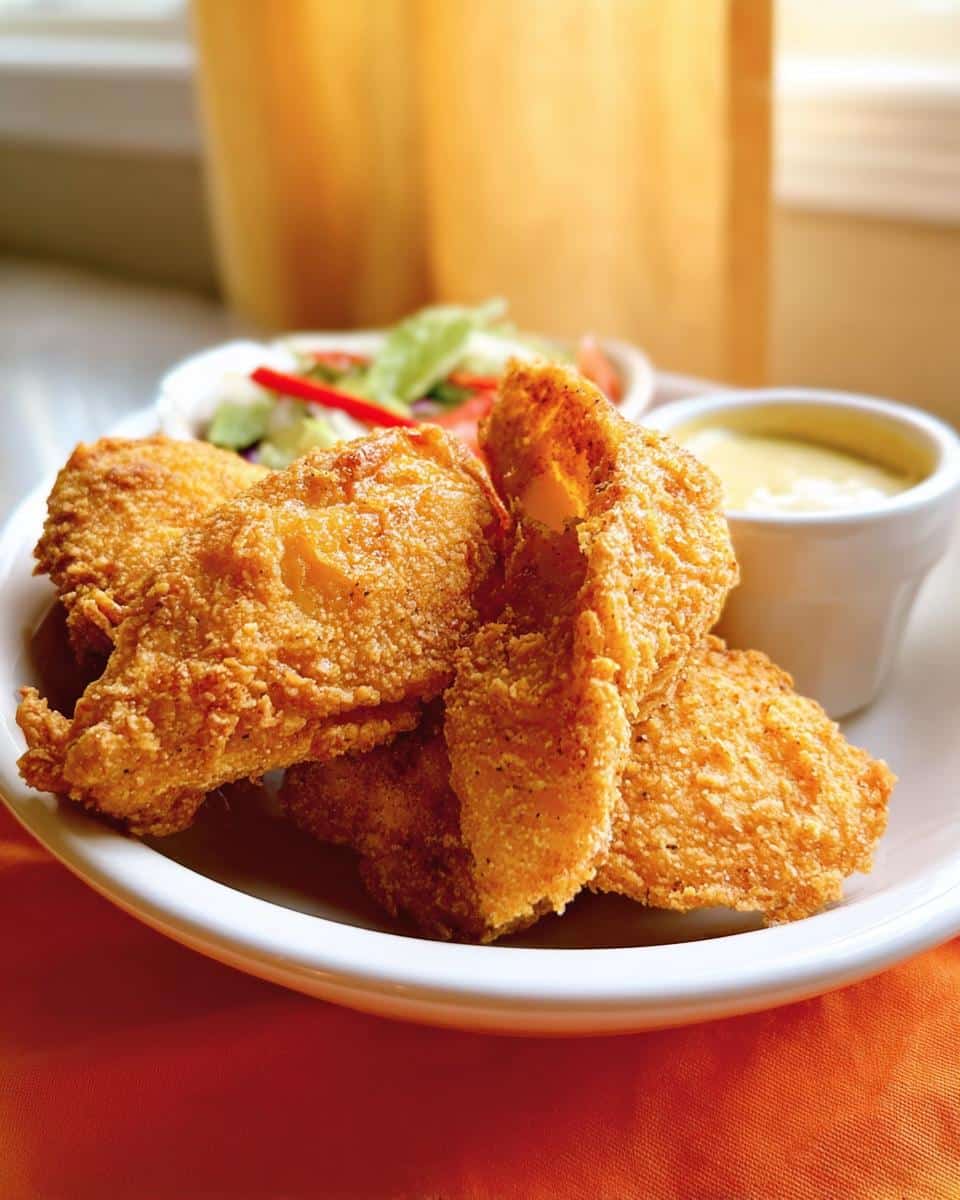
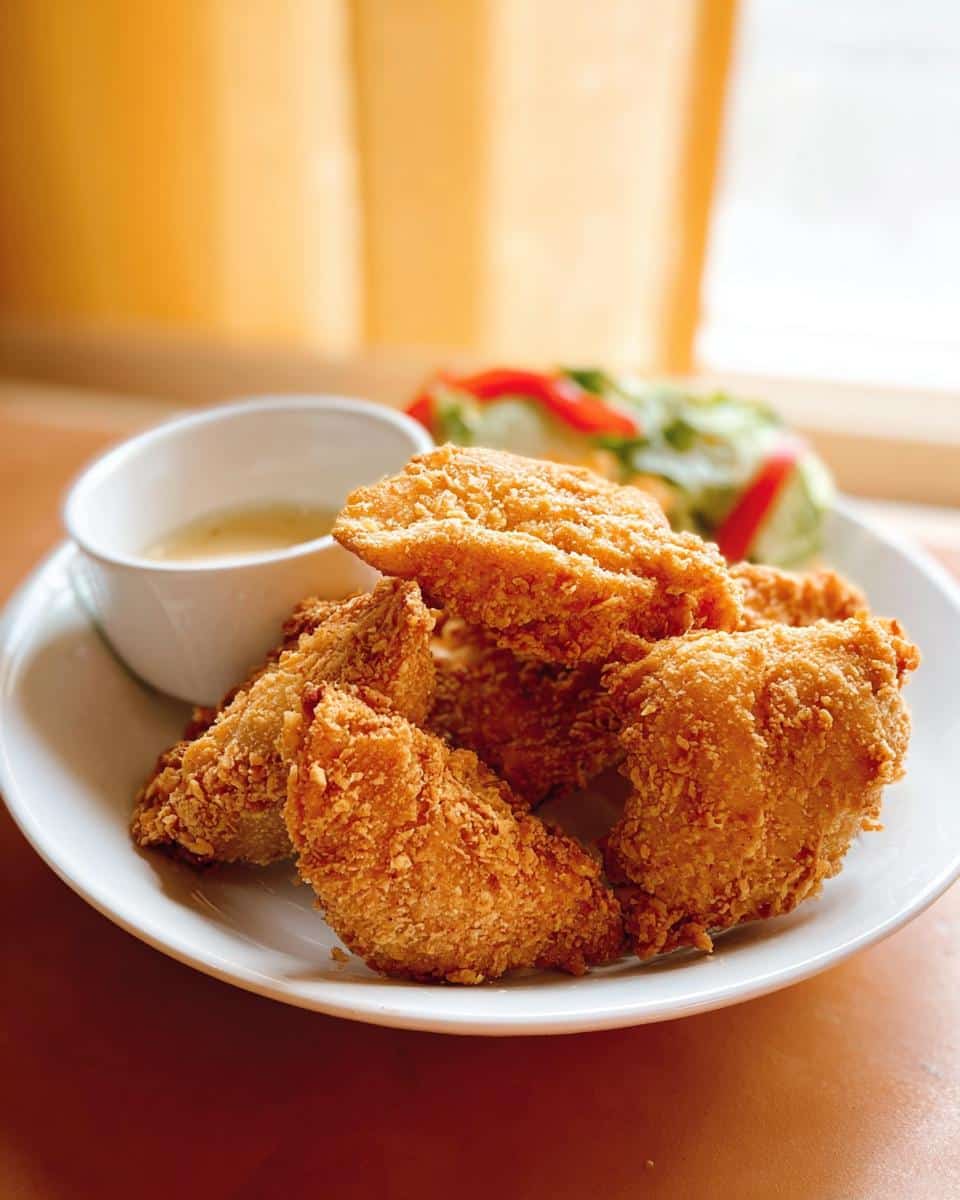
Serving Suggestions for Your Faux Fried Chicken Dessert
Okay, now that you’ve got your perfectly cooked, shockingly sweet “chicken,” the presentation is everything! This isn’t just a dessert; it’s an experience, and that means treating it right when you bring it to the table. This dish is a superstar for parties or when you need an impressive centerpiece that won’t stress you out. Since we’re aiming for that high visual impact, think about how you usually present savory appetizers.
I always suggest making use of nice food platters. Forget the cake stand for a minute; serve these pieces piled high on a wicker basket lined with checkered paper. It really sells the illusion! They look fantastic when mixed in with actual savory items if you’re serving a large spread, just be sure to tell your guests which basket has the good surprises!
If you’re using this for a major celebration, like as a fun treat for Happy Birthday Fun, add a small, colorful flag toothpick into a few pieces, or stack a couple of pieces next to a giant candle. People will be trying to inspect your handiwork before cutting in!

And don’t forget that cool yogurt sauce we made! You can’t just pour it over those crispy bits; that ruins the look! Serve that chilled sauce on the side in tiny little ramekins, just like you would for actual dipping sauce. This keeps the “fried” coating dry and crispy until the moment someone decides to dip. It’s these little details that take your trompe-l’œil from “neat idea” to “culinary masterpiece.”
Storage and Reheating Instructions for Faux Fried Chicken Dessert
Now, let’s talk about the day after the party, because I know you’ll have tasty remnants! Since this dish relies so heavily on that convincing, crispy exterior, we have to manage leftovers carefully. If you just toss these pieces in an airtight container and stick them in the fridge, that lovely crunchy coating will definitely absorb some moisture and soften up. It’s science, I’m afraid!
The good news is they are still absolutely delicious, they just lose that immediate “just-out-of-the-oven” texture. If you plan on saving them, try separating the “chicken” pieces from the yogurt dipping sauce right away. Keep both components tightly sealed. The sauce might get a touch tarter as it sits, which is often okay, but sealing it prevents any outside fridge smells from interfering.
To bring back some of that beautiful crispness, you’ll want to skip the microwave! Microwaving leftover coated foods is always a quick trip to mushville. Instead, spread your pieces out on a clean baking sheet—the same one you used for baking works perfectly! Set your oven to about 350°F (180°C).
Just give them about 8 to 10 minutes in that dry heat. This gentle reheat dries out the exterior just enough to crisp it back up beautifully without overheating the inside structure. It won’t be *exactly* like they just came out of the oven, but it beats a soggy snack any day. Enjoy those trick-treat remains!
Frequently Asked Questions About This Faux Fried Chicken Dessert
Whenever I share photos of this amazing visual trick, a ton of questions pop up! I totally get it; you want to make sure your party trick lands perfectly. Here are the things I hear most often from folks planning their own spectacular illusions. If you need to reach out about something else, don’t hesitate to use the contact page!
Can I substitute the chicken breast for a sweet base?
Oh, absolutely, you can! If you’re aiming for a 100% sweet experience, the chicken breast is really just there to give us that perfect, uneven shape for the coating to cling to. For a real dessert vibe, try cutting up dense pound cake chunks or even thick brownie squares into similar strips. Coat those sweet bases exactly the same way, and you’ve nailed a fantastic, fun treat. It’s a great alternative if you are planning Easter Baking Ideas or something similar where savory pieces just don’t fit the menu.
What makes this a good April Fools Dinner centerpiece?
This is peak April Fools gold, my friends! The reason it works so well for an April Fools Dinner is the commitment to the visual lie. You serve it up hot, usually right after a savory course, or present it on a wooden board that screams barbecue. When everyone scoops up a piece expecting something salty and savory, the sweet crunch and tangy dip deliver the most wonderful surprise! It’s a harmless, hilarious prank that everyone enjoys.
Are there options for Low Cal Snacks versions?
That’s a great question, especially if you are looking at Low Cal Snacks or Healthy Snack Ideas! Since the visual structure requires a firm base, cutting calories is tricky. However, you can definitely adjust the dipping sauce to be lighter! Instead of full-fat yogurt for the sauce, use non-fat Greek yogurt. You’ll still get the tang, but you shave off some fat. For the structural base, using slightly leaner cuts or focusing on fruit bases (if you switch methods entirely) will help make it align better with your goal for Healthy Snacks.
Understanding the Nutritional Estimate for This Faux Fried Chicken Dessert
Now, I know many of you amazing cooks out there are always tracking your macros or keeping an eye on portion sizes, especially when exploring fun recipes like this! Because this Faux Fried Chicken Dessert is such a visual creation, the final nutritional breakdown gets a little fuzzy for me, and I have to be honest with you about that.
Since the base structure can swing wildly—maybe you use brownie chunks, maybe you use pound cake, or maybe you’re testing out your own innovative sweet substitute—I just can’t give you a reliable number for calories or fat content here.
This recipe is all about the fun, the surprise, and the presentation! For tracking purposes, you’ll definitely need to calculate your own totals based on the exact sweet component you choose to coat and bake. Think of it this way: every batch is custom-made, and so should the nutrition facts be!
For more general guidelines on transparency and how I write recipes here at Top Chicken Eats, please always check out the official site disclaimer page. It helps us both keep things clear!
Faux Fried Chicken Dessert
Ingredients
Equipment
Method
- For the Yogurt Sauce: Combine all sauce ingredients in a bowl. Season with salt and pepper. Refrigerate until you serve the dish.
- Preheat your oven to 350°F (180°C) with the rack in the middle position.
- For the Marinade: Combine all marinade ingredients in a bowl. Season with salt and pepper. Add the chicken strips and toss to coat them completely.
- Oil one baking sheet and place it inside the oven to heat up.
- Spread the breadcrumbs out on a separate baking sheet.
- Drain the marinated chicken strips slightly. Roll each strip in the breadcrumbs, making sure the coating is even. Let the coated strips stand for about 5 minutes until the surface of the breading feels somewhat dry.
- Remove the hot baking pan from the oven. Place the breaded chicken strips onto the hot pan. Return the pan to the oven and bake until the chicken is cooked through, about 15 minutes.