Listen, you know how sometimes you just crave that fiery, tangy punch of buffalo wings but you’re trying to keep things light, or maybe you just need fantastic Gluten Free Dinner Ideas? I get it! When I first created this recipe down in Asheville, I wanted that classic flavor without chasing down obscure flours or dealing with soggy messes. Trust me when I say this Gluten Free Buffalo Cauliflower is the real deal. It nails that crispy exterior and spicy sauce combo perfectly, whether you’re serving it up as a game-day hero or just a satisfying meatless main dish. It’s proof that comfort food can be exciting and totally fit your lifestyle!
Why This Gluten Free Buffalo Cauliflower Recipe Works So Well
I always aim for big flavor payoffs without all the fuss. This recipe shines because it’s so straightforward but tastes like something you’d order at your favorite spot! It’s genuinely one of my favorite healthy gluten free recipes because it lets you sneak in those veggies while satisfying that buffalo craving.

- It delivers that perfect level of spice without becoming heavy.
- The almond flour coating creates a crackling crust that stays crisp even after saucing, which is rare!
- It’s an incredible vegetarian main dish, perfect for anyone looking for great easy gluten free recipes.
- You get bold, satisfying flavor that feels indulgent!
Gathering Your Ingredients for Gluten Free Buffalo Cauliflower Bites
Okay, let’s talk about what you need! Getting this right from the start sets you up for success. Since we are making Gluten Free Buffalo Cauliflower Bites, we really need to focus on quality binders since we aren’t using traditional wheat flour. Don’t worry; almond flour is our secret weapon here, and it locks in the crunch beautifully!
What I’m laying out here is perfect for about two modest servings, making it perfect if you’re just starting out or need a quick snack. Make sure you grab a good quality buffalo sauce and your spices are fresh—that’s where all the magic comes from!
For the Cauliflower and Sauce
This part is simple, but that one head of cauliflower needs to be perfect.
- One whole head of cauliflower—try to get one that’s nice and firm, yielding about two cups once it’s chopped into bite-sized pieces.
- About 1/2 cup of your absolute favorite buffalo sauce. If you’re using a store-bought kind, check the label just to be sure everything agrees with your lifestyle!
For the Gluten Free Coating
This is where we create that shatteringly crisp shell. Pay attention to these measurements—they are crucial for getting that perfect, non-soggy finish.
- 1/2 cup of almond flour (this is our gluten-free superstar binder!). Make sure it’s finely ground.
- 1 teaspoon of paprika—I use sweet paprika, but if you want a little heat kicked up here, go for smoked hot paprika!
- 1 teaspoon of garlic powder. Don’t skimp here; we need that savory foundation.
- 1 teaspoon of onion powder.
- 1/2 teaspoon of freshly cracked black pepper. Trust me, fresh pepper makes a huge difference in flavor depth.
Mastering the Preparation Steps for Perfect Gluten Free Buffalo Cauliflower
Alright, now that we have our beautiful ingredients, it’s time to get our hands dirty! This process is all about building layers—we want that creamy cauliflower protected by a crispy shell that loves to soak up the buffalo zing. Following these steps exactly is how we make sure this isn’t just some soggy vegetable disappointment. Remember what I learned from my Grandmother? Even vegetables deserve respect; I always give the cauliflower a good, vigorous scrub, even if it looks clean, just to make sure every speck of grit is gone before we start chopping!
Prepping the Cauliflower Florets
First things first: chop your head of cauliflower into bite-sized florets. They should be uniform so they cook evenly—think little nuggets, not giant crowns. After chopping, you need to wash them—really wash them. Then comes the crucial part—the drying! Use a clean kitchen towel or paper towels and pat every single piece bone-dry. Seriously, water is the enemy of crispiness in the air fryer, so don’t rush this step!
Coating and Seasoning the Gluten Free Buffalo Cauliflower
We do this in two stages for the best result. Get your buffalo sauce ready in that big bowl. Toss all your dry cauliflower florets right into that sauce until every surface is slick and bright orange. Don’t leave any white spots! Once they are sauced up, transfer them right over to your bowl of seasoned almond flour and spices. Toss them gently but thoroughly. You want a nice, slightly thick coating of the dry mix hugging every bit of that buffalo sauce. Think of it like giving your little veggie wing a protective, spicy jacket before its flight in the air fryer. For more air fryer wisdom, check out some of my tips over on my favorite air fryer meals!
Air Frying Instructions for Crispy Gluten Free Buffalo Cauliflower
Now for the fun part—the air fryer! This step takes your coated, seasoned cauliflower from raw to righteous in just about 20 minutes. This is where we achieve that beautiful crispness that makes these bites so addictive. Remember, we are aiming for that perfect texture you see in great Air Fryer Gluten Free Recipes!
First, preheat that basket to 350°F—not too high, or that almond flour coating might burn before the inside cooks. Once it’s hot, gently place your coated cauliflower pieces into the basket. And here is the main rule, people: DO NOT CROWD THEM. Seriously, give every single floret some elbow room. If they are touching too much, the steam gets trapped, and boom—soggy buffalo disaster!
Air fry them for 20 minutes total. Around the 10-minute mark, give that basket a good shake to flip them over. They should come out golden brown and perfectly crunchy. Serve them immediately while they are hot and spicy!
Tips for Making the Best Gluten Free Buffalo Cauliflower Every Time
Look, even though this is one of the simpler recipes I share, there are always little tricks that take something good and make it absolutely unforgettable. I picked up these pointers over years of tinkering in my kitchen, trying to perfect that crunch factor. When you’re working with Gluten Free Buffalo Cauliflower, sometimes the smallest detail makes the biggest payoff!
When choosing your buffalo sauce, this really matters! I tend to go for brands that use apple cider vinegar in their base, as that sharp tang cuts through the richness beautifully. But honestly, whatever gets your taste buds singing is the right choice for you. For refining texture, I sometimes add just a tiny whisper of cornstarch—or arrowroot powder if you prefer—to the almond flour mix, just to help the dry coating adhere super tight. It’s not necessary, but it helps lock in that crispness, which is what we all want, right?
If you want more ideas on flavor upgrades, you can always check out some of my other easy savory recipe ideas for inspiration. Happy cooking, y’all!
Serving Suggestions for Your Spicy Gluten Free Buffalo Cauliflower
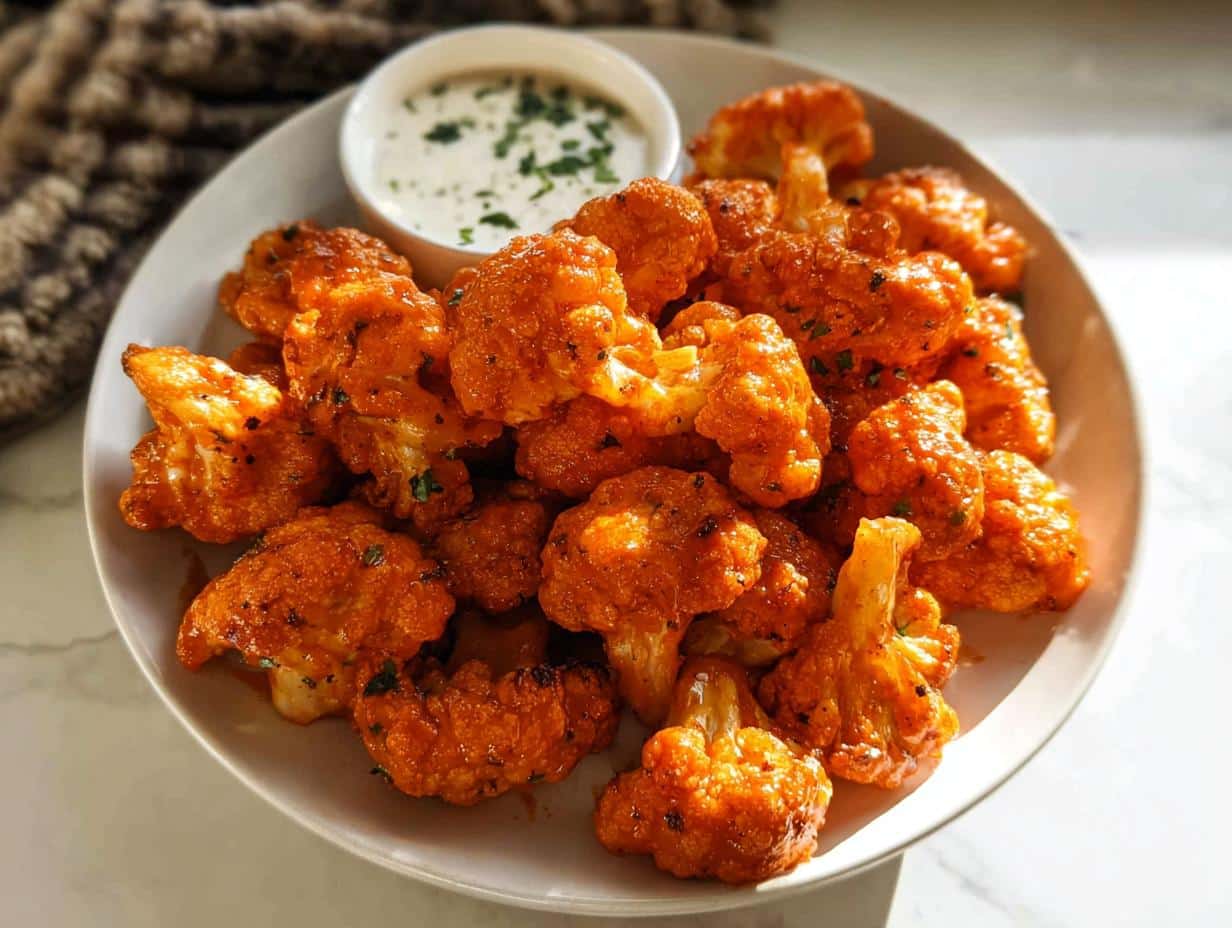
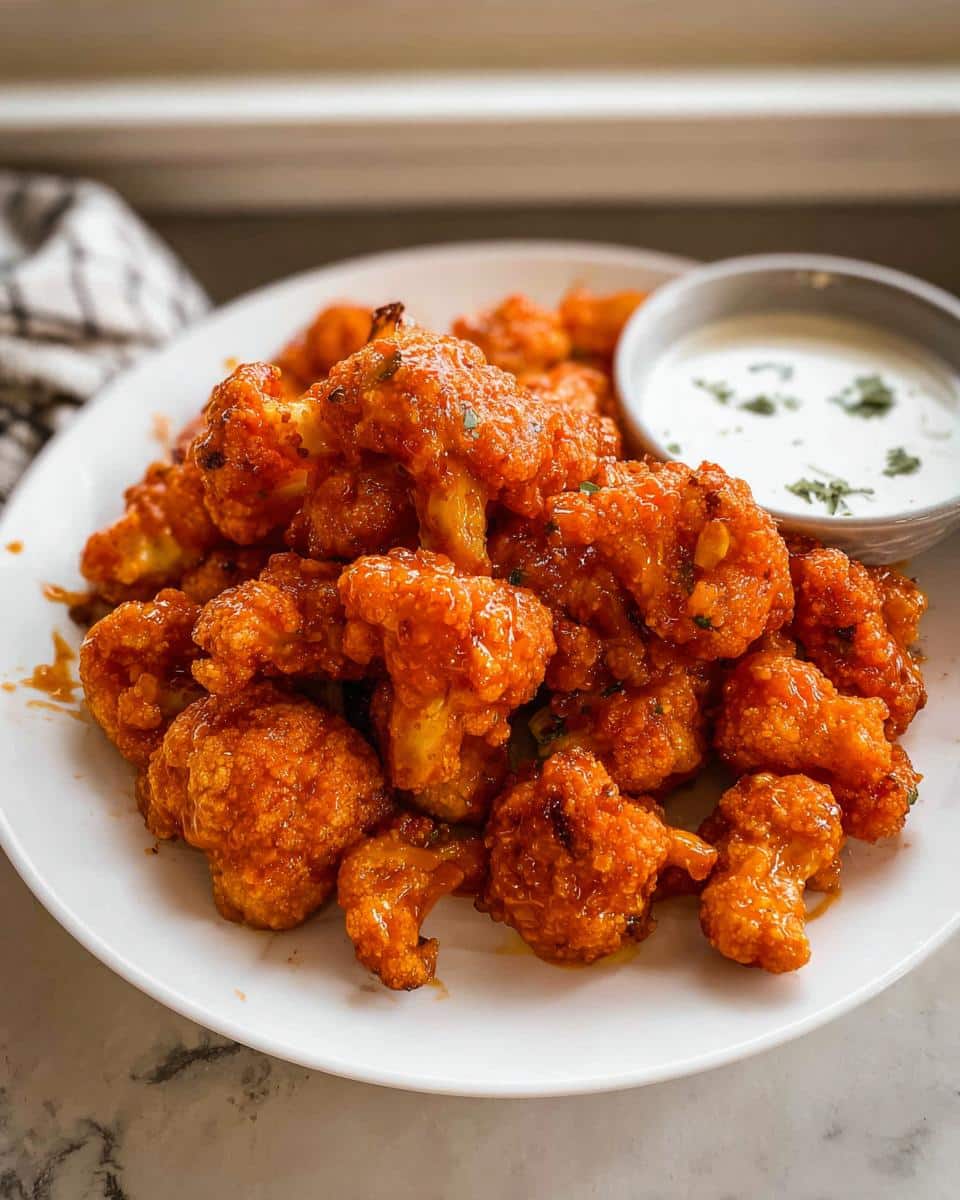
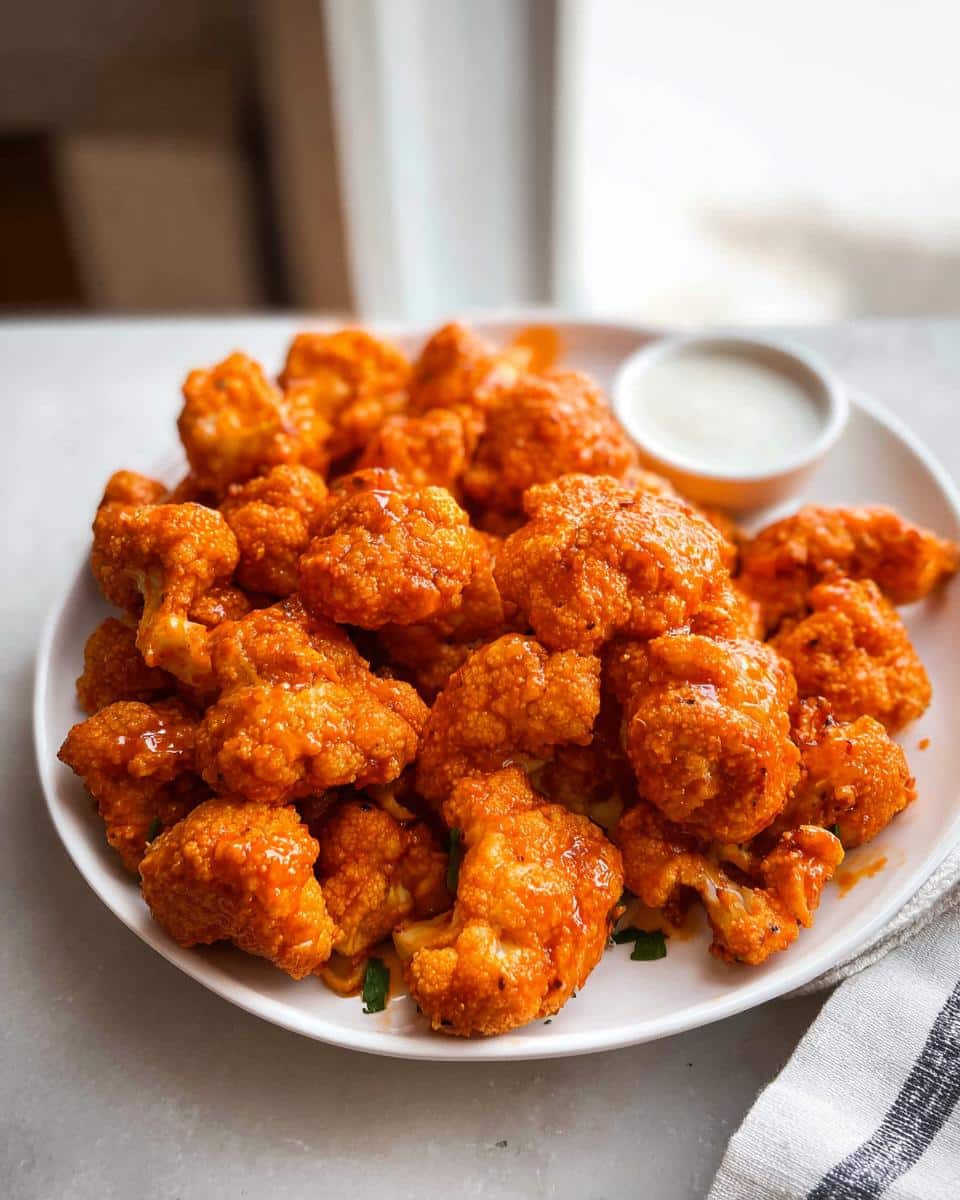
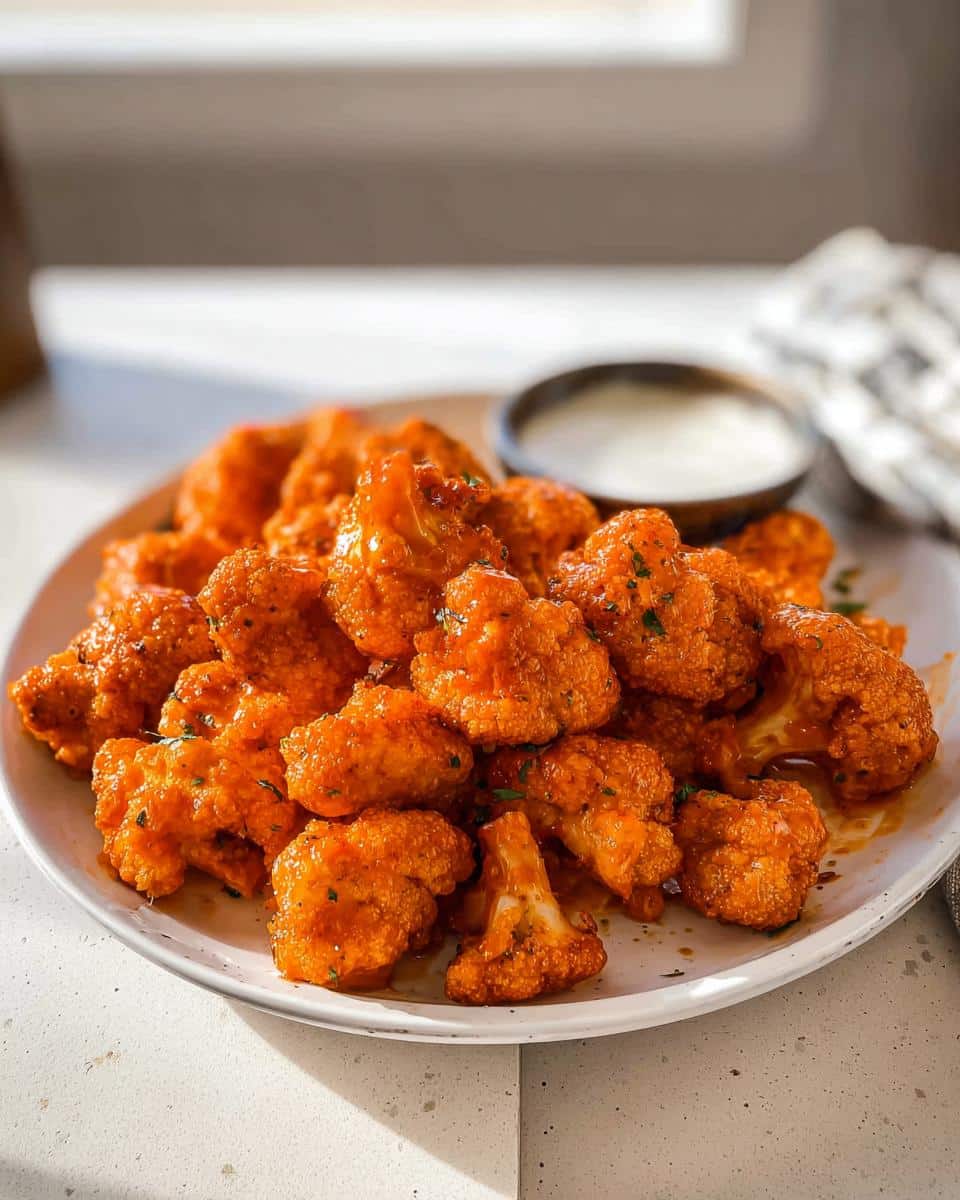
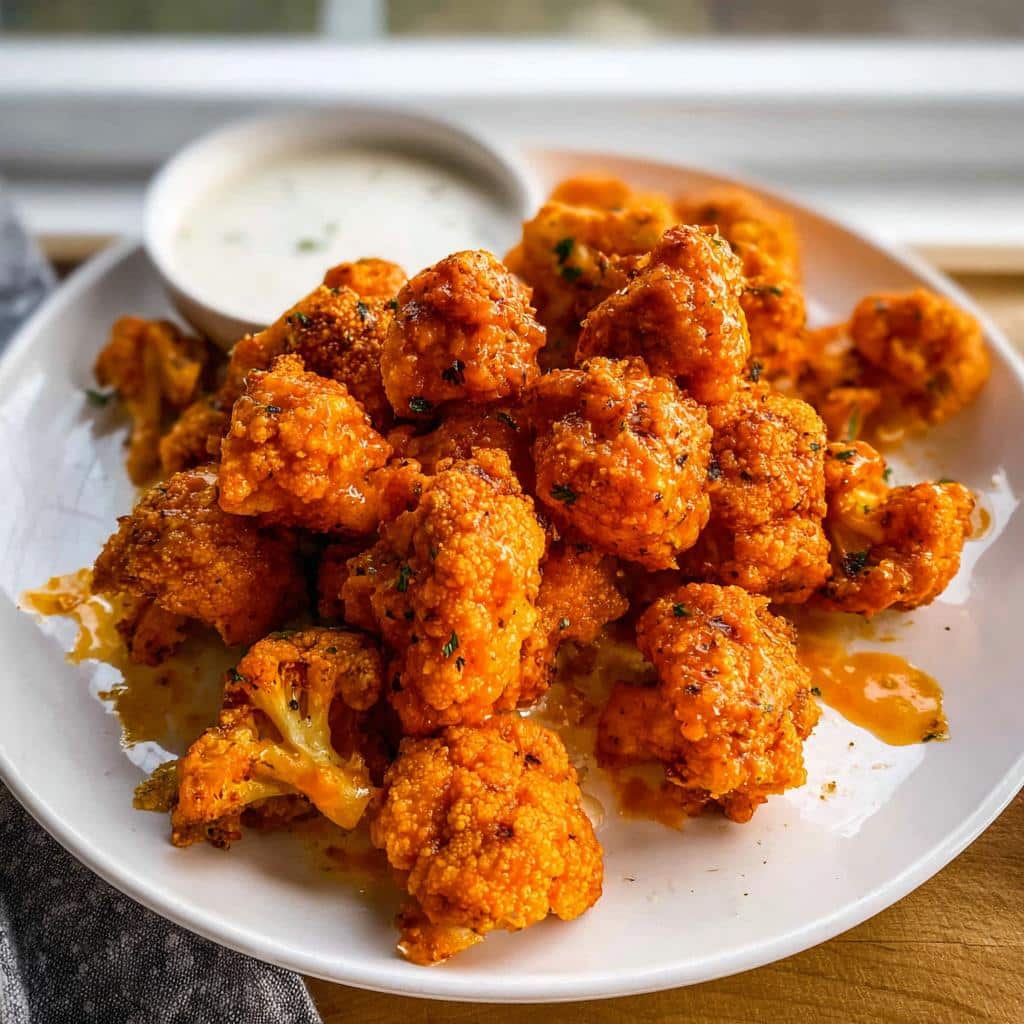
You’ve made the perfect batch of spicy, crispy bites—now what? They are fantastic all on their own as a game-day snack, of course, but you might want to build them into a real meal! Dipping is mandatory here; you absolutely need a cool counterpoint to that heat. I swear by a homemade dairy-free ranch, but a good quality blue cheese dressing works wonders too!
If you want to turn this into substantial Gluten Free Meal Prep for lunch, try serving these bites over a bed of crisp romaine lettuce with extra celery sticks and maybe some hearty chickpeas for an extra boost of protein. Head over to check out my posts on the best High Protein Gluten Free additions; the cauliflower pairs so well with beans or lentils if you skip the cheese dip!
Storage and Reheating Instructions for Leftover Gluten Free Buffalo Cauliflower
If you somehow manage to have any of this spectacular Gluten Free Buffalo Cauliflower remaining, listen up—we need to keep that crunch alive! The number one rule is: keep them away from the fridge air if you can get away with it. Once sauced and refrigerated, they will inevitably soften up slightly. Store leftovers in an airtight container at room temperature for a good few hours, but for longer storage, the fridge is necessary.
Do yourself a huge favor and skip the microwave! Microwaving guarantees a sad, steamy mess. The best way to revive these beauties is back in the air fryer. Set it to about 375 degrees for just 5 to 7 minutes. They warm up fast and that almond flour coating crisps right back up. Freshly cooked is always best, but this trick gets you super close!
Frequently Asked Questions About This Recipe
I always get so many great notes and questions after readers try making these bites, and that’s fantastic! It means you’re actually cooking, right? Here are some of the most common things folks ask me about getting the ultimate Gluten Free Buffalo Cauliflower experience at home, especially for those of you looking for other great Clean Eating Recipes.
Can I make this recipe dairy-free?
Oh, absolutely you can! Since the cauliflower itself is naturally vegetable-based and we’re using almond flour, the only potential dairy comes from what you dip it in. If you are looking for wonderful Dairy Free Gluten Free Recipes, just swap out the standard ranch or blue cheese for vegan versions! There are some incredible cashew-based dips out there now that have the same creamy, tangy profile. Or, honestly, a simple homemade cashew cream mixed with lemon and herbs is just heavenly and keeps it completely clean!
What if I don’t have an air fryer?
Don’t you worry one bit if your basket is currently in storage! While I adore the speed and crispiness the air fryer gives us, baking in the oven works perfectly well. For the oven method, you’ll still thoroughly coat the wings just like we did in the main instructions. Spread them out onto a baking sheet lined with parchment paper—make sure they aren’t touching! Bake this at 400°F (200°C). You’ll usually need about 25 to 30 minutes. Keep an eye on them around the 20-minute mark, tossing halfway through, until they are beautifully browned and cooked through. They might be slightly less aggressively crispy than the air-fried version, but still deliciously satisfying!
Before you run off to bake, remember that recipes are guides, not hard rules. And for more on how we operate here, please review our recipe accuracy notes!
A Note on Recipe Accuracy and Safety
Y’all know I stand by the flavor and the method here, but since every kitchen is different—and let’s be honest, every head of cauliflower is sized differently!—I just have to mention a few things so you can cook with total confidence. When we talk about nutrition estimates, whether it’s for our privacy policy or our recipe breakdowns, those numbers are calculated approximations.
I use standard ingredient data for the nutrient counts, but the final figures for your batch of Gluten Free Buffalo Cauliflower will absolutely depend on the specific brand of buffalo sauce you use, how large your florets ended up being, and even the natural sugar content in your cauliflower!
So, please treat the nutrient information as a good guideline for what you’re eating, not as a hard scientific fact for medical purposes. My goal is always to share food made with heart and flavor, and trust your own taste buds above all else when you’re in the kitchen!
Gluten Free Buffalo Cauliflower
Ingredients
Equipment
Method
- Chop and wash the head of cauliflower. Use a scrub to remove any residue.
- Dry the cauliflower and place it into a large mixing bowl. Pour buffalo sauce over the cauliflower wings and coat them completely. You should not see any white from the cauliflower.
- In a separate large bowl, combine the almond flour and spices. Mix well.
- Add the buffalo cauliflower to the flour mixture and toss until each piece is well coated.
- Place the wings into the air fryer in a single layer. Do not crowd the wings, as this will make them soggy.
- Fry at 350F for 20 minutes. Remove from the fryer and serve immediately with your choice of ranch or blue cheese dipping sauce.