When the after-school hunger hits, or you just need a little something sweet to get you through the afternoon slump, baking often feels like too much work. Trust me, I get it! That’s why I always turn to my super-simple recipe for Healthy Bliss Balls for Kids (No-Bake, Gluten-Free). These little bites are completely wholesome, require zero oven time, and are perfect for when you need a grab-and-go snack that isn’t full of junk.
This recipe is all about keeping things real and simple. Making these bliss balls is actually a fantastic way to get the children involved. They absolutely love helping measure the ingredients and, best of all, rolling the sticky dough into perfect little balls. It turns snack prep into quality cuddle time in the kitchen. If you’re looking for easy snacks, you simply have to try these. You can find more simple baking adventures over in my easy snacks collection!
Why These Healthy Bliss Balls for Kids (NB, GF) Are a Family Favorite
When I developed this recipe, I wasn’t aiming for perfection; I was aiming for practicality and peace of mind. These little energy boosters are the snack that saves my afternoon meltdown schedule every single time! They check all those important boxes parents look for.
- They come together in ten minutes of actual work—no oven, no mess, just pure speed.
- They are naturally sweetened and use ingredients I feel good about feeding my family.
- Being gluten-free and dairy-free makes them safe for nearly everyone at a playdate!
If you are always on the hunt for amazing easy gluten free recipes, then you know how precious a no-bake item truly is.
Quick Prep for Busy Parents
Seriously, you can’t beat ten minutes! The only time you wait is the hour in the fridge, which is perfect because that’s usually when I tackle the million other things that pile up during the day. You throw it all in the processor, roll them up while the kettle boils, and you’re done! It’s genuinely that fast.
Wholesome Ingredients in Our Healthy Bliss Balls for Kids (NB, GF)
You won’t find any weird fillers or refined sugars here—only familiar foods! My philosophy is if you can recognize what’s in it, and your kids like it, it’s a win. We’re using nuts for healthy fat and natural sweetness from dates. It’s food made with intention, not just convenience.
Essential Ingredients for Healthy Bliss Balls for Kids (NB, GF)
When I say this recipe is simple, I mean it! There are honestly only six things you need, and chances are, you have half of them sitting in your pantry right now. It’s important to get the quality right here, especially with the dates and the avocado, because those are doing most of the heavy lifting when it comes to flavor and binding everything together.
For the Bliss Balls
You’ll want to use a sturdy food processor for this part because we are totally skipping the oven. Make sure you have your walnuts ready to go:
- 1 cup walnuts
- 5 Medjool dates (make sure they are pitted!)
- 1/2 ripe avocado
- 1 tablespoon hemp seeds
- 1 tablespoon cocoa powder (and don’t forget that extra amount for rolling!)
- 1 tablespoon maple syrup
I like to check my dates before they go in; if they feel really hard, I soak them in warm water for about five minutes first. It helps the processor turn them into that sweet, sticky paste we need to get these perfect little globes.
Step-by-Step Instructions for Healthy Bliss Balls for Kids (NB, GF)
Okay, this is the fun part where things actually come together! Since we aren’t baking, precision is about texture more than temperature. Remember to bring your kids in for the rolling part—it’s the best messy fun you can have!
Preparing the Base Mixture
First things first: gather everything up. You need that food processor humming away, ready to go. Dump all those ingredients right into the bowl—the walnuts, those sweet dates, the avocado that’s going to make things creamy, the seeds, cocoa, and maple syrup.
Now, blend it! You’ll want to run that machine for a good three minutes. Keep an eye on it. You are looking for a sticky dough. If you pinch a little bit between your fingers, it should totally hold its shape. If it seems crumbly, keep blending! Once it’s perfectly doughy, scoop it all out and move it into a separate small bowl before we start rolling.
Rolling and Coating Your Healthy Bliss Balls for Kids (NB, GF)
Time for the little hands! Grab a spoon or a small cookie scoop—about two tablespoons is perfect. Roll those scoops quickly between your palms until you have a neat little ball. If you’re making these for younger kids, keep them small so they aren’t a choking hazard, okay?
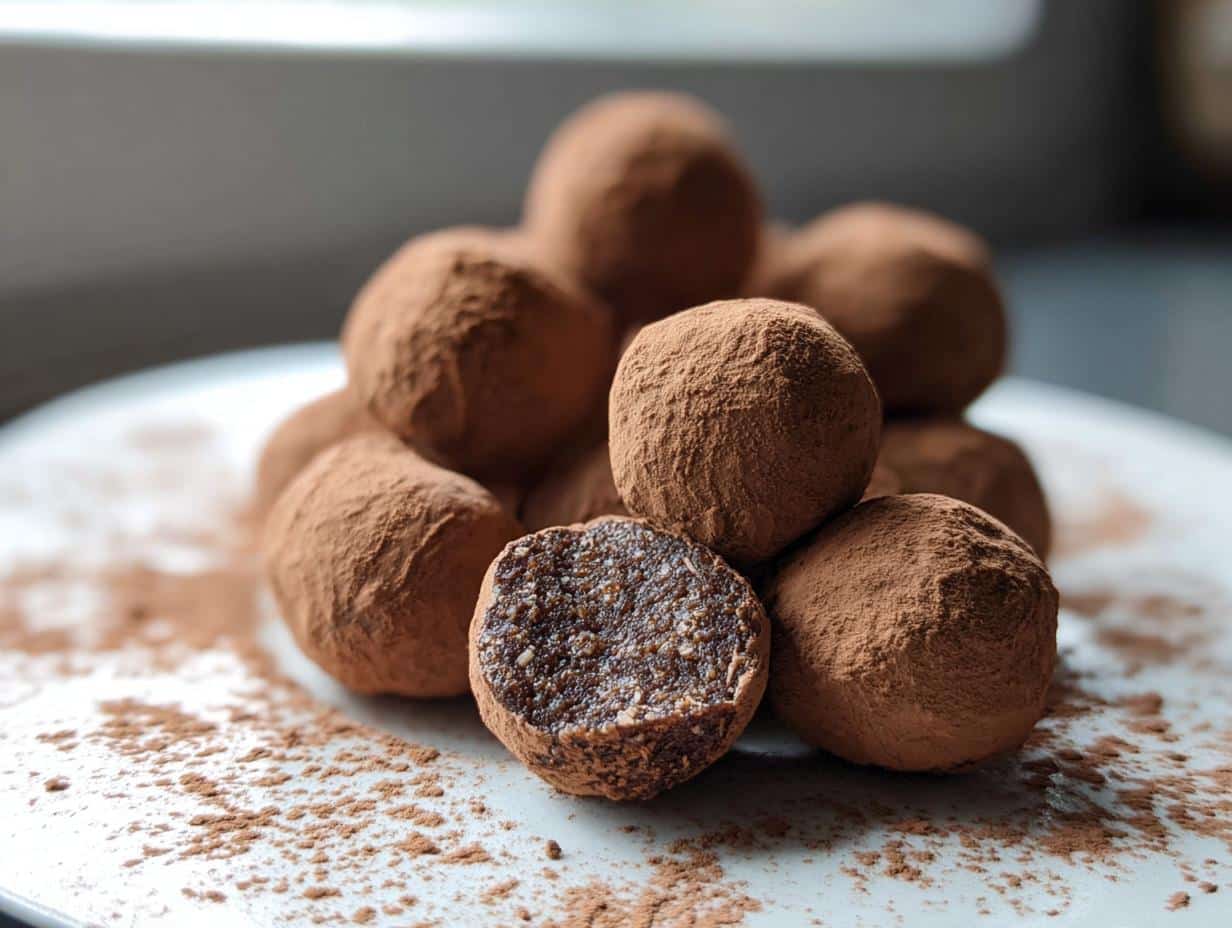
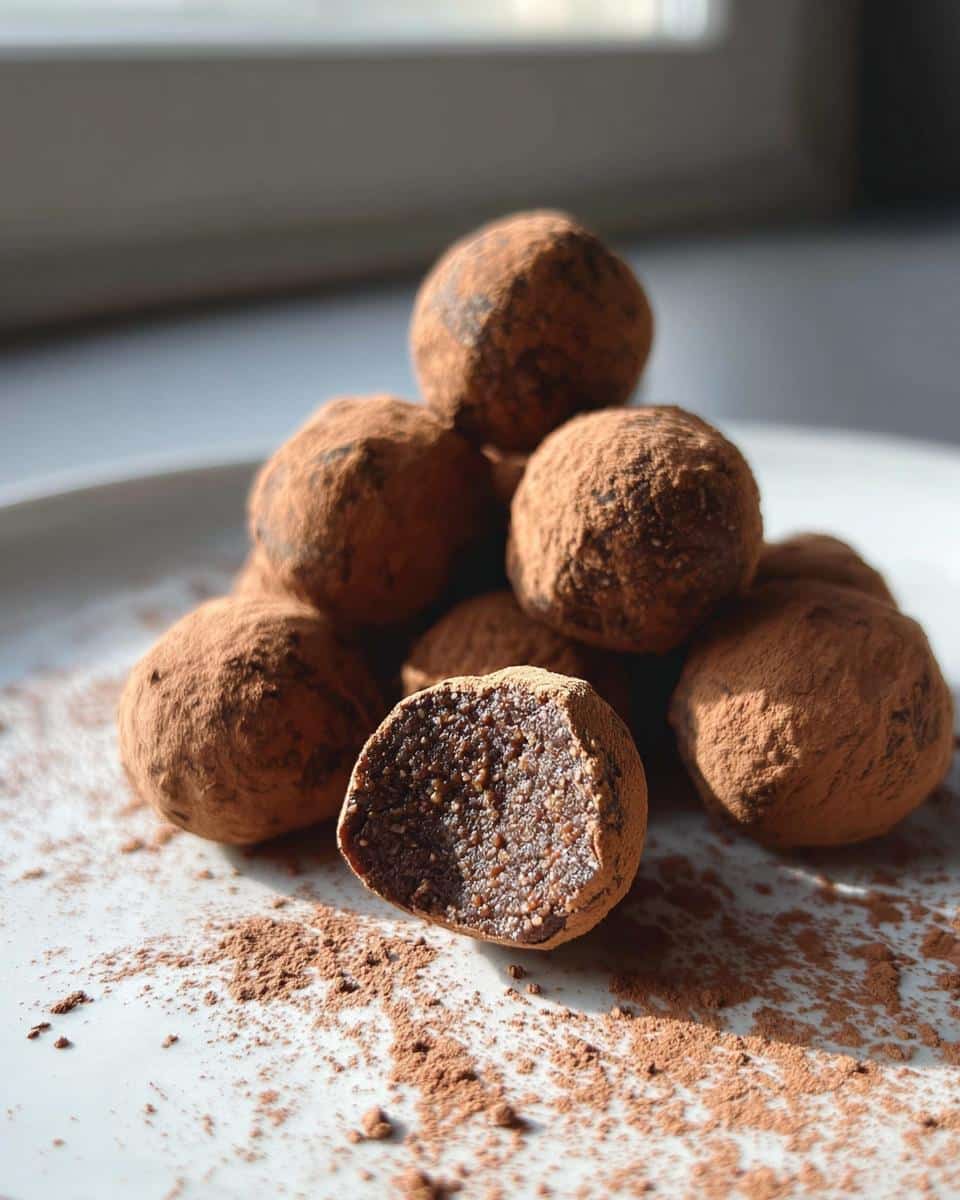
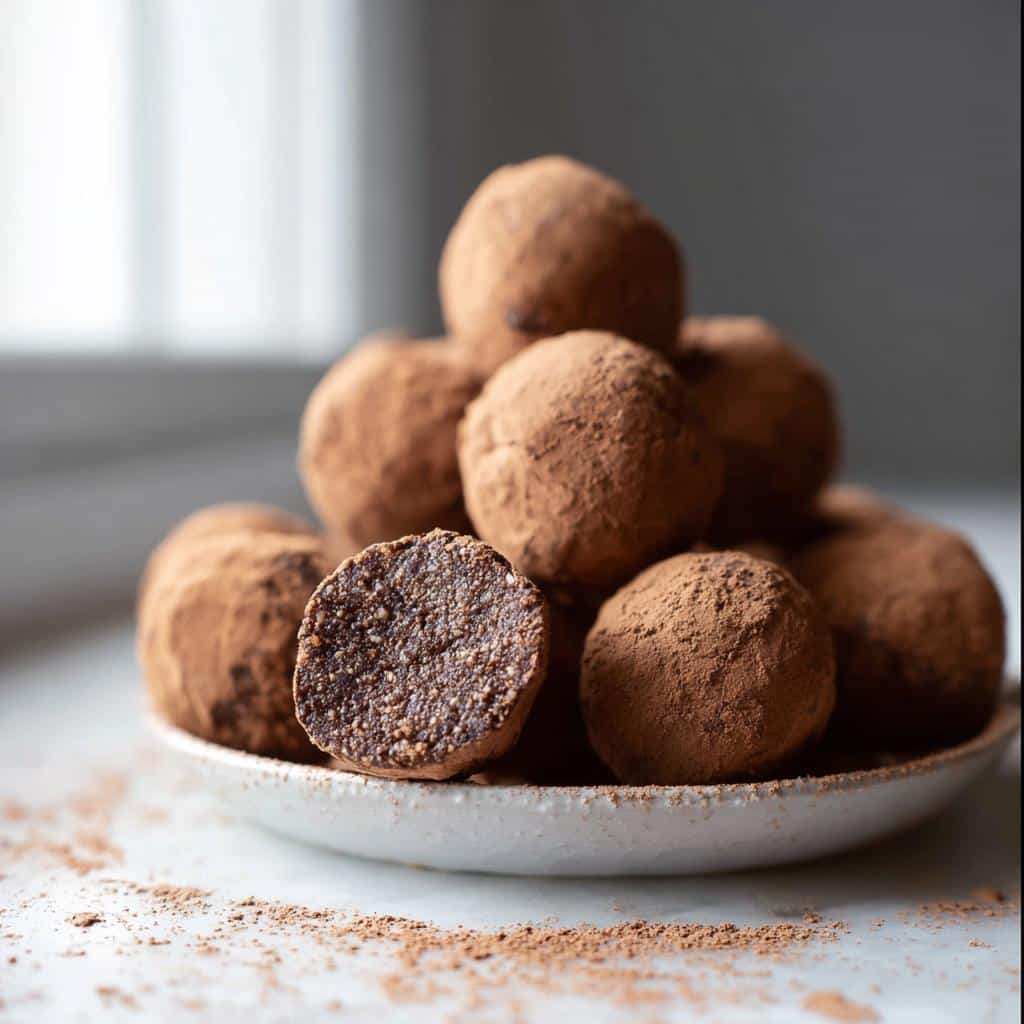
Set up a shallow bowl with your extra cocoa powder. This is the coating that keeps them from sticking to everything else. Roll each ball around in that cocoa until it’s completely covered. They look so professional when they’re done!
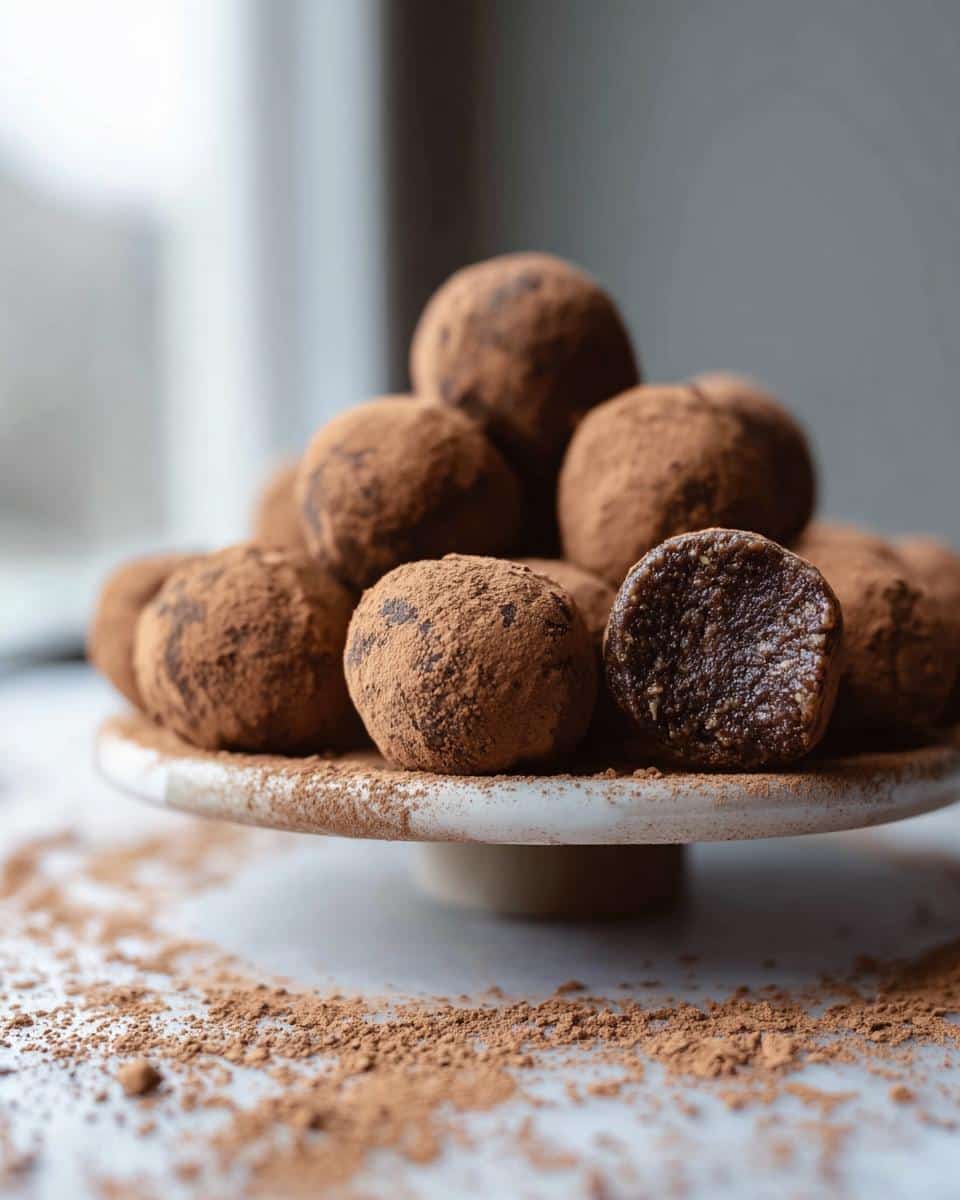
We’ve got two choices now: you can dig in right away, or move them to a baking sheet and chill them for a solid hour in the fridge. That chill time tightens everything up perfectly. If you’re planning for school lunches next week, you can wrap them up and freeze them! For more easy ideas perfect for little chefs, check out my suggestions on easy recipes for kids.
Tips for Success Making Healthy Bliss Balls for Kids (NB, GF)
Even the simplest no-bake recipes can hit a snag if the ingredients aren’t quite cooperating! Don’t panic if your dough looks a little different than mine did. This is where your kitchen wisdom comes in handy. The ingredients are natural, so humidity or the exact stickiness of your dates can make a difference.
Lilya Lawson here, folks! Remember, we are aiming for comforting food, not perfection, but a few quick tweaks can save you a sticky disaster. If you ever run into issues, remember you can always check out the disclaimer over at the site, but usually, it’s just a matter of adding a bit more something or less something.
Adjusting Dough Consistency
The number one worry I hear about bliss balls is that the dough just won’t stick! If you’ve blended everything and you still have dry crumbles—that means your dough is too dry. Before you throw it out, try adding just a tiny splash of water, maybe a half teaspoon, or another tiny drizzle of maple syrup. Mix short bursts again until it clumps up nicely.
Now, the opposite can happen too—sometimes the avocado is just super watery, and your mixture is almost paste-like, too wet to roll. If that happens and you can’t shape them, you need an absorbent helper. I usually reach for a spoonful of finely ground nuts or, if you have them handy, a teaspoon of gluten-free rolled oats ground into a flour texture. That usually does the trick! The goal is sticky enough to stay together but dry enough to roll without sticking to your entire palm.

Ingredient Spotlight: Why Avocado Works in Healthy Bliss Balls for Kids (NB, GF)
Okay, let’s talk about the ingredient that always makes people raise an eyebrow in my Healthy Bliss Balls for Kids (NB, GF) recipe: avocado! I know, right? Avocado in a sweet snack recipe sounds super weird sometimes, but trust me, this is one of my best secrets for keeping snacks both delicious and genuinely healthy.
Since we are making these totally no-bake and keeping them dairy-free, we lose the traditional binders like melted butter or that heavy creaminess you get from cream cheese. That’s where the avocado steps in like a total superstar. It brings necessary healthy fats and gives the entire dough the perfect creamy, thick texture we need to roll those balls without them just crumbling apart.
The best part? You absolutely cannot taste it. I promise! The strong flavors of the walnuts and the cocoa powder completely mask any slight savory note the avocado might have. It just melts into the background, working hard to keep the balls moist and feeling rich. It’s a brilliant way to sneak in extra good fat for growing kiddos without them even knowing they are eating a vegetable!
Storage and Make-Ahead Options for Healthy Bliss Balls for Kids (NB, GF)
One of the biggest things I love about these Healthy Bliss Balls for Kids (NB, GF) is that they are the absolute definition of make-ahead magic! You can whip up a double batch right now and have snacks ready for the entire school week. They are so reliable, which, as a busy parent, is everything we look for in a good recipe.
You technically don’t have to chill them at all—you can roll them and pop them straight into your mouth! But trust me on this one: if you have the patience, that one hour in the fridge makes a huge difference. That chill time firms them up just enough so they aren’t sticky when your kids grab them. They hold their shape much better whether they are in a lunchbox or just sitting on the counter.
If you’re looking for something that lasts even longer, freezing is the way to go. We keep a big bag of these in the freezer pretty much all the time. They thaw out really fast on the counter or in a lunch bag right before school starts.
- In the Refrigerator: Once thoroughly chilled, these bliss balls stay wonderfully fresh in an airtight container for about a week to ten days. They are great for daily snacks.
- In the Freezer: For long-term storage, place them in a freezer-safe, airtight container. They last beautifully for up to three months! Just pull out what you need the night before or an hour before serving.

Having these ready means you always have a genuinely healthy, gluten-free snack option on hand. You can see more of my favorite grab-and-go treats perfect for lunchboxes by checking out my easy snacks collection!
Frequently Asked Questions About Gluten Free Snacks
I know you probably have a few more questions floating around, especially when dealing with allergies or trying to keep things healthy for the kiddos. That’s totally fair! Here are a few things people often ask me about these Healthy Bliss Balls for Kids (NB, GF) and general Gluten Free Food snacking.
Are these bliss balls truly carb free recipes?
That’s a great question, especially if you’re watching sugar or carbs closely! While these are certainly made with whole foods and are naturally sweetened, they aren’t quite “carb free recipes.” The dates and the maple syrup are natural sugars, which definitely count as carbs. However, because we are balancing them with healthy fats from the walnuts and avocado, they give you a much slower, smoother energy release than a processed snack would, which I think is what really matters for kids.
Can I substitute the walnuts in these Healthy Bliss Balls for Kids (NB, GF)?
Absolutely, you can! Allergies are real, and we always need backups. If you need to avoid walnuts, you have a couple of wonderful options for keeping this recipe just as good. You can swap them out 1:1 for raw almonds, or if you need to go completely nut-free, sunflower seeds or pumpkin seeds work really well too. Just make sure your food processor has to work a little harder to blend those seeds into a fine meal before adding the wet ingredients!
What makes these a good Gluten Free Lunch Ideas option?
These are honestly one of the best Gluten Free Lunch Ideas because they travel so well. Since they are no-bake, they don’t get weird in heat like a standard cookie might, especially if you give them that full hour to chill first. They don’t crumble into a million pieces when packed, and they stay good in an exterior lunch bag pocket for hours. They are just neat, bite-sized goodness that keeps little tummies happy until dinner! I always prep a big batch just for school snack duty.
If you still have questions after trying them out, feel free to check out my About page for more on my cooking philosophy, or just leave a comment below!
Nutritional Estimate for Healthy Bliss Balls for Kids (No-Bake, GF)
When we talk about making healthier snacks, I always want to be clear about what exactly we’re eating. When you use whole ingredients like nuts and avocado, you are getting good fats, but those calories add up quickly! So, I always preach that this part isn’t about strict dieting; it’s about knowing what you’re feeding your busy kiddos.
This breakdown is just an estimate, mind you, because the exact size of your dates or how much water is in your avocado can change things slightly. However, based on these standard measurements for 12 balls, here is what you can generally expect per ball:
- Calories: Approximately 140-160 kcal
- Total Fat: Around 11g (Mostly heart-healthy fats from walnuts!)
- Protein: About 3g
- Total Carbohydrates: Roughly 10g (This is where those natural sugars from the dates and maple syrup show up)
See? It’s a nice little package of energy! They aren’t carb-free, but they certainly keep the energy steady compared to, say, a packet of fruit snacks. I love them because they feel substantial and satisfying, which means my kids aren’t asking for another snack five minutes later!
Share Your Experience Making These Treats
I truly hope these Healthy Bliss Balls for Kids (No-Bake, Gluten-Free) become a regular staple in your home just like they are in mine! There is nothing that makes me happier than knowing my recipes are helping you simplify snack time while offering something nourishing.
Once you’ve blended, rolled, and let your family taste these simple chocolatey bites, please come back and rate the recipe using the star system below. I’m always eager to hear how they turned out!
Tell me about your kids’ reactions! Did they help roll them? Did they even notice the avocado hiding in there? Drop all your thoughts, adaptations, or questions in the comments section. Seriously, don’t be shy—I read every single one!
And if you snap a photo of your beautiful, delicious batches, please tag me on social media! Seeing your cookies making happy moments is why I do this whole blogging thing. You can connect with me easily by visiting my contact page if you have specific questions.
A quick note from me: I’m Lilya Lawson, the founder back here at Top Chicken Eats. I’m all about practical, soulful cooking rooted in family tradition. My goal is always to give you recipes that feel dependable and bring real warmth to your everyday kitchen routine. Thank you for trusting me with your family’s snacking needs!
Healthy Bliss Balls for Kids (No-Bake, Gluten-Free)
Ingredients
Equipment
Method
- Gather all your ingredients. Prepare a food processor or high-speed blender. Make sure dates are pitted and your avocado is ripe.
- Add all ingredients to the food processor. Blend for about 3 minutes or until a sticky dough forms. The mixture should hold together when pressed between your fingers. Transfer the mixture to a small bowl.
- Using a spoon or small ice cream scoop, measure about 2 tablespoons of dough. Roll the dough between your hands to form 1-inch balls.
- Place extra cocoa powder in a shallow bowl. Roll each bliss ball in the cocoa until it is fully coated.
- You can eat the balls immediately, or place them on a baking sheet and chill them in the refrigerator for one hour. For longer storage, place the balls in an airtight container and freeze them.