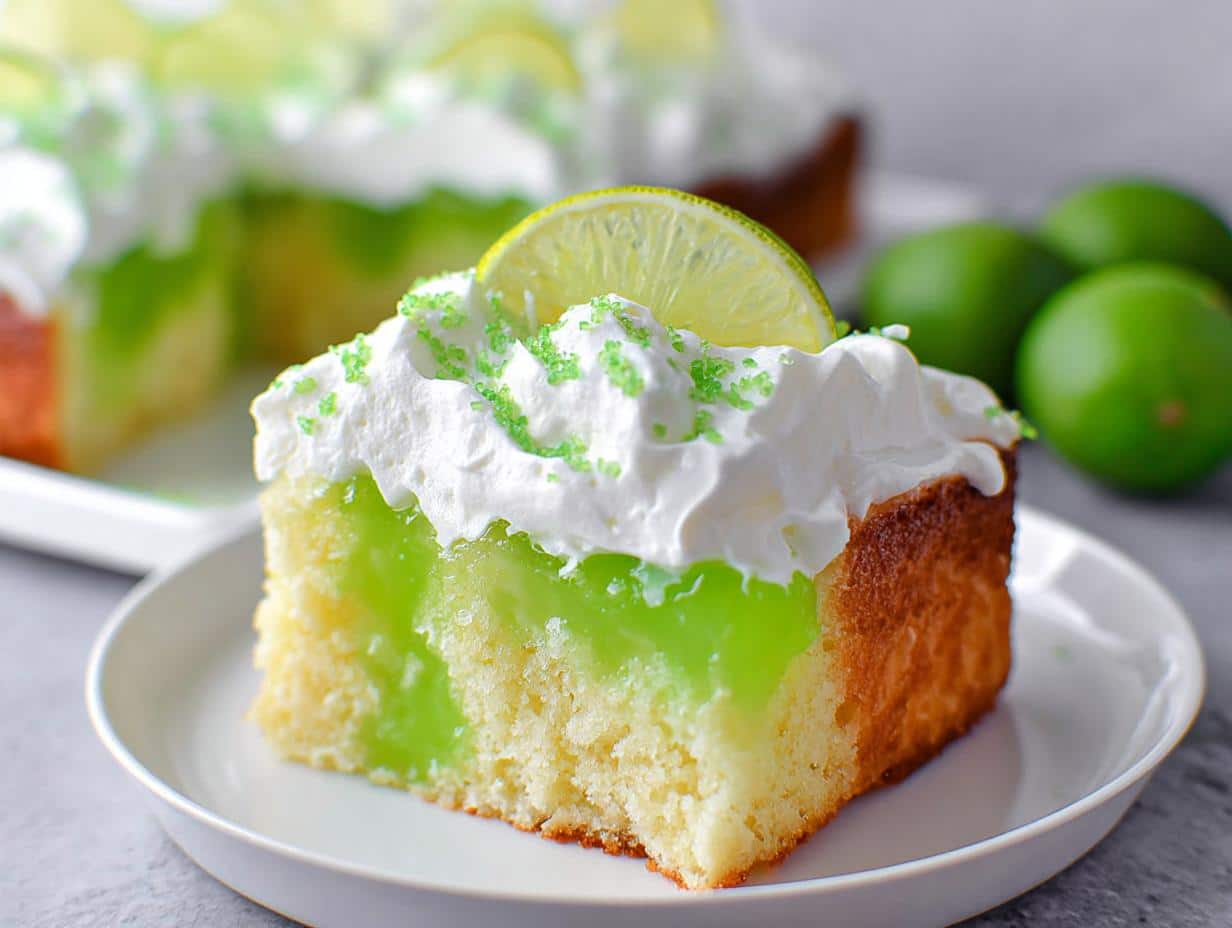
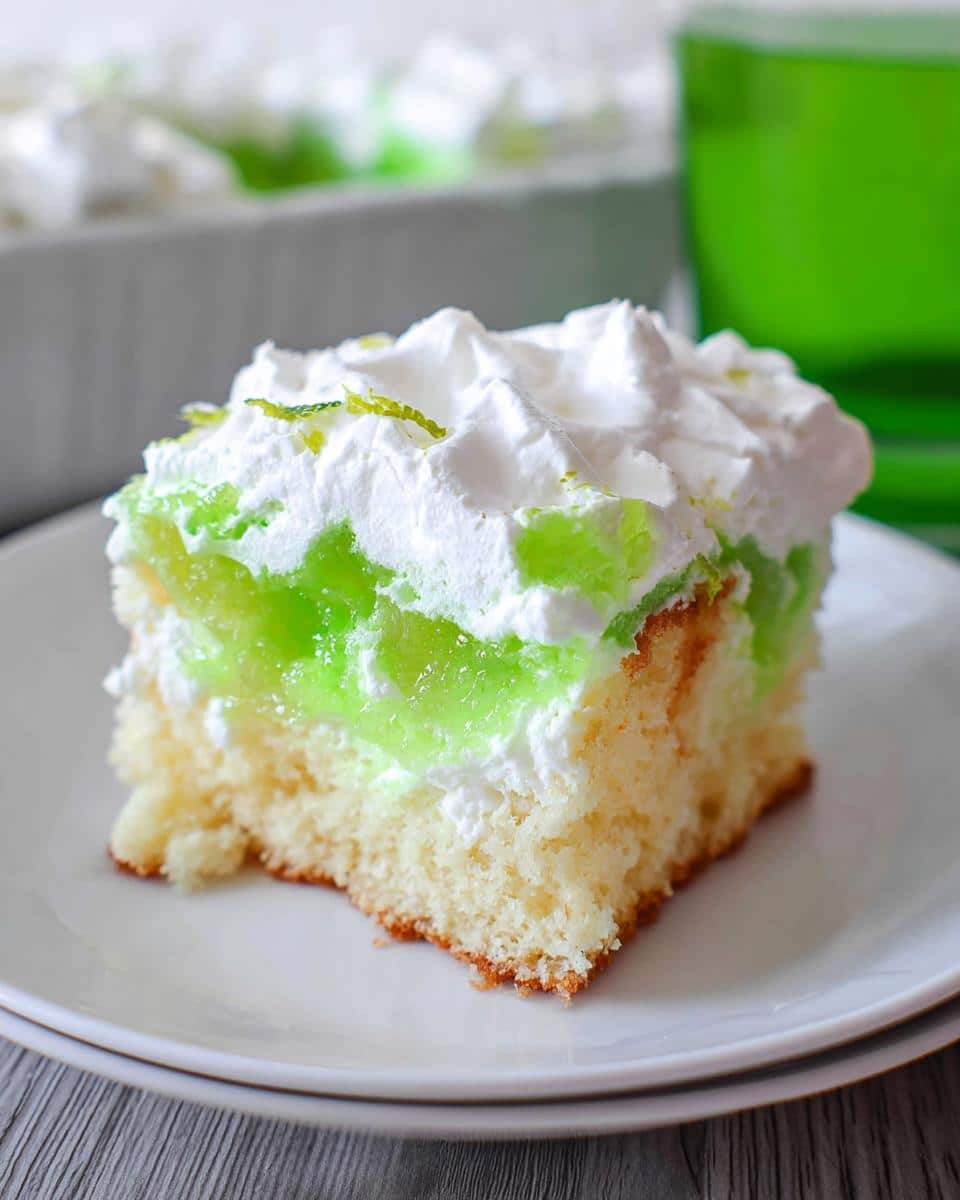
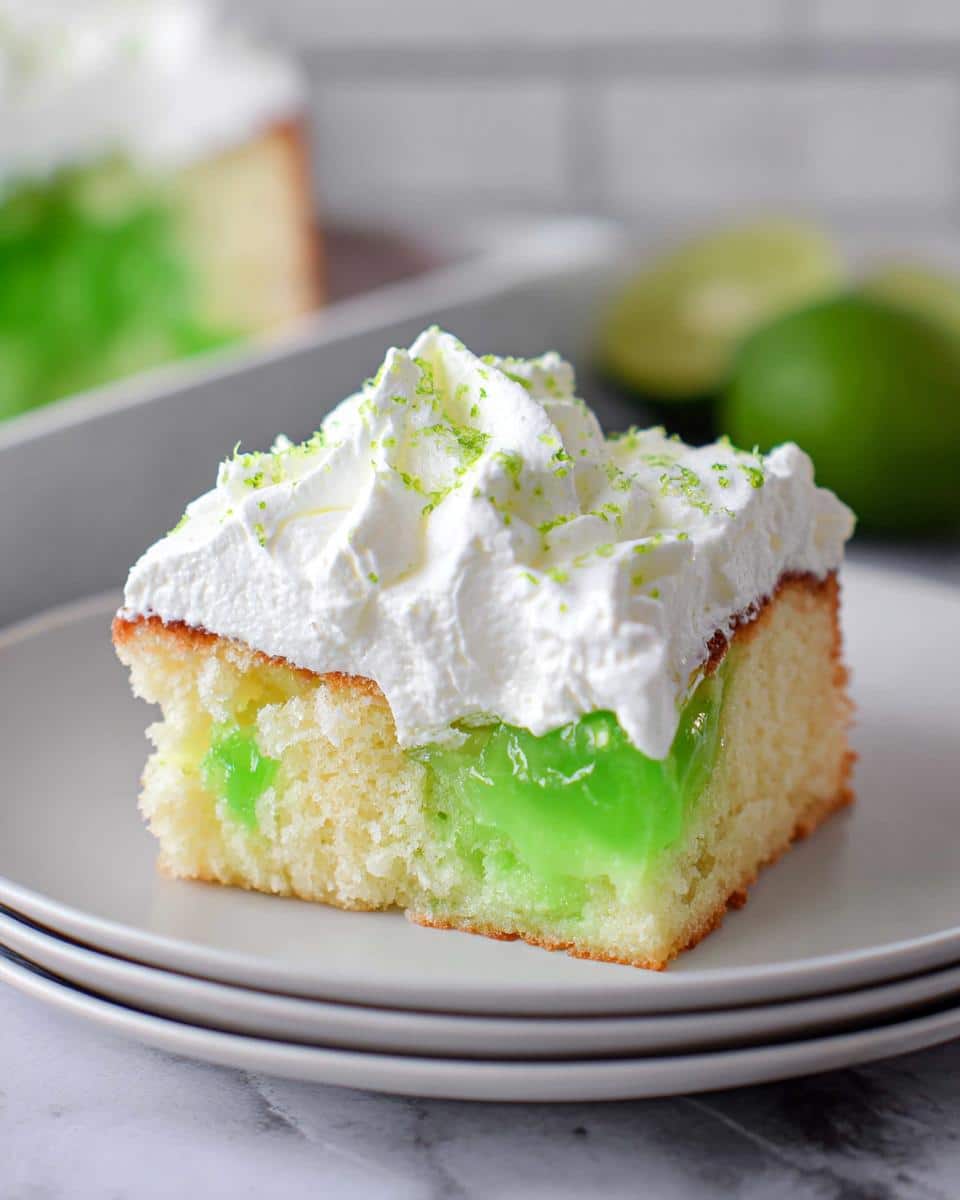
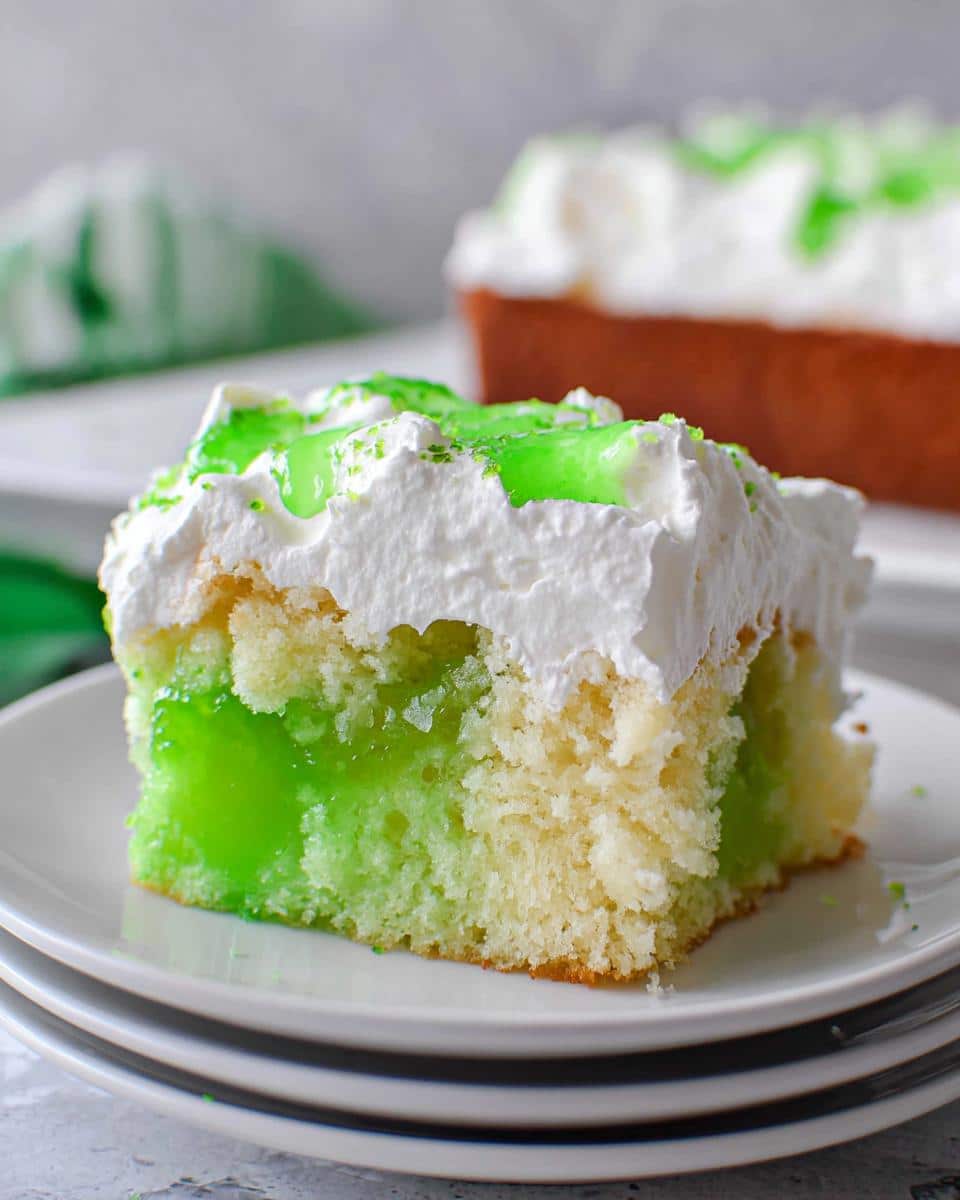
When the weather warms up, or maybe when you just need a real zing in your afternoon treat, nothing beats something bright and citrusy. I always turn back to the classics, and honestly, the old-fashioned poke cakes do not get enough credit. They’re wonderfully nostalgic, carrying that comforting feeling of mid-century gatherings without demanding hours in the kitchen. Today, we’re diving into one of my absolute favorites: the Lime Poke Cake. It’s delightfully tangy, unbelievably moist, and truly the easiest stunner you can bring to any potluck.
Why This Lime Poke Cake Recipe Stands Out
I’ve made a lot of different desserts over the years, but this one always wins friends over because it seems way fancier than the effort it takes. Seriously, we are talking minimal active time here! This recipe’s biggest selling point is how incredibly moist it stays. That signature texture doesn’t happen by accident; it’s all thanks to the gelatin bath soaking right into the cake crumb.
This isn’t just any dessert; it’s reliable picnic food that travels well! You can whip up the base the afternoon before, and it just gets better while chilling in the fridge.
The Perfect Balance of Sweet and Tart Lime Poke Cake
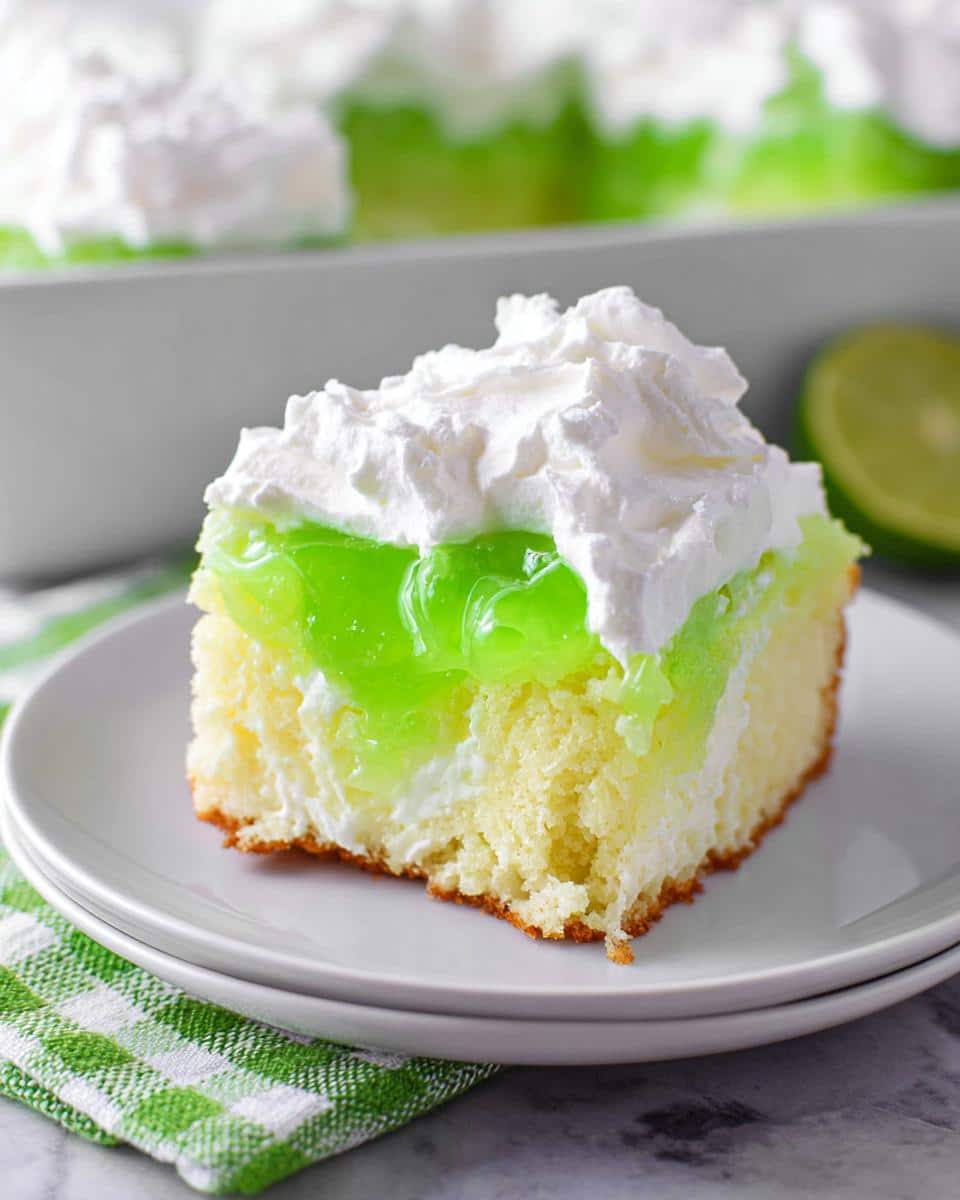
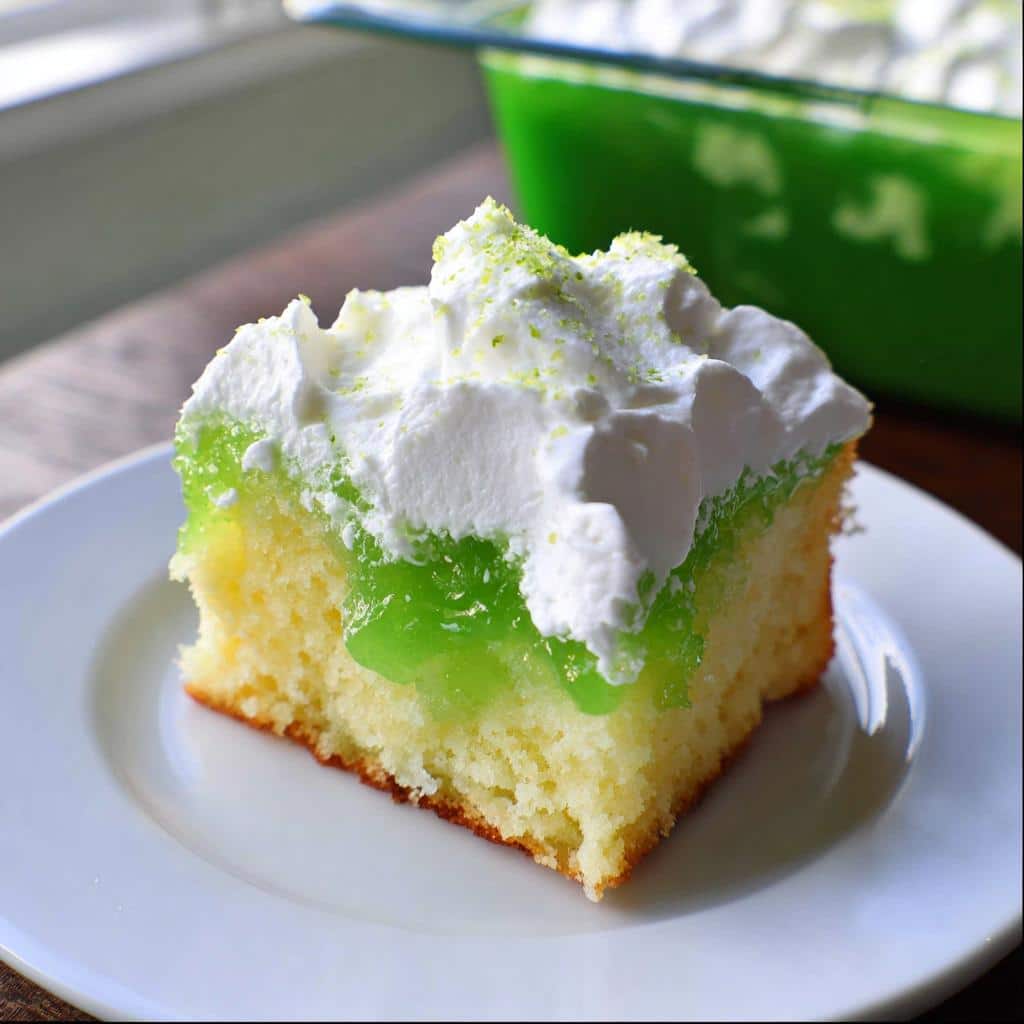
Oh, the flavor combination is just electric! You get the pure, comforting sweetness from that plain white cake base, and then BAM! The lime cuts right through it with this bright, zesty punch. The gelatin mixture gives the Lime Poke Cake this lovely, jiggly intensity that you just don’t get from frosting alone. It’s that perfect summer flavor contrast.
Simple Steps for a Stunning Dessert
You start with a box mix, which means most of the hard work is out of the way before you even start poking. The whole active process—baking, poking, and pouring—takes less than an hour total. Letting the cake chill for those two hours is the hardest part, but trust me, that time lets the juices settle in and make the cake absolutely luxurious.
Essential Ingredients for Your Lime Poke Cake
Okay, now that we know this cake is a winner, let’s talk about what you need to grab from the pantry. The real beauty of the poke cake is that it relies on simple, accessible staples—we aren’t sourcing exotic fruit here! Having the right things ready makes the assembly process so smooth. You’ll notice the ingredient list is perfectly split between what makes the base and what causes all that wonderful moisture explosion later on. Don’t skip any of these notes; they are crucial for getting that vibrant flavor.
For the Cake Base
- 1 box of White cake mix (You know the drill: use the eggs, oil, and water the box calls for!)
For the Filling and Topping of the Lime Poke Cake
This is where the magic starts happening! Make sure you grab the right size gelatin, or things might get a little soupy.
- 1 small package of Lime gelatin (It has to be the regular 3.4 oz size, folks!)
- 1 cup of Boiling water (Make sure it’s truly boiling to dissolve everything properly.)
- 1 (8 oz) container of Whipped topping (And please, let this thaw completely before you even think about spreading it on the cake.)
Step-by-Step Instructions to Make Lime Poke Cake
It’s time to bring this cake together! And I promise you, this process is so straightforward, even if you’ve got younger helpers—check out these simple steps, perfect for a fun afternoon baking session. We move quickly from the oven to the fridge, but we absolutely cannot rush the cooling parts. That waiting time is where the texture magic happens for the final Lime Poke Cake. If you’re looking for more easy recipes that keep the kids busy and happy in the kitchen, I always suggest checking out some of my other tried-and-true kid-friendly bakes.
Baking and Preparing the Cake Base
First things first, get that oven hot! Bake your white cake mix exactly as the box tells you to—don’t start experimenting here; we need a solid, simple foundation. Once it’s done, the most crucial part starts: cooling. Let that cake cool down completely in the pan. I mean totally cool, not even slightly warm! Once cooled, grab a wooden spoon handle (that’s my favorite tool for this step!) and start poking holes all across the top. Space them out about one inch apart. Don’t push them too close to the edge, or the whole side might crumble when you pour.
Creating the Tangy Lime Filling
While the cake is cooling, it’s filling time. Bring your water to a rolling boil—I mean bubbling hot. Pour that boiling water right over your lime gelatin powder in a separate bowl. Now, stir it constantly for about two full minutes until you absolutely cannot see any grains left. It needs to be completely dissolved. Then, take that liquid sunshine and gently pour it evenly over the entire poked cake surface. Make sure you watch as it slowly seeps down into every single hole you made. That’s the flavor soaking in!
Chilling and Finishing Your Lime Poke Cake
After the pour, we hide the cake! Cover the pan tightly and put it into the refrigerator. You need to let this chill for a minimum of two hours, which is really the total chilling time we need here. This allows the gelatin to set up firmly into the cake structure. Once it’s chilled and firm, take out your thawed whipped topping. Spread that lovely white cloud evenly across the top surface of your gorgeous Lime Poke Cake. If you have any extra time, stick it back in the fridge for another 30 minutes so the topping firms up just a bit before slicing and serving!
Tips for a Perfect Lime Poke Cake Every Time
Achieving that famous melt-in-your-mouth texture with this cake isn’t hard, but there are a couple of little secrets I learned over the years to make sure you nail it every time. Seriously, even though this Lime Poke Cake is simple, the details count!
First off, don’t try to poke hot cake. I know you’re eager, but if you poke a warm cake, the gelatin runs right out the bottom of the pan, and you end up with a soggy mess instead of a marvelously moist dessert. Wait until it’s completely cool to the touch before you grab that spoon handle.
When you mix your lime gelatin, that two minutes of stirring in boiling water isn’t just a suggestion—it’s non-negotiable. If you don’t fully dissolve the crystals, you’ll end up biting into little hard pockets of lime candy inside your soft cake layers. Yuck! Finally, when applying that whipped topping, use an offset spatula or the back of a spoon to spread it gently outward from the center. Don’t press too hard, or you might break one of those delicate gelatin-filled tunnels we worked so hard to create.
Variations of Lime Poke Cake for Any Occasion
While the classic lime flavor is unbeatable, half the fun of a dessert like this is adapting it! You can easily twist this recipe to suit whatever holiday or gathering you have coming up. Since this cake is so beautifully bright and easy to dye, it’s become one of my go-to recipes when I’m planning my St Patrick Day Food lineups. It’s all about the vibrant color, you know?
If lime isn’t doing it for you one day, think about swapping that gelatin packet out for lemon or even strawberry. You’ll still get that perfect moisture from the poke technique, just with a slightly different flavor profile. For a real twist on our Lime Poke Cake, try mixing in some coconut extract right with the gelatin for an unexpected tropical vibe!
Making This a Green Foods For Party Favorite
If you’re looking for something that really pops for a holiday celebration, this is where you get creative! To make this a true Green Foods For Party showstopper, just drop about three or four small drops of bright green food coloring into your bowl when you dissolve the lime gelatin in the boiling water. Stir it really well before pouring it over the cake. Suddenly, your dessert looks like it belongs right alongside your best St Patrick’s Day Food Ideas Party spread. It’s such a simple change, but the impact is huge!
Serving Suggestions and Storage for Lime Poke Cake
Once you’ve done all that plying and chilling, you want to make sure you serve this gorgeous creation correctly so it doesn’t turn into a sloppy pile on the plate! Presentation is just as important as flavor, especially when you’ve made something this refreshing for your guests. Since the topping is soft, getting a clean slice takes just a tiny bit of finesse. My go-to method is using a long, thin knife dipped in hot water and wiped dry between every single cut. This keeps that beautiful whipped topping from sticking to the blade and dragging down the cake layers.
It really is one of the best make-ahead party cakes because it’s actually better the next day! The longer that lime essence has to soak in, the deeper the flavor gets, and the more tender the whole slice becomes.
Storage and Make-Ahead Strategy
Honestly, you can bake this cake the day before you want to serve it. Once you’ve topped it with the whipped cream, cover the pan tightly—I usually use plastic wrap that I lightly tent over the topping so it doesn’t stick—and keep it right there in the fridge. It should hold up beautifully for about three to four days when stored this way. It stays moist and keeps that bright, tangy flavor without any trouble.
Now, freezing isn’t something I usually recommend for this particular cake. The gelatin structure and the whipped topping don’t love the freezing process, and you’ll likely end up with weeping or separation when you thaw it out. It’s definitely best enjoyed within that first few days while it’s wonderfully chilled and set.
Frequently Asked Questions About Lime Poke Cake
I always get questions when folks try this recipe for the first time, and that’s totally normal! When you mix cake mix with liquid gelatin, sometimes you worry about the outcome. Don’t you fret; I’ve got the straightforward answers right here based on what I’ve learned researching these classic American desserts.
Can I use fresh lime juice instead of gelatin?
It’s tempting to think fresh juice is always better, right? Well, yes and no. If you skip the gelatin entirely and just pour straight lime juice into the holes, you’ll lose that signature wobbly texture and the structure won’t set up quite right. The gelatin is critical because it solidifies when chilled, locking in the moisture and giving you that classic poke cake consistency. Fresh juice might make things a little too runny, but you could definitely whisk a tablespoon or two of fresh lime zest and juice *into* the dissolved gelatin mixture before pouring—that will pump up the flavor without ruining the texture.
Is this considered a good St Patrick Day Food?
Absolutely! This is one of the best St Patrick Day Food ideas, provided you remember that one little step I mentioned earlier: adding the green food coloring to the gelatin. When you make this cake a vibrant emerald shade, it instantly becomes fantastic Irish Party Food. It’s a lighter option compared to heavy bakes you usually see, making it perfect for keeping the energy up at your celebration. If you’re planning a big bash, this is definitely going on my list for St Patrick’s Day Food Ideas Party spreads!
If you want to learn more about how I research the history behind these fun, themed recipes, you can always read a bit more about my focus on foodways over on my author page right here at the site.
Understanding the Nutritional Profile of This Lime Poke Cake
Now, I know some of you are probably wondering how this sweet treat fits into the grand scheme of things—especially if you’re juggling snacks for a big gathering or keeping an eye on things during the holidays. While I’m a historian of flavor, not a certified nutritionist—I always tell folks you should check a reliable source for exact counts!
However, based on the standard white cake mix, the sugar in the gelatin, and the fats from the topping, I can give you a general idea of what you’re looking at per slice, assuming you get 12 even servings out of that 9×13 pan like I recommend. Remember, this is just an estimate, and for my official site disclaimer on all nutritional data, you can always take a peek right here: our site disclaimer explains it all.
Roughly speaking, for one piece of this tangy delight, expect:
- Calories: Likely in the 250–300 range. It’s cake and whipped topping, after all!
- Fat: Moderate, mostly coming from the original cake mix ingredients and the topping.
- Carbohydrates: High, driven mostly by the sugar in the cake, gelatin, and powdered elements.
- Protein: Pretty low, as this is truly a dessert through and through.
It’s a treat, plain and simple! It uses convenience ingredients, which is what made it so popular back when it was first trending. Don’t worry about the numbers too much; just enjoy the bright lime flavor responsibly!
Share Your Experience Making This Lime Poke Cake
Now that you’ve got the recipe and all my little secrets for keeping this cake perfectly moist and tangy, I truly want to hear from you! This whole journey of baking and sharing history only works if we connect in the kitchen, right?
Did you try it out for a recent gathering, or maybe you adapted it to be the perfect green snack for your kids? I’d absolutely love to know how your Lime Poke Cake turned out. Don’t be shy about substitutions either! Did you try adding a splash of rum to the gelatin? Were you brave enough to use a different citrus flavor? Let me know all the details.
Please drop a rating out of five stars right below the instructions—it helps other bakers know that this recipe is a guaranteed winner! And if you snapped a picture of your beautiful, jiggly, lime-covered beauty, be sure to share it on social media. Tag me! I love seeing these classic comfort foods reborn in modern kitchens. If you want to send me a direct photo or just have a specific question about the process, you can always reach out to me via my contact page. Happy baking, friends!
Lime Poke Cake
Ingredients
Equipment
Method
- Bake the cake according to the package directions. Let the cake cool completely after baking.
- Use a spoon handle to poke holes across the top of the cooled cake, spacing them about 1 inch apart.
- Mix the lime gelatin powder with the boiling water until the gelatin dissolves completely. This takes about 2 minutes.
- Gently pour the dissolved gelatin mixture over the top of the cake. Make sure the gelatin fills all the holes.
- Refrigerate the cake for 2 hours.
- Remove the cake from the refrigerator and spread the thawed whipped topping evenly over the top surface.
- Slice and serve the cake immediately, or cover it and keep it refrigerated until you are ready to serve.