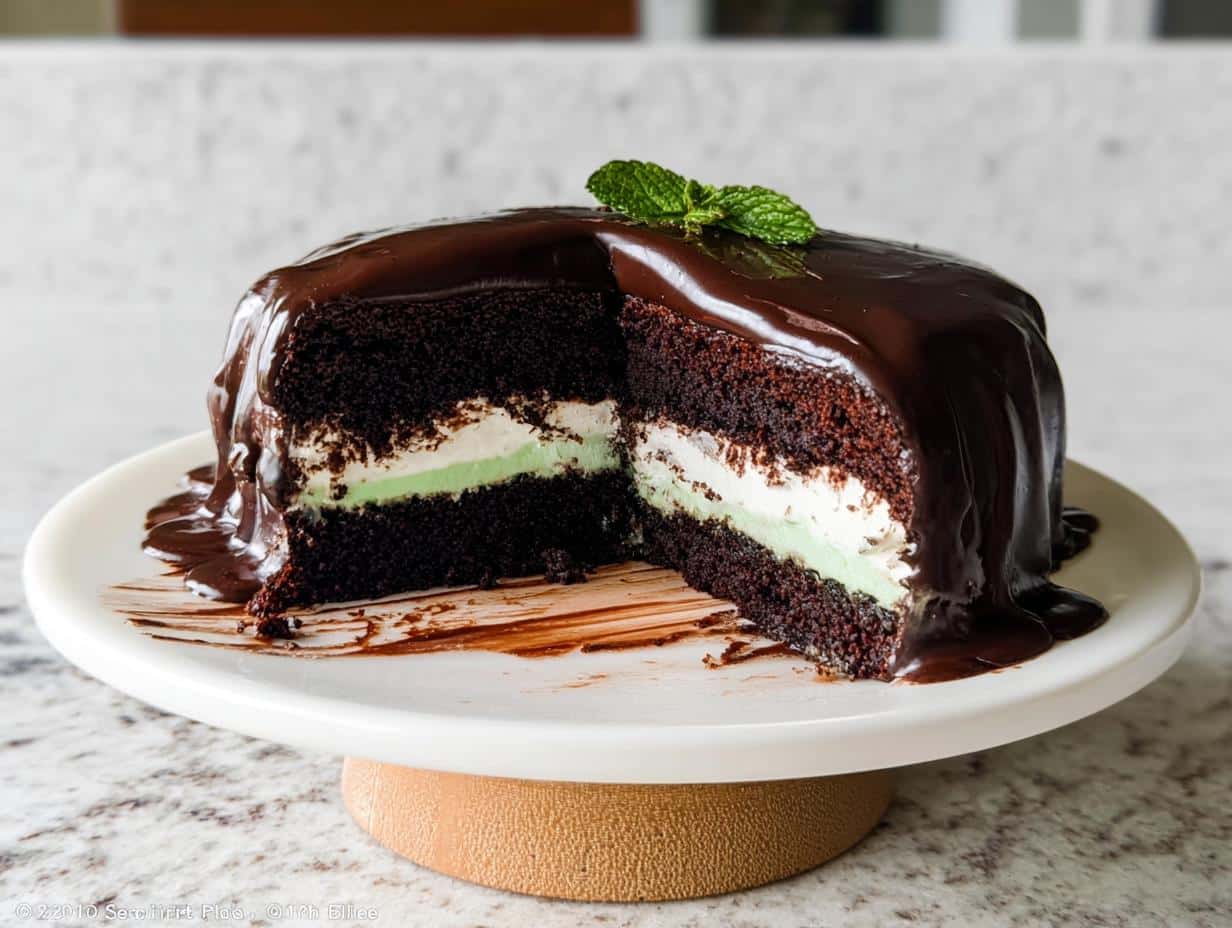
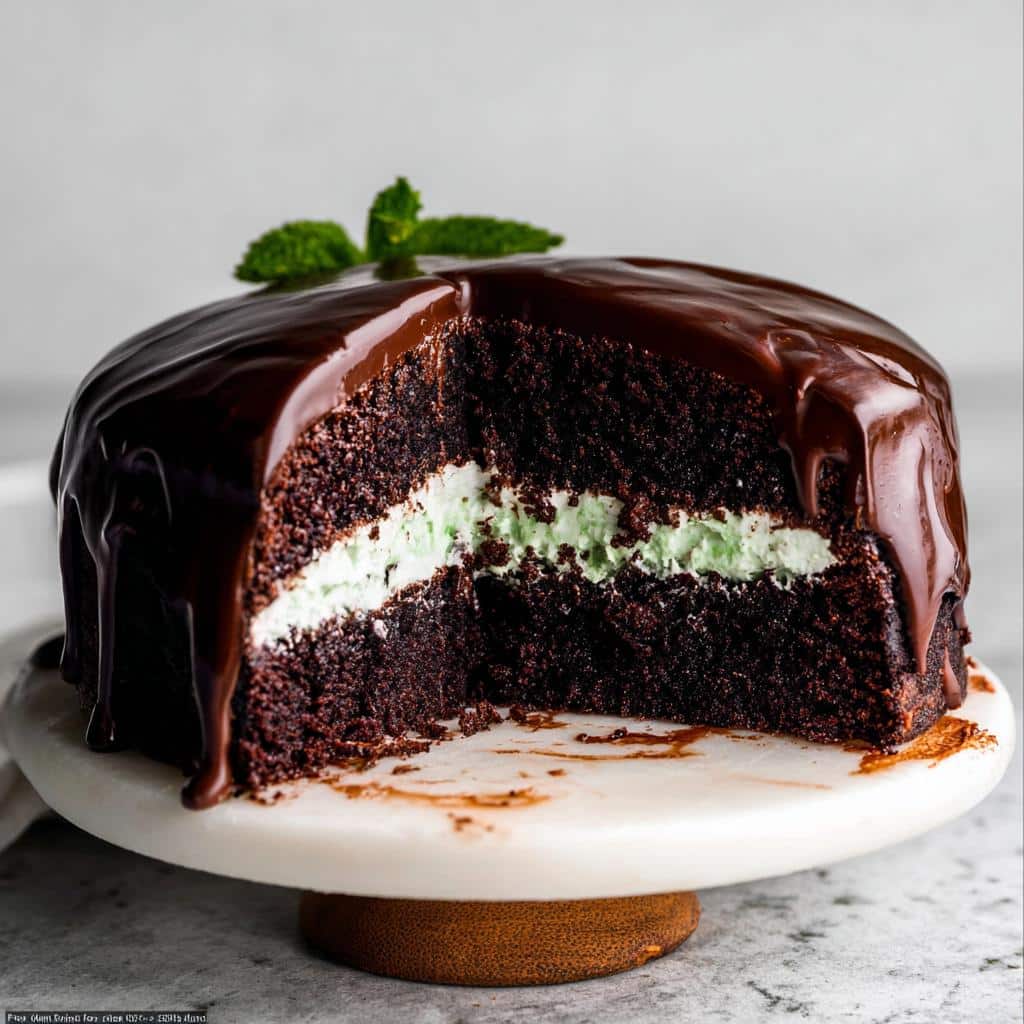
When you need a dessert that absolutely screams ‘refreshing’ but still hits that deep, satisfying chocolate craving, you know you’ve got to bring in the mint! I’m Sarah, and while I usually focus on approachable recipes for weeknight dinners, sometimes you just need a showstopper that feels totally special. That’s why I absolutely adore this Mint Chocolate Cake.
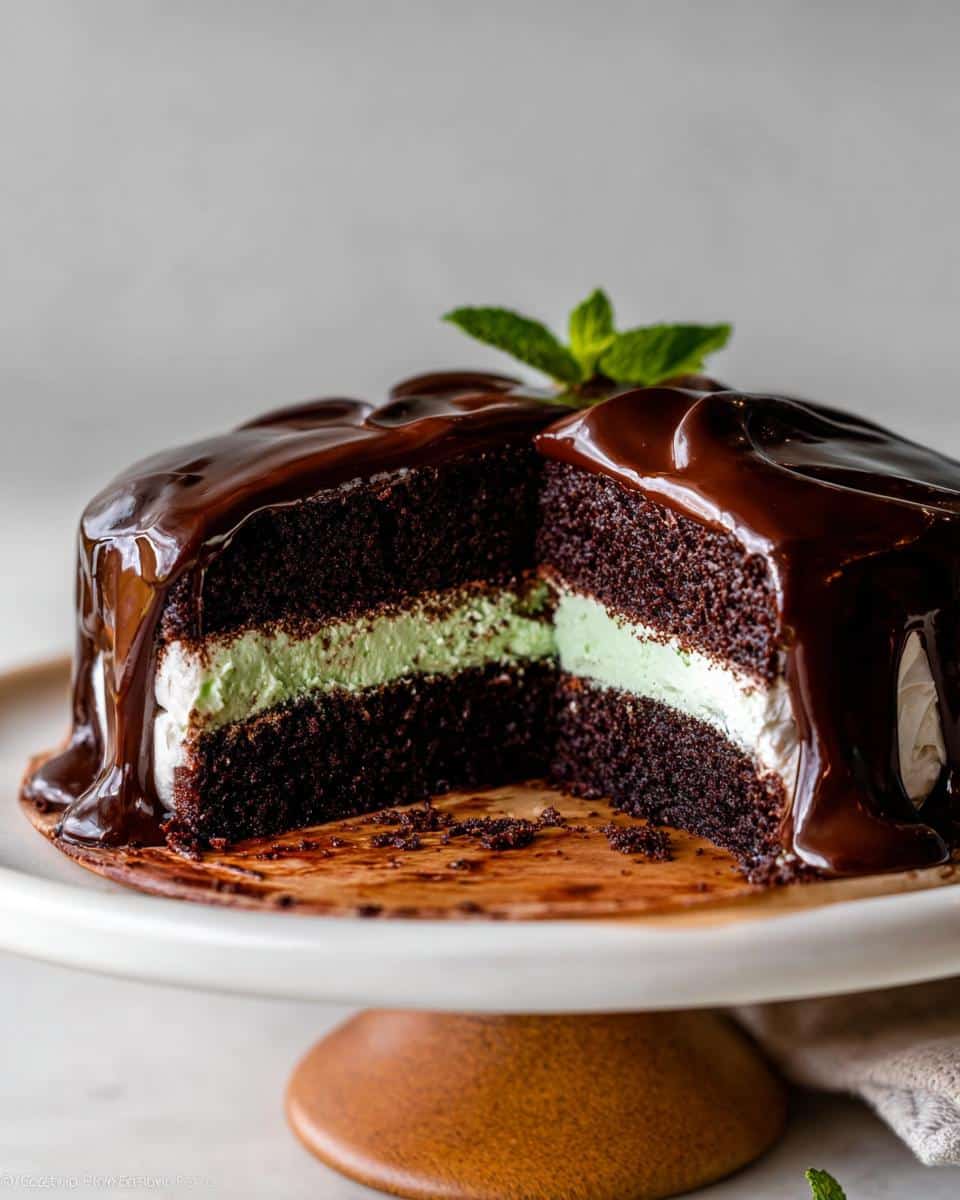
This isn’t your standard overly sweet mint treat. What makes this recipe—and my whole approach to baking—special is proving that you absolutely don’t need to be intimidated by layers or fancy frostings. We’re pairing a moist, deep chocolate cake with a bright, fresh peppermint cream and topping it all off with a luscious dark chocolate ganache. It’s visually stunning, but honestly, it’s surprisingly easy to pull off in your own kitchen. Get ready for your new favorite dessert!
Why You Need This Mint Chocolate Cake Recipe Today
Look, I know there are a million chocolate cake recipes floating around out there, but trust me when I say this one is different. Sarah Bennett style means we aim high on flavor but keep the difficulty low, and this cake nails that balance perfectly. You’ll be reaching for this recipe again and again.
- It’s the perfect flavor symphony! We get that rich, dark chocolate from the cocoa and the ganache, but it’s perfectly cut by the cool blast of fresh peppermint in the frosting. It’s so refreshing.
- Forget stiff, fiddly cakes. Because we use oil in the cake batter, this stays incredibly moist, even the day after you bake it. That means less stress for you the next day!
- This is a showstopper without the scary work. The layers stack up beautifully, and that gorgeous dark ganache drip makes it look like you spent all day in a fancy bakery.
- It’s amazing for holidays and fun gatherings! If you are looking for excellent easy dessert recipes, think about St. Patrick’s Day. This layer cake makes wonderful St Patrick’s Day Food Ideas Party that everyone will comment on!
Gathering Ingredients for Your Mint Chocolate Cake
Okay, we’re diving into the supplies list! I always tell my students that baking is like science—you need the right components to get that magic reaction. For this Mint Chocolate Cake, we have three main parts, and getting your ingredients ready beforehand makes the process so much smoother. Trust me, having everything measured out means you won’t forget that vital teaspoon of peppermint!
Also, a quick note from my Seattle kitchen: Make sure your butter and eggs for the cake and frosting are at room temperature. This isn’t a suggestion; it’s essential for that perfect, fluffy texture we want! If they are cold, your batter won’t combine evenly, and we are avoiding clumpy cakes at all costs.
For the Rich Chocolate Cake Layers
These items create that deeply flavorful, moist base. Remember: room temperature for the butter and eggs!
- 1 cup granulated sugar
- 1/2 cup unsalted butter, room temperature and cut into 8 pieces
- 1/4 cup extra-virgin olive oil
- 2 large eggs, at room temperature
- 1 Tablespoon pure vanilla extract or vanilla paste
- 1 cup all-purpose flour
- 1/2 cup unsweetened dutch-process or natural cocoa powder, sifted
- 1 teaspoon baking powder
- 1 teaspoon baking soda
- 1 teaspoon salt or fine sea salt
- 1/2 cup hot water
Making the Dark Chocolate Ganache
This part doesn’t use heat until the very end, so have your chocolate ready to go. Make sure that dark chocolate is finely chopped for the smoothest melt!
- 2 cups dark chocolate, finely chopped (Use high quality chips or baking bars.)
- 1.25 cups heavy cream or heavy whipping cream
- 1/4 teaspoon salt or fine sea salt
- 2 teaspoons pure vanilla extract or vanilla paste
Whipping the Peppermint Cream Frosting
This is where the mint magic happens! We use both fresh mint and extract for that real, bright flavor. You’ll need room temperature butter and shortening here, too.
- 1/2 cup unsalted butter, room temperature
- 1/2 cup vegetable shortening, room temperature
- 2 Tablespoons fresh mint, finely chopped (Plus more for garnish if desired.)
- 3.5 cups confectioners’ sugar
- 2 teaspoons peppermint extract
- 3 Tablespoons whole milk, room temperature
Step-by-Step Instructions for the Perfect Mint Chocolate Cake
Now for the fun part! Putting everything together is where this cake really shines. I want you to pretend you’re building something strong yet beautiful. We tackle the cake first, then the toppings while it cools. Don’t rush the cooling part, though—that’s where we set ourselves up for a perfect finish later! This whole process is designed to be smooth, so if you have all your ingredients ready, we can start right now.
Preparing and Baking the Cake Base
First things first: get that oven preheated to 350°F (177°C). While it warms up, you need to prep your 9-inch round cake pan. Grease it really well, cut a circle of parchment paper to fit snugly in the bottom, and then grease that parchment paper too. This double protection means no sticking, ever!
Grab your electric mixer for the cake base. Cream that sugar and room-temperature butter together until it looks light and fluffy—that usually takes about three minutes on medium speed. Then, slowly stream in your olive oil while the mixer is still running on low. Scrape the sides and bottom, because we want everything combined evenly!
Now, add in your room-temperature eggs, one at a time. Don’t rush this; let each one mix in before introducing the next one. Stir in your vanilla. In a separate bowl, quickly whisk together the flour, cocoa powder (make sure it’s sifted!), baking powder, baking soda, and salt.
We fold the dry stuff into the batter in three batches, just mixing until it’s *almost* blended. The batter will look super thick—don’t panic! Now, pour in that hot water and whisk it just until it comes together. Pour the batter evenly into your prepared pan. Tap the pan hard on the counter a few times to get any sneaky air bubbles out. Pop it in the oven for 30 to 36 minutes. It’s done when a toothpick comes out clean or the center springs back when you give it a gentle poke.
Let the cake cool in the pan on a wire rack for a solid 20 minutes before carefully turning it out onto the rack to cool completely. We need it totally cool before we frost it!
Creating the Smooth Chocolate Ganache
This ganache is so luxurious, and the double-boiler method keeps it silky smooth. Set a large, heat-safe bowl over a saucepan that has just a little bit of water simmering—key point here: the bottom of the bowl cannot touch the water!
Toss in your finely chopped dark chocolate, heavy cream, salt, and vanilla extract. You need to stir frequently until every bit of that chocolate has melted perfectly into the cream. Once it’s smooth and glossy, take it off the heat. Now, you have to be patient! Set it aside at room temperature to cool down and thicken up. This cooling time is crucial, usually taking around 60 to 90 minutes. If you try to pour it too soon, it’ll just run right over the edges!
Whipping Up the Bright Peppermint Cream
This frosting is where we get that amazing mint kick! Get your mixer ready with the paddle attachment. Cream the room-temperature butter, shortening, and that finely chopped fresh mint together on medium-low speed until everything looks friendly. Scrape down those bowl sides!
Once combined, slowly add in the confectioners’ sugar, peppermint extract, and milk. Keep beating until the frosting is light, whipped, and super creamy. If it seems too stiff when we bring it out later, just remember you can whip in an extra splash of milk!
Assembling Your Layered Mint Chocolate Cake
Okay, the cake is cool, the frosting is fluffy, and the ganache is pourable—time to build! Spread the peppermint cream in a nice, thick layer right over the top of your beautifully cooled chocolate cake. Don’t worry about making it perfect yet; this layer is just the base for the ganache!
Once frosted, pop the whole cake, uncovered, into the refrigerator for about 30 minutes. This chilling step is non-negotiable; it helps firm up the peppermint cream so the ganache doesn’t slide right off! After that little nap, take it out and slowly pour that thickened ganache on top. Use a small icing spatula to gently nudge it over the edges until you get those lovely, artistic drips. If you’re making this for the kids, make sure to save some extra mint to sprinkle on top before the final chill!
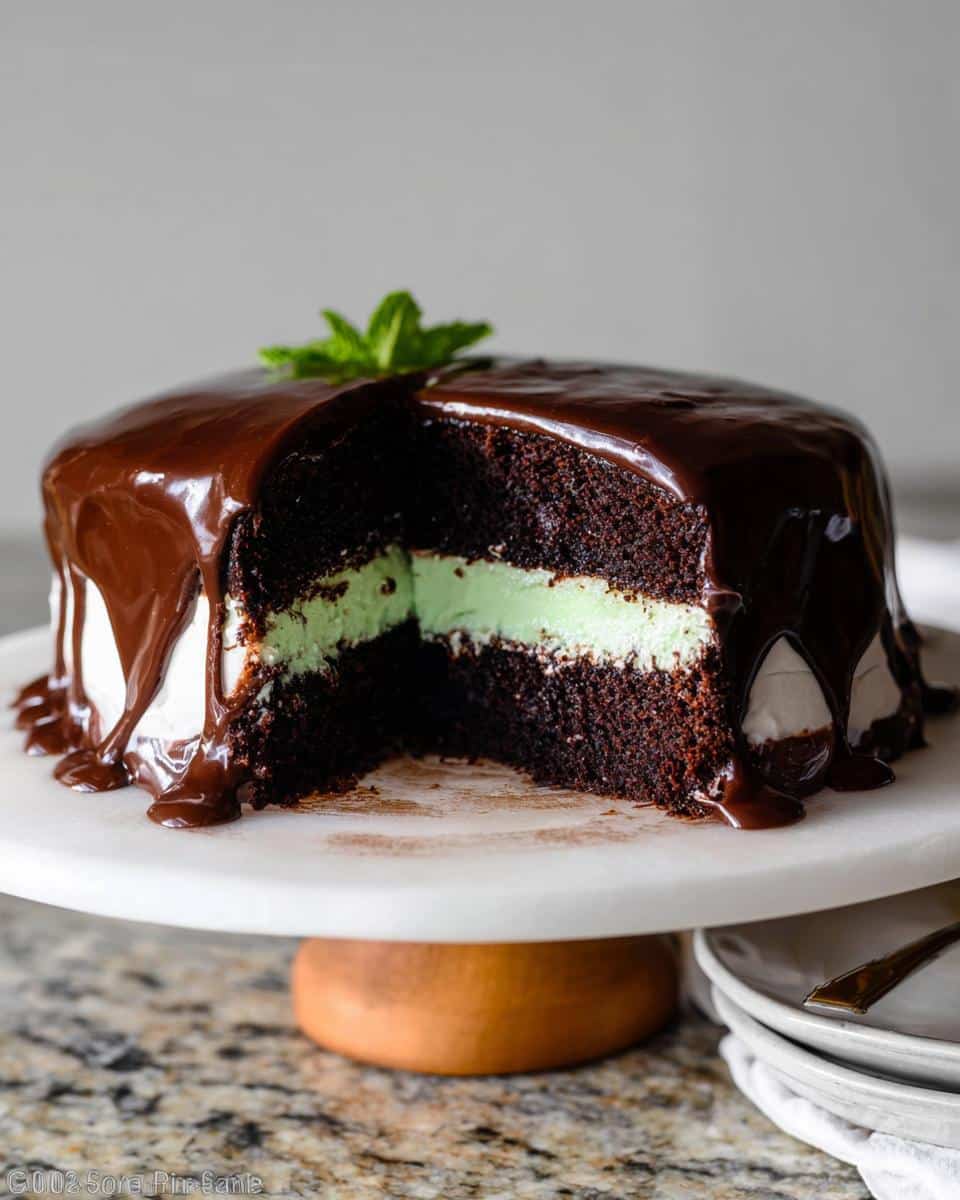
Return the assembled cake to the refrigerator uncovered for another 30 minutes to let the ganache set up nicely. Then, it’s ready to slice! Enjoy how phenomenal that looks!
Essential Equipment for Making This Mint Chocolate Cake
Part of feeling confident in the kitchen is showing up with the right tools! I always say that having the right gear makes the whole process feel more like fun and less like you’re wrestling the ingredients. Luckily, for this fantastic Mint Chocolate Cake, we aren’t asking you to drag out every gadget you own. It’s pretty straightforward, but these core pieces really make the difference between a good cake and a great one.
If you’re missing any of these, don’t sweat it! But if you are serious about making this shine, these are the items that will help you achieve that perfect texture in the cake and that smooth finish on the ganache. I listed them out below so you can check your stash before you even start mixing the batter.
- One 9-inch Round Cake Pan: This is specific for getting those even layers.
- Electric Handheld or Stand Mixer: This is a huge time saver for creaming that butter and sugar properly for both the cake and the frosting!
- Silicone Spatula or Wooden Spoon: Essential for gently folding in the dry ingredients without kicking out all the air we just mixed in.
- Cooling Rack: You need this to let the cake cool completely and correctly, preventing a soggy bottom.
- Small Icing Spatula: Perfect for spreading that peppermint cream smoothly and getting the ganache just where you want it!
Tips for Success When Baking Your Mint Chocolate Cake
You’ve done the hard work mixing the batter and everything is in the oven—that’s fantastic! But the mixing and ingredient prep are really where most people accidentally trip up when making a layered cake like this. When I teach my baking classes, these are the few little secrets I always drill into my students to ensure they get that beautiful, restaurant-worthy slice every single time.
First up, let’s talk about temperature, something I learned the hard way when I first started baking! If your butter for the frosting isn’t soft but slightly cool, or if your eggs for the cake are stiff and cold, they just won’t mix correctly with the sugar. That initial creaming builds the structure, so aim for that perfect, slightly yielding consistency for your butter. It’s worth pulling those items out a good hour beforehand.
Don’t Overmix After Adding Flour!
Once you start folding in your flour mixture for the cake base, you need to switch gears mentally from high-speed whipping to gentle incorporation. Overmixing at this stage develops the gluten too much, and we end up with a cake that’s tough instead of tender. Fold just until you see no more white streaks. Seriously, stop mixing when you think you should probably just mix a *little* bit more. That tiny bit of extra mixing is what ruins the texture!
Ganache Consistency is Everything
Remember that ganache you made earlier? It needs to be thick enough to hold its shape a little bit, but still fluid enough to pour. If you rush it and use it when it’s too warm, it will melt right through that peppermint frosting layer—and we absolutely don’t want that messy scenario! If you notice it’s cooling too fast and getting stiff while you’re whipping the frosting, just put the bowl over a warm (not hot!) sink basin for five minutes. It’ll become pourable again without getting icy.
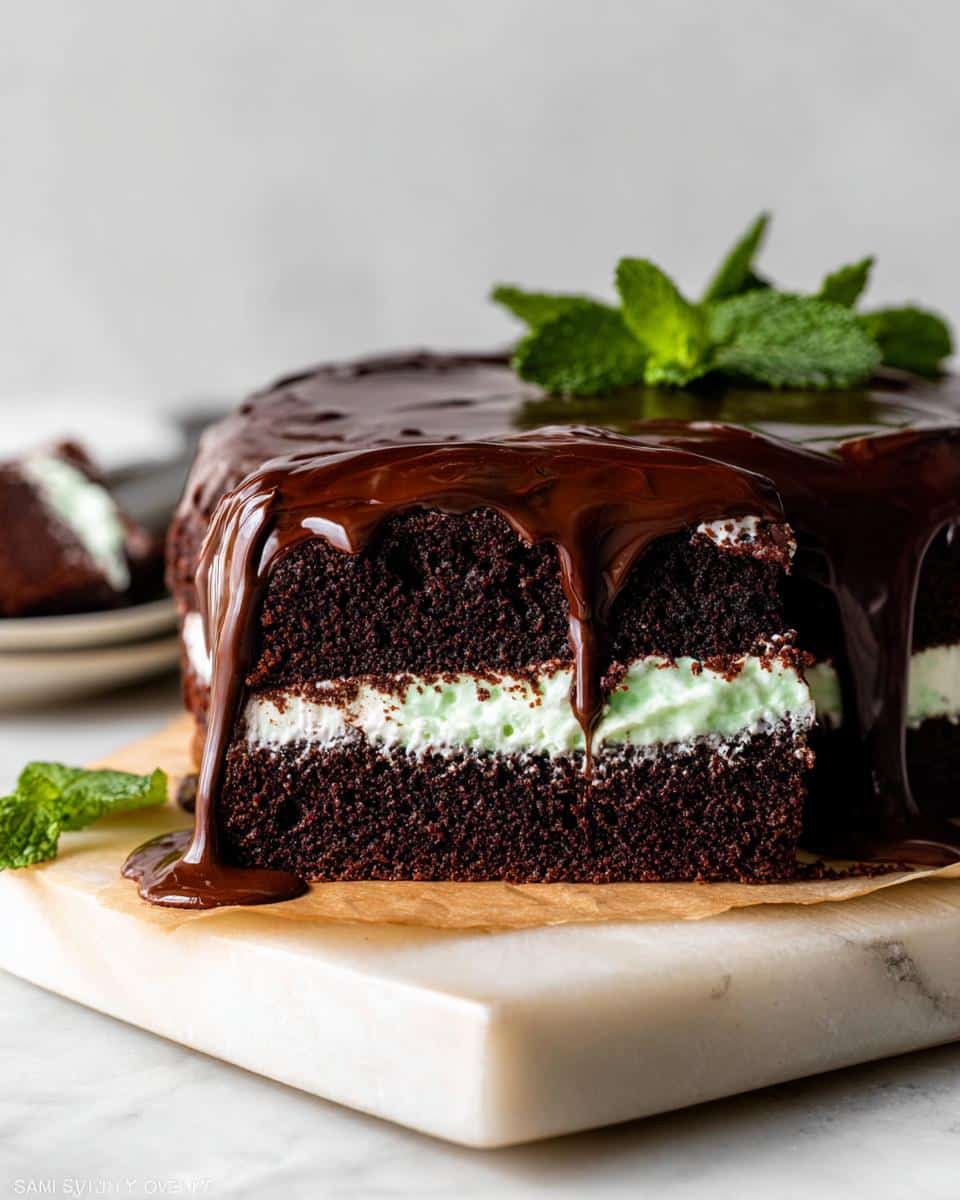
My Favorite Presentation Trick (A Tip from Sarah!)
When it comes to presentation, especially if you are using this as gorgeous Saint Patrick Day Food, don’t feel like you need a perfectly smooth exterior on the peppermint cream layer. Because we are covering it with ganache, the layer underneath doesn’t have to be flawless. My trick? Use the back of a spoon to create gentle waves or swirls in the peppermint frosting before you chill it down for 30 minutes. When you pour the ganache over those waves, you get this amazing, rustic, textured chocolate top underneath that looks way more professional than a slick, flat surface. It gives the whole cake depth!
If you want more inspiration on how I approach photography and making sure my kitchen creations look their best, you can always check out my work over on the About Page!
Making Ahead and Storing Your Mint Chocolate Cake
This Mint Chocolate Cake is the perfect recipe for stress-free entertaining because you can break the work up over two days! I’m a huge proponent of making components ahead of time, especially when there are three different delicious things—cake, frosting, and ganache—to assemble. Don’t feel like you have to do this all in one afternoon, or you’ll be exhausted before the guests even arrive!
The baked cake layers are superstars for make-ahead baking. Once they are completely cooled, you can wrap them up airtight. I find that if I wrap them tightly in plastic wrap and then put them inside a large zip-top bag, they keep great at room temperature for one whole day. If you need longer, you can freeze them for up to three months!
The frosting and the ganache are also freezer-friendly, which is great news for the busy baker. The peppermint frosting needs to come to room temperature, and then you just whip it again briefly to get that gorgeous creamy texture back. If it seems a touch too thick after warming up, just stream in a tiny splash of milk until it feels right again.
For the ganache, if you refrigerate it, it will get rock hard. If you need to use it sooner than the 90 minutes suggested, just gently warm it on the stovetop for a few moments until it’s fluid again. Don’t overheat it, or it goes back to being oily!
Freezing the Finished Cake
Yes, you can freeze the fully assembled cake! Bring the cake out of the freezer the night before you plan to serve it and let it thaw slowly overnight in the refrigerator. Then, just pull it out on party day and let it sit on the counter for about an hour before cutting. It tastes just as incredible as the moment you finished decorating it!
I’ve got a few other fun recipes that also freeze beautifully, like these extra special brownie bites, so definitely keep making extras!
Serving Suggestions for Your Festive Mint Chocolate Cake
This cake is already a star, but if you’re planning a big gathering, maybe for a celebration like St. Patrick’s Day, you can certainly build a whole dessert table around it! The beauty of the strong mint and chocolate flavor is that it pairs well with simple things that let the cake shine.
Since we are already aiming for fun and festive, think about complementing ingredients. If you’re making a spread of Irish Party Food, you want something light or maybe slightly acidic to balance out the richness of the cake and ganache. A side of fresh raspberries or sliced strawberries is just perfect—the red and green together look beautiful, too!

For a broader theme, this cake works amazingly well as a standout piece for your next St. Patrick’s Day spread. It fits right in with other holiday dessert ideas. You can call it your signature St Patrick Party Food centerpiece!
If you’re having friends over for themed snacks, consider setting out some fresh mint tea or a strong black coffee alongside it. That sharp drink cuts through the creaminess beautifully. It’s such a crowd-pleaser, whether you serve it cold straight from the fridge or let it warm up slightly on the counter for an extra gooey ganache!
Frequently Asked Questions About This Mint Chocolate Cake
Before you run off to start the oven, answer these quick questions! We cover substitutions for those fresh herbs and how to make sure this cake fits whatever party theme you’re throwing together. I always try to answer what I’d ask myself when I look at a new recipe, especially when it involves something fun like this amazing Mint Chocolate Cake!
Can I make this Mint Chocolate Cake green for a party?
Absolutely! That is half the fun of this dessert! The peppermint cream frosting is the perfect canvas for color. I highly recommend using gel food coloring rather than liquid, as gels are more concentrated and won’t mess with the frosting’s texture. Start with just one tiny drop and mix until you get that perfect vibrant shade you’re looking for. It instantly transforms your dessert into great Green Foods For Party fare!
What is the best way to make this a St Patrick Day Food?
Beyond coloring the frosting green, presentation is key for Saint Patrick Day Food! Think about garnishes! If you made the frosting bright green, using shaved dark chocolate or even crushed peppermint candies *instead* of fresh mint leaves on top creates a wonderful visual contrast. It helps elevate it from just a tasty cake to proper St Patrick Day Food Ideas Party fare.
Can I substitute the fresh mint in the frosting?
You definitely can, but I really hope you don’t! The fresh mint provides this bright, almost herbal lift that the extract alone just can’t mimic. However, if you absolutely can’t find fresh mint, you can use 3 teaspoons of peppermint extract instead of 2, along with maybe 1 teaspoon of vanilla. You might need to adjust the milk slightly if the frosting seems too thick, but always rely on your taste buds for the best flavor balance!
Is this cake suitable for kids, like St Patrick’s Day For Kids Treats?
If you’re serving this to younger guests, you might want to skip the very potent peppermint extract entirely and just use finely chopped mint leaves and maybe a little vanilla instead! You can also use milk chocolate chips in the ganache instead of dark chocolate! This makes the overall flavor much milder, sweeter, and more kid-friendly for your selection of St Patrick’s Day For Kids Treats! For all policies regarding recipes and usage, please check out the site disclaimer.
Nutritional Estimates for Your Mint Chocolate Cake
Now, I’m Sarah, and while I’m a culinary educator, I’m certainly no certified nutritionist! The exact makeup of this cake changes wildly based on the brand of cocoa powder you use, the fat content of your heavy cream, and the type of dark chocolate you select. So, please take these numbers as a friendly guideline based on standard ingredient estimations for a recipe divided into 12 generous slices.
If you *need* exact counts, I always tell folks to put the final ingredient list into their favorite online nutritional calculator, as that will be more precise for your home kitchen. Remember, this is a special occasion cake, not an everyday snack!
- Calories: Approximately 550-620 per slice
- Total Fat: Roughly 30-35g per slice
- Protein: Around 5-7g per slice
- Carbohydrates: About 70-80g per slice
For definitive information, please review the disclosures on the site disclaimer page.
Making Ahead and Storing Your Mint Chocolate Cake
This Mint Chocolate Cake is the perfect recipe for stress-free entertaining because you can break the work up over two days! I’m a huge proponent of making components ahead of time, especially when there are three different delicious things—cake, frosting, and ganache—to assemble. Don’t feel like you have to do this all in one afternoon, or you’ll be exhausted before the guests even arrive!
The baked cake layers are superstars for make-ahead baking. Once they are completely cooled, you can wrap them up airtight. I find that if I wrap them tightly in plastic wrap and then put them inside a large zip-top bag, they keep great at room temperature for one whole day. If you need longer, you can freeze them for up to three months!
The frosting and the ganache are also freezer-friendly, which is great news for the busy baker. The peppermint frosting needs to come to room temperature, and then you just whip it again briefly to get that gorgeous creamy texture back. If it seems a touch too thick after warming up, just stream in a tiny splash of milk until it feels right again.
For the ganache, if you refrigerate it, it will get rock hard. If you need to use it sooner than the 90 minutes suggested, just gently warm it on the stove for a few moments until it’s fluid again. Don’t overheat it, or it goes back to being oily!
Freezing the Finished Cake
Yes, you can freeze the fully assembled cake! Bring the cake out of the freezer the night before you plan to serve it and let it thaw slowly overnight in the refrigerator. Then, just pull it out on party day and let it sit on the counter for about an hour before cutting. It tastes just as incredible as the moment you finished decorating it!
I’ve got a few other fun recipes that also freeze beautifully, like these extra special brownie bites, so definitely keep making extras!
Serving Suggestions for Your Festive Mint Chocolate Cake
This cake is already a star, but if you’re planning a big gathering, maybe for a celebration like St. Patrick’s Day, you can certainly build a whole dessert table around it! The beauty of the strong mint and chocolate flavor is that it pairs well with simple things that let the cake shine.
Since we are already aiming for fun and festive, think about complementing ingredients. If you’re making a spread of Irish Party Food, you want something light or maybe slightly acidic to balance out the richness of the cake and ganache. A side of fresh raspberries or sliced strawberries is just perfect—the red and green together look beautiful, too!
For a broader theme, this cake works amazingly well as a standout piece for your next St. Patrick’s Day spread. It fits right in with other holiday dessert ideas. You can call it your signature St Patrick Party Food centerpiece!
If you’re having friends over for themed snacks, consider setting out some fresh mint tea or a strong black coffee alongside it. That sharp drink cuts through the creaminess beautifully. It’s such a crowd-pleaser, whether you serve it cold straight from the fridge or let it warm up slightly on the counter for an extra gooey ganache!
Frequently Asked Questions About This Mint Chocolate Cake
Before you run off to start the oven, answer these quick questions! We cover substitutions for those fresh herbs and how to make sure this cake fits whatever party theme you’re throwing together. I always try to answer what I’d ask myself when I look at a new recipe, especially when it involves something fun like this amazing Mint Chocolate Cake!
Can I make this Mint Chocolate Cake green for a party?
Absolutely! That is half the fun of this dessert! The peppermint cream frosting is the perfect canvas for color. I highly recommend using gel food coloring rather than liquid, as gels are more concentrated and won’t mess with the frosting’s texture. Start with just one tiny drop and mix until you get that perfect vibrant shade you’re looking for. It instantly transforms your dessert into great Green Foods For Party fare!
What is the best way to make this a St Patrick Day Food?
Beyond coloring the frosting green, presentation is key for Saint Patrick Day Food! Think about garnishes! If you made the frosting bright green, using shaved dark chocolate or even crushed peppermint candies *instead* of fresh mint leaves on top creates a wonderful visual contrast. It helps elevate it from just a tasty cake to proper St Patrick Day Food Ideas Party fare.
Can I substitute the fresh mint in the frosting?
You definitely can, but I really hope you don’t! The fresh mint provides this bright, almost herbal lift that the extract alone just can’t mimic. However, if you absolutely can’t find fresh mint, you can use 3 teaspoons of peppermint extract instead of 2, along with maybe 1 teaspoon of vanilla. You might need to adjust the milk slightly if the frosting seems too thick, but always rely on your taste buds for the best flavor balance!
Is this cake suitable for kids, like St Patrick’s Day For Kids Treats?
If you’re serving this to younger guests, you might want to skip the very potent peppermint extract entirely and just use finely chopped mint leaves and maybe a little vanilla instead! You can also use milk chocolate chips in the ganache instead of dark chocolate! This makes the overall flavor much milder, sweeter, and more kid-friendly for your selection of St Patrick’s Day For Kids Treats! For all policies regarding recipes and usage, please check out the site disclaimer.
Nutritional Estimates for Your Mint Chocolate Cake
Now, I’m Sarah, and while I’m a culinary educator, I’m certainly no certified nutritionist! The exact makeup of this cake changes wildly based on the brand of cocoa powder you use, the fat content of your heavy cream, and the type of dark chocolate you select. So, please take these numbers as a friendly guideline based on standard ingredient estimations for a recipe divided into 12 generous slices.
If you *need* exact counts, I always tell folks to put the final ingredient list into their favorite online nutritional calculator, as that will be more precise for your home kitchen. Remember, this is a special occasion cake, not an everyday snack!
- Calories: Approximately 550-620 per slice
- Total Fat: Roughly 30-35g per slice
- Protein: Around 5-7g per slice
- Carbohydrates: About 70-80g per slice
For definitive information, please review the disclosures on the site disclaimer page.
Mint Chocolate Cake
Ingredients
Equipment
Method
- Preheat oven to 350°F (177°C). Grease a 9×2-inch round cake pan, line with a parchment paper round, then grease the parchment paper.
- For the cake: In the bowl of an electric mixer fitted with a paddle attachment, cream the sugar and butter together on medium speed until light and fluffy, about 3 minutes. With the mixer on low, slowly stream in the oil. Scrape the sides and bottom of the bowl. With the mixer on low, add in the eggs, one at a time, making sure each is incorporated before adding the next. Add the vanilla and run the mixer for 30 more seconds. Take the bowl out of the mixer.
- In a medium bowl, whisk the flour, cocoa powder, baking powder, baking soda, and salt until combined. With a spatula or spoon, fold the flour mixture into the butter mixture in three batches, mixing each until almost blended. The batter will be very thick. Pour in the hot water and whisk to combine. Pour evenly into the prepared cake pan. Tap the pan on the counter a few times to settle the batter and release air bubbles.
- Bake in the center of the oven for 30-36 minutes. Check the cake at 30 minutes; it is done when a toothpick inserted into the center comes out clean or when the cake springs back if you lightly poke the center. Remove from the oven and cool the cake in the pan set on a cooling rack for 20 minutes. Remove the cake from the pan and place it directly on the cooling rack to finish cooling.
- Make the ganache as the cake cools: Place the chocolate, cream, and salt in a large heat-safe bowl set over a medium saucepan of simmering water. Do not let the bottom of the bowl touch the water. Stir frequently until chocolate has melted and the ganache is smooth. Remove from heat and stir in the vanilla. Set aside at room temperature to cool until thickened, about 60-90 minutes.
- For the peppermint cream frosting: In the bowl of an electric mixer fitted with a paddle attachment, beat the butter, shortening, and mint together on medium-low speed until combined. Scrape down the sides and up the bottom of the bowl and beat again as needed. Add confectioners’ sugar, peppermint extract, and milk and continue beating until whipped, smooth, and creamy.
- Assemble: Spread peppermint cream in a thick layer all over the top of the cooled cake. Place the cake uncovered in the refrigerator for 30 minutes to help set the frosting. Pour ganache slowly on top of the cake and use a spatula or knife to gently spread it over the frosting. Return the cake to the refrigerator and chill uncovered for 30 minutes before slicing and serving. Garnish with mint leaves if you wish.