
Oh, my heart, if you’re anything like me, some days you just look at the oven and sigh. We want decadent, we want creamy, but we do *not* want the heat! That’s why I’m so thrilled to share these No-Bake Chocolate Cheesecake Jars with you today. Seriously, forget baking; these beauties are rich beyond belief, portion-controlled so you don’t have to cut anything, and use about five ingredients if you count the toppings.
I whipped these up last week when I needed a soulful dessert fast, and they were a huge hit! They have that luxurious, velvety texture that screams indulgence. We’re talking chocolate cookie crust, the silkiest filling, and a dreamy topping. This recipe is pure comfort, made simple, and it’s something I know you’ll want to tuck away in your own collection of favorite easy dessert ideas. If you want to know more about my cooking philosophy, you can always pop over and read a bit about me on the About Page!
Why You Will Love These No-Bake Chocolate Cheesecake Jars
These jars are truly a lifesaver on busy evenings or when hosting friends unexpectedly. Why fuss with baking when you can achieve this level of creamy decadence with so little effort? They honestly feel fancy but are secretly one of the simplest homemade desserts you’ll ever make.
- No oven required, ever! We keep that heat out of the kitchen, which is a lifesaver in the summer.
- Portion control is built right in. You just grab a jar and go!
- The layers look fantastic, making this one of the best dessert recipes for pulling out at the last minute.
- These are fantastic for making ahead. Just pop them in the fridge, and they are ready when you are. If you’re looking for more speedy sweet treats, check out my No-Bake Cookies!
Essential Equipment for Your No-Bake Chocolate Cheesecake Jars
You don’t need tons of fancy gear for these jars, which is part of the charm! Since we aren’t baking, we just need the right tools to smash cookies and whip that creamy filling until it’s light as air. Trust me, having the right mixer makes all the difference here!
Tools Needed for Preparation
Here’s the short list of what you need ready to go before you even open the cream cheese:
- A food processor, or maybe just a sturdy zip-top bag and a rolling pin if you like a good arm workout while crushing those cookies.
- Your faithful electric mixer—handheld or stand mixer works perfectly.
- A microwave-safe bowl for melting down that rich chocolate.
- Six charming little jars or small cups for serving.
Gathering Ingredients for No-Bake Chocolate Cheesecake Jars
Okay, getting ready to make these means we are setting ourselves up for success, and that starts right here with our ingredients. The beauty of these little jars is they use pantry staples, which is lovely for those days you need a quick dessert idea without running to the store. We are breaking this down into three groups: the cookie crunch at the bottom, the decadent filling in the middle, and the light topping.
When you pull out the cream cheese, make sure it’s actually softened! That’s non-negotiable for beating out those lumps. This recipe is a fantastic example of how simple dessert recipes can taste like they took hours. If you’re trying to keep the little ones busy, searching for easy recipes for kids, they can certainly help smash those cookies!
Chocolate Crust Ingredients
First up is our base—the crunch that keeps the cheesecake from sliding around in the jar. You need 30 whole Oreos. Yes, the whole cookie, filling and all! Don’t worry about scraping anything out; we want all the flavor. Those need to be crushed finely, and then you just mix in 5 Tablespoons of butter that’s already melted. Easy peasy!
Creamy Chocolate Cheesecake Filling Ingredients
Now for the star! You’ll need 24 ounces of cream cheese—and I’m serious, soften this one up first! We also need ½ cup of granulated sugar and ½ teaspoon of vanilla extract. For the chocolatey depth, grab 1 cup of semi-sweet chocolate chips. Remember, we use the heavy cream in two parts: ½ cup to melt the chocolate and another 1 cup separately for whipping into the filling later. Get that cream cheese ready and room temperature!
Cream Cheese Whipped Cream Ingredients
For the little cloud on top, we’re keeping it light and tangy. Scoop out 4 ounces of softened cream cheese—just a little bit more of that soft cheese! You’ll mix that with just 2 Tablespoons of granulated sugar and 1 teaspoon of vanilla extract. Finally, you’ll whip in 1 full cup of heavy cream until it stands up nice and tall. This topping makes them feel extra special.
Step-by-Step Instructions for No-Bake Chocolate Cheesecake Jars
Alright, let’s get these jars built! This is where the magic happens, and I promise you, if you follow these steps, you won’t end up with lumpy filling or melted chocolate weeping out the sides. It’s all about temperature control and patience, even though this is a no-bake recipe. If you are looking for quick snacks later, you can find some fun ideas over on my Easy Snacks page.
Preparing the Cookie Crust Base
First, we crush those Oreos! In the food processor, pulse those 30 cookies until they look like coarse sand. If you don’t have a processor, put them in a heavy zip bag and just go to town with a rolling pin—that’s great stress relief, by the way!
Pour that melted butter over the crumbs and stir it until everything is just combined. Then, take about 1 Tablespoon of that mixture and dollop it into the bottom of each of your six jars. Use the back of a spoon or a small glass to gently press it down. You want a nice, firm little base layer.
Making the Silky Chocolate Cheesecake Filling
This part requires our attention! In a separate microwave-safe bowl, combine the chocolate chips and the first measure of heavy cream—which was ½ cup. Microwave this in 20-second bursts, stirring well between each burst, until it’s smooth as silk. Let that sit and cool down just a bit while you work on the cheese.
In your mixer bowl, beat the 24 ounces of softened cream cheese until it is absolutely lump-free. I stop the mixer and scrape the bowl down at least twice during this stage! Once it’s perfect, mix in the ½ cup sugar and ½ teaspoon vanilla. Now, slowly drizzle in that slightly cooled melted chocolate while running the mixer on low. Don’t rush this; we want it combined without the chocolate seizing up!
Finally, gently add the remaining 1 cup of heavy cream and beat it up until everything is beautifully fluffy and holds its shape just right. It should look like a luxurious, dense mousse.
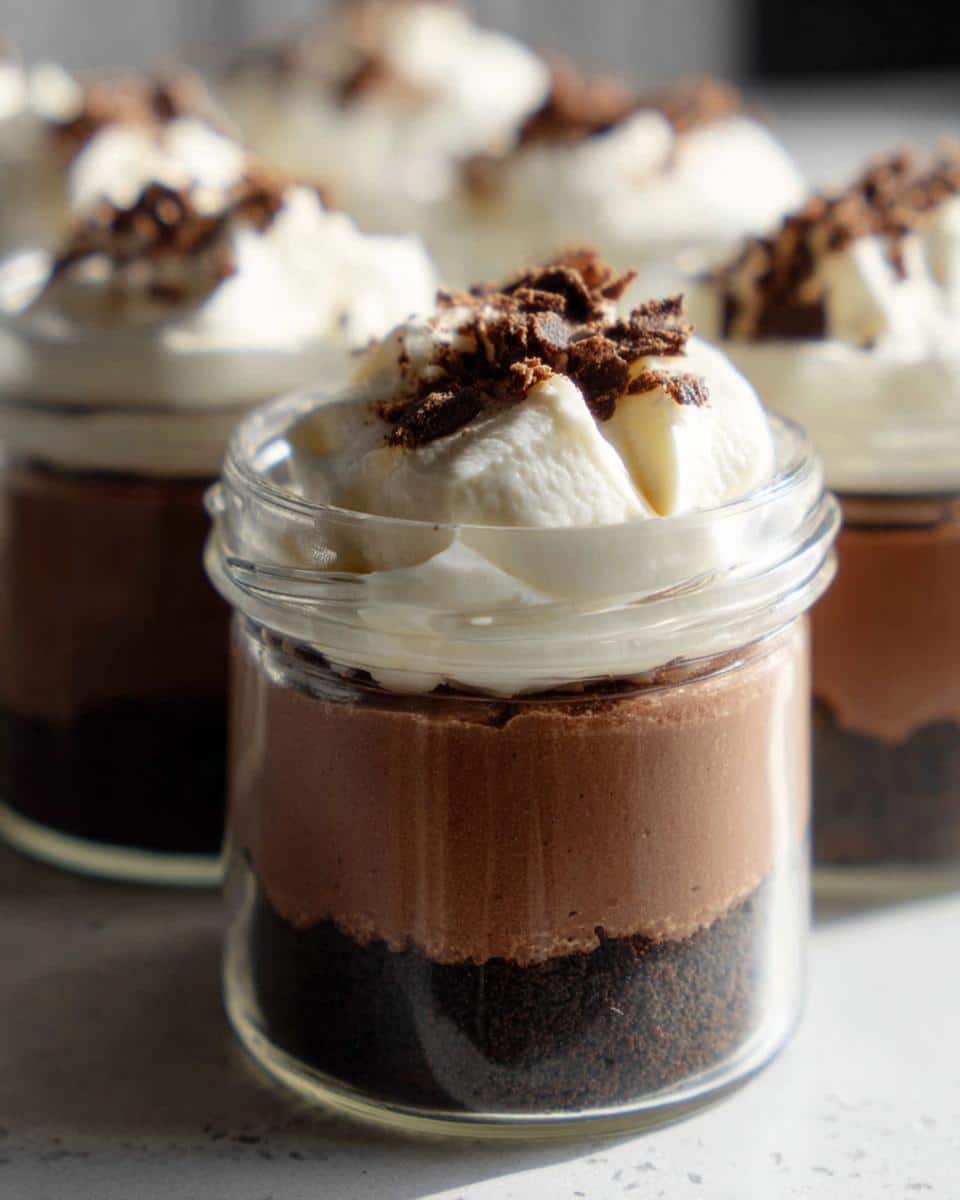
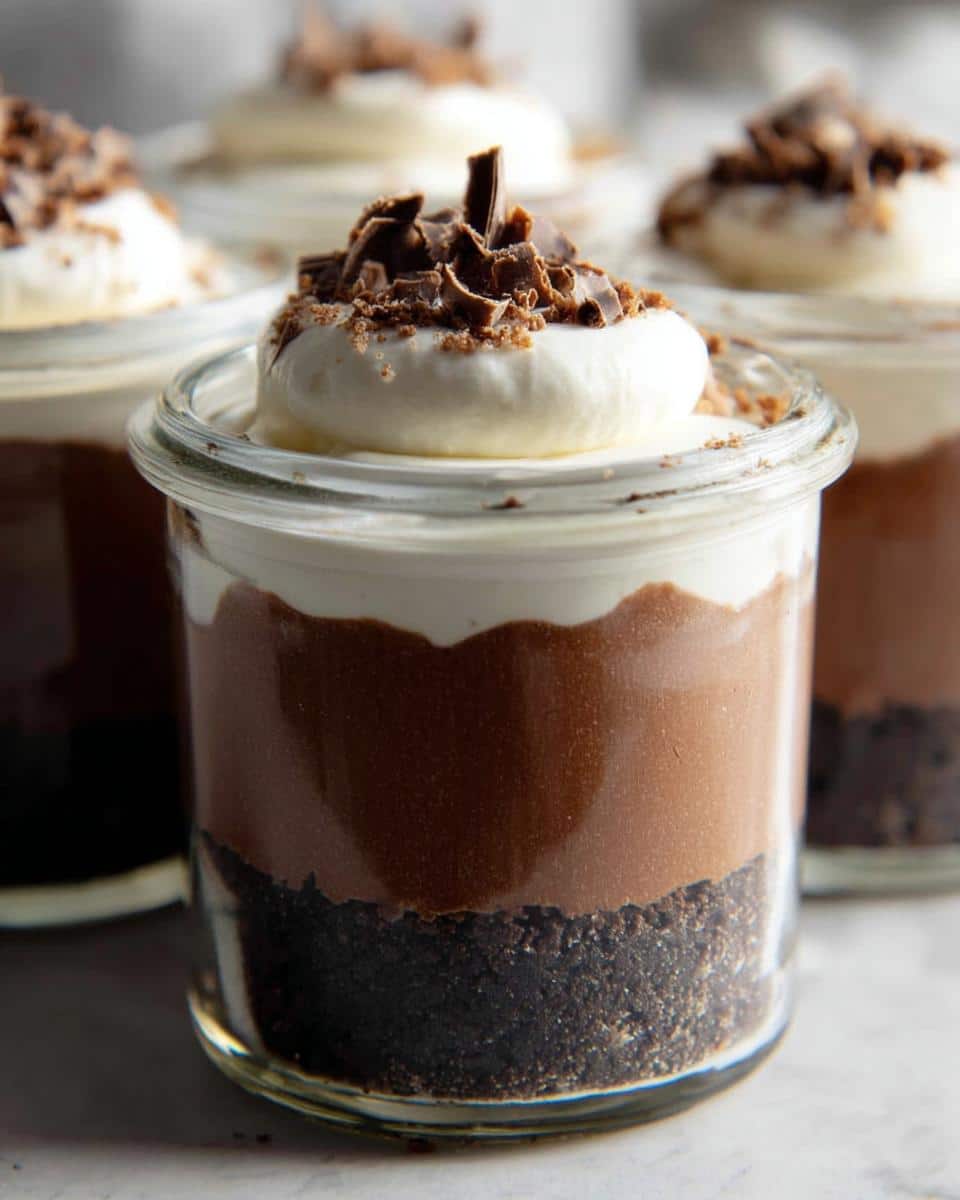
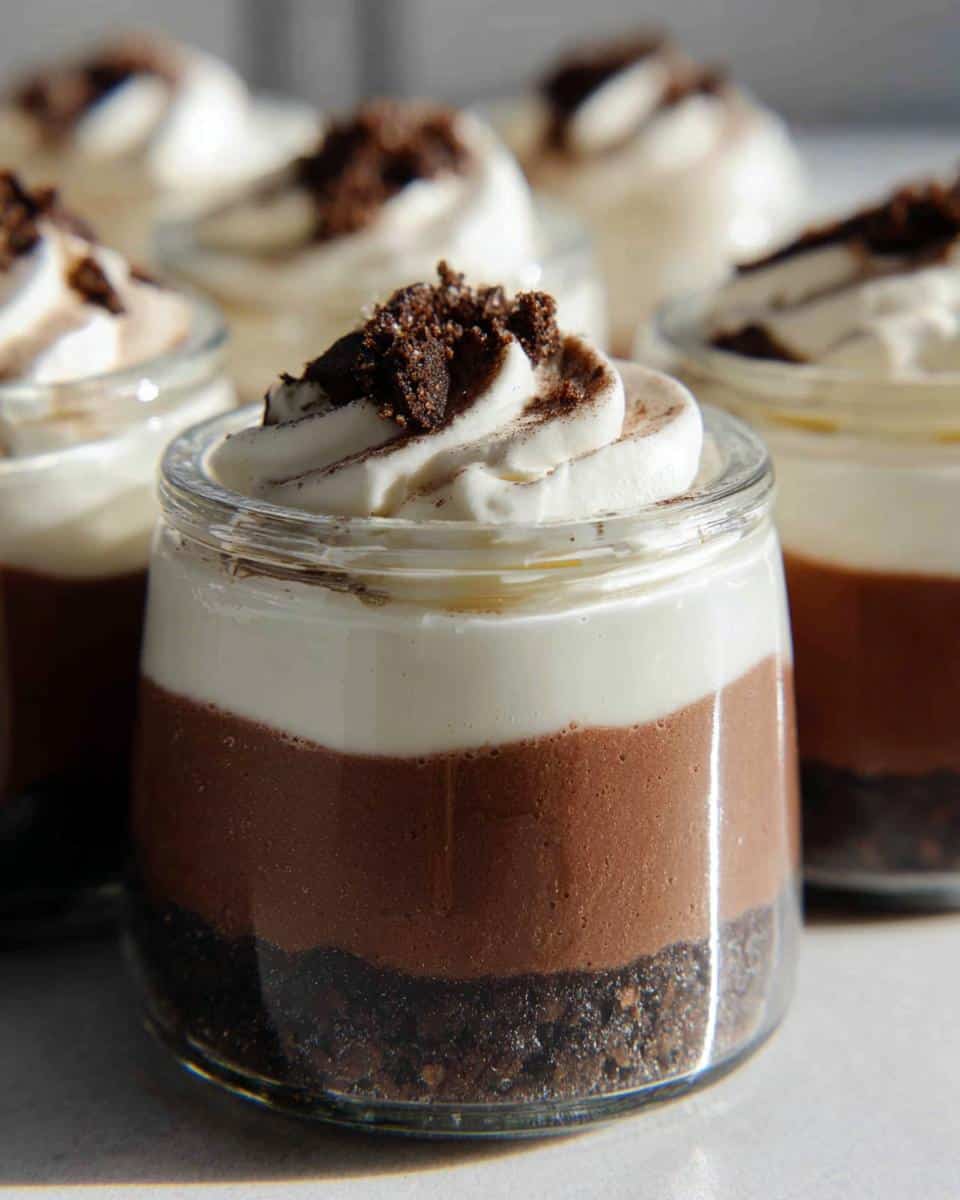
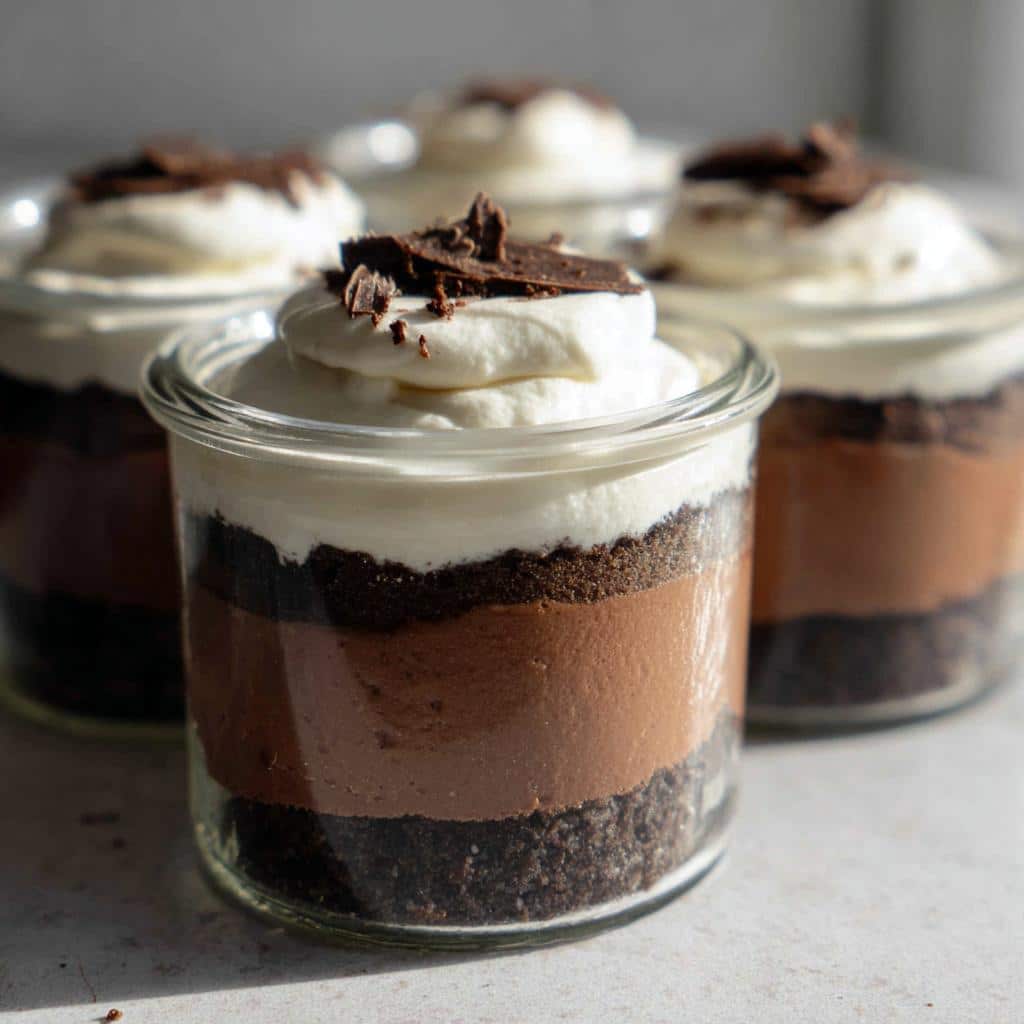
Assembling the No-Bake Chocolate Cheesecake Jars Layers
Grab those crust-filled jars! Spoon or pipe that gorgeous chocolate filling right on top of the cookie base. Make sure this filling layer is even and looks tidy. This is important: Once they are layered, pop them into the fridge. They need at least 60 minutes of chilling time to firm up before we add the final layer, or the topping will melt right into the filling.
Finishing with Cream Cheese Whipped Cream
While those chill, whip up the topping! Beat the smaller 4 ounces of cream cheese until smooth, then add the 2 Tablespoons sugar and 1 teaspoon vanilla. Once combined, slowly stream in that last cup of heavy cream. Whip it up until you get stiff peaks—it needs to be sturdy enough to pipe!
Take the chilled jars out, and pipe or spoon that fluffy cream cheese whipped cream generously on top. I like to make a big swirl! You can finish it with a few chocolate shavings or sprinkles, and then they are ready to serve or wait in the fridge a little longer!
Tips for Perfect No-Bake Chocolate Cheesecake Jars
Even though these are simple dessert recipes, a couple of little tricks can take them from great to absolutely unforgettable. I’ve learned these ones the hard way, so you don’t have to! Don’t skip the chilling time; that little hour is crucial for getting that firm, perfect cheesecake texture.

When you’re melting your chocolate and cream, stir every 20 seconds! If you walk away and let it sit too long, the chocolate can burn easily, and nobody wants bitter cheesecake. Trust me, a little stirring vigilance keeps things tasting sweet and rich.
For presentation, use a piping bag for the final whipped topping. It just looks so much nicer than a spoon, especially when you’re using individual jars for a crowd. If you aren’t serving them right away, keep them covered tight in the fridge. I find they taste best if they chill for at least two hours, but they are still wonderful the next day. Speaking of crowd pleasers, check out my ideas for easy lunch ideas while you’re finishing up your dessert plans!
Ingredient Notes and Substitutions for Your No-Bake Dessert
I get so many questions about swapping things out, especially since these are such easy desserts with few ingredients to begin with! Look, I love sticking to the recipe, especially when it comes to the creamy base, but I totally understand needing flexibility. My goal is always to get that perfect texture, so let’s talk switches.
For the crust, if you absolutely run out of Oreos or maybe just want a slightly different flavor profile, graham crackers are a decent substitute. Just use enough butter to get them to stick together—you might need a tiny bit less since graham crumbs are naturally drier than the creamy filling in a chocolate sandwich cookie. If you use graham crackers, you’ll get something closer to a traditional cheesecake flavor, which is wonderful, too.
Now, about the chocolate! I used semi-sweet because I love that slight tartness balancing out all that cream cheese and sugar. But if you are a true dark chocolate lover, please feel free to swap the semi-sweet chips for dark chocolate chips. It will give your filling a much deeper, more intense cocoa flavor. If you use milk chocolate, though, you have to be careful!
Milk chocolate has more sugar, so it can make the filling taste overly sweet. Plus, it melts differently. If you try milk chocolate, I highly recommend cutting back on the granulated sugar in the cheesecake filling by about a quarter cup. Just test your filling mixture before you chill it! You want decadence, not just sweetness.
Remember, if you’re ever unsure about any ingredient or technique, you can always check out my disclaimers and tips over on the Disclaimers Page. Happy tinkering!
Storage and Serving Suggestions for Your Easy Desserts With Few Ingredients
One of the greatest things about these No-Bake Chocolate Cheesecake Jars is how beautifully they keep. Since they are individual portions, they are fantastic for making ahead, which is a huge relief when you’re planning for easy desserts for a crowd!
You can absolutely store these in the refrigerator, and they taste even better after they’ve settled for a few hours. I find they hold up perfectly for up to three days when covered tightly in the fridge. Don’t even think about freezing them; that texture really prefers the cold chill of the fridge, not the hard freeze.
For serving, keep them chilled right up until you hand them out. A little garnish goes a long way! A few extra mini chocolate chips or a tiny dusting of cocoa powder on that whipped cream top makes them look incredible. If you need more make-ahead magic, I have tons of inspiration over on my page for Easy Desserts For A Crowd!
Frequently Asked Questions About No-Bake Chocolate Cheesecake Jars
I always get the best questions after people try my recipes! Since these are one of my go-to quick dessert recipes when time is short, I figured I’d clear up some of the common worries I hear about no-bake treats. Don’t sweat it, these are very forgiving!
Can I make these No-Bake Chocolate Cheesecake Jars ahead of time?
Absolutely! That’s one of the best parts of these jars. You can assemble everything, right up to the topping, and keep them covered tightly in the fridge. Honestly, they firm up beautifully overnight and taste even better the next day. I wouldn’t push it past three days, though—we want that fresh, creamy texture!
What is the best way to make the chocolate smooth in this Simple Dessert Recipe?
The secret to that silky texture is two-fold. First, you must use heavy cream, not milk, when melting the chocolate chips to create a smooth, thick ganache. Second, once it’s melted, let it cool down just a touch before you beat it into the cream cheese mixture. If the chocolate is piping hot when it hits the cheese, it can seize up and leave you with chocolate bits instead of a smooth filling for these simple dessert recipes.
Are there healthy dessert options that compare to these jars?
Well, “healthy” is relative when we’re talking cheesecake! These are certainly an indulgence—that crust is rich! But compared to a traditional baked cheesecake that requires more sugar and butter for structure, these are much easier on your time. If you want to tilt them slightly healthier, use the darkest chocolate chips you can find, maybe even 70% cacao or higher. That intense flavor means you might use less sugar overall in the filling!
If you have any other questions at all about preparation or timing, feel free to send a message over the Contact Page; I love hearing from you!
Sharing Your Homemade Desserts Experience
Now that you’ve got six gorgeous No-Bake Chocolate Cheesecake Jars sitting pretty on your counter (or maybe you’ve already sampled a few—no judgment here!), I’d love to hear all about it! These are the kinds of homemade desserts I live for—simple to make but big on flavor and presentation.
Did you try adding a drizzle of caramel on top? Or maybe you broke up some peanut butter cups onto the whipped cream instead of sprinkles? Please take a picture and tag me on social media so I can see your beautiful jars! It truly warms my heart to see my kitchen memories showing up in yours.
If you followed along and everything came together beautifully, please consider leaving a quick star rating right here on the recipe card! It really helps other folks find these easy dessert ideas that skip the oven. And if you ran into hiccups, tell me about them in the comments! We learn the best things when we troubleshoot together.
A little note about me: Lilya Lawson is the Founder and Culinary Director of Top Chicken Eats. Based in Asheville, NC, I create comforting desserts like No-Bake Chocolate Cheesecake Jars — recipes designed to be simple, soulful, and shared with the people you love. If you’re curious about my approach to food and privacy, you can always check out my information on the Privacy Policy page!
Thank you so much for letting me share this little bit of chocolatey happiness with you. Happy scooping!
No-Bake Chocolate Cheesecake Jars
Ingredients
Equipment
Method
- Crush the 30 Oreos into fine crumbs. Stir in the 5 Tablespoons of melted butter. Spoon about 1 Tablespoon of this mixture into the bottom of each jar, pressing lightly to form the crust.
- Melt 1 cup of semi-sweet chocolate chips with 1/2 cup of heavy cream until the mixture is smooth when stirred. Set this aside to cool slightly.
- Beat 24 oz of cream cheese until it is completely smooth. Scrape the sides of the bowl and the beater to remove any lumps.
- Add the ½ cup granulated sugar and ½ teaspoon vanilla extract to the cream cheese, mixing to combine. Then add the melted chocolate mixture and beat well. Add the chocolate mixture slowly while the mixer runs on low speed to help it incorporate without hardening too quickly.
- Slowly add the remaining 1 cup of heavy cream while mixing. Once all the cream is added, increase the mixer speed to medium and beat until the filling is fluffy.
- Spoon or pipe the chocolate cheesecake filling over the crust layer in the jars.
- To make the cream cheese whipped cream, beat the 4 oz of softened cream cheese until smooth.
- Add the 2 Tablespoons granulated sugar and 1 teaspoon vanilla extract, beating until incorporated.
- Slowly drizzle in the 1 cup heavy cream while mixing. Increase the mixer speed and beat until the mixture is fluffy and holds a stiff peak.
- Pipe or spoon the cream cheese whipped cream over the chocolate mixture. Top with sprinkles or mini chocolate chips if you choose.
- Serve the jars right away or refrigerate them until you are ready to serve.