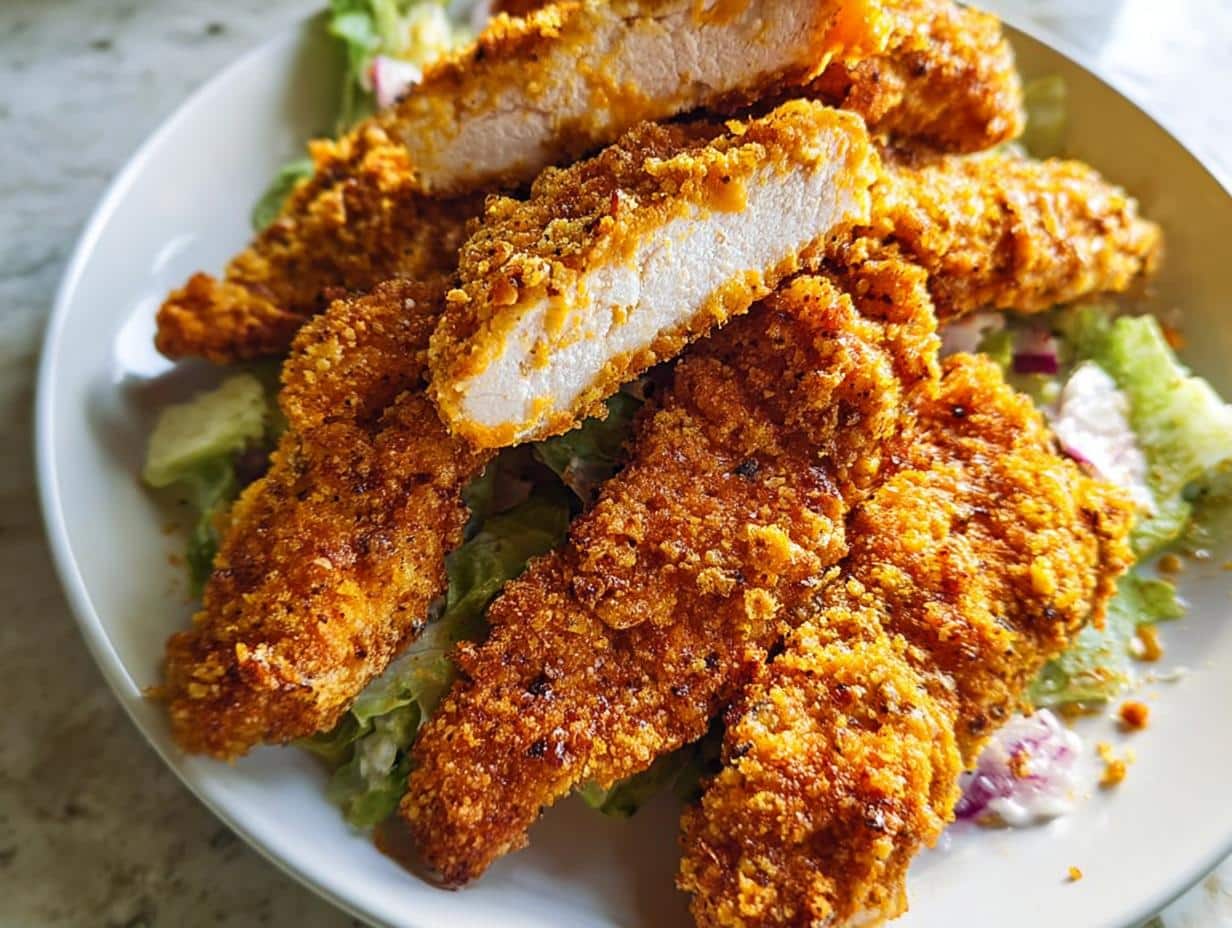
We all crave that deep, satisfying comfort food, right? But that usually means frying and a big mess afterward. Well, I’ve got some news that’ll make your weeknights a whole lot tastier and healthier! These Oven-Baked Cheesy Chicken Tenders are my absolute answer to family dinners that check every box: crispy, surprisingly cheesy, and baked straight on a sheet pan. Forget the splattering oil; we’re trading it in for pure golden crunch. This recipe is so easy, it reminds me of those simple, happy meals we’d throw together back home in Texas when company unexpectedly dropped by. Trust me, once you pull these out of the oven, they’ll become a staple in your rotation.

Why This Oven-Baked Cheesy Chicken Tenders Recipe Stands Out
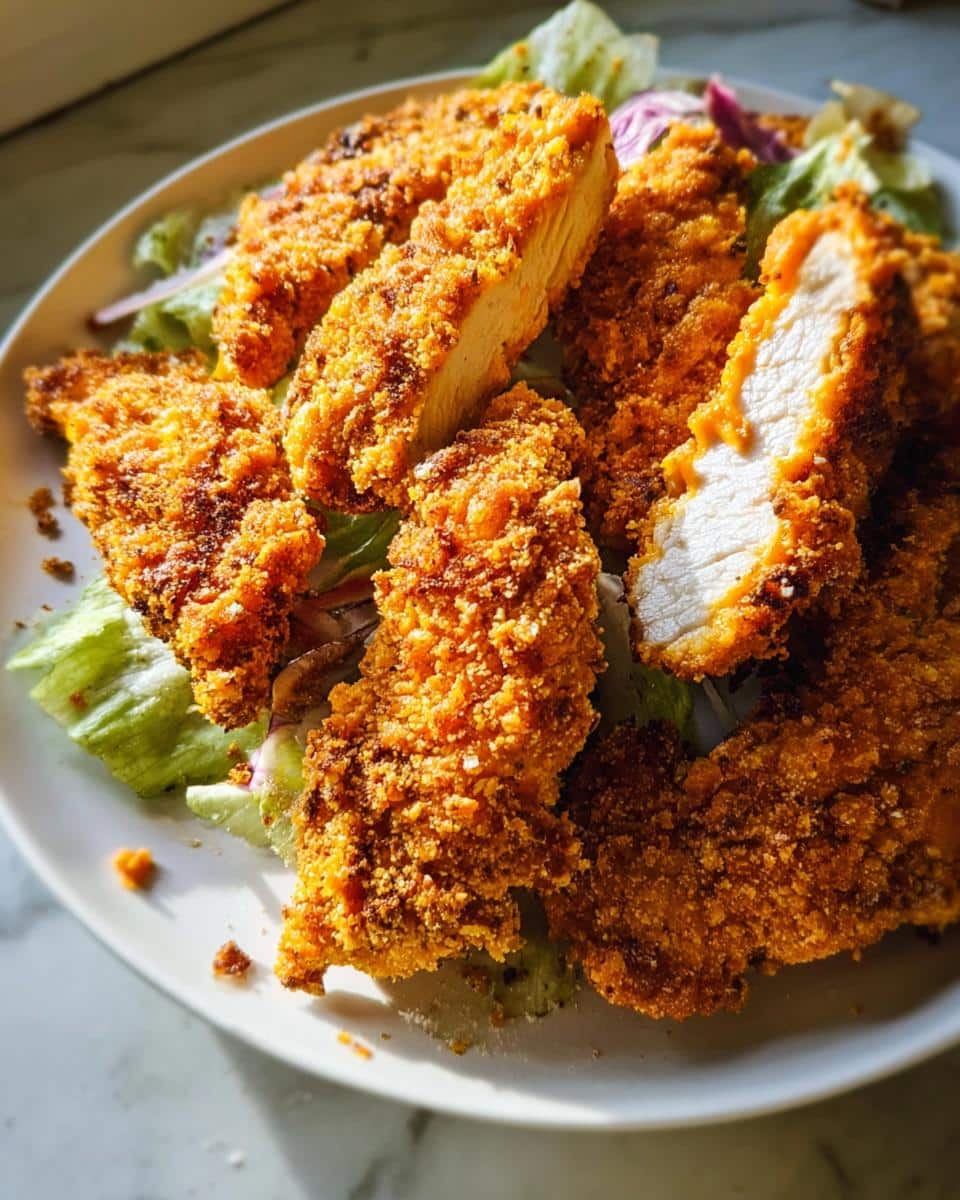
When it comes to chicken tenders, people usually have two choices: perfectly delicious but messy fried versions, or baked ones that always end up a little sad and limp. We’re fixing that! This recipe delivers that satisfying crunch you love, only without needing a vat of oil. It’s honestly one of the best food recipes because the cleanup is minimal, and the flavor payoff is huge.
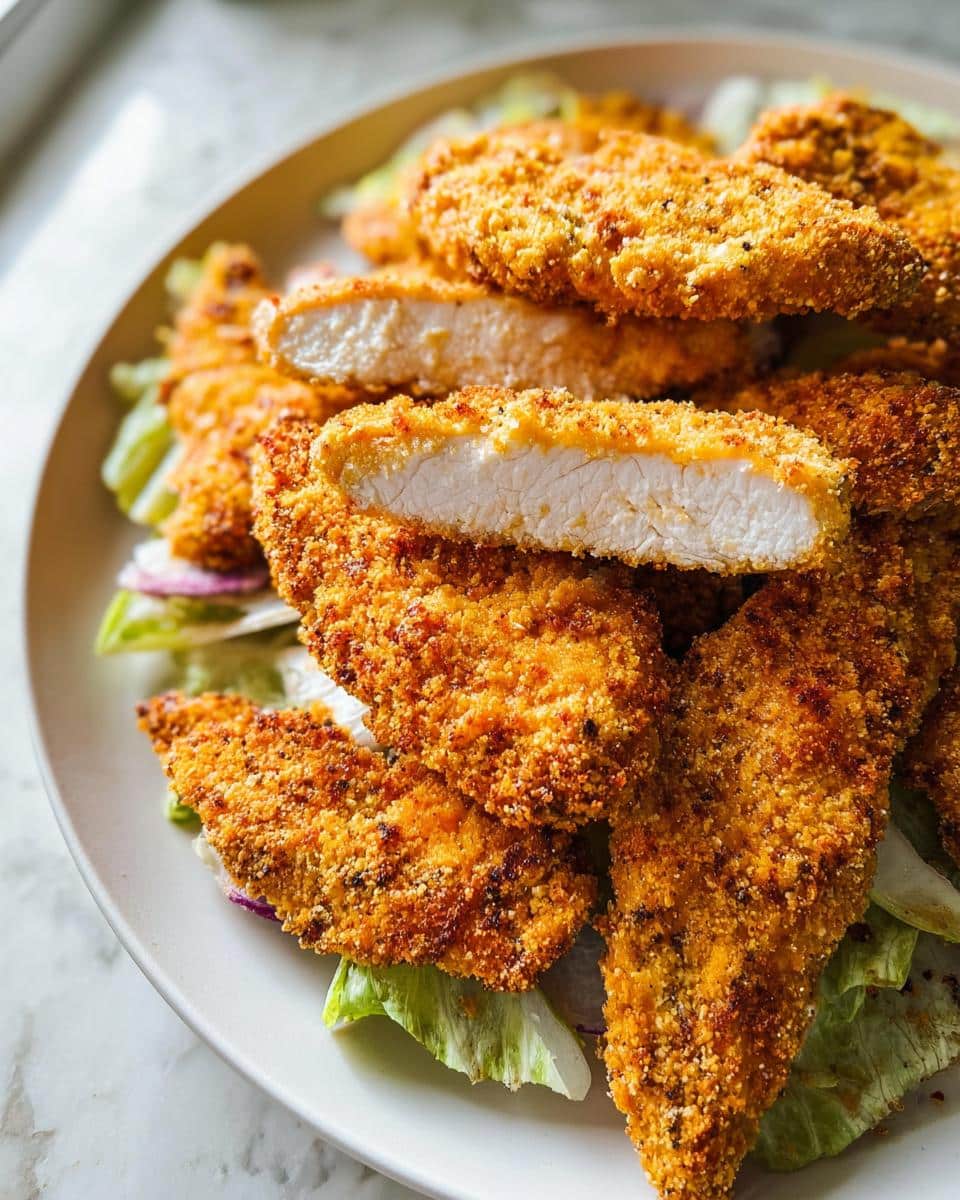
- The interior stays unbelievably juicy thanks to that quick buttermilk soak.
- The exterior gives you that signature crispy texture we’re all after.
- It’s a fantastic entry point for anyone looking for easy family dinner chicken!
Achieving Crispy Coating Without Frying in Our Oven-Baked Cheesy Chicken Tenders
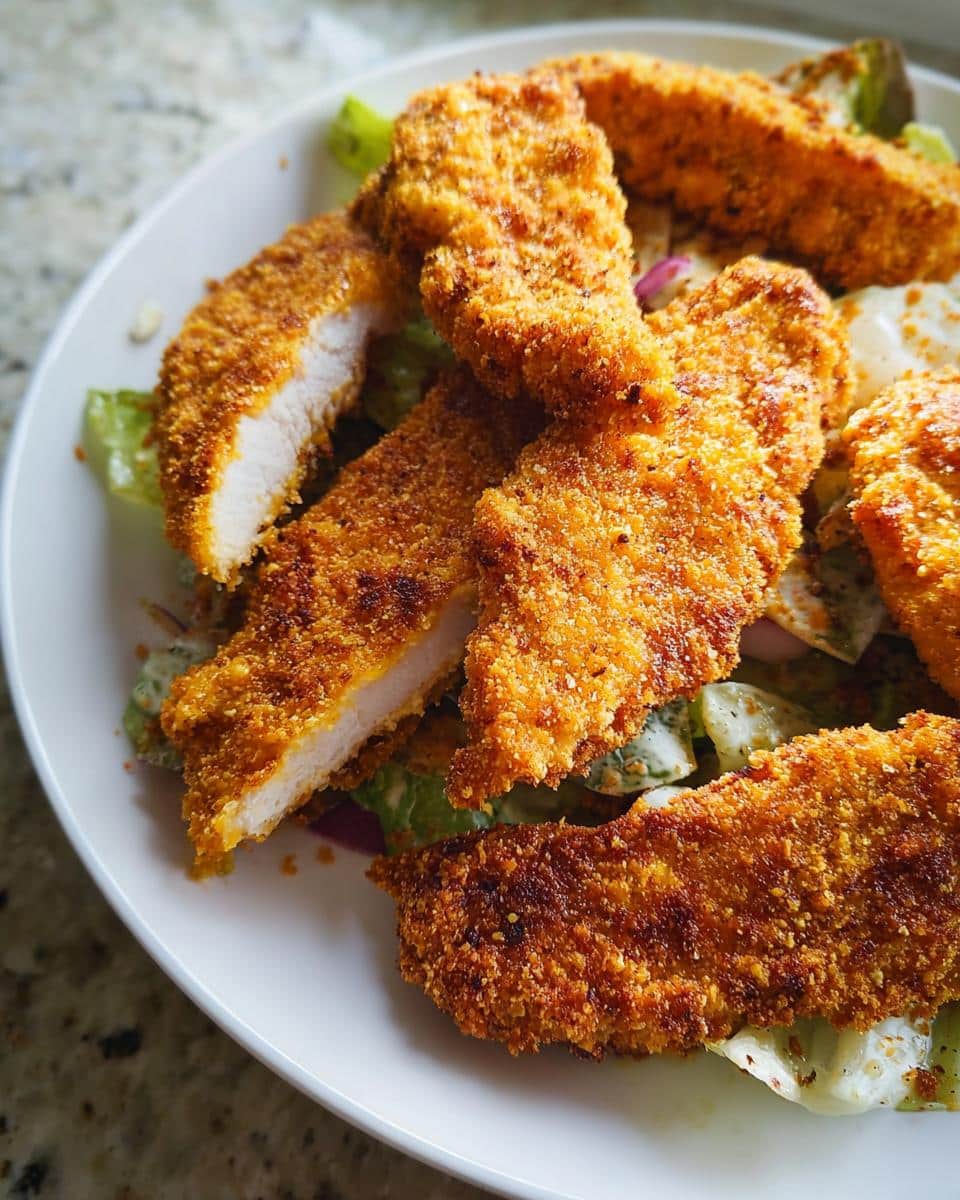
The secret to the crunch in these Oven-Baked Cheesy Chicken Tenders isn’t just the cracker; it’s the cooking environment we create! After you bread them, don’t skimp on the cooking spray over the top. That light mist of oil hits the hot oven air and essentially flash-fries the surface of the cheesy crumbs. Trust me, spraying the tops ensures you get golden crispiness right up to the edges—no soggy bottoms here!
Family Appeal and Quick Dinner Ideas
If you’re aiming for impressive results with very little hands-on time, this is your ticket. Kids absolutely adore these, and you’ll love how quickly they come together. They fit right into the category of great Quick Dinner Ideas because the active prep is so short. You can confidently serve this knowing everyone at the table, even the pickiest eaters, will ask for seconds.
Essential Ingredients for Perfect Oven-Baked Cheesy Chicken Tenders
Okay, let’s talk about what makes these Oven-Baked Cheesy Chicken Tenders truly special. It comes down right down to two main components: the chicken prep and the amazing, savory cheesy crust. I know you see a lot of recipes out there, but using specific ingredients here makes all the difference between a good tender and an unforgettable one! We’re keeping things clean because we want that flavor to shine, especially when we get to the part where we mix up that homemade dip.
For the Chicken Marinade and Coating
This first step is critical for getting the juiciest chicken possible. Don’t skip the buttermilk soak! It’s how we guarantee tenderness, especially when baking.
- We need 3/4 cup of buttermilk, which works wonders on the meat.
- For seasoning the marinade, whisk in 2 teaspoons of kosher salt, 2 teaspoons of garlic powder (set the rest aside!), 1 teaspoon of hot sauce for just a little kick, and 1/4 teaspoon of black pepper.
- Grab about 2 pounds of boneless, skinless chicken tenders or breasts—cut breasts into strips if that’s what you have.
- And here’s the magic ingredient for the coating: 4 cups of Cheez-Its. And yes, the “Extra Toasty” ones work best, they have a deeper flavor!
- Don’t forget the cooking spray to lightly mist everything before it hits the oven.
For the Homemade Ranch Dip
Honestly, the dip is almost as exciting as the tenders themselves. It’s so much fresher than anything you buy in a bottle, and you can tailor it perfectly! If you’re looking for a slightly lower-fat version, go ahead and use plain, whole-milk Greek yogurt instead of sour cream; it gives it a wonderful tang.
- You’ll need 2 tablespoons each of finely chopped fresh chives and fresh parsley—fresh herbs make such a difference!
- Mix in 1/2 cup of sour cream or Greek yogurt, and 1/3 cup of buttermilk.
- For the classic ranch flavor depth, add 1 teaspoon of garlic powder, 1/2 teaspoon of onion powder, 1/2 teaspoon of kosher salt, and 1/4 teaspoon of black pepper.
Check out some of my favorite kid-friendly recipes using fresh components like these!
Step-by-Step Guide to Making Oven-Baked Cheesy Chicken Tenders
Now we get to the really fun part—putting this whole operation together! Making truly great Oven-Baked Cheesy Chicken Tenders is all about stacking up the right textures in the right order. The key is making sure every step sets us up for that amazing crispy finish when we finally pull them out of the oven. Don’t worry about rushing; the marinating time is actually doing most of the heavy lifting for you!
Marinating the Chicken for Flavor and Tenderness
First things first, we need to wake up that chicken! Grab your large bowl and whisk together the marinade base: that 3/4 cup of buttermilk, 2 teaspoons of kosher salt, 2 teaspoons of garlic powder, the teaspoon of hot sauce, and 1/4 teaspoon of the black pepper. Give it a good stir.
Toss your chicken tenders right into that mixture. If you’re using breasts, cut them down into strips about half an inch wide first—that ensures they cook evenly! Make sure every piece is completely coated. You need this soak time to tenderize the meat, so leave it on the counter for at least 15 minutes while you prep everything else. If you’re planning ahead for one of those *Super Easy Meals*, cover it and let it chill in the fridge overnight. That gives you amazing flavor!
Preparing the Cheesy Crumb Coating
While the chicken is soaking, let’s make the crust. You need those 4 cups of Cheez-Its ready to go. I prefer using my food processor for this because it’s fast. Toss the crackers in with the remaining 1 teaspoon of garlic powder and the last teaspoon of black pepper. Pulse, pulse, pulse! We are looking for a fine, sandy crumb, not jagged chunks. It takes about a minute. If you don’t have a machine, don’t sweat it! Seal those crackers in a heavy-duty zip-top bag and just gently crush them with a rolling pin until they are finely ground. Pour those beautiful cheesy crumbs into a wide bowl for dredging.
Breading and Baking for Optimal Texture
This is where we set up the final texture. First, get your oven preheated to a hot 425°F. Remember, we arranged two racks to divide the space into thirds for better heat circulation. Line two baking sheets with parchment paper—this is vital for cleanup! Give that parchment a super light coating of cooking spray.
Now, bread the strips one by one. Lift a tender from the buttermilk (let the excess drip off!) and drop it into the Cheez-It mixture. Press that crumb coating firmly onto both sides. This double-press action is key! Lay the coated chicken on your prepared sheets, making sure they aren’t touching. Before they go in, spray the tops *lightly* with cooking spray. Bake for 12 minutes. Then, flip every single tender and rotate the pans front-to-back and rack-to-rack. Bake for another 8 to 13 minutes until golden brown and cooked through! You can check out some of my favorite high-protein recipes while you wait for them to bake!
Tips for Success with Your Oven-Baked Cheesy Chicken Tenders
Baking tenders can sometimes lead to disappointment if you rush critical steps, but I’ve learned a few tricks over the years that ensure success every time. Remember, these Oven-Baked Cheesy Chicken Tenders rely on high heat and dry surfaces to shine!
First off, make sure your baking sheets aren’t overcrowded. If the chicken pieces are touching, you’re steaming them instead of baking them, and we definitely don’t want limp chicken! Give them space so the hot air can circulate underneath.
Also, preheating that oven to 425°F is non-negotiable. That initial blast of heat helps those cheesy crumbs set instantly. If you’re worried about the bottoms being a bit softer, try sliding a wire rack onto your parchment-lined baking sheet before you spray and place the tenders on top. It elevates them just enough for air to hit the bottom surface. For more guidance on efficient cooking, check out some of my favorite Easy Cooking Recipes for handling high-heat dishes.
Making the Ranch Dip: An Easy Meal Component
Honestly, I could stop after the tenders are done, but having a fantastic dip makes this feel like a real treat. This homemade ranch is so incredibly simple, it barely counts as cooking! It relies on fresh ingredients that really pop against the salty, cheesy crunch of the chicken. You mix it up while the tenders are in their final baking cycle, so it’s ready right when they are.
When I’m developing recipes, I always push home cooks to taste things before serving—it’s the difference between just following directions and actually *cooking*. So, as you mix this, make sure you’re tasting it! I’ve put in what I think is perfect, but maybe you like way more onion powder, or perhaps more black pepper. Now is the time to adjust those seasonings to your exact preference.
The combination of sour cream (or Greek yogurt, if you’re being sensible!) and buttermilk gets you that perfect, pourable-but-thick texture. Fold in those finely chopped herbs—chives and parsley—and you’re done! You instantly elevate this whole dinner from “easy” to “tasty recipes” territory just by having this fresh dip ready to go.
Variations on Oven-Baked Cheesy Chicken Tenders
One of the best things about a solid base recipe like these Oven-Baked Cheesy Chicken Tenders is how beautifully they adapt to your mood or what you happen to have in the pantry. Cooking should be fun, right? It shouldn’t feel like you’re trapped in a culinary cage! These simple chicken tenders really open up when you start playing around with the coating and the herbs.
I always tell folks that if you can master the buttermilk + high heat combination, you can make hundreds of different tasty recipes just from this one foundation. If you are looking for more quick dinner ideas that let you switch things up, try these simple tweaks!
- Spice Swap: Instead of just relying on the flavor from the Cheez-Its, try blending in some other spices into your crumb mixture. A half teaspoon of smoked paprika adds a wonderful warmth, or maybe a pinch of dried oregano for an Italian flair. You can turn this into fantastic kid-friendly chicken recipes by adding a tiny bit of onion powder here too.
- Spice It Up (For Real This Time): If you’re like me and love heat, add a dash of cayenne pepper right into the buttermilk marinade alongside that hot sauce. It will penetrate the chicken better, warming it from the inside out, rather than just sitting on the surface.
- Dip Alternatives: The homemade ranch is amazing, I won’t lie, but sometimes you need something else! Try serving these with a spicy honey mustard—it’s just equal parts honey and Dijon mustard with a drop of sriracha. Or, if you’re feeling extra adventurous, a simple lime-cilantro yogurt sauce is refreshing.
These simple changes keep the cleanup easy, just like in my favorite Easy Meals category, but they give you a whole a new dish every time. Enjoy experimenting!
Storage and Reheating Oven-Baked Cheesy Chicken Tenders
I know these tenders are so good you might think you’ll eat them all in one sitting, but trust me, making extra is always the best plan. They are fantastic for meal prepping! Because we baked them instead of frying, they hold onto their texture much better when stored. That’s a win for anyone trying to batch-cook for the week ahead.
When you’re packing leftovers—both the tenders and that lovely ranch dip—you need to keep them separate. Tenders go into an airtight container, and the dip goes into its own small jar. Don’t store them together; the moisture from the dip will sabotage those crispy crumbs overnight!
Now for the reheating advice, and this is important for maintaining that baked goodness: Resist the microwave! We love microwaves for speed, but they will steam your tenders and turn them sad and squishy. A quick visit back to the heat is what you need.
The Best Way to Reheat for Crispness
My go-to method for reheating these tasty recipes is the good old oven. Preheat it to about 350°F. Lay the tenders out on a parchment-lined baking sheet—just like you did the first time. Give them about 8 to 10 minutes. You aren’t really cooking them again; you are just waking up the crispness lingering in those Cheez-It crumbs. If yours are thicker, maybe give them 12 minutes.
If you have a toaster oven, that works even better! It heats up faster and concentrates the heat perfectly around the small batch of tenders. I find 5 minutes usually does the trick there. Remember to always check your internal temperature just to be safe, especially if you are cooking for little ones. For some other great wisdom on kitchen practices, take a peek at my full disclaimer page for context on my testing methods.
Packing for Lunch Boxes and Quick Dinners
These strips are perfect straight out of the fridge for a kid’s lunch box, especially when paired with some carrot sticks or grapes. They are satisfying protein that travels well. But if you’re serving them for a Quick Dinner Idea later in the week, reheating them makes them feel fresh-baked.
The ranch dip holds up beautifully in the fridge for about four to five days, so you can easily make a big batch of tenders on Sunday and have lunch covered through Wednesday. That’s what I call efficiency in the kitchen!
Frequently Asked Questions About Oven-Baked Cheesy Chicken Tenders
I always get questions when I share a recipe that seems too good to be true, and that’s fair! You want to make sure these Oven-Baked Cheesy Chicken Tenders fit your life and deliver on that crispy promise. So, I gathered up the ones I hear most often. Don’t you worry; we’re going to ensure this turns out to be one of your favorite Tasty Recipes.
Can I use Panko breadcrumbs instead of Cheez-Its for these Oven-Baked Cheesy Chicken Tenders?
That is such a common question! You absolutely *can* use Panko breadcrumbs, but I need to warn you: you lose that distinctive savory, sharp cheese flavor that makes these so special. If Panko is all you have, go for it! But to keep the spirit of the recipe alive, you should mix in about a half cup of finely grated sharp cheddar or Parmesan cheese right into your Panko crumbs before you dredge the chicken. That way, you still get that cheesy crust you’re looking for in these Oven-Baked Cheesy Chicken Tenders.
Are these considered healthy chicken tenders recipe?
When we compare them to their deep-fried cousins, yes, these are definitely a healthier chicken tenders recipe! We are baking them with just a light spray of oil instead of submerging them in fat. You are still getting a fantastic protein punch from the chicken, and when you eat them with the fresh ranch dip, you’re getting herbs and yogurt/sour cream instead of mayonnaise-heavy store-bought dressings. They are lighter, easier on the stomach, and still wonderfully satisfying for a family dinner.
What is the best way to make this an Easy Meal?
This recipe is designed to be an Easy Meal, but if you want max efficiency, here’s my trick: do your marinating the night before. When you pull the chicken straight from the fridge in the morning, cut it into tenders, then toss it right back in—that’s your 15 minutes done! When you get home, the major work is already done. The absolute best part that makes this a true Easy Meal? The dip is so simple you can mix it up the night before, too. Store it in a jar, and you are just 25 minutes away from the table!
Share Your Experience Making These Tasty Recipes
I truly hope you get a chance to make these oven-baked tenders soon! When I test these dishes in my own kitchen, I’m always thinking about how they’ll fit into your family tables, whether you’re looking for quick dinner ideas or something fun for a weekend.
This recipe is meant to be shared, celebrated, and even slightly adapted to your tastes. So, if you pull these out of the oven and they come out golden, crispy, and exactly what your family needed, please let me know!
Take a moment to leave a rating below the recipe—it really helps other home cooks decide if these are worth their time. And I would absolutely love to hear if you tried one of those flavor variations we talked about, like adding smoked paprika or whipping up a different dip! Did your kids love the cheesy crunch?
Upload a picture of your beautiful spread; I adore seeing these tasty recipes come to life across the country! If you ever have questions while you’re cooking, or maybe you want to share some of your own *Good Recipes* wisdom, you can always get in touch with me directly through my Contact Page. Happy cooking, y’all, and enjoy that cheesy crunch!
Oven-Baked Cheesy Chicken Tenders
Ingredients
Equipment
Method
- In a large bowl, combine 3/4 cup buttermilk, 2 teaspoons kosher salt, 2 teaspoons garlic powder, 1 teaspoon hot sauce, and 1/4 teaspoon black pepper. Stir to mix the marinade.
- If you are using chicken breasts, cut them lengthwise into strips that are 1/2-inch wide. Add the chicken to the marinade and toss until every piece is coated. Let the chicken sit at room temperature for at least 15 minutes, or cover the bowl and refrigerate for up to overnight.
- Place 4 cups Cheez-Its, the remaining 1 teaspoon garlic powder, and the remaining 1 teaspoon black pepper into a food processor fitted with the blade attachment. Pulse the mixture until the crackers are finely ground, which takes about 1 minute. Alternatively, crush the ingredients in a large zip-top bag using a rolling pin until finely ground. Transfer the crumbs to a wide bowl or pie plate.
- Arrange 2 racks in your oven to divide the space into thirds. Preheat the oven to 425°F. Line 2 baking sheets with parchment paper and coat the paper lightly with cooking spray.
- Bread the chicken one piece at a time. Remove the chicken from the buttermilk, allowing excess marinade to drip back into the bowl. Place the chicken into the cracker crumbs and press gently so the crumbs stick completely. Place the coated chicken pieces on the prepared baking sheets, spacing them evenly. Lightly coat the tops of the chicken with cooking spray.
- Bake the chicken for 12 minutes. Flip each tender and rotate the baking sheets from front to back and between the racks. Continue baking until the chicken is golden brown and fully cooked, which takes an additional 8 to 13 minutes. While the chicken bakes, prepare the ranch dip.
- Finely chop chives and parsley until you have 2 tablespoons of each. Place the herbs in a small bowl. Add 1/2 cup sour cream, 1/3 cup buttermilk, 1 teaspoon garlic powder, 1/2 teaspoon onion powder, 1/2 teaspoon kosher salt, and 1/4 teaspoon black pepper. Stir everything to combine. Taste the dip and add more salt and pepper if you think it needs it. Serve the chicken tenders with the ranch dip.