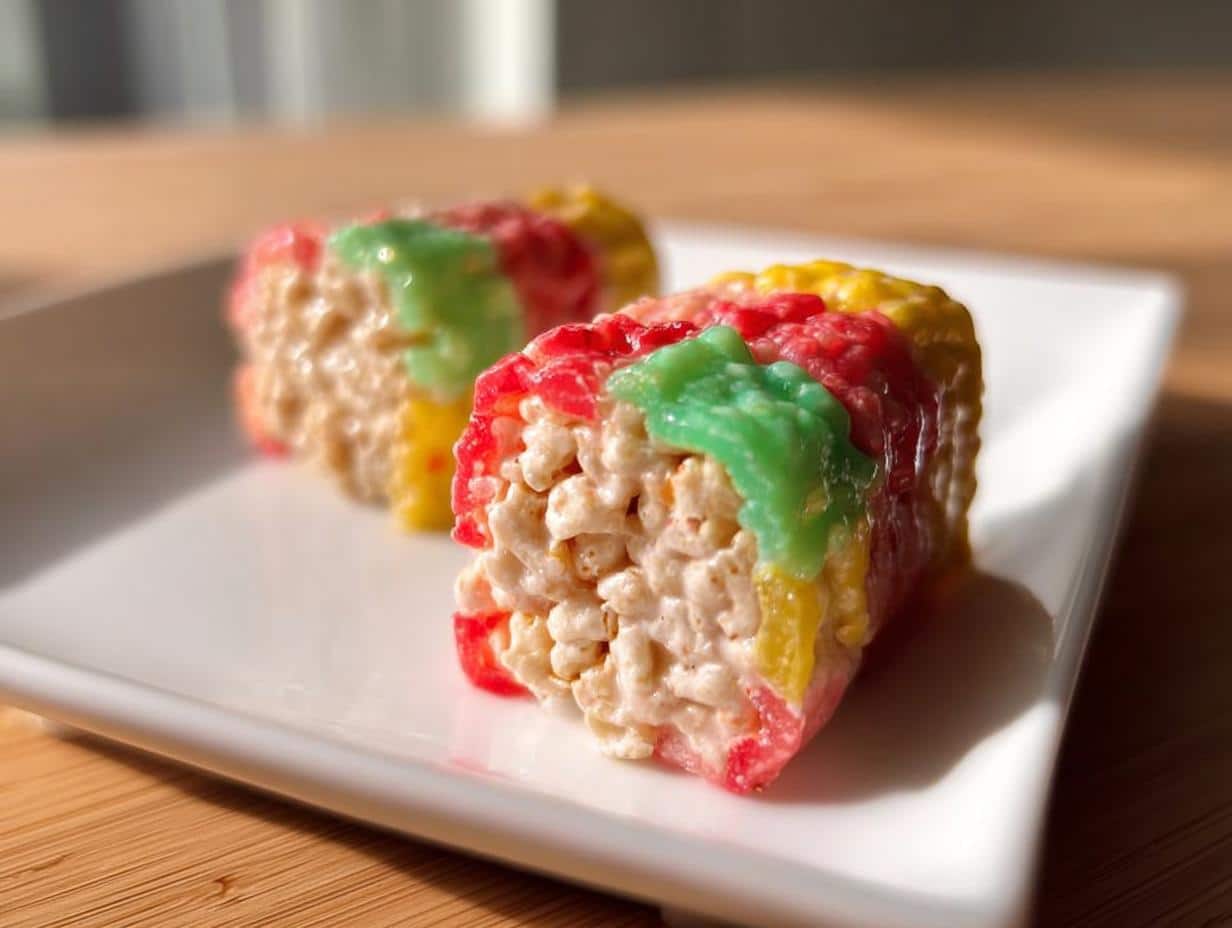
You know, I spend so much time digging into the history of classic cuisine, tracing flavors back generations, but sometimes you just need a moment of pure, unexpected joy in the kitchen. That’s when I turn to the delightful world of food illusion, or trompe-l’œil, if we want to get fancy! These Sushi Candy Rolls are the perfect example.
They look like they belong on a fine Japanese platter, but I promise you, the only thing being sliced here is your expectation of what dessert should be. As a Cultural Food Writer, I love seeing how global aesthetics—like the neat presentation of sushi—inspire playful American treats. This no-bake recipe takes humble candy and cereal and turns it into the ultimate conversation starter for any gathering.
Why These Sushi Candy Rolls Are Essential Party Fare
Honestly, if you need something that immediately gets people talking without requiring an oven to be on, this is your recipe. I keep this one tucked away for last-minute celebrations or when I just need a little culinary mischief in my week. They hit that sweet spot between being incredibly easy and wildly surprising.
Here’s why I think every party planner needs this trick up their sleeve:
- These are fantastic for balancing out heavier food platters because they are light, sweet, and fun.
- Total time is under 30 minutes? Yes, please!
Visual Impact and Novelty of Sushi Candy Rolls
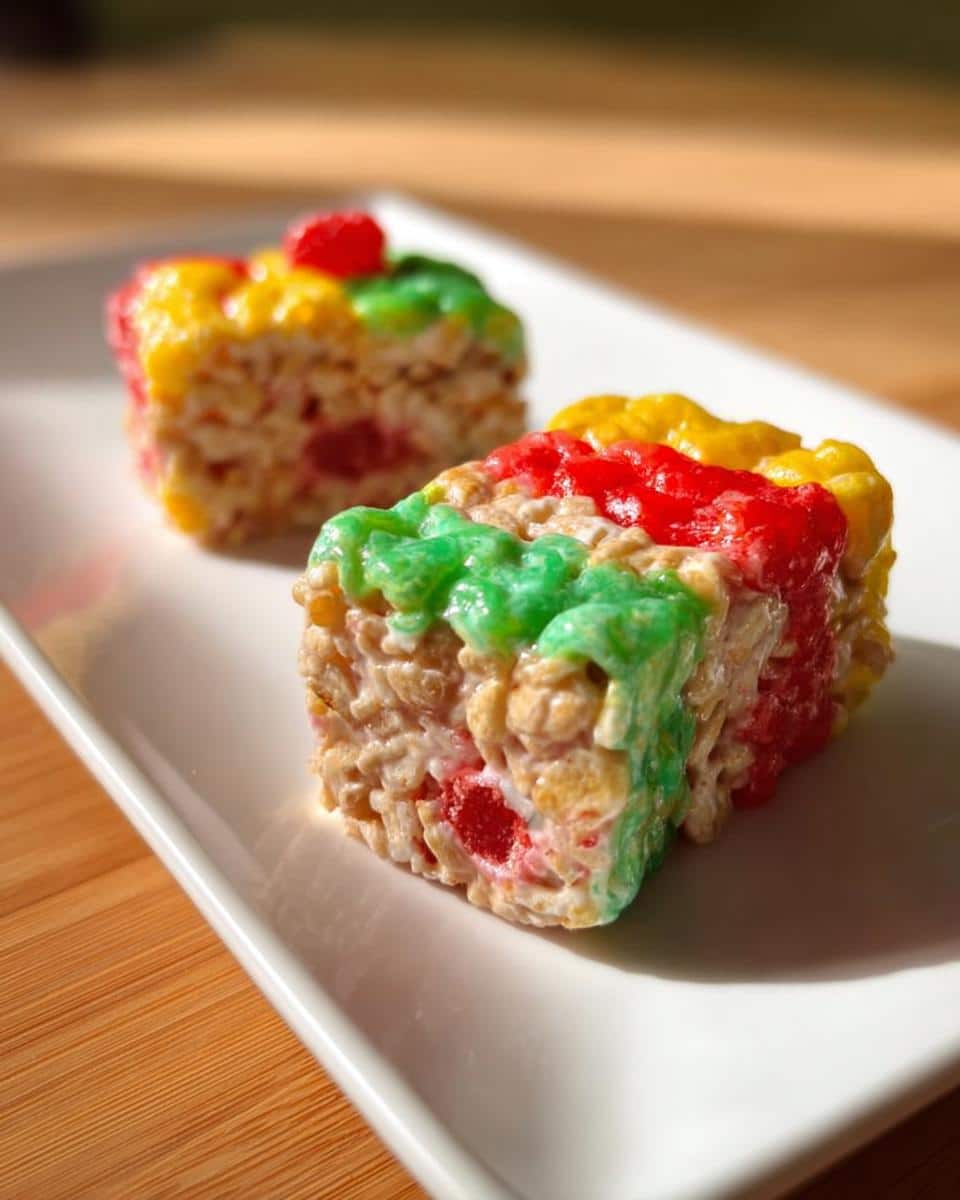
The magic here is the look. You spend five minutes making something that looks labor-intensive and exotic, right? Seeing guests pause, certain they are about to eat fish, only for them to bite into sweet RICE KRISPIES is priceless. It’s the ultimate fun party candy idea without actually needing to bake.
Simple Assembly for Sushi Candy Rolls
Since there’s no baking involved, we skip all the guesswork that comes with oven temperatures! Melting marshmallows and rolling things up is perfect for involving kids, too. Everything comes together in about 25 minutes total, which is faster than most trips to the store would take!
Gathering Supplies for Your Sushi Candy Rolls
Okay, before we dive into the wonderful world of making these sugary sushi lookalikes, we need to make sure our little workspace is set up. This recipe is so straightforward, but having the right gear makes everything smoother. Trust me, a sticky marshmallow mixture waits for no one!
Since we aren’t actually turning on the main oven—this is purely a microwave and assembly job—we don’t need much fuss, but these two items are non-negotiable for getting that perfect shape.
Essential Equipment for Making Sushi Candy Rolls
You’ll just need these two things handy:
- A large microwaveable bowl. You need space for tossing the marshmallows and the cereal, otherwise, it’s going everywhere!
- A pie plate or ovenproof serving dish. We use this for mixing one of the optional components later, but it’s good to have ready.
Next up, we talk about the delicious components themselves. You’ll definitely want your star ingredients waiting on the counter before you start melting anything!
The Ingredients Needed for Perfect Sushi Candy Rolls
Now that we have our bowls ready, let’s talk about the building blocks! Since this is a candy creation, we are looking for specific textures—something sticky for the base and something pliable for the wrapping. Get these items ready, and trust me, we are halfway there before we even turn on the microwave.
For the Cereal Mixture Base
This is the “sticky rice” component of our illusion, and precision matters here so it holds its shape when we roll it. You’ll need:
- Just 1.5 tablespoons of butter or margarine. Don’t use too much, or things get greasy!
- Exactly 20 JET-PUFFED Marshmallows. These melt down beautifully.
- A generous 3 cups of KELLOGG’S RICE KRISPIES cereal—this gives us that perfect, light crunch inside our rolls.
Components for Rolling the Sushi Candy Rolls
These are the wrappers and the little “fish” accents on top. We need colorful, chewy fruit snacks for this part! You’ll need:
- 10 chewy fruit snack sheets—these are what we use to wrap everything up neatly.
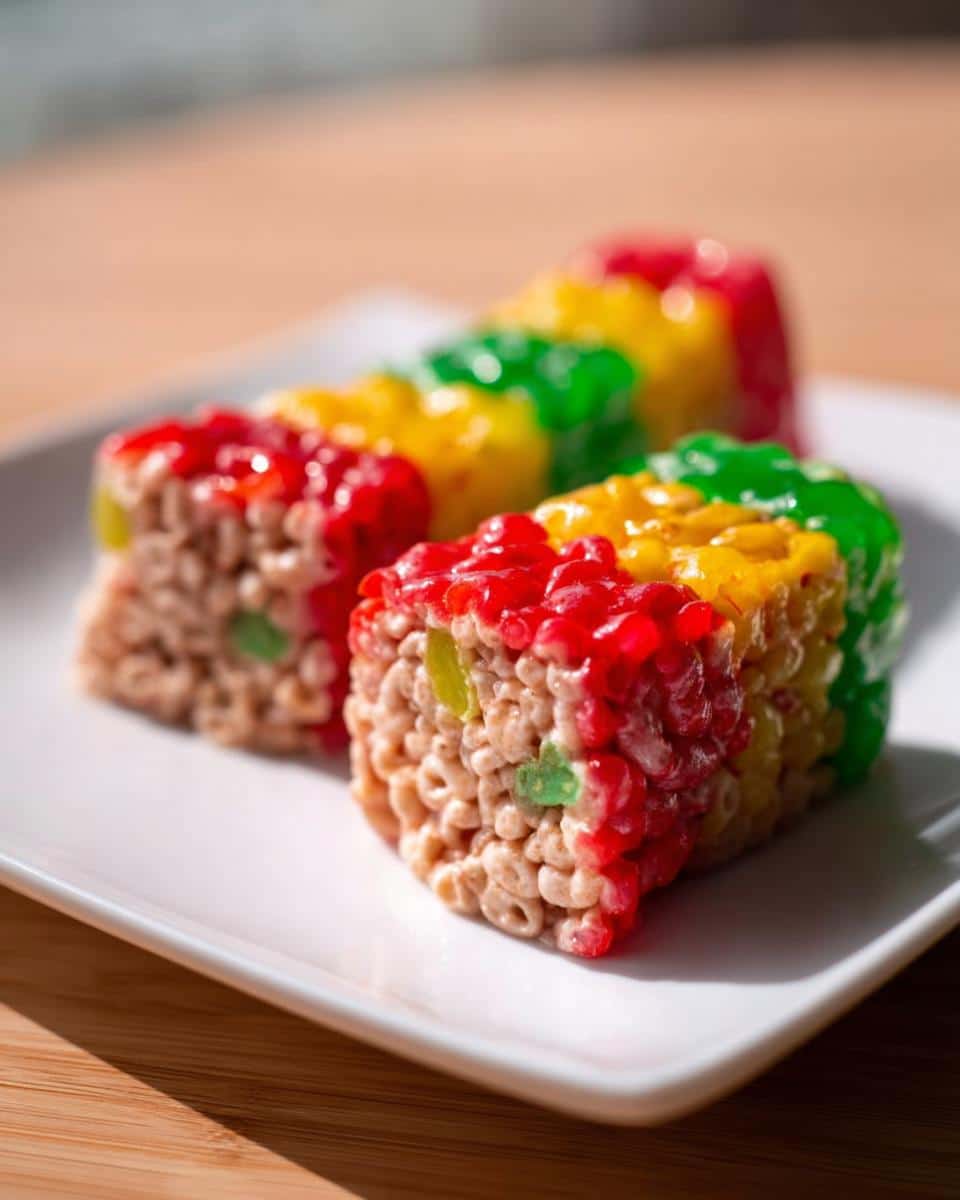
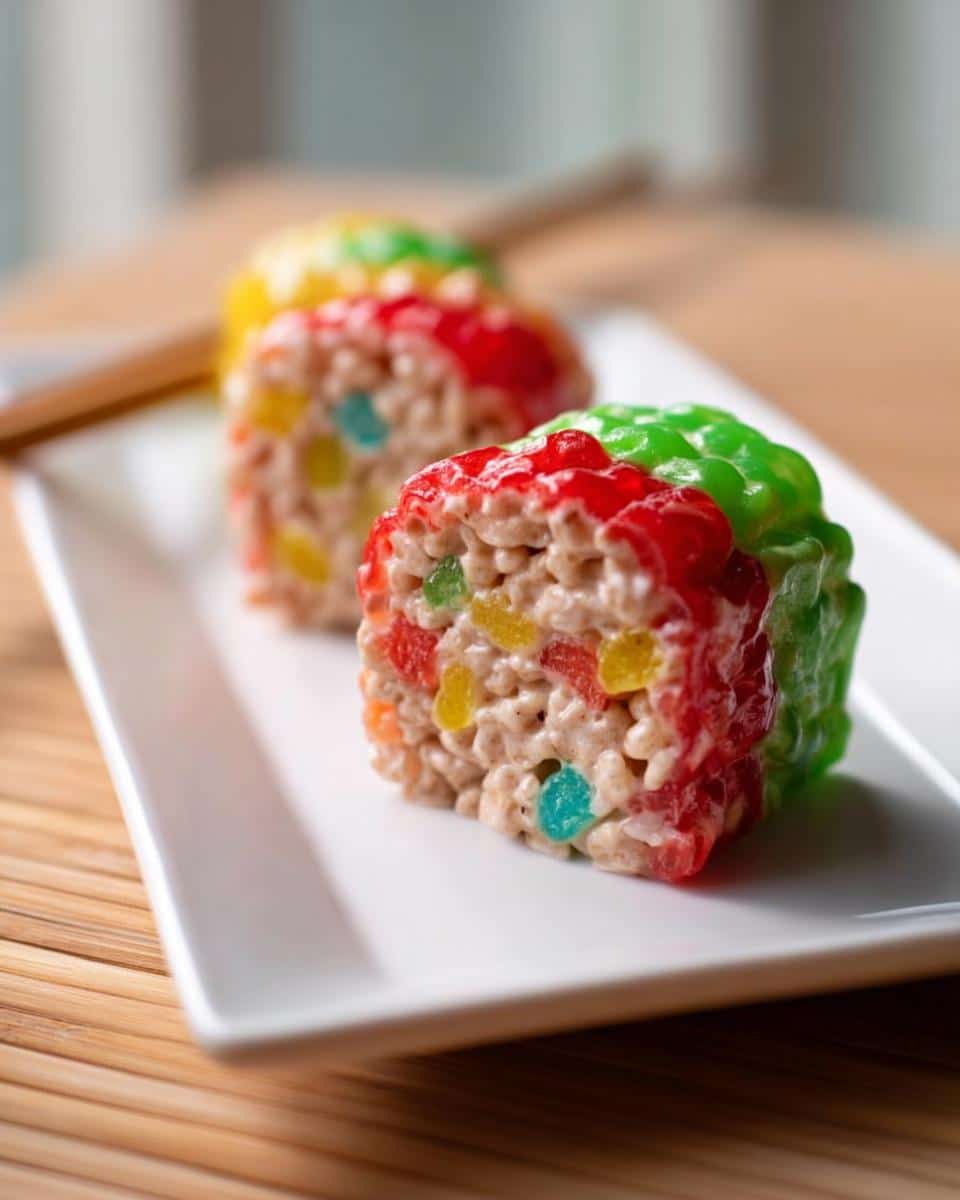
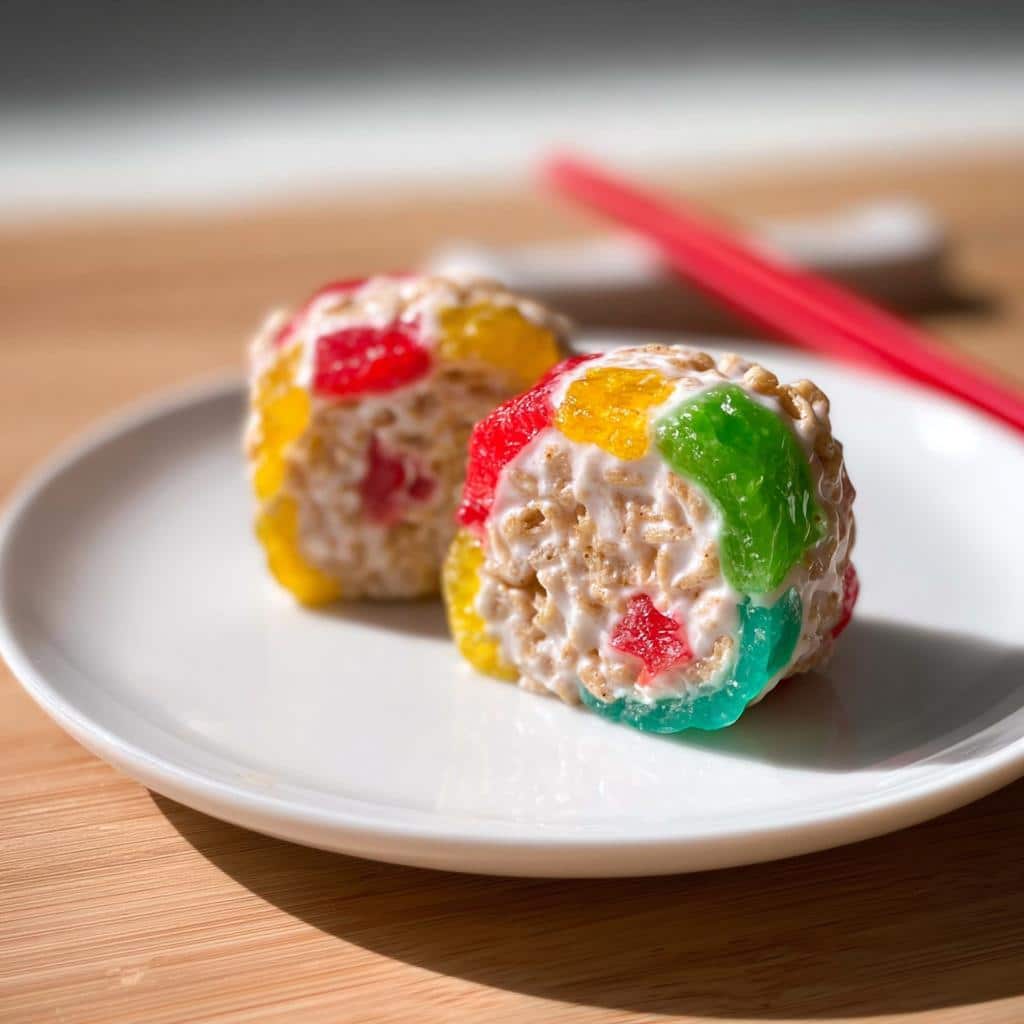
- 40 bite-size fish-shaped chewy fruit snacks. These sit right in the middle and look just like little pieces of tuna or salmon when you slice the finished roll!
Clarifying Ingredients for Assembly Notes
I have to mention, as I looked through the original instructions, there were a few items listed that seemed like they belonged to a completely different recipe—maybe a savory dip? For the main marshmallow treat rolls above, we won’t touch the 8 oz. block of softened PHILADELPHIA Cream Cheese, the KRAFT Shredded Cheese, or the Real Mayo. If you want to use that as a separate sweet icing or dip later, go for it, but keep it out of the cereal mix!
Step-by-Step Instructions to Create Sushi Candy Rolls
Alright, let’s get this party started! As a historian, I know that every great creation starts with a solid foundation, and that’s exactly what we’re doing here with our marshmallow base. This process is fast, so have your cereal bowl right next to your microwave!
Preparing the Marshmallow Cereal Base
First things first, grab that large microwaveable bowl. Melt 1.5 tablespoons of butter in there on HIGH for about 45 seconds until it’s totally liquid. Toss your 20 marshmallows into the melted butter—make sure they get a nice coating! Now, pop that back into the microwave for 1 1/2 to 2 minutes total. Here’s the key: stir it well every 45 seconds while it’s heating up. This stops the marshmallows from scorching. Once it’s smooth and gooey, quickly stir in the 3 cups of RICE KRISPIES cereal until everything looks combined. Don’t dawdle!
Assembling and Rolling the Sushi Candy Rolls
This is where the illusion really starts to take shape. Take one of your 10 fruit snack sheets and lay it flat. You need to press about 3 tablespoons of that warm cereal mixture right onto the sheet, but leave a small half-inch border around the edges so you can actually seal it up. Now, place 4 of your little fish-shaped fruit snacks right down the center of the cereal. Gently, but firmly, roll that entire sheet up, just like trying to wrap a very sticky sleeping bag. Roll it tight so you get that classic, dense sushi look!
Handling the Cream Cheese Mixture
Okay, this step, based on the ingredient list, seems like a wonderful savory counterpoint, or maybe a creamy dip for slicing later. To follow the provided instructions, you’ll mix 8 oz. of softened cream cheese, 1 1/2 cups of shredded cheese, and 1/3 cup of mayo in your pie plate. Since we are making sweet candy desserts, I suggest you keep that cheesy mix separate! Maybe serve it on the side as a weird, savory ‘wasabi’ tasting plate for laughs, but it definitely doesn’t go inside our sweet rolls!
Expert Tips for Perfect Sushi Candy Rolls Success
Making these illusion treats is fun, but dealing with melted marshmallow can sometimes feel like wrestling an octopus! Don’t let sticky situations ruin your vibe. A few little tricks I’ve picked up over the years will keep your production line moving smoothly.
Tips for Handling Sticky Marshmallow Mixtures
When you are pressing that warm cereal mixture onto your fruit snack sheets, your hands are going to get tacky fast—I mean really tacky. Before you start pressing, just dab a tiny bit of vegetable oil on your palms. You don’t need much, or the cereal won’t stick to itself! Alternatively, you can put a sheet of wax paper directly over the mixture before you start flattening it out. It’s a lifesaver, honestly.
Achieving Tight Sushi Candy Rolls
The secret to the finished look, especially when you slice them, is compression. You want a tight roll, not a floppy log. If you happen to have a bamboo rolling mat lying around from when you were attempting real sushi, wash it up; it works perfectly for wrapping up your fruit snack sheet! If you don’t have one, just use plastic wrap. Wrap the whole log up tightly and let it sit for about ten minutes. This sets the shape perfectly before you take your knife to it.
Having those firm rolls makes them look so much more authentic when you serve them alongside other no-bake desserts!
Ingredient Notes and Substitutions for Sushi Candy Rolls
As a culinary writer focused on history and tradition, I always want folks to feel empowered to make a dish their own, especially when we’re dealing with something as flexible as candy! If you can’t find the exact chewy fruit snack sheets or those perfect little fish snacks, don’t panic. This recipe is more about the *method* of rolling than the specific brand of gelatinous treat you wrap it in.
If you’re aiming for true, beautiful sushi structure, you need pliable wrapping. If you can’t find the sheets, you could try very thin fruit leather, though you might have to warm it up slightly between your hands for a minute to get it workable. For the ‘tuna’ center—those cute fish snacks—don’t worry if you have to use brightly colored gumdrops or even small slices of gummy worms laid out in a line instead. The key is that little pop of color.
Regarding health—and I see the search interest pointing toward Low Cal Snacks—we have to be real: marshmallows and cereal aren’t health food! However, because these rolls are so rich in visual impact, you can serve much smaller portions. Cutting one finished roll into three thin pieces still delivers that massive ‘wow’ factor, which helps control the overall intake. It’s all about mindful serving when you’re recreating a masterpiece, even a sugary one like this!
Serving Suggestions for Your Sushi Candy Rolls
Once you’ve got your beautiful, colorful logs of candy sushi ready, the next, and arguably most fun, part is the presentation! This is where the whole illusion pays off, especially if you’re putting these out for a big crew or a major event. People eat with their eyes first, and that’s doubly true when the food is a playful trick like this.
I always treat the final assembly like I’m staging a small culinary exhibit. Forget just plopping them on a paper plate; we are aiming for a show-stopping **Food Platter** moment here.
Here’s how I get mine ready for the spotlight:
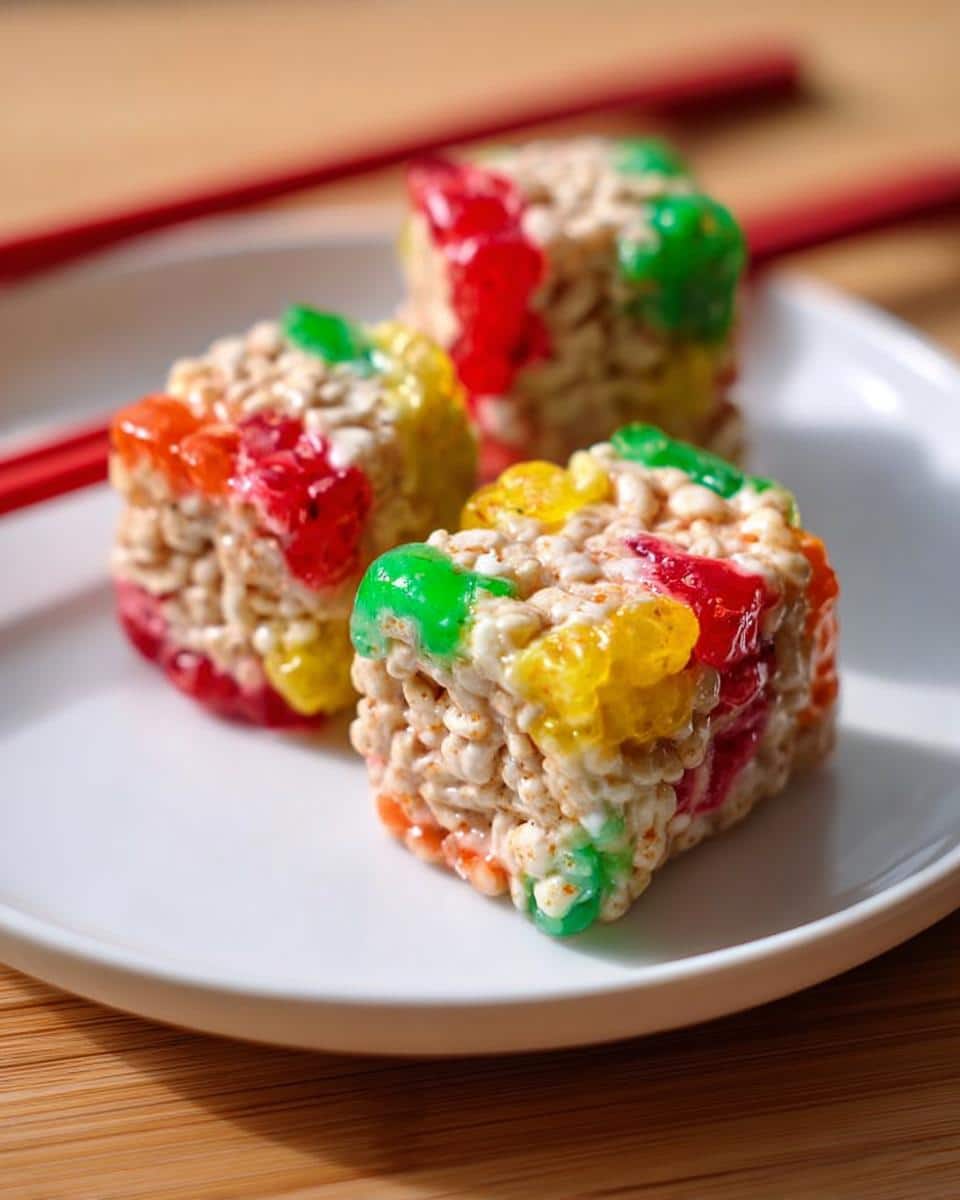
- The Cut: Once your rolls have firmed up (after sitting for about ten minutes), take your sharpest knife—I slightly oil the blade for a clean slice—and cut each roll into four or five small, round pieces. Keep the cuts even so they mimic traditional maki rolls perfectly.
- The Arrangement: Arrange these *sushi* pieces cut-side-up on a nice, dark platter or a simple white serving dish. If you used different colored wrappers (like red, green, and white fruit snacks), mix them up so you get a vibrant pattern across the board.
- Garnishes (The Fun Part!): To really lean into the illusion, I grab a small dollop of that leftover cream cheese mixture we discussed earlier and place a tiny bit next to a few pieces—call it the ‘creamy sauce’! Also, a few sprinkles of colored sugar or even finely shredded coconut on a few rolls can look just like shredded fish topping.
If you’re serving these as part of a larger spread—maybe alongside some fruit or those lighter Healthy Snack Ideas—the contrast is fantastic. People grab the sweet, colorful pieces because they look so tempting, and the reveal is always so much fun. They make the whole spread look incredibly creative and effortless!
Storing Leftovers of Your Sushi Candy Rolls
Even though these treats are usually the first thing to disappear at a party, you might find yourself with a few leftover rolls—or maybe you made a huge batch ahead of time! Since they are held together by set marshmallows, texture preservation is key here. You definitely don’t want them getting stale!
The best way to keep them fresh is to store them in an airtight container. I generally keep them right on the counter at room temperature. Refrigeration can sometimes make the marshmallow mixture a little too hard, which ruins that delightful, chewy texture we worked so hard to achieve. Don’t try to reheat them; they don’t like that!
If they look a tiny bit floppy the next day, just slice them, lay them out on a clean plate for about thirty minutes, and the air circulation helps them firm up just enough for a perfect second-day snack.
Frequently Asked Questions About Sushi Candy Rolls
It’s natural to have questions when you’re mixing culinary arts with candy magic! As a food writer, I find that clarity in the process ensures the most fun at the end. Here are the things folks ask me most often about these playful treats.
Can I make these Sushi Candy Rolls ahead of time for a party?
You absolutely can! I usually make mine the day before I need them. Just make sure you seal them up tight in an airtight container at room temperature, just like I mentioned before. They hold their shape beautifully as long as they aren’t exposed to too much humidity. They really are fantastic **Pot Luck Dishes For A Crowd** because you can prep them entirely off-site!
Are there Healthy Snack Ideas alternatives for the cereal base?
That’s a fair question! While these are primarily a dessert, we can always aim for smarter swaps. If you’re managing portions or aiming for lighter treats, you can swap the standard RICE KRISPIES for puffed brown rice cereal or even a plain, low-sugar puffed corn cereal to keep that texture but cut down on sugar slightly. This helps lean them closer to the realm of **Low Cal Snacks**, even if they are still incredibly sweet!
What makes these Sushi Candy Rolls great for Happy Birthday Fun?
Honestly, it’s the grand reveal! I love bringing out a platter that looks like dinner, and then announcing it’s the birthday dessert. But the real fun comes from the assembly. These are perfect for setting up a little station where kids or guests can help press the mixture into the fruit sheets. It turns dessert-making into interactive entertainment, which is exactly what birthday parties need!
For more on how we explore culinary history meets modern fun here at Top Chicken Eats, you can always check out my author page!
Sushi Candy Rolls
Ingredients
Equipment
Method
- Microwave the butter in a large microwaveable bowl on HIGH for 45 seconds or until melted. Add the marshmallows and toss to coat them. Microwave the mixture for 1 1/2 to 2 minutes or until the marshmallows are completely melted and the mixture is well blended, stirring every 45 seconds. Stir in the cereal.
- Unroll the fruit snack sheets. Press 3 tablespoons of the cereal mixture onto each sheet, leaving a 1/2 inch border around the edge. Place 4 fish-shaped fruit snacks down the center of each sheet, then roll the sheet up tightly.
- Mix 1 package (8 oz.) of softened PHILADELPHIA Cream Cheese, 1 1/2 cups of KRAFT Shredded Cheese, 1/3 cup each of KRAFT Real Mayo and chopped or sliced Add-Ins in a pie plate or ovenproof serving dish.