You know those nights, right? The kind of night where you desperately need something chocolate—something homemade—but the thought of pulling out bowls, whisks, and waiting an hour just isn’t going to happen. Trust me, I’ve been there. When those cravings hit, you need speed, comfort, and absolutely zero cleanup standing between you and dessert. That’s exactly why I perfected this Easy Chocolate Mug Cake recipe.
This isn’t some fussy little dessert; it’s the ultimate single-serving chocolate hug cooked right in your favorite mug. It’s my answer to instant gratification, rooted in the same philosophy my Southern cooking background taught me: care doesn’t have to mean complexity. Grab your mug, and let’s make something wonderful in about five minutes total!
If you’re looking for rich, fudgy satisfaction without the fuss, you need to see what I shared over at my favorite Christmas chocolate desserts collection for later inspiration, but for right now, this mug cake is everything.
Why This Easy Chocolate Mug Cake is Your New Go-To Simple Dessert Recipe
Listen, when you need a warm chocolate cake, you need it *now*. That’s the magic here. We cut out all the unnecessary steps that make baking a chore. This is truly one of the best Simple Dessert Recipes you’ll ever try because it sacrifices absolutely nothing on flavor for speed.
If you’re looking for Easy Dessert Ideas that require zero planning, look no further. This mug cake checks all the boxes for what a real comfort dessert should be:
Ready in Under Five Minutes
Seriously, the total time, including mixing and cooking, is around five minutes. That includes a full minute of resting time! You can conquer a late-night craving before you even finish scrolling through your phone. Because it cooks via microwave instructions, there’s no preheating time to eat into your day.
Minimal Ingredients for Easy Desserts With Few Ingredients
You don’t need to run to the store for some fancy item. We rely on basics: flour, sugar, cocoa, and milk. If you’ve baked cookies or made pancakes before, you already have 90% of what you need right now. This makes it the perfect recipe when you thought you had nothing for dessert!
Equipment Needed for Your Easy Chocolate Mug Cake
You don’t need a stand mixer or even a full set of mixing bowls for this one, which I love! The whole process is designed around simplicity, which means fewer dishes piled up in the sink tomorrow. Since this is an Easy Chocolate Mug Cake, the equipment list is thankfully short.
The most critical piece of gear—and I can’t stress this enough—is finding the right vessel.
- Microwave-safe mug or coffee cup: You need one that holds at least 10 to 12 ounces. If your mug is too small, the batter will bubble up and make a huge mess. Trust me, I learned that the hard way when I used one of my favorite tiny espresso cups. Oops! A standard, hefty coffee mug is usually perfect for this Single Serving Dessert.
- A small spoon or teaspoon: This is what you’ll use for mixing everything right in the mug.
That’s it! Honestly, the beauty of these Microwave Cake Instructions is how little equipment you dirty up. If you’re dealing with a craving moment, you want that minimal cleanup, and this setup delivers.
Gathering Ingredients for the Perfect Single Serving Dessert
The real beauty of this recipe is that it relies on things you probably already have hanging around in your pantry. When you’re desperate for one of those Easy Desserts With Few Ingredients, you shouldn’t have to run out for specialty items. This Easy Chocolate Mug Cake leans heavily on the basics, which is why it’s so reliable.
Because we’re only making one serving, the measurements feel tiny, but don’t worry about scooping too much or too little. Precision is key here, especially with the leavening agent, so make sure your measuring spoons are level! You can check out my tips on some of my favorite easy snacks while you gather your supplies.
Dry Components for the Easy Chocolate Mug Cake
Start everything off by measuring the dry stuff directly into your mug. This saves having to wash a separate prep bowl, which is the whole point of this exercise!
- All-Purpose Flour: We need 3 Tablespoons (that’s about 23 grams). It provides the structure.
- Granulated Sugar: 2 Tablespoons (25 grams) of white sugar for sweetness. It balances out the bitterness of the cocoa powder perfectly.
- Unsweetened Cocoa Powder: 1 Tablespoon (7.5 grams). This is where the deep chocolate flavor comes from!
- Baking Powder: A tiny 1/4 teaspoon. This is what makes it puff up just enough so it’s cake and not just chocolate sludge.
- Salt: Just a small dash—about 1/8th of a teaspoon—to make the chocolate really sing.
Wet Ingredients and Flavor Builders
Once your dry ingredients are mixed together—give them a quick stir with that small spoon—we bring in the moisture. This part is crucial for getting that wonderful texture that makes this a top-tier, Simple Dessert Recipe.
- Milk: 3 Tablespoons (45 ml). It truly doesn’t matter what kind you use; whole milk, skim, almond—whatever you have on hand will work just fine.
- Canola Oil: You need 1 Tablespoon (15 ml). If you ran out of oil, melted butter works just as beautifully, but oil tends to keep the cake edges softer.
- Vanilla Extract: Just 1/8 teaspoon. It enhances the chocolate so much, don’t skip it if you can help it!
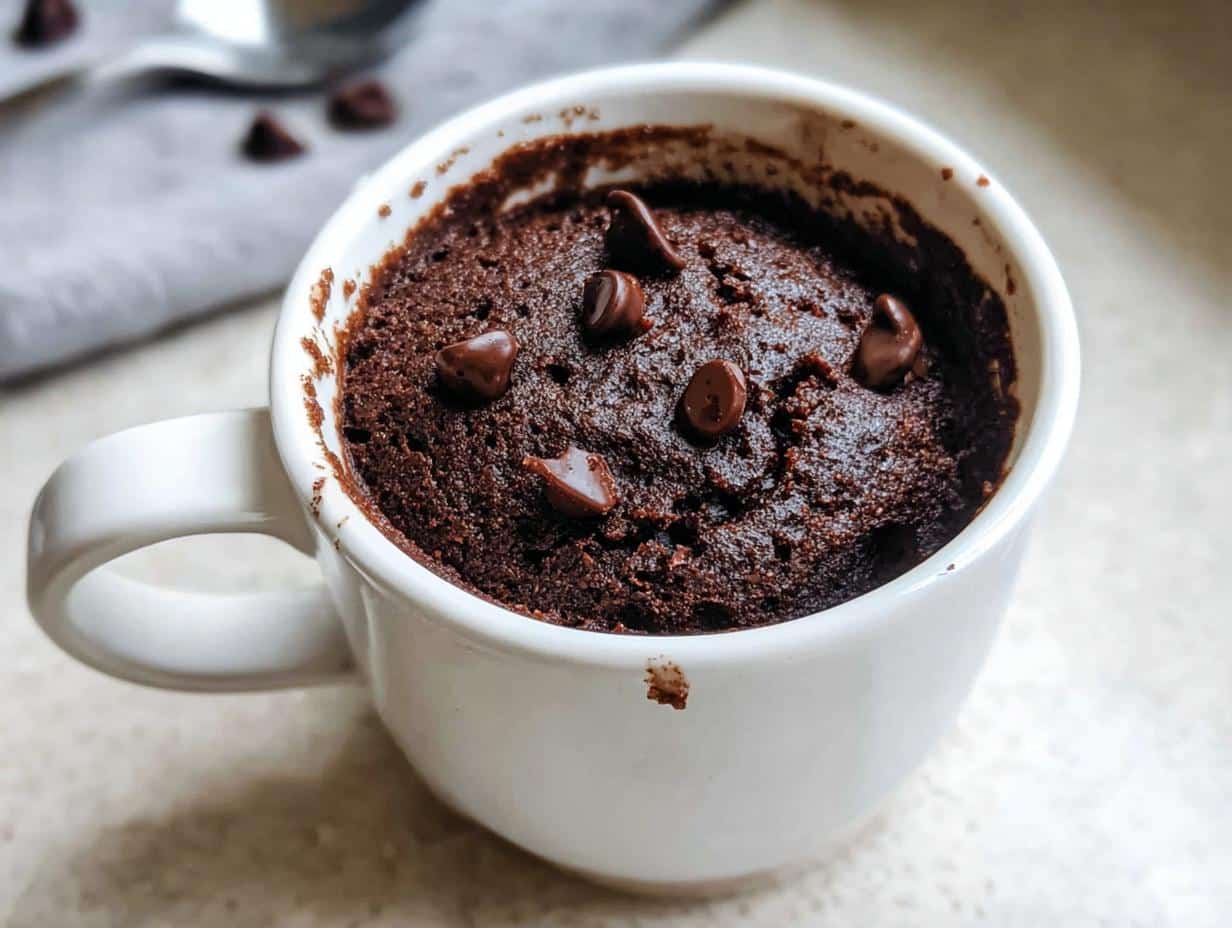
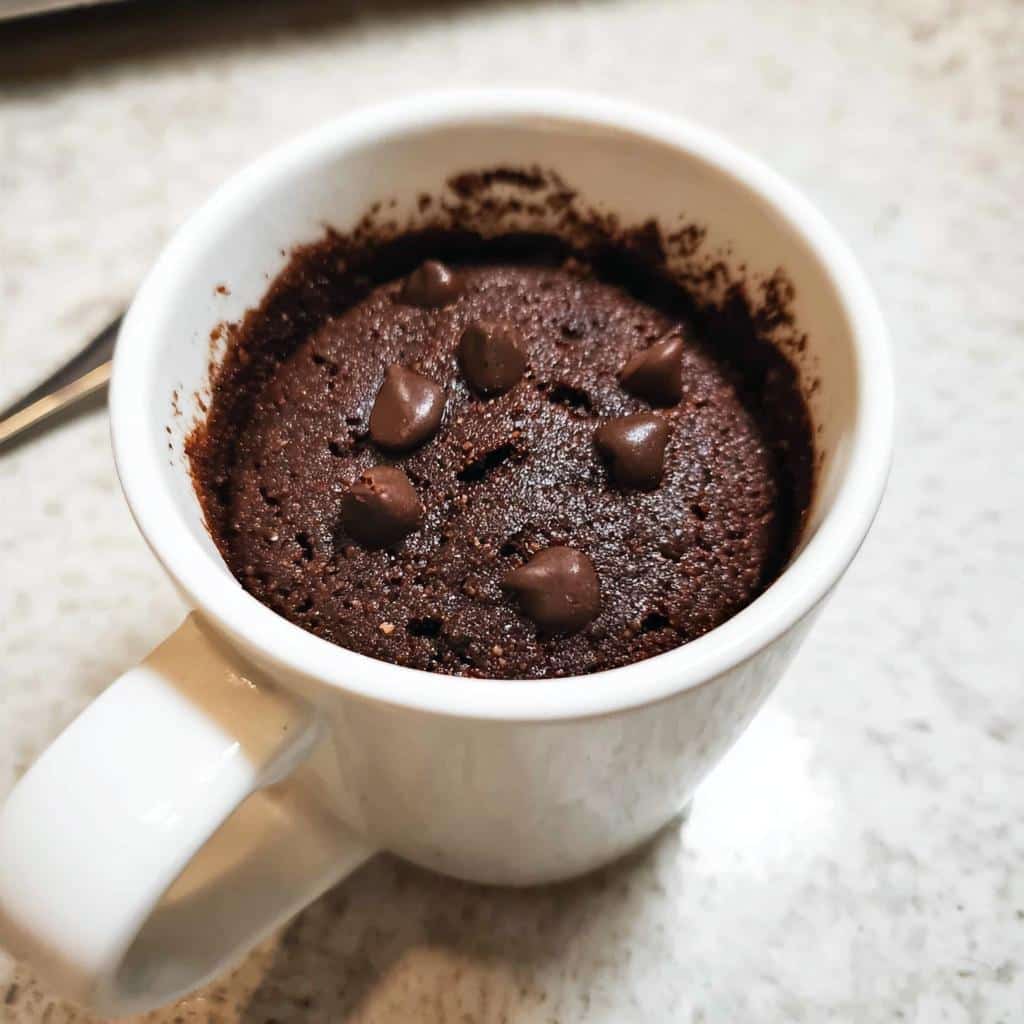
Finally, don’t forget the best part: Add in 1 teaspoon of chocolate chips, or sprinkle them right on top before microwaving. Those little pockets of melted chocolate are what make this recipe feel so decadent!

Mastering Microwave Cake Instructions for Your Easy Chocolate Mug Cake
Okay, you’ve got your ingredients gathered in that big mug. Now comes the quick but vital part: assembling the batter. Since this recipe is so small, you don’t want to over-mix, or you’ll end up with something rubbery. We are aiming for that soft, comforting texture that these Microwave Cake Instructions promise!
First things first, remember that instruction about spraying the mug? Do that now! A little non-stick spray goes a long way to prevent sticking.
Mixing the Easy Chocolate Mug Cake Batter
Remember how we added all the dry ingredients first? Now, gently pour in your milk, oil, and that tiny touch of vanilla extract. Take your spoon and start stirring slowly. You need to be diligent here; make sure you get right down to the bottom of the mug. My biggest tip—and I learned this after making one cake that was dry confetti at the bottom—is to scrape the sides and bottom repeatedly until everything is smooth. No streaks of dry flour should remain!
Once it looks nicely combined, fold in those chocolate chips—or sprinkle them on top if you want them to stay whole. That’s it for mixing!
Microwave Timing and Resting for the Best Texture
This is where the magic (and sometimes the disaster) happens if you aren’t careful. Pop your mug into the microwave. Everyone’s microwave is different, but generally, you’re looking at 70 to 90 seconds on high power. Watch it! You want the cake to look set but still slightly shiny on top—a bit glossy means it’s moist inside. If it looks completely dry, you’ve gone too long, honey!
Crucially, and don’t skip this step for the ultimate Easy Chocolate Mug Cake texture, you must let it rest. Pull it out (carefully, it’s hot!) and let it sit for a full 1 minute. This resting time allows the final steam to finish cooking the center gently. If you eat it right away, it might feel too gooey, but after that minute? Pure, soft perfection. I always check out my simple recipes for kids for inspiration when I need super fast results, too!
Expert Tips for the Best Easy Chocolate Mug Cake Results
Even though this Easy Chocolate Mug Cake is designed to be utterly foolproof, microwaves love to keep us on our toes, don’t they? Every microwave seems to run on its own weird time scale. I learned this the hard way when I first started playing around with these quick fixes, especially when trying to make a batch of what I thought would be Simple Dessert Recipes for an impromptu movie night.
I remember one time, I thought one minute flat sounded right for everybody—big mistake! The first mug was perfectly fudgy, but the second one baked up harder than a hockey puck. It was a disaster! So, my number one piece of advice, built from past chocolate failures, is to work with your machine, not against it. These little tweaks will save you from that rubbery texture we are trying so hard to avoid.
Adjusting Cook Time Based on Microwave Wattage
This is the real secret sauce when dealing with any Microwave Cake Instructions. Those 70 to 90 seconds I gave are a starting point, not a law carved in stone. If your microwave is super high-powered—say, 1200 watts or more—you might only need 60 seconds, or even less. If yours is older or lower wattage, you might need closer to 100 seconds.
Always check the cake by looking at the top. If the surface is totally dry and matte, you’ve gone too far. You’re looking for that sweet spot where the edges look baked, but the very center still has a slight sheen or looks a tiny bit wet. That glossiness is your promise of moisture once it rests. If you’re ever in doubt, pull it out early! It’s much easier to pop it back in for 10 more seconds than to try and fix an overcooked cake.
Ingredient Substitutions for This Simple Dessert Idea
Because this is such a lean recipe using Easy Desserts With Few Ingredients, substitutions are easy to make, which is great when you’re quickly gathering supplies.
- Butter Instead of Oil: Like I mentioned above, if you don’t have canola oil or vegetable oil, just scoop out an equal amount of melted unsalted butter. It adds a slightly richer flavor, but the texture stays spot-on for this Quick Dessert Recipe.
- Different Milks: Seriously, any milk works! Dairy, almond, soy, oat—they all work because the fat and liquid ratio is mostly determined by the oil/butter portion of the recipe.
- Gluten-Free Flour: You can swap the all-purpose flour for a good quality 1-to-1 gluten-free blend. I just made sure to mix thoroughly to avoid any dry spots that GF flours sometimes leave behind.
If you want more soulful, simple food ideas, you should definitely check out my personal journey on the ‘About’ page to see where my love for easy, comforting food really comes from!
Serving Suggestions for Your Homemade Desserts
The Easy Chocolate Mug Cake is delicious straight from the microwave after that crucial resting minute, but let’s be honest, sometimes we just need that extra level of decadence, you know? Since this recipe is designed for speed, our toppings should be just as easy. We aren’t going to spend 20 minutes whipping up a ganache when we need chocolate *now*.
These additions are perfect for turning your quick comfort food into something worthy of a weekend treat without slowing down your process. We want Homemade Desserts that still feel special, even if they were ready in less time than it takes to boil water.
Here are my favorite ways to dress up this deeply satisfying single serving treat:
- A simple dusting of powdered sugar gives it a slightly elegant look—it only takes two seconds!
- A small scoop of vanilla bean ice cream melting right on top is pure heaven. The cold melting into the warm cake is just the best contrast.
- A spoonful of peanut butter warmed slightly in the microwave and drizzled over the top? Yes, please. It makes it so rich.
- For a slightly fancier touch, try a few sprinkles or some chopped nuts if you have them handy.
If you’re looking for other simple recipe ideas that pack a big sweet punch, you might love the fun mix-ins I used in my sweet marshmallow popcorn mix recipe. But honestly, for the deep chocolate fix, a little ice cream never fails!
Storage and Reheating Instructions (Though Best Eaten Fresh)
Now, this is important to talk about because this recipe is designed for pure, immediate satisfaction. I’m not going to lie to you: this Easy Chocolate Mug Cake is truly a one-and-done deal. The second it cools down completely, the texture starts to change because of the specific way it cooks in the microwave. It’s a fantastic Single Serving Dessert choice for instant gratification, but it’s not really built for leftovers.
If, and I mean *if*, you manage to have a little bit left over after tasting it, your options are super limited. Don’t try to save it overnight hoping it will be good tomorrow; it just won’t have that soft, tender crumb we worked so hard to achieve with those precise Microwave Cake Instructions.
However, if you absolutely must save a small piece, here is the best way to manage it:
- Storage: Pat a small amount of plastic wrap right onto the surface of the cake remaining in the mug (this prevents it from drying out further). Keep it covered on the counter, not in the fridge, for just a few hours maximum. The fridge will make it firm and tough, and nobody wants that.
- Reheating: If you need to revive it, place the mug back in the microwave. Use very short bursts—start with 10 seconds on 50% power, then maybe 5 seconds more if needed. You want it warm and soft, not piping hot and hard.
Honestly, my best advice for this recipe is always to have a fresh batch ready if you need more later. Because it takes literally two minutes to mix up, making a second one fresh is always going to beat the slightly sad texture of a reheated one. This recipe is about enjoying the moment, so make exactly what you need!
Frequently Asked Questions About Making an Easy Chocolate Mug Cake
I know when you’re speed-baking something like this, you’ve got questions! It’s easy to feel nervous when cooking cake in the microwave for the first time. We want that moist, comforting result, not something that feels like eating an eraser. I want to make sure your experience with this Easy Chocolate Mug Cake is fantastic, so let’s cover some of the things I get asked about most often regarding these Quick Dessert Recipes.
If you’ve got a question about anything else—maybe you’re having trouble with the power level or worried about your mug size—you can always reach out to me through my contact page. I love hearing from you all when you’ve successfully made one of my fuss-free desserts!
Can I make this Easy Chocolate Mug Cake recipe ahead of time?
Oh, bless your heart for trying! But no, honey, you absolutely shouldn’t try to make this ahead of time. This recipe is the definition of instant gratification. The texture relies heavily on the moisture that has just been created by the microwave heat. If you try to store it, even covered, it hardens up fast. It’s designed to go from pantry ingredients to warm, fudgy cake in about five minutes flat. Trust me, if you wait, it won’t be one of the Best Dessert Recipes anymore!
What if I don’t have baking powder? Can I use baking soda?
This is a great question because leavening agents are so important in tiny recipes like this! For this specific Easy Chocolate Mug Cake, you really need the baking powder. Baking powder is double-acting, meaning it gives you one nice little lift when you mix it wet, and then a second, strong lift when it hits the heat of the microwave. Baking soda needs an acid to activate fully (and we don’t have much acid here unless you swap the milk for buttermilk). If you use just baking soda, you risk having a dense, slightly metallic-tasting cake, and we want fluffy and chocolatey!
Is this one of the best dessert recipes for a very small portion?
It certainly is! That’s exactly why I love it so much. Sometimes you don’t want a whole plate of dessert staring at you all night, right? This recipe is perfect for those moments when you need just a satisfying bite or two of warm chocolate to hit the spot. It’s calibrated perfectly for a single 10-to-12-ounce mug, making it the champion of Simple Dessert Recipes when you’re cooking just for one. If you need a bigger batch later, you’ll have to switch gears and bake a full pan of one of my other recipes!
Estimated Nutritional Data for This Quick Dessert
Because this Easy Chocolate Mug Cake is made using a very specific set of pantry staples and cooked so quickly, the final numbers are going to be much more precise than a traditional baked cake. However, I always like to remind you that this is just an estimate, okay? We are using specific brand measurements here, and if you swap the milk for heavy cream or use a super fatty brand of cocoa powder, your numbers will change!
I’ve pulled together what you can generally expect from this single-serving treat based on the standard ingredients listed. Think of these numbers as a good baseline for planning your day!
For the full legal details regarding how I approach reporting this information, please check out the general disclaimer page at my site. But for the real talk, this dessert is still miles better than hitting the drive-thru for a late-night sugar rush!
- Calories: Approximately 220 – 250 calories (this depends heavily on the type of milk and oil you use!)
- Total Fat: Around 9g – 11g (the oil/butter is the biggest contributor here).
- Protein: Roughly 4g – 6g (mostly from the flour and milk).
- Total Carbohydrates: About 35g – 40g (this includes the sugar and the flour).
Remember, since this is a Single Serving Dessert, you’re only consuming what’s in that one mug. It’s designed to satisfy that immediate need for one of the best Simple Dessert Recipes without any guilt over leftovers. Enjoy every bite!
Share Your Single Serving Dessert Experience
That’s it! You’ve officially conquered instant dessert satisfaction. I truly hope this Easy Chocolate Mug Cake brought you that warm, fuzzy, homemade feeling we all chase sometimes. I’m Lilya Lawson, and believe me when I say that finding joy in these tiny, quick victories in the kitchen is what food is all about—not complicated techniques or fancy ovens.
Now that you have your chocolate fix, I want to hear all about it! Please don’t be shy; these Microwave Cake Instructions can be finicky because machines differ so much. Tell me in the comments exactly how long your microwave took to get it perfect! Did you go the full 90 seconds, or were you done closer to one minute?
I absolutely live for seeing your creations! If you snapped a photo of your perfect single-serving moment, share it on social media and tag me. Seeing your success with these Quick Dessert Recipes always makes my day and reminds me why I keep sharing my family’s approach to great, soulful food.
If you have any questions about privacy or how I manage reader information, check out my Privacy Policy, but most importantly, go enjoy that warm, gooey chocolate goodness you just made! Happy cooking, my friends!
Easy Chocolate Mug Cake
Ingredients
Equipment
Method
- Lightly spray the bottom of a microwave-safe mug or coffee cup with cooking spray.
- Add flour, sugar, cocoa powder, baking powder, and salt. Stir these dry ingredients together.
- Add milk, canola oil, and vanilla extract. Stir until the mixture is smooth, making sure to scrape the bottom of the mug. Stir in chocolate chips or sprinkle them on top.
- Cook in the microwave for 70 to 90 seconds until the cake is just set but still slightly shiny on top. Allow the cake to rest in the microwave for 1 minute before you eat it.