Seriously, when a craving hits—and it always does, right?—turning on the oven feels like too much effort sometimes. I totally get that! As a dietitian who believes comfort food should fit into real life, I’m always looking for those magic shortcuts that deliver maximum indulgence with zero fuss. That’s why these No-Bake Oreo Dessert Cups are my absolute go-to when I need a quick dessert recipes fix. We’re talking about perfectly portioned layers of creamy chocolate heaven built on a crunchy Oreo base. Forget baking; these set up beautifully in the fridge and taste like pure nostalgia!
If you’ve been searching for simple dessert recipes that please everyone, you’ve landed in the right spot. I developed this version to be incredibly fast for those busy weeknights. You can find more of my quick treats in my guide to no-bake cookies. Trust me, these individual cookie cups are one of the best dessert recipes out there for instant gratification.
Why You Need These No-Bake Oreo Dessert Cups Today
Honestly, sometimes you just don’t have the time or energy for a full baking project. That’s where these cups shine! They are perfect when you’re staring down a busy schedule but still need that satisfying sweet fix. It’s the ultimate easy dessert idea that looks fancy but takes minutes.
- You get built-in portion control—no slicing or messy scooping required!
- These are amazing for feeding a crowd without heating up the kitchen in the summer.
- Prep time is seriously under 15 minutes, so you can make them and forget them until dessert time.
- They’re kid-friendly and fun; check out some other easy recipes for kids that skip the oven, too!
Essential Ingredients for Perfect No-Bake Oreo Dessert Cups
When you’re making something no-bake, the quality and readiness of your ingredients are everything! Since we aren’t using the oven to correct mistakes, we need to be precise here. Don’t skip the notes about temperature, trust me—it makes the difference between smooth chocolate bliss and a lumpy mess. This is one of those simple dessert recipes where the few ingredients really have to pull their weight!
For the Base and Topping
- 16-18 Oreos, crushed (You need to divide these evenly between your 8 serving cups for the bottom layer and the sprinkle on top!)
For the Cream Filling
Remember, the cream cheese needs to be sitting out for a bit so it’s totally at room temperature. It combines so much better that way!
- 4 oz Cream cheese (Must be room temperature!)
- 2.5 cups Heavy whipping cream (Keep this piping cold until you use it!)
- 1 tsp Vanilla extract
- 1 pinch Salt
- 1 cup Powdered sugar
- 0.25 cup Unsweetened cocoa powder
Step-by-Step Guide to Making No-Bake Oreo Dessert Cups
Okay, this is the fun part where everything comes together without ever having to turn on your oven! Because we aren’t baking, the secret to getting those gorgeous, distinct layers is mixing things in the right order and making sure our base is set. As a flavor strategist, I have to say that getting that cream cheese smooth first is a non-negotiable step for a silky filling.
Preparing the Oreo Layers
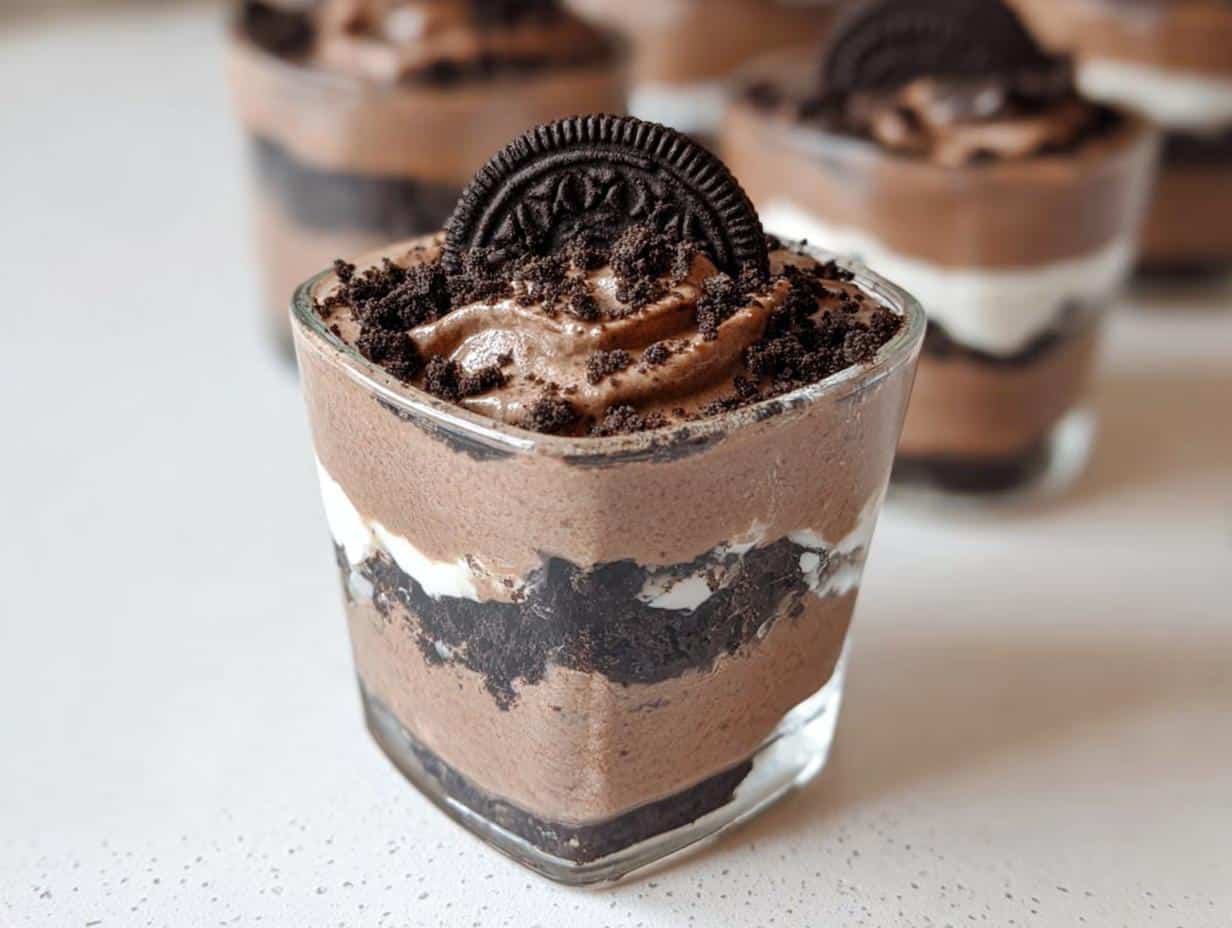
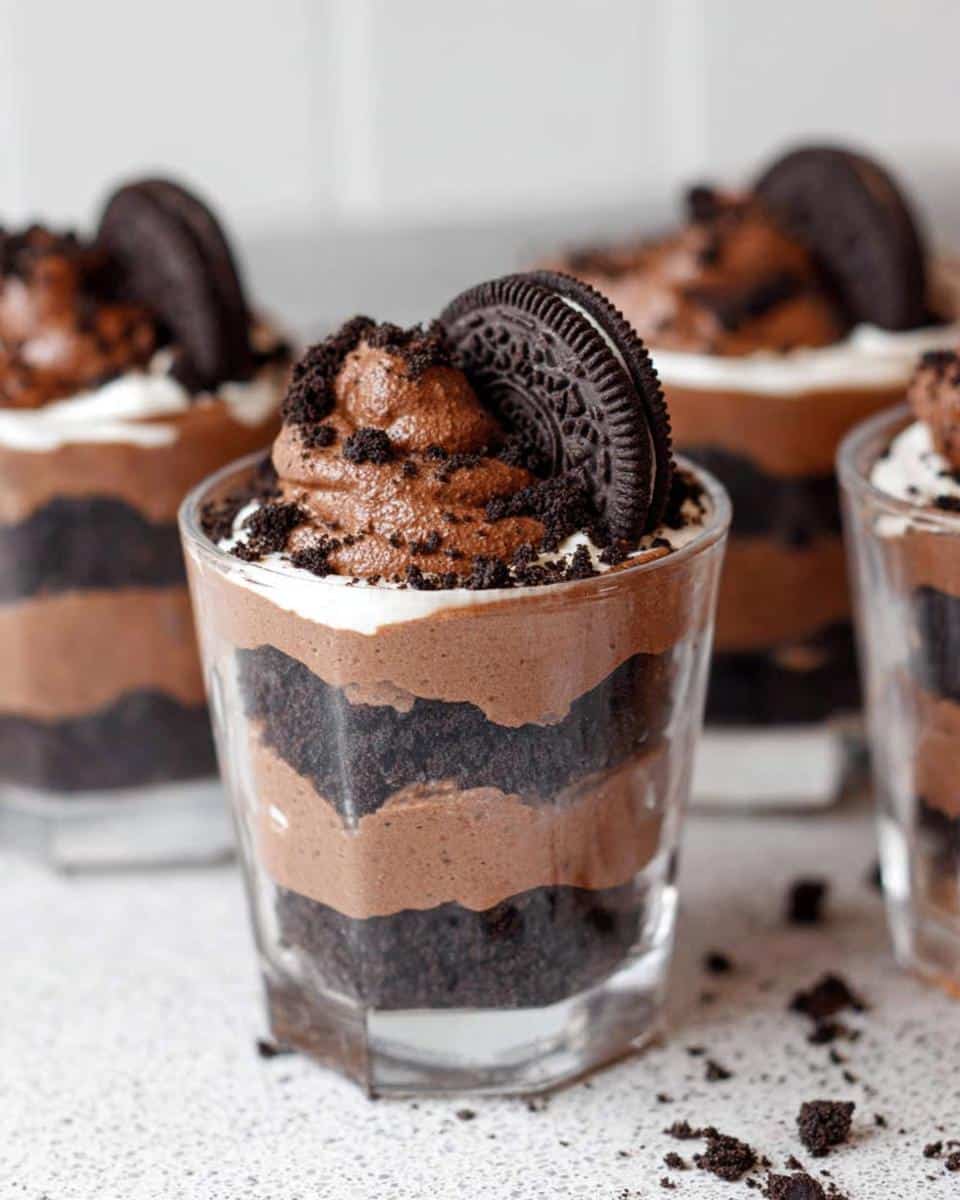
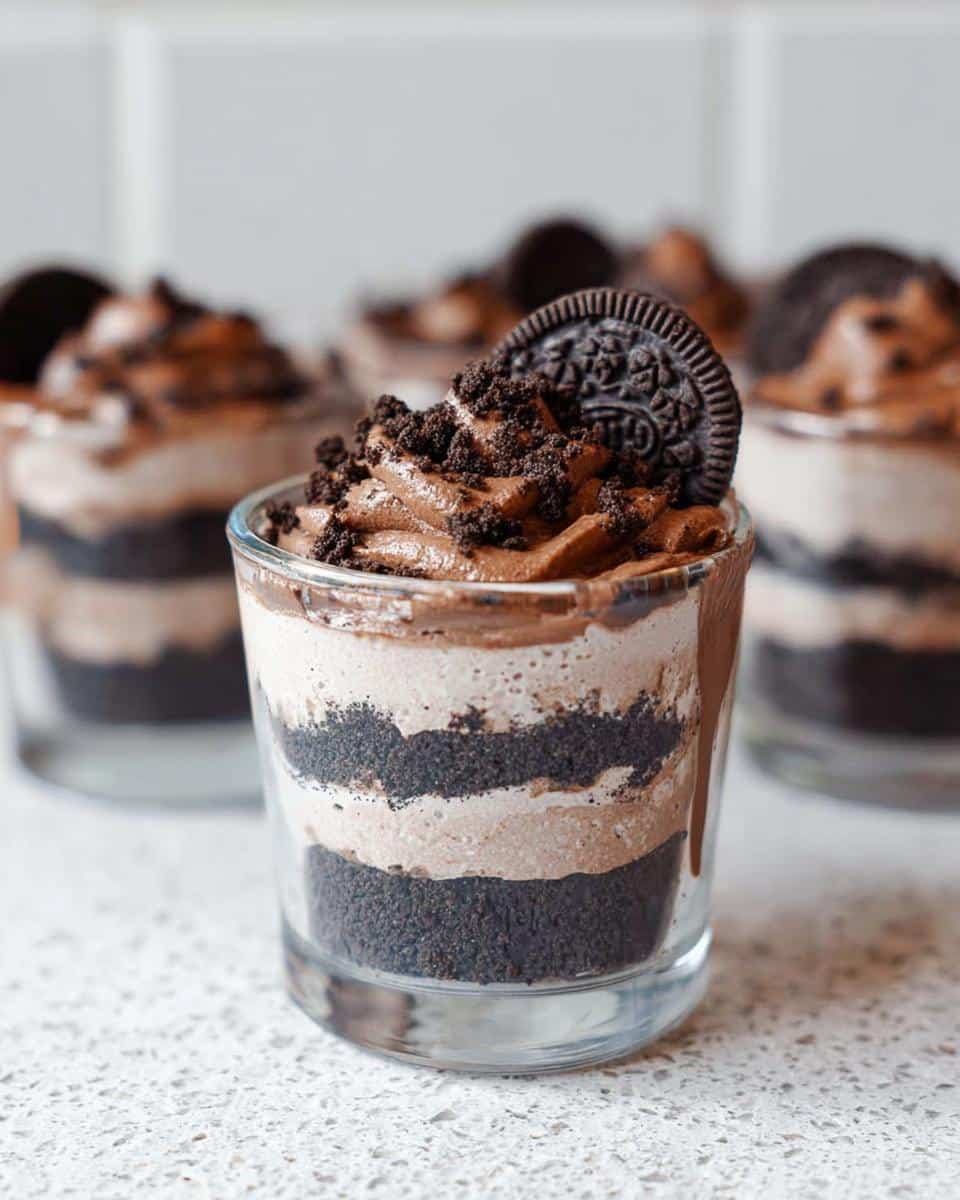
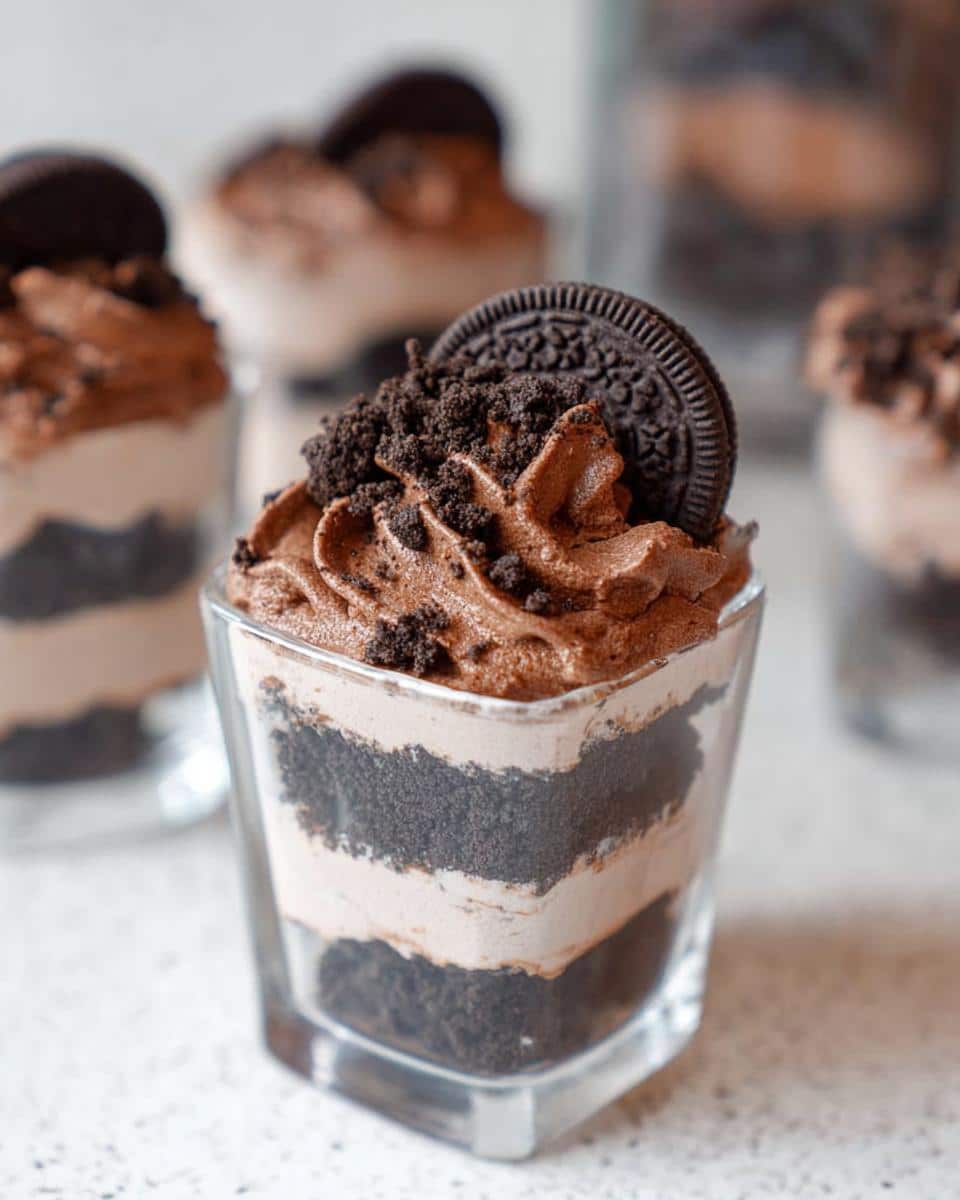
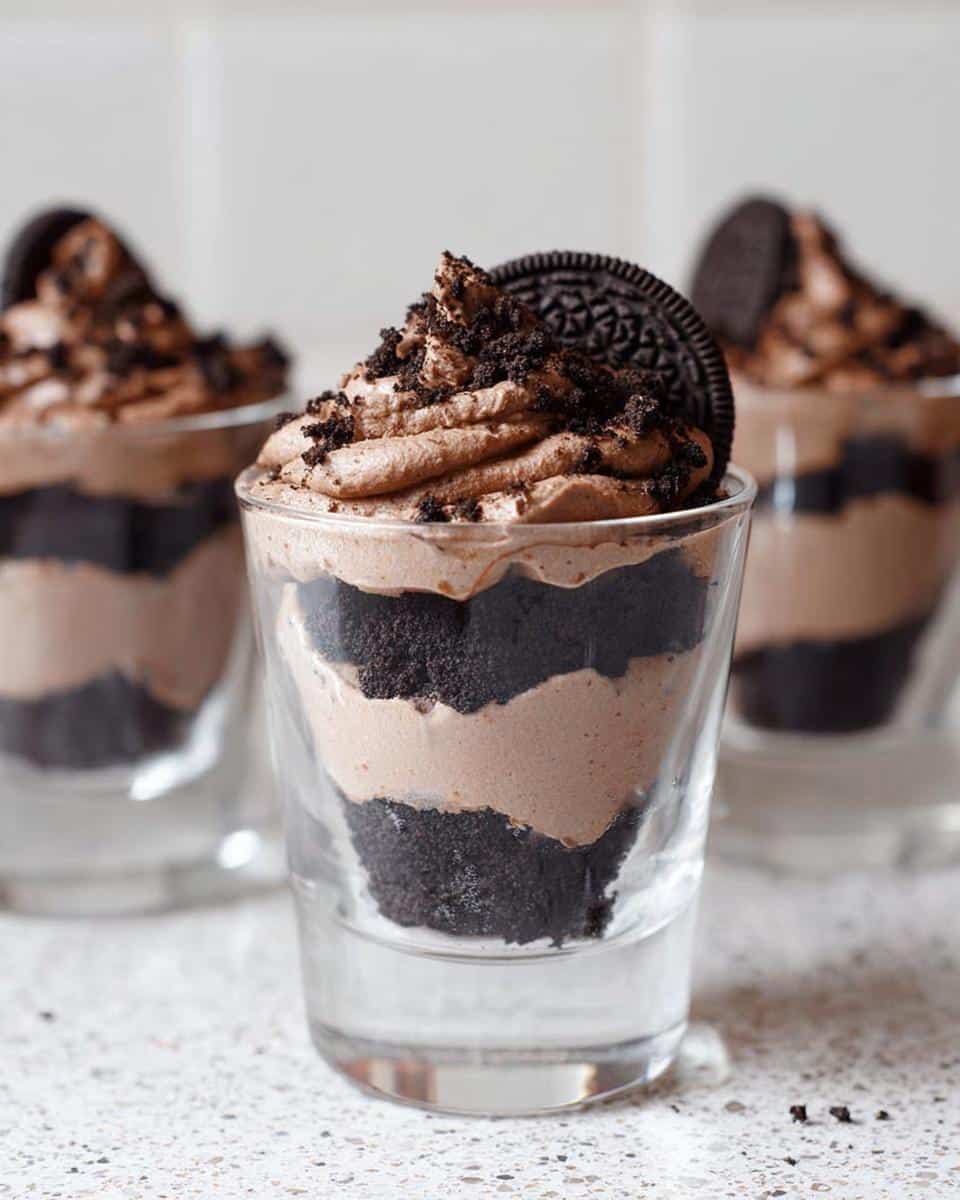
First up, let’s deal with those cookies. Toss all 16 to 18 Oreos right into your food processor and grind them until they are fine crumbs. This takes literally no time, I promise. Once they’re ready, you need to divide those cookies carefully across your 8 serving cups. You’re making two piles: one for the bottom crust and one to save for sprinkling on top later. Don’t stress too much about exact measurement here, but try to keep them even across all your cups.
Whipping the Creamy Filling
Grab that room-temperature cream cheese and beat it with your hand mixer until it looks fluffy—no lumps allowed! Now, add everything else: the cold heavy whipping cream, the powdered sugar, the vanilla, the salt, and that lovely cocoa powder. Whip it all together until you hit stiff peaks. Stiff peaks mean the filling is sturdy enough to hold its shape. If you can lift the beater out and the tip of the cream mixture stands straight up, you’re gold!
Assembling and Chilling Your No-Bake Oreo Dessert Cups
This is where they start looking like real desserts! Transfer that gorgeous chocolate filling into a piping bag if you want those nice swirls—it just makes them look extra special—or use a spoon if you’re moving faster. Pipe a nice dollop over the Oreo bases. Then, gently add another sprinkle of those reserved crushed Oreos over the cream. Finally, pipe the last bit of filling on top and garnish with your remaining cookie crumbs. The final, and arguably most important, step for these easy dessert ideas is patience: chill them for a solid 3 hours. That sets everything perfectly, giving you that amazing contrast between crunchy and creamy that makes these small bites so satisfying!
Tips for the Best No-Bake Oreo Dessert Cups
I’ve made this recipe so many times that I’ve learned exactly what trips people up, so let’s nail this on your first try! The most important thing you can do is cheat the temperature game. If your cream cheese is cold, your filling will be lumpy, no matter how long you whip it. Seriously, let it sit out for at least 30 minutes.
When whipping the heavy cream, watch your mixer closely. You’re looking for stiff peaks, not grainy over-whipped butter! Just a quick stop at the stiff peak stage is all you need before you gently fold it into the cream cheese mixture. Also, when layering, press that bottom layer of crumbs down firmly so your cup doesn’t fall apart when someone tries to dig into it. If you follow those steps, you’ll get those perfect, distinct layers every time. For more helpful advice on enjoying food mindfully, check out my disclaimer page!
Ingredient Notes and Substitutions for Your No-Bake Oreo Dessert Cups
We are keeping this recipe wonderfully simple, but sometimes life throws us a curveball and we are missing an ingredient! Since this is a no-bake dessert, the ingredients can’t be easily masked by baking, so we need sensible swaps. Can you use regular milk instead of heavy whipping cream? My answer is generally ‘no’ for the filling; the high fat content in the heavy cream is what allows it to whip up stiff and hold those gorgeous layers. If you absolutely must use an alternative, try using a store-bought stabilized whipped topping, but skip whipping the cream entirely.
Also, full-fat cream cheese is a must here! Low-fat or Neufchâtel cheeses contain too much water and will make your filling runny. For anyone looking for more insight into how I approach comfort food realistically, feel free to read more about my philosophy on mindful eating.
Storage and Make-Ahead Instructions for No-Bake Oreo Dessert Cups
I love these because they get better as they sit! They are actually one of my favorite Simple Dessert Recipes to prepare the day before a party. Remember how I stressed that 3-hour chill time? That’s the bare minimum! You can definitely make these up to 24 hours ahead of time. Just cover them tightly with plastic wrap (you might want to cover each cup individually if you are worried about the crumbs getting too soft).
Can you freeze them? You sure can! If you wrap them up really securely, they freeze well for short periods. However, I would strongly advise against it if you plan on serving them immediately after thawing, as the texture might get a bit watery. For the best results and texture, stick to the fridge! Check out my tips for easy lunch ideas for other make-ahead meals.
Troubleshooting Common No-Bake Oreo Dessert Cup Issues
Even simple desserts can have little hiccups, but don’t panic! If your creamy filling refuses to stiffen up, you almost certainly used cream cheese that was too cold, or maybe your heavy cream wasn’t cold enough when you started whipping. You can try chilling the entire mixing bowl contents for 10 minutes and then whipping again—sometimes that temperature change does the trick!
If your base layer seems super soggy underneath the filling, that means you rushed the crushing step and left the cream filling to sit on top of the crumbs too long before chilling. For the best structure, make your Oreo base, then get that filling piped in right away. These little adjustments are what make the difference between an ‘okay’ dessert and one of the best dessert recipes you’ve ever made!
Frequently Asked Questions About These Easy Desserts With Few Ingredients
I always get asked about time commitments and substitutions when people see how fast these come together. It’s proof that you don’t need hours to create something that tastes amazing! If you have any other questions about this recipe, I encourage you to reach out on my contact page.
How fast can I really make these No-Bake Oreo Dessert Cups?
If you hustle, you can absolutely have these assembled in about 15 minutes. That’s why they are such fantastic, Quick Dessert Recipes! The actual hands-on time is super brief, but remember, you still need that mandatory 3-hour chill time for them to set properly, so plan ahead just a little.
What if I can’t find Oreos? Can I use other easy cookie recipes?
You certainly can! While the classic flavor is iconic, you can swap the Oreos for any chocolate sandwich cookie you love. If you want a different texture, even crushed graham crackers mixed with a little melted butter for the base works in a pinch if you’re trying to clear out the pantry! These are so adaptable. They fit right in with other Easy Cookie Recipes.
Can I prepare these dessert cups for a huge party by doubling or tripling the recipe?
Yes, scaling up is ridiculously easy! Since this recipe avoids baking, you don’t have to worry about oven space. Just make sure your mixing bowl is large enough to properly whip that heavy cream to stiff peaks. For eight servings, you should be fine, but if you go way bigger, you might need to whip the cream in batches.
How do I adjust the serving size if I only need 4 cups instead of 8?
Just cut everything in half! Halving the recipe works perfectly fine for these Simple Dessert Recipes. You’ll use about 8 or 9 cookies total and half the amount of cream cheese and cream. Just remember that the chilling time stays the same, even for fewer cups.
Understanding the Nutrition of Your Homemade Desserts
As a Registered Dietitian, you know I can’t let you walk away without talking honestly about what’s in these magnificent, no-bake treats! Because we are skipping the oven and using wonderful, straightforward ingredients like cream cheese and Oreos, the nutrition tells a real story about comfort eating. It’s not supposed to be a guilt-free kale smoothie, but knowing what you’re enjoying is part of mindful eating, right?
Since I focus on flavor strategy and making comfort food realistic, I always run the numbers so you have a clear picture. Please remember, these values are truly estimates! The exact amount of cream cheese, the size of your Oreos (were they the double-stuffed kind?), and how stiff your cream peaks were can all slightly change the final count. Think of this as a guideline for your homemade desserts!
Based on standard measurements for 8 servings, here is a rough estimate for one No-Bake Oreo Dessert Cup:
- Calories: Approximately 350 – 390 kcal
- Total Fat: Approximately 22 – 26g
- Protein: Approximately 4 – 5g
- Total Carbohydrates: Approximately 35 – 40g (This includes about 28g of sugar!)
See? It’s indulgent, satisfying, and perfectly portioned, so you can enjoy every single bite without worry. That’s the goal here: joy without the guesswork!
No-Bake Oreo Dessert Cups
Ingredients
Equipment
Method
- Crush the Oreo cookies in a food processor. Divide the crushed cookies evenly among 8 serving cups, using about one tablespoon per cup. Set the cups aside.
- Use a hand mixer to whip the cream cheese until it becomes soft and fluffy.
- Add the heavy whipping cream, vanilla extract, salt, powdered sugar, and unsweetened cocoa powder to the whipped cream cheese. Whip again until the mixture is smooth and stiff peaks form.
- Transfer the whipped cream mixture to a piping bag. Carefully pipe about 1/4 cup of the mixture into each prepared cup. Add another layer of crushed Oreos, followed by another layer of the whipped cream mixture.
- Top each cup with more crushed Oreos. Chill the dessert cups for 3 hours before serving.