Oh, summer days just scream for something light, fruity, and absolutely cheerful, don’t they? I love desserts that let the fresh ingredients truly shine, and that’s exactly what we get with this amazing Gluten Free Strawberry Shortcake. If you thought going gluten-free meant saying goodbye to that tender, biscuit-like texture, think again! I grew up on my grandmother’s Southern comfort food, and when I started adapting recipes for everyone, making this classic accessible was a must. This shortcake isn’t fussy at all; it’s quick, easy, and delivers that satisfying sweet-and-tart burst of strawberry flavor we all crave. Trust me, this one is a winner for picnics or just a Tuesday treat.
If you’re curious about my journey turning handwritten classics into reliable recipes for everyone, you can always pop over and read a little more about how I got started over at my story page.
Why This Gluten Free Strawberry Shortcake Recipe Stands Out
Let’s be honest, gluten-free baking can sometimes get complicated or dense, but not this shortcake! This recipe is special because it creates a truly light and fluffy base that somehow holds up perfectly to all that juicy strawberry topping. It’s proof that Gluten Free Sweets can be just as comforting and delicious as the original versions. We’ve got links to tons of other fast bakes right here if you love speed!
What I love most is how quickly we can get these on the table. We’re talking about less than an hour from start to finish. If you need reliable Gluten Free Treats that look elegant but require zero fuss, keep reading!
- It’s unbelievably light for a gluten-free cake.
- The flavor focuses entirely on that gorgeous, fresh fruit.
- Perfectly portioned, so no big cake slicing stress!
Quick Preparation for Your Gluten Free Strawberry Shortcake
Seriously, look at the times: fifteen minutes prep and seventeen minutes baking. That’s it! You can whip these up even if you decide spontaneously that you need a dessert tonight. Since they bake up in a standard cupcake pan, there’s no waiting around for a huge cake to cool down properly. They’re ready to split and serve before you even finish washing the berry bowl. It’s genius for busy days!
Essential Ingredients for Amazing Gluten Free Strawberry Shortcake
Okay, gathering your ingredients is where the magic starts, and with gluten-free baking, details matter a lot! I’ve broken this down into the shortcakes themselves and the glorious topping. Since we are aiming for the best texture here, pay close attention to the flour and the dairy situation. If you’re looking for more simple ways to manage ingredients, check out my section on easy gluten-free recipes for great swaps!
For the Short Cakes, you’ll need:
- 1.25 cups of your favorite gluten-free flour blend. I really like using the Bob’s Red Mill 1-to-1 Baking Flour for consistency in this Gluten Free Strawberry Shortcake.
- 0.66 cup of sugar—just plain white sugar works perfectly here to balance the fruit.
- 2 teaspoons of gluten-free baking powder—make sure it’s fresh!
- 0.5 teaspoon of salt to make all those sweet flavors pop.
- 0.66 cup of buttermilk. This is key for the slight tang!
- 0.25 cup of oil; I prefer avocado oil because it has almost no flavor, but melted and cooled coconut oil is wonderful too.
- 1 large egg.
- 1 teaspoon of gluten-free vanilla extract.
And for the sweet, required Topping:
- 1 lb of the best fresh strawberries you can find. No frozen ones for this part, please!
- Whipped cream, or if you’re keeping this totally dairy-free, grab a tub of your favorite non-dairy whipped topping.
Ingredient Notes and Dairy-Free Substitutions for Gluten Free Strawberry Shortcake
Let’s talk substitutions, because I know not everyone keeps buttermilk lying around. If you need Gluten Free Dairy Free Recipes, this is simple: take that 0.66 cup of regular milk and stir in 1 teaspoon of white vinegar. Let it sit for about five minutes until it thickens slightly. Voila! You’ve made your own buttermilk that works perfectly in these Non Dairy Desserts.
Regarding the flour, measuring is super important when you are using a specialized gluten-free flour blend. Don’t scoop the measuring cup directly into the bag! You might pack too much in, which makes the shortcakes heavy. Always spoon the flour gently into the cup, then level off the excess with a knife. This small step ensures you get that perfectly light crumb we are aiming for in our Gluten Free Strawberry Shortcake.
Equipment Needed for Perfect Gluten Free Baking Recipes
You don’t need a ton of fancy gadgets for this recipe, which I absolutely love. Keep it simple! But there are three pieces of equipment that are non-negotiable if you want these to turn out beautifully. Since this is all about individual portions, we skip the big cake assembly, which makes cleanup so much easier, too.
Here is what you’ll need to pull together your wonderful Gluten Free Strawberry Shortcake:
- A good medium mixing bowl. This is where everything comes together, so make sure you have enough room to whisk without sending flour flying!
- A 12-serving cupcake pan. This is my secret to perfectly baked, easy-to-handle shortcakes. Instead of trying to slice a big, delicate gluten-free cake later, baking them individually ensures every single serving gets that nice, golden edge and bakes evenly in the center. It’s just smarter baking!
- A wooden toothpick. This is for testing doneness. Forget your fancy instant-read thermometer for this one; the toothpick test is forever and always reliable on delicate batters like this.
That’s really it! A bowl, a pan, and a stick. It shows you don’t need a whole bakery setup to make incredible Gluten Free Treats right at home.
Step-by-Step Instructions for Your Gluten Free Strawberry Shortcake
Alright, let’s get baking! You’ll be shocked how fast this goes. First thing, fire up that oven to 375°F (190°C). Make sure your rack is centered up nice and high, ready for action. Now, grab that 12-serving cupcake pan and make sure you either grease it really well or pop in those paper liners—we don’t want any sticking on these delicate beauties!
Next, grab that mixing bowl. Combine all your dry ingredients first: the flour blend, sugar, baking powder, and that pinch of salt. Give it a quick whisk so everything is distributed evenly. Now add the wet stuff: the buttermilk (or your vinegar-milk mix), the oil, the egg, and the vanilla. Mix it all up gently. You only want to whisk until everything is just combined. Seriously, stop mixing right when the flour streaks disappear. Over-mixing is the enemy, especially with Gluten Free Baking Recipes! If you’re baking with little ones, you can find some fun tips for including them here.
Spoon that lovely batter into your wells—fill them only about two-thirds full. Pop them in the hot oven for about 16 to 18 minutes. You’ll know they are done when a wooden toothpick slides right into the middle and comes out clean. Pop them out onto a cooling rack while we handle the best part!
Preparing the Strawberry Topping for Your Gluten Free Strawberry Shortcake
This topping is where all that fresh summer flavor hits you! You need to take your pound of fresh strawberries, wash them up (after removing those pesky stems, of course), and slice them up. Now here’s my trick: pour them into a bowl and take the back of a fork—or even a potato masher if you’re feeling rustic—and gently mash them a bit. You aren’t making jam, sweetie; you’re just breaking them down enough so they release all those beautiful, sweet juices. Cover the bowl once you’ve done that and let them chill out in the fridge while your shortcakes cool slightly. Those juices create their own syrup!
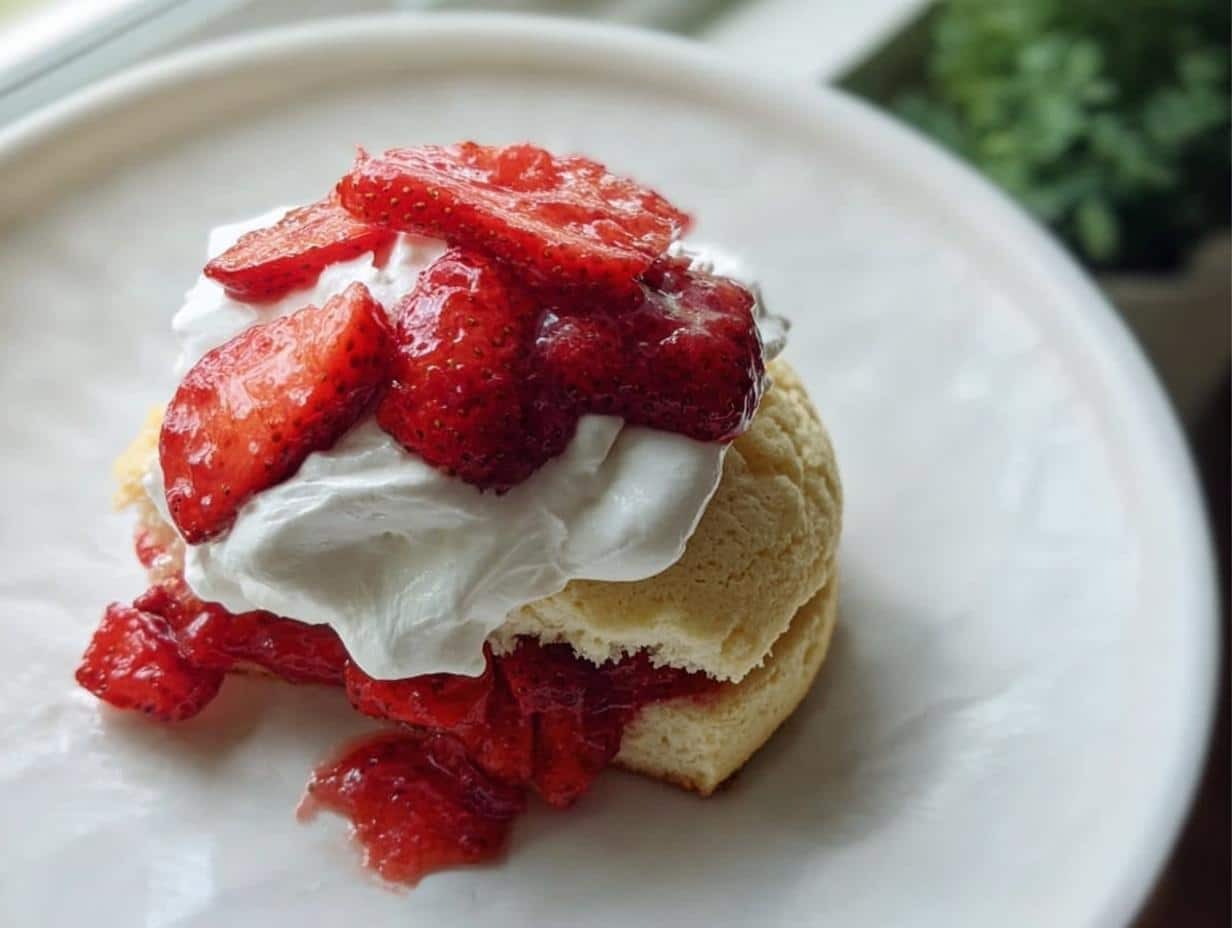
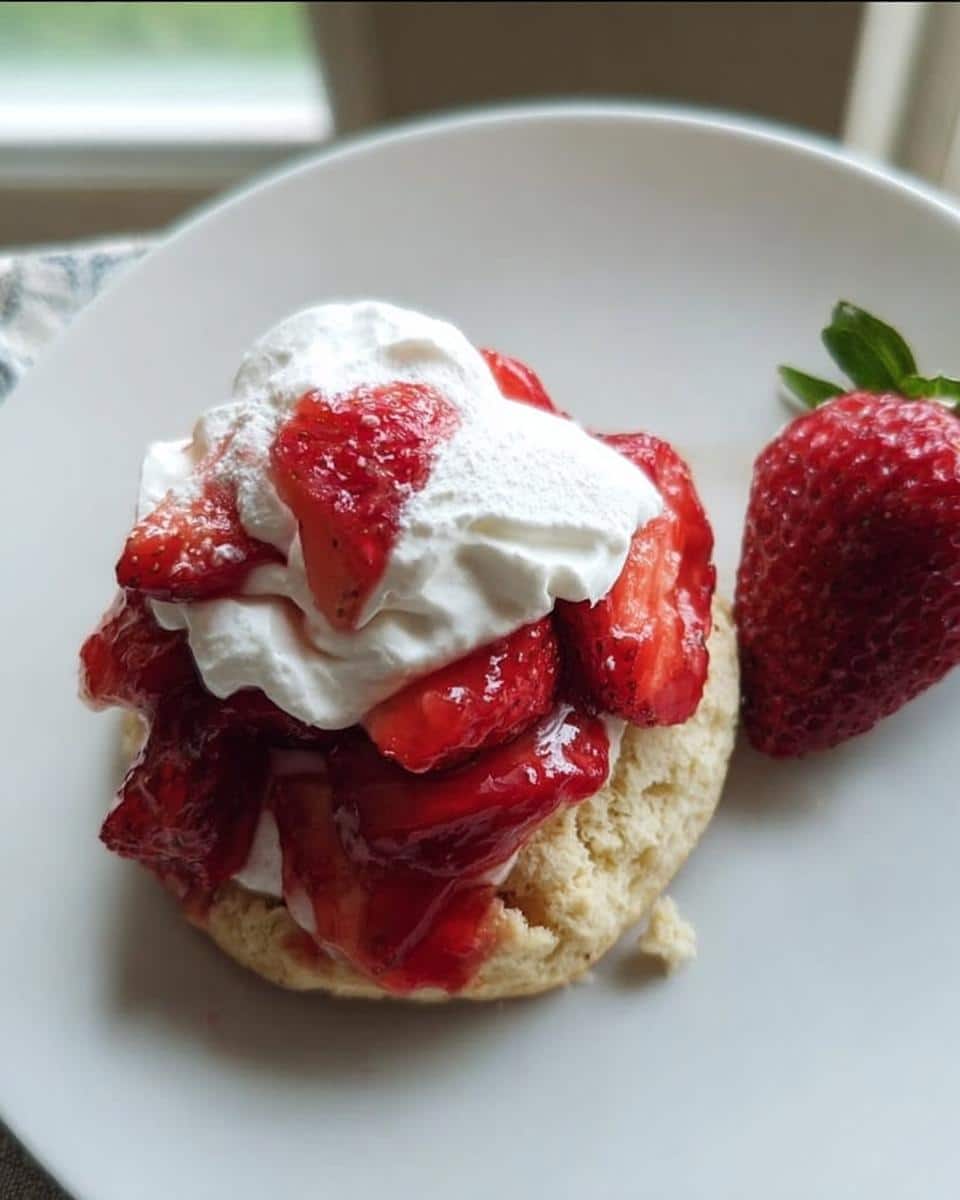
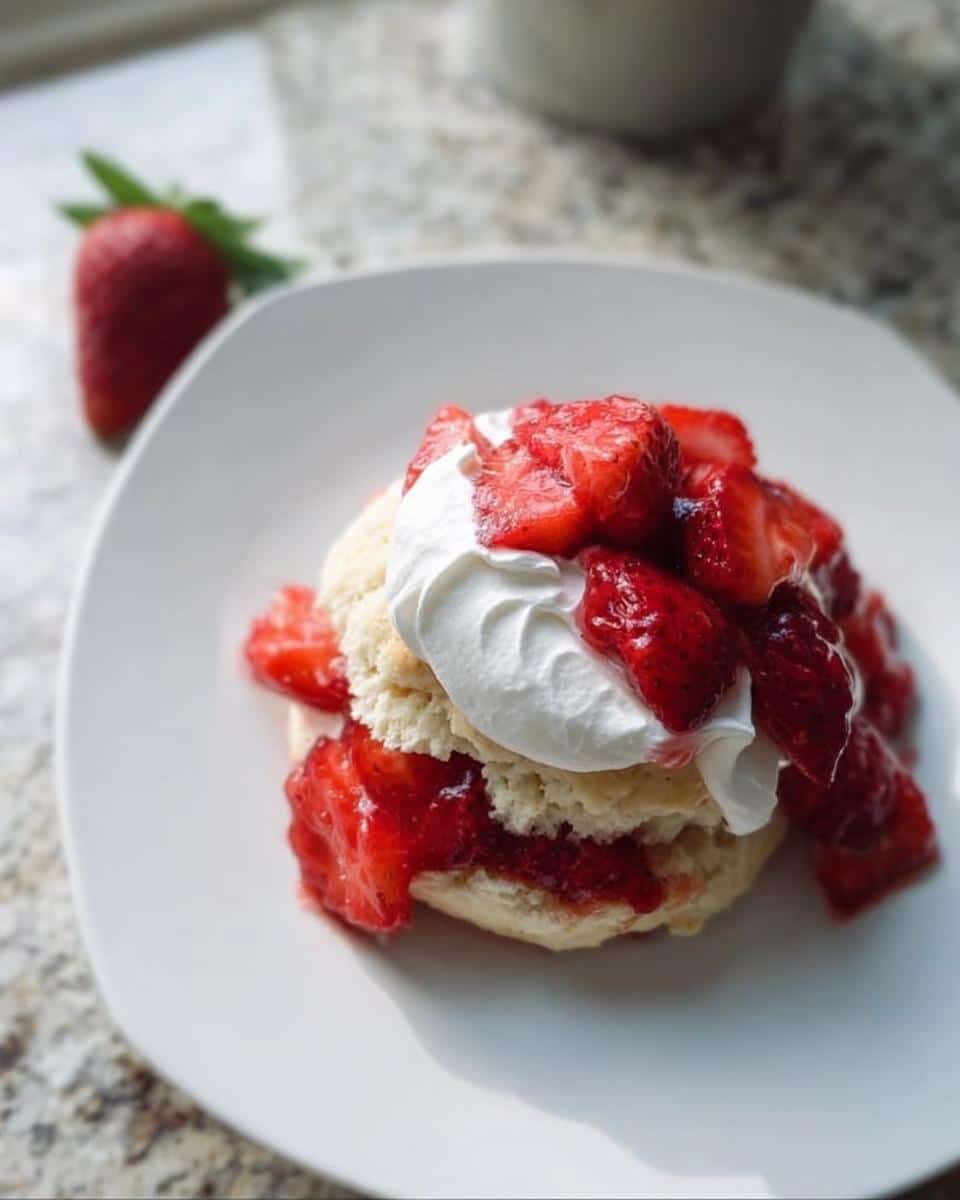
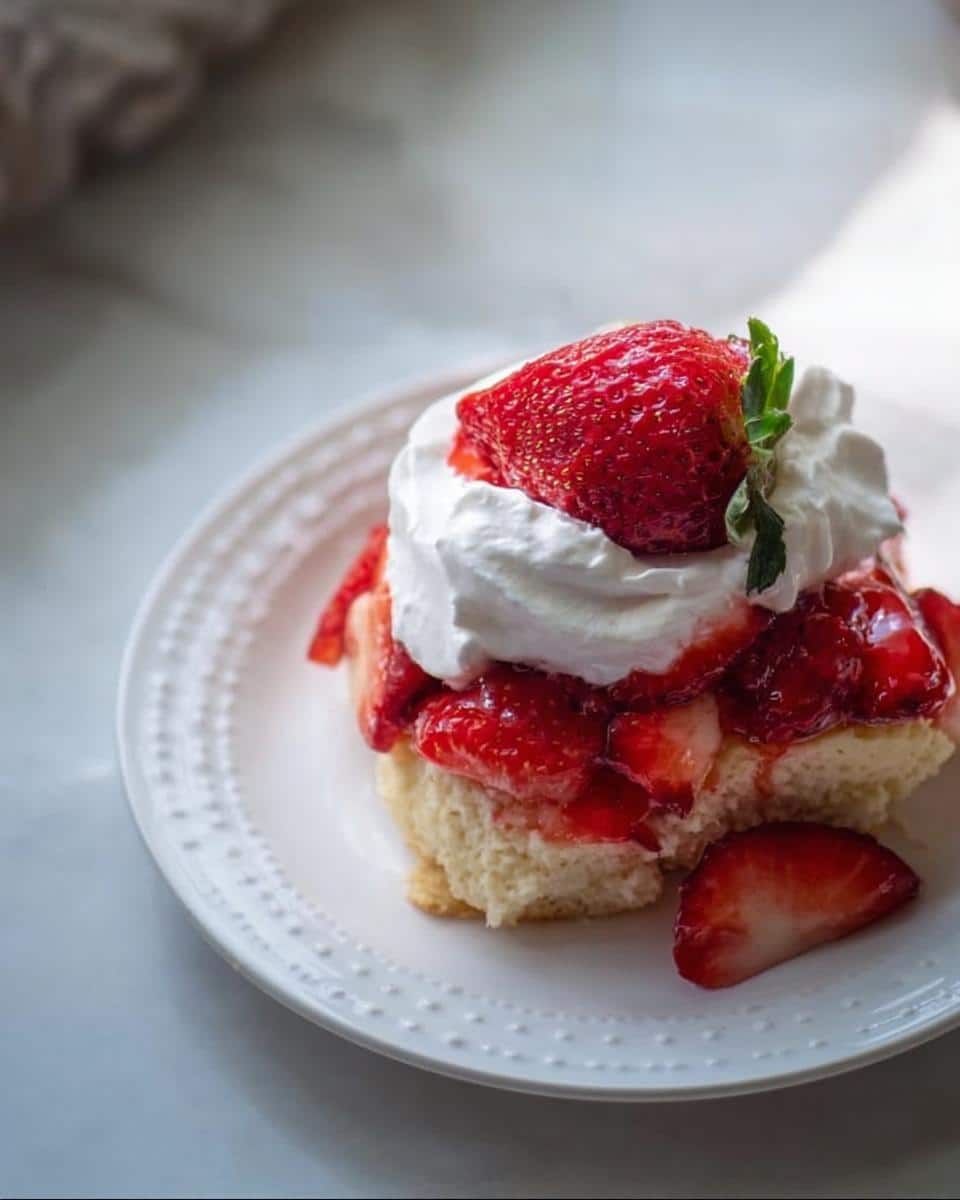
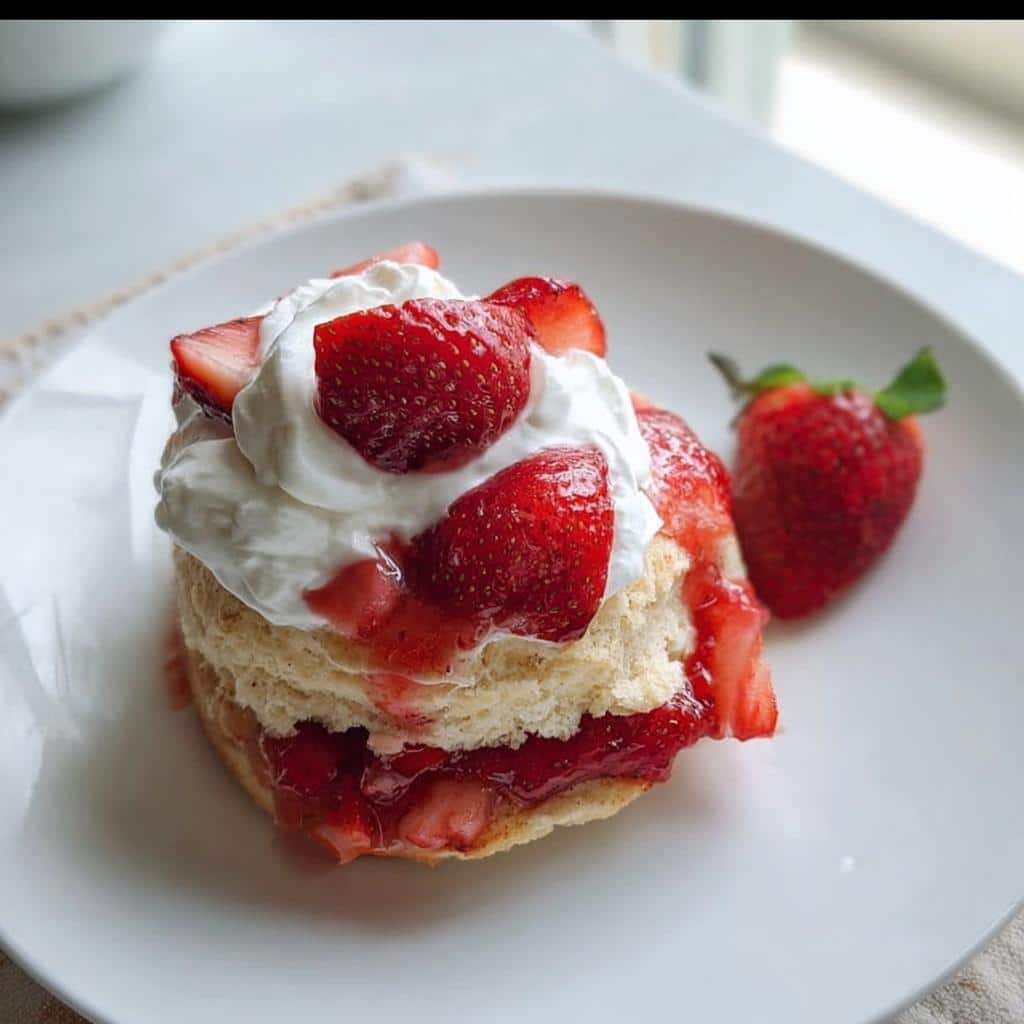
When everything has cooled down just enough for you to handle it, slice that shortcake in half horizontally, spoon on a giant helping of those macerated strawberries, and top it all off with that fluffy whipped cream. Perfection!
Tips for Success Making Gluten Free Cake Recipes
Even though this Gluten Free Strawberry Shortcake is super straightforward, I want to make sure you get that light, tender crumb every single time. Gluten-free baking is different from regular baking—it’s more about measuring carefully and managing moisture. I’ve gathered a few insider tips that I always rely on, whether I’m making this dessert or any other of my favorite gluten-free cake recipes.
My number one non-negotiable tip comes straight from my mom, who always stressed precision when using specialty blends. Remember what I said about measuring flour? You must spoon the gluten-free flour blend into your measuring cup and then level it off with a straight edge. Do not just scoop it out of the bag! If you scoop, you compact the flour, and then your shortcakes will come out dense and crumbly instead of light and tender. It feels like a small thing, but trust me, it makes a huge difference in the final texture.
Next up is fat choice. For this specific shortcake, I called for oil—avocado oil is my go-to because it’s neutral. However, you absolutely can swap that out for melted butter if you prefer that dairy richness! Just make sure that butter is completely melted *and* cooled slightly before you add it to the wet ingredients. If it’s hot butter, it will curdle the buttermilk and cook your egg right there in the bowl. We are baking, not scrambling!
Finally, pay attention to your buttermilk substitute if you went dairy-free. When you add that vinegar or lemon juice to your milk alternative, give it a full five minutes to work its magic before you add it to the batter. That little bit of curdling action creates the acidity we need to help activate the baking powder and give our cakes lift. It’s chemistry, baby, and it ensures you get beautiful, rise-y results every time you try these!
Serving Suggestions for Your Gluten Free Strawberry Shortcake
Once everything is baked and cooled and those strawberries are swimming in their own sweet juice, it’s time for the fun part: assembly! This is where you get to play stylist with your dessert. Since these are individual shortcakes, presentation is super easy but looks so elegant. You don’t need to worry about frosting a whole cake—each one is its own little masterpiece ready to go.
The classic way, which I always recommend, is to take your shortcake base, slice it right across the middle like a sandwich bun, and don’t be shy! Spoon a generous amount of that strawberry mixture onto the bottom half, then nestle the top half on gently. You want some of those juices running down the sides, that’s a sign of a job well done.
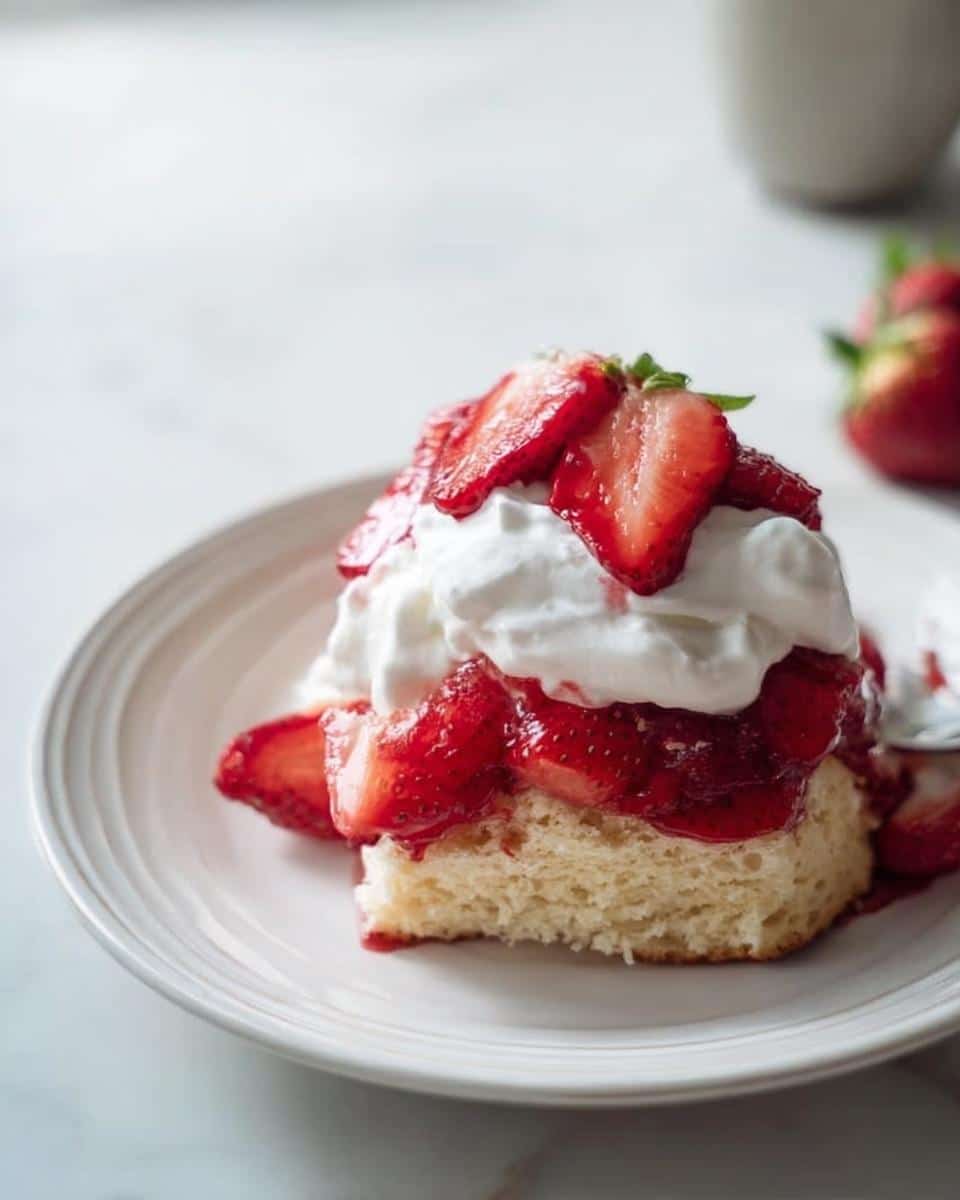
Now for the whipped cream! I honestly love using a really rich, full-fat whipped cream, piped high right on top. But if you’re avoiding dairy, there are so many amazing non-dairy whips out there now that taste fantastic and hold their shape beautifully. Just dollop it on top of the berries. If you want to get really fancy, you can use a piping bag with a star tip for a professional look—it takes 30 extra seconds, I promise!
For an extra layer of crunch or flavor—because why stop at good when you can go great?—I sometimes like sprinkling a tiny bit of crushed, toasted almonds on top of the cream. Or, if you’re making these for a special brunch, you could drizzle on a tiny bit of something sweet. If you’re feeling adventurous with your toppings sometime, I have a recipe for a sweet marshmallow popcorn mix that, when crumbled lightly, adds the most unexpected texture to a berry dessert!
The key is to serve them shortly after assembly so the shortcake stays a little crisp on the edges before it soaks up all that glorious strawberry syrup. Enjoy the look on everyone’s face when they realize how light and flavorful these gluten-free gems are!
Storage and Make-Ahead Options for Gluten Free Treats
One of the best things about making these individual shortcakes is that they hold up surprisingly well, which makes them excellent for entertaining. Who has time to bake everything right before guests arrive? Not me! This recipe is forgiving, which is perfect for us home cooks.
The main instruction I give for storing these delightful Gluten Free Treats is to keep them sealed up tight. You want to store the baked shortcake portions in an airtight container at room temperature. They are usually good for up to three days, which is pretty impressive for a gluten-free baked good!
Now, a word of warning: if you’ve already assembled the shortcakes with the strawberries and the whipped cream, you need to eat those right away. The moisture from the fruit will inevitably start to soak into that beautiful cake base, which can turn it too soggy if left overnight. Nobody wants a soggy shortcake, right?
If you want to do some serious ahead-of-time prep—and I always do—you can totally break this recipe into stages. Bake the shortcakes completely and let them cool down all the way. Store them sealed on the counter. Then, you can mash your strawberries and let them juice up in the fridge. Keep the whipped cream separate, of course, until the very second you plan to serve them. This way, when party time rolls around, all you have to do is slice the cake, scoop the fruit, and top with cream!
You could even freeze the plain shortcakes! Just make sure they are completely cooled, wrap them tightly in plastic wrap, and then slip them into a freezer bag. They freeze beautifully for about a month. When you’re ready to use them, just let them thaw out on the counter for an hour or two. They taste almost freshly baked!
Frequently Asked Questions About Gluten Free Strawberry Shortcake
I totally get it; sometimes you have a question that Google just won’t answer clearly, and that’s when you need a real person! I’ve collected the most common things people ask me about making this Gluten Free Strawberry Shortcake so we can clear up any last-minute confusion.
Can I use fresh berries other than strawberries?
You absolutely can! This recipe works wonderfully as a base for almost any soft summer berry or stone fruit. If you use blueberries or raspberries, you might not need to mash them as much, or you might want to skip the sugar in the mashing step since they are naturally sweeter. If you use sliced peaches, they work beautifully with a little extra lemon juice added to help them break down just slightly. But honestly, strawberries are the classic because their slight tartness cuts through the sweetness of the cake so perfectly. If you’re looking for more ideas on using fresh fruit, be sure to check out the legal stuff over at my other site pages—just kidding, that link is just for compliance!
What is the best GF flour blend for this recipe?
This is probably the question I get asked the most about all my Gluten Free Cake Recipes! For shortcakes, you really need a blend that already contains xanthan gum, otherwise, your cake might crumble too much when you try to split it open. I specifically called out the Bob’s Red Mill 1-to-1 blend because I know it works flawlessly with the amount of fat and moisture in this recipe. Store-brand blends can sometimes be unpredictable, meaning you might end up with a drier cake. Stick to a reputable 1-to-1 blend designed for measuring cup-for-cup in place of wheat flour for the best results here.
Can I make the cake part ahead of time?
Yes, and I highly recommend it! As I mentioned earlier, the shortcakes themselves store so well. Bake them completely according to the instructions, let them cool down totally, and then wrap each one tightly in plastic wrap before placing them in an airtight container. They are still deliciously fresh for a day or two this way. Don’t assemble them with the fruit until right before serving, though, or you risk losing that lovely slightly crisp exterior!
Is this a good option for GF Desserts?
It’s more than good; it’s one of the best transitional desserts for people new to gluten-free eating! These are light, they taste just like a classic biscuit shortcake, and they satisfy that craving for something sweet without feeling heavy. So yes, if you need reliable GF Desserts for a gathering, this recipe never disappoints guests who aren’t even avoiding gluten. Everyone loves fresh strawberries in the summer, and this delivers!
Share Your Amazing Gluten Free Strawberry Shortcake Creations
Now that you’ve made the most incredible, light, and fruity Gluten Free Strawberry Shortcake, I really, truly want to see your results! That’s the best part of running this community—seeing all your beautiful bakes popping up online. I put my heart into making sure this recipe is reliable for you, so let me know how it went!
If you loved how fluffy and tender these turned out, please leave a rating right here on the post. Five stars help other cooks find this recipe, and honestly, it makes my day to see those high counts coming in. Even if you made a few tweaks—maybe you used peaches instead of berries, or maybe you tried a different non-dairy cream—please drop a comment below and tell me all about it! Hearing your experiences helps us all learn.
And don’t forget to snap a picture when you serve them. If you share on Instagram or Pinterest, tag me! It means the world when I see your family gathered around enjoying these simple, comforting desserts. We’re all connected through good food, and I can’t wait to see your summer shortcake display. If you need to reach out directly with a question or a truly inspiring photo, the contact form is always open over at the Contact Us page!
Amazing Gluten Free Strawberry Shortcake
Ingredients
Equipment
Method
- Preheat the oven to 375°F (190°C). Position the rack in the center of the oven. Grease a 12 serving cupcake pan or line it with papers, then set aside.
- For the short cakes: In a medium mixing bowl, combine the flour, sugar, baking powder, and salt. Add the buttermilk, oil, egg, and vanilla. Whisk just until the ingredients are combined.
- Spoon the batter evenly into the cupcake wells, filling them about two-thirds full. Bake for 16 to 18 minutes, or until a wooden toothpick inserted in the center comes out clean.
- For the topping: Remove the stems from the strawberries, wash them, and slice them into a bowl. Mash the strawberries with the back of a fork to release their juices. Cover the bowl and refrigerate until you are ready to use them.
- When ready to serve, cut each shortcake in half horizontally. Spoon the strawberry topping on top, and add whipped cream if you wish.
- Store the shortcakes in an airtight container at room temperature for up to three days.