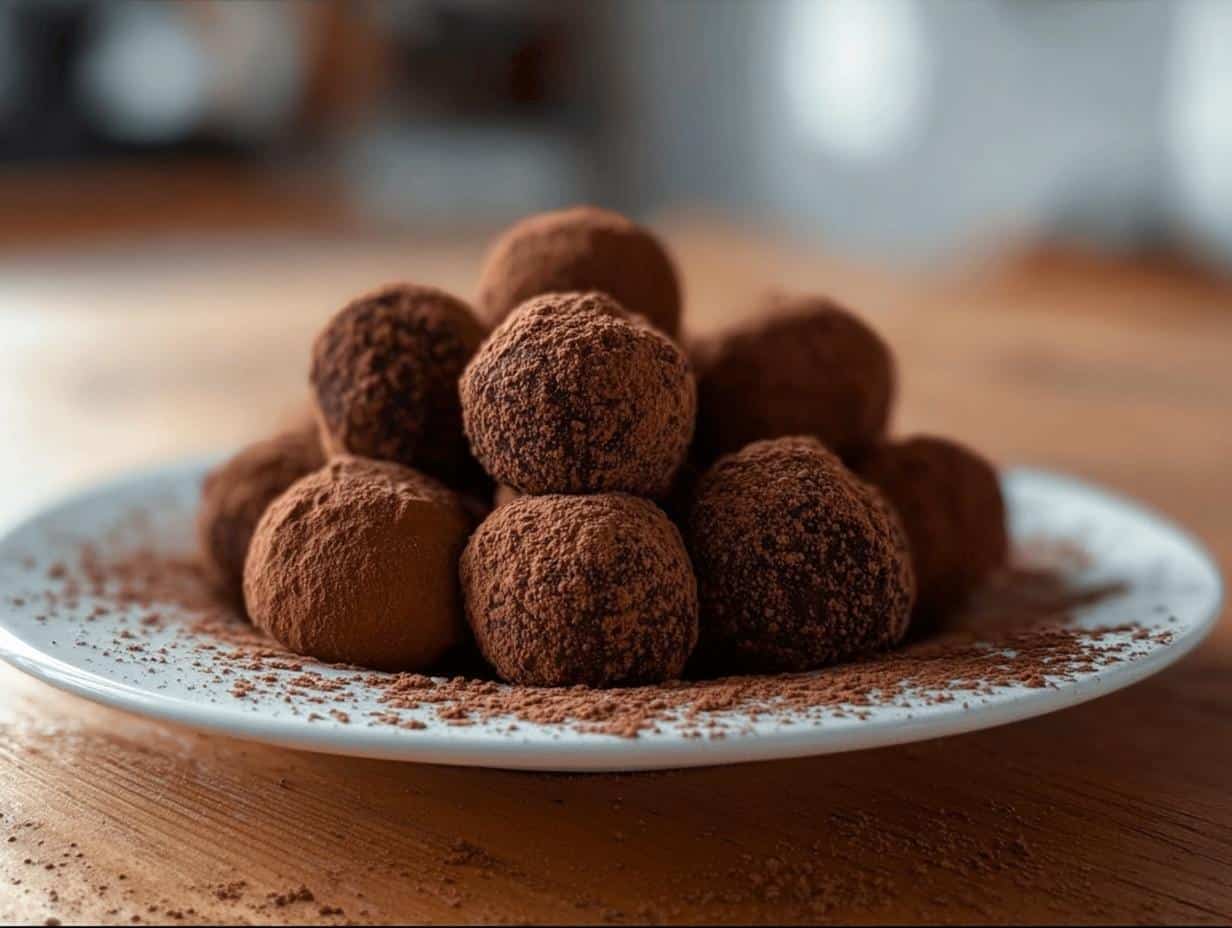
Oh my goodness, you have to stop what you’re doing and check these out! Sometimes you just need that little bite of pure, unadulterated luxury, right? I live for desserts that look like they took hours, but actually come together faster than you can brew your coffee. Trust me when I say these Gluten Free Chocolate Truffles are the easiest, most decadent things you’ll make all year. As someone who loves showing everyone that elegant food doesn’t need to be complicated, these little rounds prove my point perfectly. They’re naturally gluten-free, rich, smooth, and absolutely addictive!
Why You Will Love These Gluten Free Chocolate Truffles
Honestly, I keep these on rotation because they rescue me whenever I need a last-minute impressive treat. They’re so simple, which is why I always have the ingredients ready to go!
- They are naturally gluten-free! This means everyone can enjoy these rich, melt-in-your-mouth delights.
- Total elegance, zero fuss. You get that gourmet feel without turning on the oven.
- They pack a seriously deep chocolate punch that satisfies any craving immediately.
If you’re looking for more simple, show-stopping desserts, you should check out my collection of easy dessert recipes. These truffles are definitely at the top of that list.
Quick Preparation for Homemade Chocolate Treats
The best part? The active time is just fifteen minutes! Seriously, it’s mostly just chopping chocolate and stirring. Since there’s no baking involved, you skip all the messy oven drama. You just mix, chill (which is hands-off time, yay!), and roll. It’s the perfect recipe for when you realize you need a special treat five minutes ago.
Essential Ingredients for Perfect Gluten Free Chocolate Truffles
Okay, listen up, because this is where the magic—and the richness—comes from. Since there are so few ingredients here, every single one needs to be the best quality you can find. Trust me, using anything less than amazing dark chocolate is a mistake you do not want to make! We need that intense flavor to shine through since these are the ultimate easy gluten-free recipes.
Here is what you need:
- 200g of high-quality dark chocolate, chopped—this is non-negotiable!
- 1/2 cup heavy cream—this helps create that signature melt-in-your-mouth ganache.
- 1 tablespoon unsalted butter (optional, but wow, does it add richness!)
- 1 teaspoon vanilla extract (if you’re feeling fancy).
- Cocoa powder for a generous dusting when we finish up.
Ingredient Notes and Substitutions
Because we want these to be perfect for everyone, especially folks looking for Gluten Free Dairy Free Recipes, we can talk substitutions. If you absolutely must avoid dairy for your Non Dairy Desserts, you can swap the heavy cream for full-fat canned coconut cream (the thick part you scrape off the top). It works beautifully for the ganache base!
For the chocolate itself, aim for 60% to 75% cacao. If you go too low in cocoa solids, the truffles might be too soft. If you go too high, they might be a little too bitter. Find that sweet spot; that high-quality chocolate makes all the difference in achieving that perfect, smooth texture we’re going for in these Gluten Free Chocolate Truffles.
Equipment Needed to Make Gluten Free Chocolate Truffles
You don’t need a kitchen full of fancy gadgets for these, which I love! We’re keeping it super streamlined. You probably have most of this stuff just sitting in your drawers already.
- A small saucepan (just for warming up the cream, nothing huge!)
- A heatproof bowl to mix everything in.
- A teaspoon, which will be your measuring tool for rolling later.
Step-by-Step Instructions for Your Gluten Free Chocolate Truffles
This is where we turn simple components into total decadence! Don’t worry if you’ve never made a ganache before; it’s so straightforward, especially since we aren’t baking anything. Just pay close attention to the heat on the stove, and you’ll have beautiful homemade chocolate treats in no time.
Creating the Rich Chocolate Ganache Base
First things first, grab your small saucepan and get that heavy cream warmed up over medium heat. This is important: we want it just starting to simmer—you’ll see tiny bubbles form around the edges—but absolutely do not let it boil over! Boiling the cream can ruin the texture of the final ganache, and we want these to be silky smooth, right?
While the cream is warming, get your chopped dark chocolate (and the optional butter, if you’re using it for that extra richness!) into your heatproof bowl. Once the cream is hot, pour it right over the top of the chocolate. Now, time to wait. Seriously, wait a full 2 to 3 minutes before touching it. Let the heat do the work!
After waiting patiently, start stirring slowly from the center outwards. You must keep stirring until it’s completely combined and smooth. I mean *completely* smooth! If you see any lumps, keep going—that’s my number one piece of expertise when making any chocolate mixture. Stir in that vanilla extract if you are using it, cover the bowl, and pop it into the fridge. This chilling phase is critical; you need at least two full hours, or until the mixture is totally firm and ready to handle.
Chilling and Shaping Your Gluten Free Sweets
Once that ganache is firm—and I mean firm enough to hold its shape—it’s time for the fun part! Take it out of the fridge. If it feels a little stiff, just let it sit on the counter for about ten minutes to warm up ever so slightly. You don’t want it melting everywhere, but you need to be able to work with it.
Grab your teaspoon and scoop out small bits. Now, use your palms to quickly roll those scoops into little balls. Try to work fast here, because the heat from your hands will start softening the truffle mixture really quick. If they get too messy, pop the whole batch back in the fridge for ten minutes!
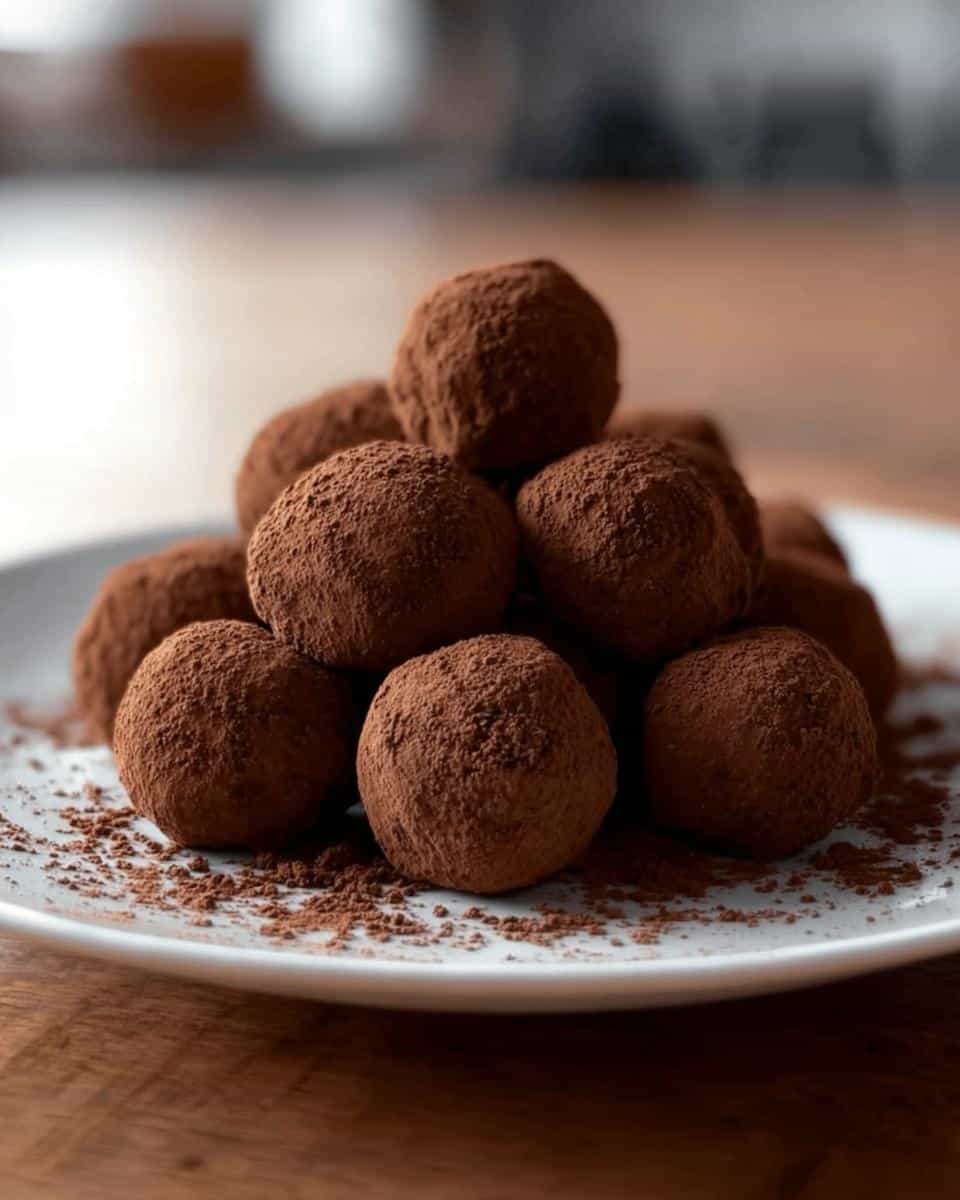
As soon as they are rolled, move them straight over to a plate dusted generously with cocoa powder. Give them a good roll around so they’re totally coated. These little beauties are officially your finished GF Desserts, just waiting for their final chill!
Tips for Success When Making Gluten Free Chocolate Truffles
Even though this recipe is super straightforward, knowing a few insider tricks makes the difference between a good truffle and an OMG-I-need-the-whole-recipe truffle! Since these are one of my favorites for holiday gifts, I’ve learned a couple of things over the years to make sure they come out gorgeous every single time.
Here are my best secrets for guaranteed perfection:
- Don’t Skimp on the Chocolate Quality: I mentioned it before, but honestly, this is the most important tip. Since chocolate is the *only* star here, use the best dark chocolate you can find. If you use waxy baking chips, your truffles are going to feel waxy when they melt in your mouth—and we definitely don’t want that! Go for good quality couverture if you can find it; it melts so beautifully.
- Manage Your Hand Temperature While Rolling: When you’re scooping and rolling those little balls, work quickly. If your hands are naturally warm, the ganache will start to melt and get sticky before you can finish coating it in cocoa powder. If you find they are getting too soft, don’t panic! Just stop, put the whole tray back in the fridge for ten minutes, and then finish rolling. Cold ganache rolls into a perfect sphere much easier.
- Dusting Like a Pro: You want a nice, even cloud of cocoa powder covering the entire truffle, not just a light dusting on one side. I like to heavily dust a shallow dish with cocoa powder first. Then, I drop three or four rolled truffles in at once and use a spoon to gently roll them around to ensure every millimeter gets covered. This also protects them slightly from sticking together in the container! If you want to see more creative ways to finish Gluten Free Sweets, check out some of my Christmas chocolate desserts for inspiration!
Follow those three rules, and you’ll have the smoothest, richest Gluten Free Chocolate Truffles known to humankind. They seriously impress everyone!
Creative Variations for Your Gluten Free Treats
Now that you’ve mastered the basic, utterly divine Gluten Free Chocolate Truffles—the classic cocoa-dusted version—it’s time to start playing! This recipe is basically a blank canvas for your chocolate dreams, and it’s so easy to customize it into whatever kind of Gluten Free Snacks you want.
Since the base is already so rich and straightforward, it plays perfectly with almost any flavor infusion or outside coating you can think of. Switching up the coating is the easiest way to create an entirely new experience! You don’t need to worry about changing the core recipe at all—just when you get to the rolling step.
Flavor Additions Before Chilling
If you want the flavor baked right into the truffle, add your flavorings right after you mix the warm cream into the chocolate. This is when the ganache is still liquid and ready to absorb things!
- Citrus Zest: A teaspoon of finely grated orange or lemon zest mixed in gives a bright, surprising counterpoint to the dark chocolate. It wakes everything up!
- Liqueurs: If you’re making these for an adult gathering, a splash of raspberry liqueur, Kahlua, or orange liqueur adds incredible depth. Just make sure you cut back slightly on the cream to account for the liquid.
- Spices: A tiny pinch of cayenne pepper or cardamom mixed in makes these sophisticated and unexpectedly warm. You only need just a whisper, trust me.
Dressing Up the Outside for Fun Gluten Free Sweets
The coating layer is my favorite part for making them holiday-ready or just making them look super fancy! After you roll the basic truffle ball, instead of just using cocoa powder, try these other options for stunning Gluten Free Sweets.
For rolling, set up a few small bowls with your coatings ready to go:
- Toasted Coconut: Toss the sticky balls in finely shredded, toasted coconut. It adds texture and a slightly sweet, tropical note.
- Chopped Nuts: Finely chopped pecans or hazelnuts give a great crunch. Make sure they are chopped very small so you get some in every single bite!
- Sprinkles or Edible Glitter: If you are making these for a party, a generous roll in colorful sprinkles or gold edible glitter makes them instantly festive and fun.
- Melted Chocolate Dip: For something next-level decadent, chill the cocoa-dusted truffles for 15 minutes first. Then, dip them halfway into melted tempered dark or white chocolate and let them set on parchment paper. This makes them look professionally made!
See? So many ways to customize these! You can make a batch of spicy ones and a batch of orange ones for variety, which is perfect when you are serving a platter of these incredible, easy treats.
Storing and Serving Your Gluten Free Chocolate Truffles
So, you’ve made these amazing little morsels—congratulations! Now, how do you keep them perfect until you decide to devour them all? Since these are pure chocolate and cream, we have to be mindful of temperature. This isn’t like storing a cookie; these melt if they get too cozy on the counter!
The simple answer is the refrigerator, always. Keep your wonderful easy snacks in an airtight container. I like using a nice glass container because plastic can sometimes absorb the chocolate smell, and we want pure chocolate flavor, not plastic flavor, right?
They should last beautifully for about a week stored this way. I’ve *tested* letting them go longer, and they’re usually fine for up to ten days, but honestly, they never last that long in my house. They just disappear too quickly!
The Best Way to Serve Them
Here is a little trick I learned the hard way: never serve the truffles straight from the fridge! If they are ice-cold, the texture will be too hard, and you won’t get that heavenly, soft, creamy melt that makes these the best Gluten Free Chocolate Truffles ever. They need a minute or two on the counter before serving.
Take them out about 10 to 15 minutes before you plan on serving them, especially if you’re setting out a platter for guests. This slight warming softens the ganache just enough to give you that signature luxurious mouthfeel. If you notice the cocoa powder starts gathering moisture because of the temperature change, you can always very gently dust them again right before taking them to the table!
What About Freezing?
Yes, you absolutely can freeze these! If you’ve made a huge batch or you want to save some for future dessert emergencies, freezing works wonderfully for these GF Desserts because they don’t contain any flour to worry about.
To freeze them safely, make sure they are fully chilled first. Pop the cocoa-dusted truffles into a freezer-safe, airtight container. You need to separate the layers with parchment paper or wax paper so the cocoa coating of the bottom layer doesn’t stick to the top layer of the next batch. They preserve their texture super well in the freezer for up to three months.
When you want to eat them, just transfer the container from the freezer directly to the fridge for about 4 to 6 hours to thaw slowly. Then, let them sit out on the counter for those crucial 10 minutes before serving. Perfect every time!
Frequently Asked Questions About Gluten Free Chocolate Truffles
I totally get it; when you’re making a special recipe like this, you might have a few lingering questions, especially if you are trying to stick to certain dietary needs. Don’t worry for a second—I’ve gathered the most common things folks ask me about making this easy chocolate truffles recipe a total success!
Can I freeze these Gluten Free Chocolate Truffles?
Yes, you absolutely can! And honestly, if you aren’t eating them right away, freezing is a great way to keep them pristine. Pop them into a single layer on a baking sheet first, freeze them until solid (about an hour), and then transfer them to an airtight, freezer-safe container with wax paper layered between batches. They keep beautifully for ages! When you’re ready to enjoy them, just move the container straight into the fridge for about four to six hours to thaw slowly. Remember my tip: always let them sit out for 10 minutes before serving so they soften up perfectly!
What is the best chocolate to use for these GF Desserts?
This is probably the most important question you can ask for these GF Desserts! Since the recipe is so simple, the quality dictates the final result. I highly, highly recommend using a good quality dark chocolate bar, chopped fine, rather than standard chocolate chips. Chips often contain stabilizers that keep them from melting smoothly into that gorgeous, uniform ganache. For the absolute best texture, aim for a chocolate that has between 60% and 72% cacao content. This percentage gives you that deep, intense chocolate flavor without being overwhelmingly bitter. It’s the key to getting that amazing, creamy melt when you bite into your Gluten Free Chocolate Truffles.
Are these easy chocolate truffles suitable for someone who needs dairy-free options?
They really are! While the standard recipe uses heavy cream, this recipe is so adaptable. If you need a truly dairy-free snack, simply substitute the heavy cream 1:1 with the thick, solid cream you scrape off the top of a chilled can of full-fat coconut milk. Make sure you chill the can overnight without shaking it first! The coconut cream acts almost identically to dairy cream when heated gently, giving you that rich texture without any dairy drama. It’s one of my favorite swaps when I’m working on Gluten Free Dairy Free Recipes.
Why do my truffles feel sticky when I try to roll them?
Oh, that’s almost always due to the heat of your hands interacting with the ganache, or the ganache not being chilled long enough! If they get sticky, stop immediately! Don’t try to push through it, or you’ll just melt them into a chocolate puddle. Just pop the whole bowl back in the fridge for 15 minutes. Cold ganache rolls beautifully into perfect shapes. If you’re working in a very warm kitchen, you might need to chill them in batches as you roll them.
Estimated Nutritional Information for Gluten Free Chocolate Truffles
Now, let’s talk numbers! I always feel a little silly posting nutrition facts for something this decadent, because these are truly meant to be a little treat, not a diet staple. But hey, I know some of you like to keep track, especially when reaching for weight loss recipes, so here is a rough estimate.
Remember, this information is based on the recipe using the standard ingredients listed—dark chocolate, heavy cream, and no optional butter—divided into 20 glorious little truffles. If you use coconut cream or add extra butter or flavorings, the numbers will shift, so treat this as a guideline, not a guarantee!
For one truffle, here’s what we are generally looking at:
- Calories: Approximately 70 per truffle
- Fat: Around 6g
- Protein: Less than 1g
- Carbohydrates: Around 4g
Because these Gluten Free Chocolate Truffles are so rich and flavorful, one or two is usually more than enough to satisfy that deep chocolate craving we get. They are amazing because they deliver that intense deliciousness with minimal fuss, and since they don’t have any flour, they feel surprisingly light even though they are pure indulgence!
Gluten Free Chocolate Truffles
Ingredients
Equipment
Method
- Heat the heavy cream in a small saucepan over medium heat until it just begins to simmer. Do not let it boil.
- Place the chopped dark chocolate and butter, if using, in a heatproof bowl. Pour the hot cream over the chocolate and let it sit for 2 to 3 minutes.
- Stir the mixture until it is smooth and fully combined. Stir in the vanilla extract if you are using it.
- Cover the bowl with plastic wrap and refrigerate for at least 2 hours, or until the mixture is firm enough to handle.
- Scoop out small portions using a teaspoon and roll them between your palms to form smooth balls.
- Dust the formed truffles generously with cocoa powder.
- Keep the truffles refrigerated until you are ready to serve them.