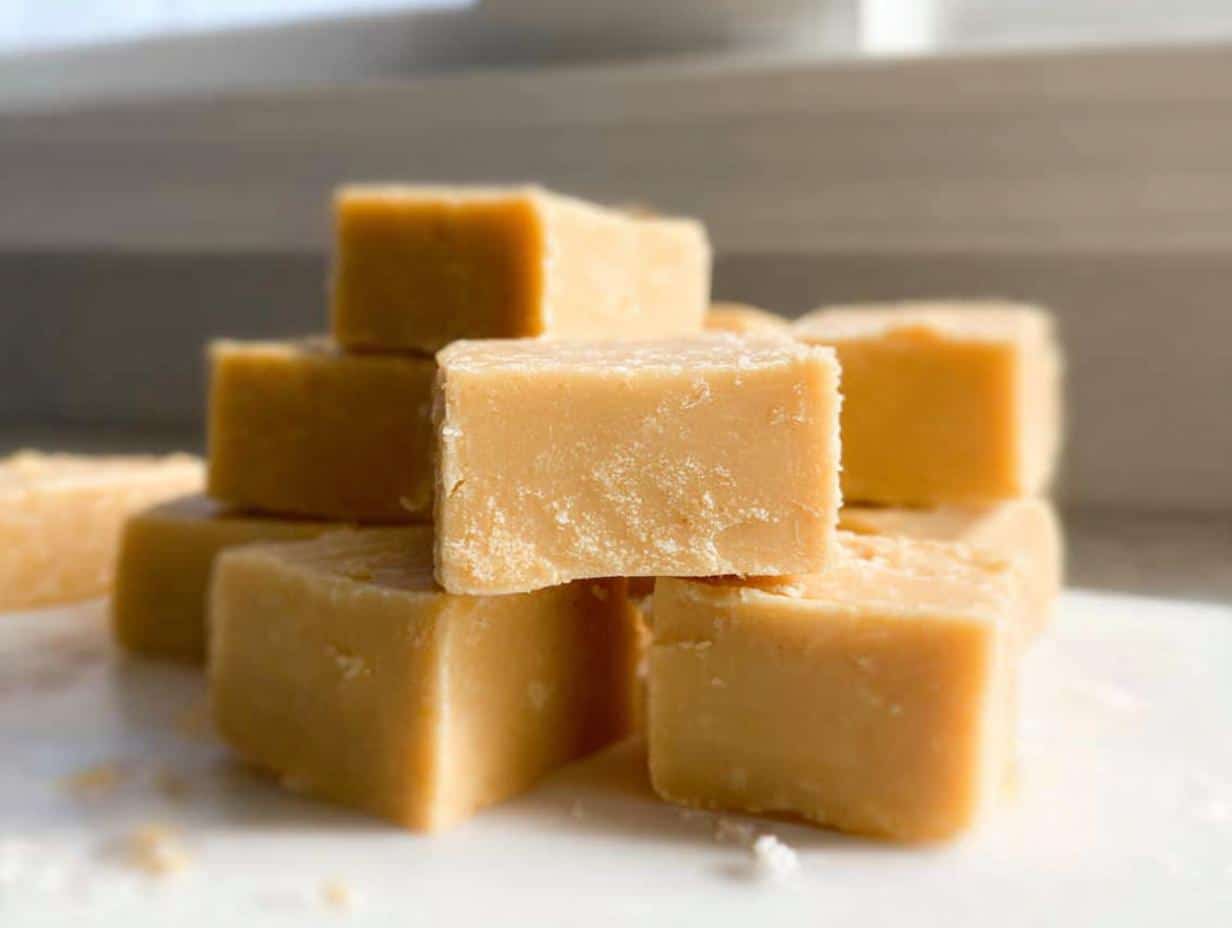
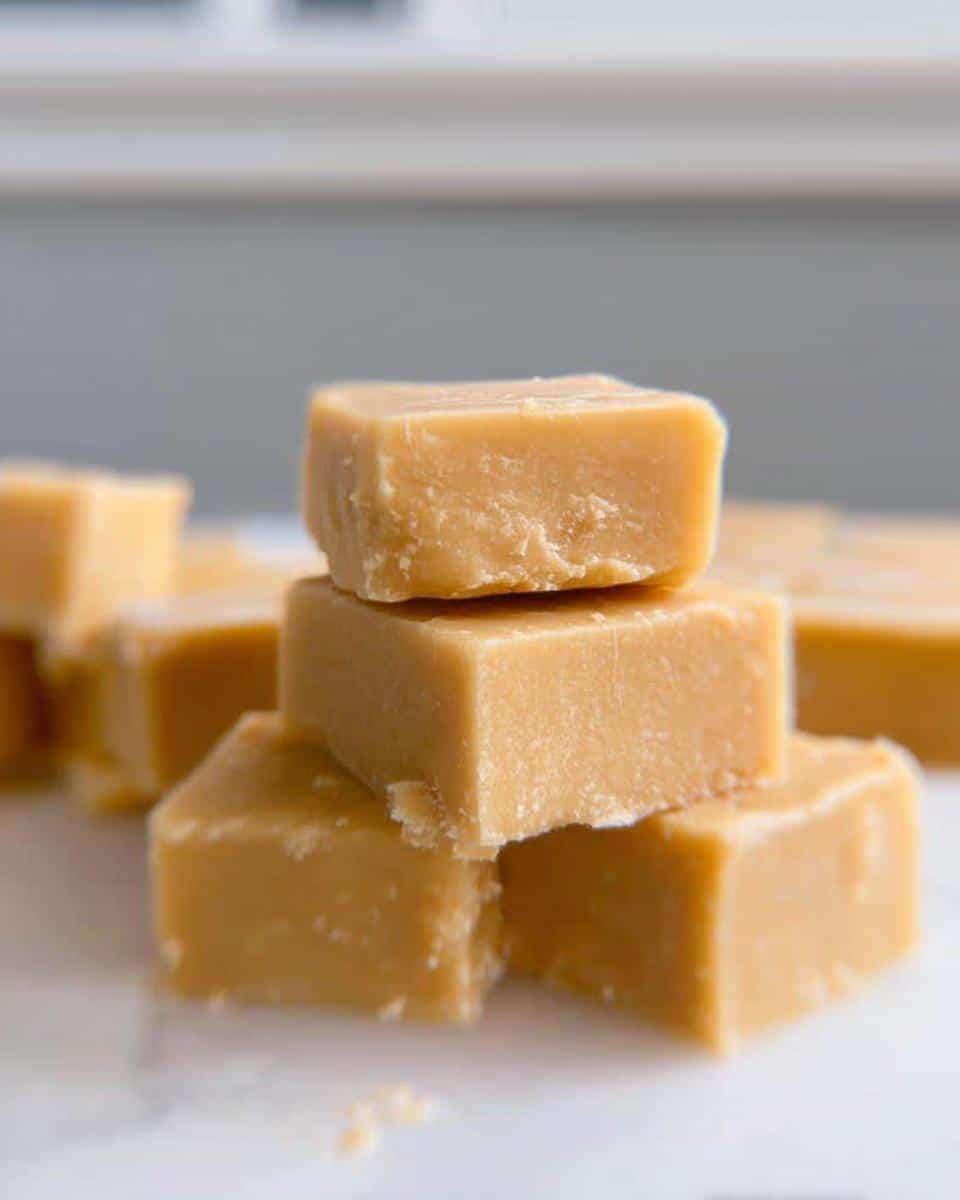
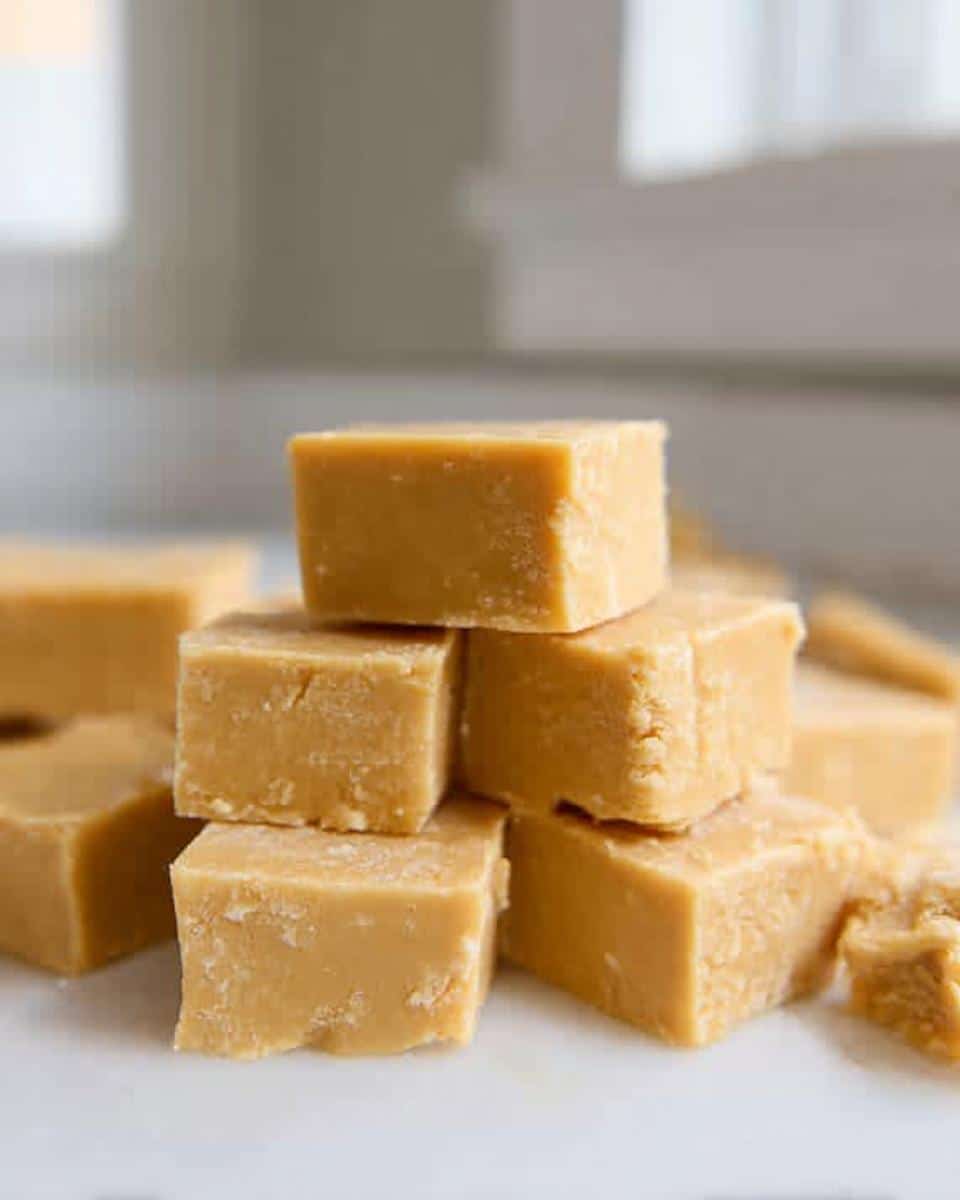
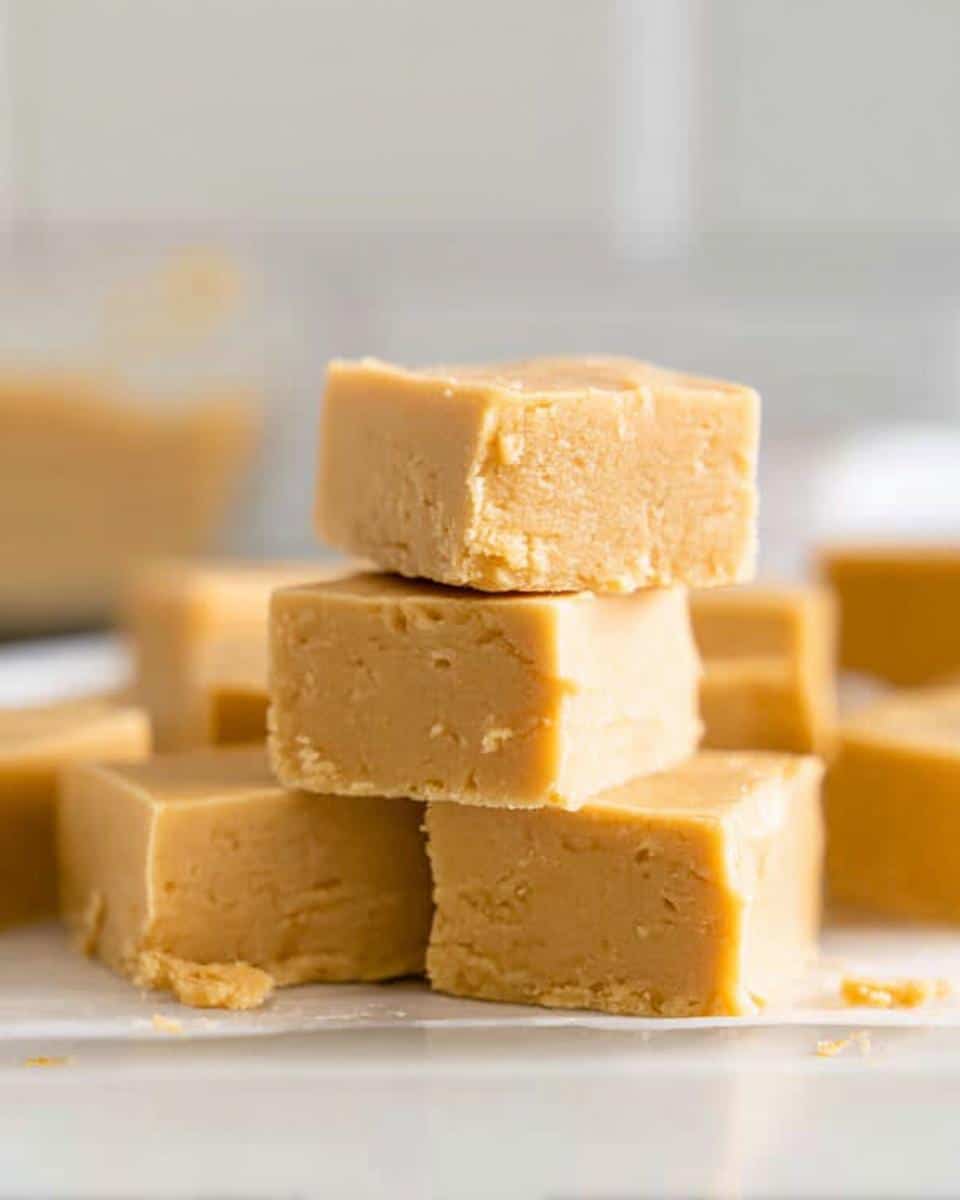
Oh my goodness, if you love desserts that just completely melt on your tongue, stop what you are doing right now! Seriously! We talk a lot about comforting baked goods here, but sometimes you just need something ridiculously creamy that comes together faster than ordering takeout. Today, I’m sharing the ultimate secret to my no-bake Gluten Free Peanut Butter Fudge. It’s so easy, you barely need to turn on the oven—perfect for those days when you need a quick, stunning treat.
I rely on this recipe whenever I need homemade fudge recipes for quick gifts or when unexpected company drops by. Knowing I can whip up sixteen perfect, rich squares that everyone, including my friends who stick to easy dessert recipes, can enjoy? That’s pure kitchen magic, trust me.
Why This Gluten Free Peanut Butter Fudge Recipe Stands Out
What makes this go-to recipe better than the ones gathering dust on old recipe cards? It’s truly the texture. This isn’t grainy or crumbly fudge; it’s dense, smooth, and practically melts before you even notice it’s gone! Because it fits perfectly into my collection of quick gluten free treats, it’s become my secret weapon.
Beyond the amazing taste, it means no fussing with ovens or tricky tempering. It’s the kind of dessert that makes people think you spent hours in the kitchen when really, it took minutes of mixing. It’s amazing for anyone needing simple Gf Desserts.
Perfect Texture and Flavor Combination
If you are a peanut butter fanatic, pull up a chair! The combination of quality peanut butter and rich butter creates this unbelievably creamy mouthfeel. It’s that classic, comforting flavor profile we all crave, but perfectly safe for my friends avoiding gluten. I swear, every square tastes like the very best part of a gourmet peanut butter cup.
Simplicity: The Ultimate No-Bake Gluten Free Peanut Butter Fudge
This is where we really shine, folks. Seriously, this is the definition of easy no bake fudge. There are only a handful of ingredients, and the “cooking” involves a quick trip to the microwave. If you’re new to making candies or just short on time, this is your starting point. No complicated sugar thermometers needed, just stirring and chilling!
Gathering Your Ingredients for Gluten Free Peanut Butter Fudge
Okay, before we even think about mixing anything, we need to get our guys lined up! This recipe is fantastic because the ingredient list is short and sweet. It’s all pantry staples, which makes it perfect for those spontaneous cravings. I need to share a quick tip right here: I find that using a good quality, store-bought creamy peanut butter works best because it has the right amount of stabilizers to keep our fudge super smooth. Don’t try to substitute that with natural drippy peanut butter, trust me on this one!
You can find some great simple recipes over in my easy snacks and small bites category, but the fudge ingredients below are special!
Fudge Ingredients List
- Fudge Ingredients
- 1 cup creamy peanut butter
- 1 cup butter (salted or unsalted) (2 sticks)
- 2 teaspoons gluten-free vanilla extract
- 4 cups powdered sugar
- 1/4 teaspoon salt (Omit if using salted butter)
Essential Equipment for Making Gluten Free Peanut Butter Fudge
You know, because this is a no-bake treat, our equipment list is delightfully short. It’s all about efficiency! Having these few simple things ready to go means we can move straight from gathering ingredients to mixing fudge in like five minutes flat. This is one of those recipes where preparation is genuinely 90% of the battle, so let’s make sure you have everything handy.
When I photograph these bites, I always make sure these pieces of equipment are clean and ready in the background—it just shows off how straightforward the whole process is!
- 8-inch or 9-inch square baking pan (This is key for getting those perfect 16 squares!)
- Parchment paper (Don’t skip lining this, or the fudge will fight you when it’s time to cut!)
- Medium mixing bowl (Needs to be microwave-safe, obviously)
- Microwave (We’re relying on this for quick melting!)
- Spatula or spoon (For stirring the thick batter—your arm might get a slight workout here!)
Step-by-Step Instructions to Prepare Gluten Free Peanut Butter Fudge
Alright, let’s get down to business! This next part is what separates a dream of creamy fudge from actually eating it. Since this is mostly no-bake, the steps are super quick, but timing matters just a bit. I want you to handle the microwave step carefully; that bowl gets seriously hot!
Follow these steps exactly, and I promise you’ll have the smoothest fudgy treats ready for the fridge in no time. This recipe is so straightforward, even if you’re whipping up kid-friendly cheerio granola bars for the first time, you’ll nail this fudge!
Preparation and Melting the Base for Gluten Free Peanut Butter Fudge
First things first: pan prep! Grab that 8-inch or 9-inch square pan and line it completely with parchment paper. Make sure you leave a good overhang on two sides—this is crucial because those flaps are going to act as handles later when we lift the whole block of fudge out to slice it. Super handy!
Next, in your microwave-safe bowl, toss in that full cup of peanut butter and the whole cup of butter. We want this melted until smooth, so we microwave it in one-minute blasts. Don’t just set it for three minutes straight, please! Stopping every minute lets you stir and ensures you don’t scorch the peanut butter. Once it looks good and liquidy, pull it out. Be careful when you remove the bowl—it will be hot, hot, hot!
Combining Wet and Dry Ingredients for Your Gluten Free Peanut Butter Fudge
Once the base is melted and mixed, toss in your vanilla extract and salt (if you are using unsalted butter). Give that a quick swirl. Now comes the powdered sugar, and this is where it gets real. Add all four cups of sugar at once. Yes, all of it!
You need to stir this vigorously with a sturdy spatula or spoon. I’m not going to lie, it’s tough work! It will go from a liquid mess to a thick, almost crumbly dough very quickly. Keep stirring until you can’t see any streaks of white sugar anymore and everything is homogenous. If you stop too soon, your fudge will be gritty, so push through until it’s uniformly thick.
Setting and Cutting the Final Gluten Free Peanut Butter Fudge
Now that you have this thick, glorious mixture, scrape it into your prepared pan. Use the back of your spatula or a clean spoon to press it down firmly and smooth out the top nice and flat. A flat top makes for prettier squares later!
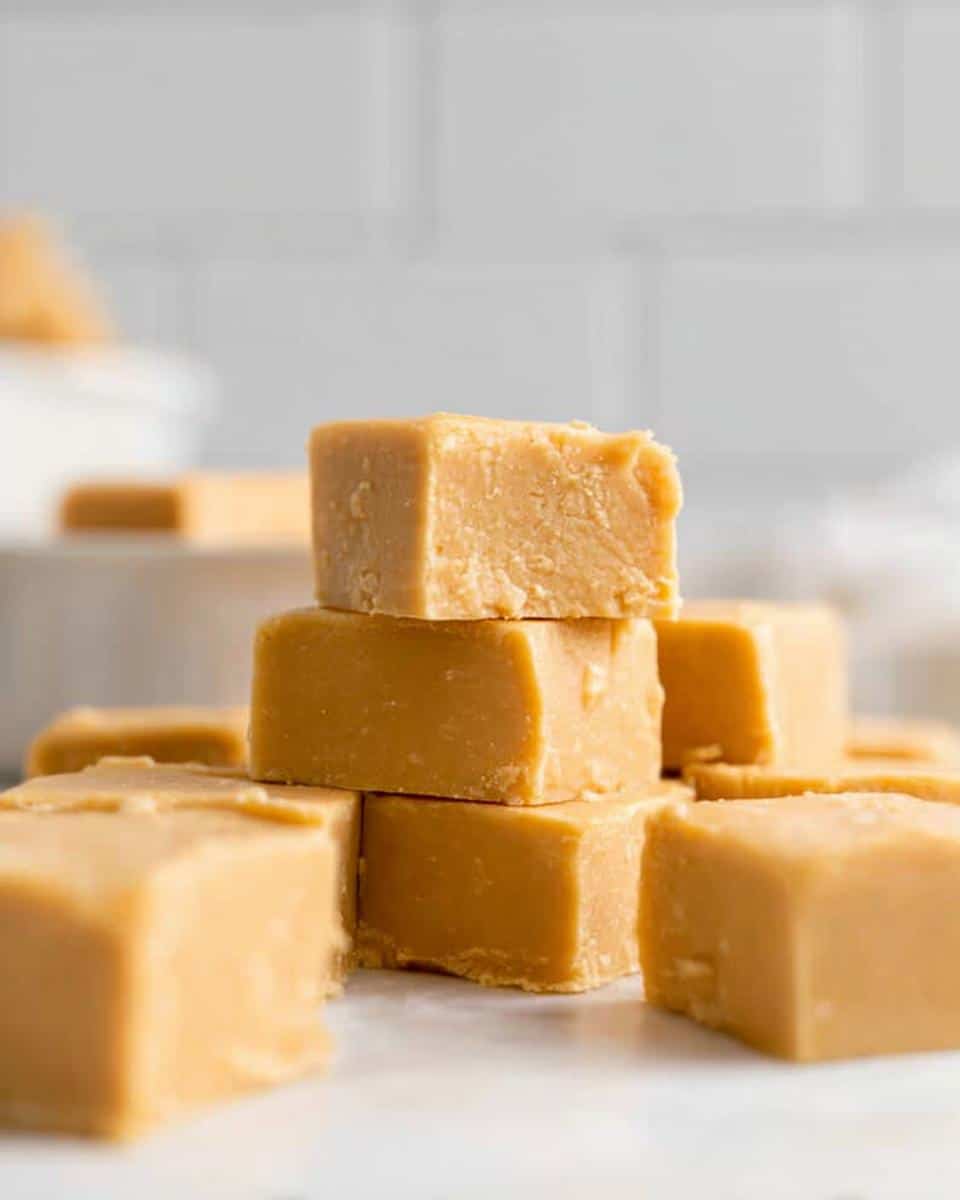
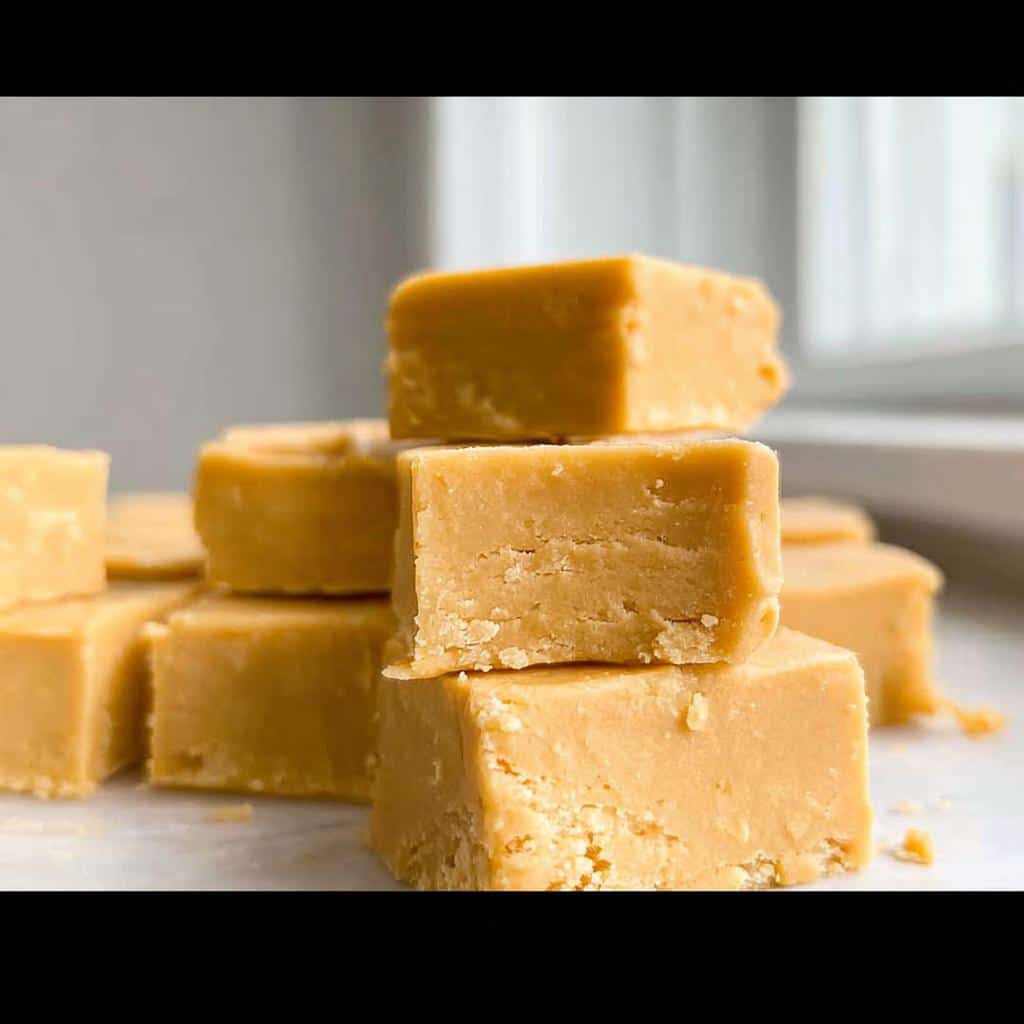
Cover that pan right up—plastic wrap works great—and pop it into the refrigerator. You need patience here! The minimum chilling time is a solid six hours, but honestly, making it the night before is the way to go. When it’s completely firm, lift the fudge out using those parchment paper handles, place it on your cutting board, and slice it into 16 even squares.
Tips for Perfect Gluten Free Peanut Butter Fudge Every Time
Even though this is our super simple, no-fuss recipe, a few little insider secrets can take your results from “good” to “Wait, you *made* this?!” I always want you to feel confident, especially when working with those foundational ingredients that define these wonderful Gluten Free Sweets.
My goal is always that silky smooth finish. If you’re worried about the texture being too hard or uneven, I’ve got a couple of things that Sarah (that’s me!) swears by.
Stovetop Method Alternative for Gluten Free Peanut Butter Fudge
So, what if your microwave isn’t cooperating, or maybe you just prefer stovetop control? I totally get it! You can absolutely use your stove for melting the base, and sometimes I even prefer it for a more gentle heat.
Grab a medium saucepan—no need for double boilers or anything fancy. Set your heat to medium and melt the peanut butter and butter together right there in the pan. You’ll stir this constantly until it’s smooth and combined. Once that’s done, take the pan right off the heat immediately! Stir in the vanilla and salt. The heat retained in the fats is enough to blend everything without cooking the sugars. Then, you’ll proceed exactly as before: stir in that powdered sugar off the heat until it’s thick, press it into the pan, and chill!
Ingredient Quality for Superior Gluten Free Sweets
I mentioned it before, but it bears repeating when we talk about what makes this recipe superior: stick to the good stuff! Since there are so few ingredients in these Gluten Free Sweets, each one plays a huge role.
When it comes to the peanut butter, please use the standard, shelf-stable creamy kind. I love making my own stuff, but for fudge, those natural, oily butters just don’t combine structurally the same way once the powdered sugar hits. The right peanut butter ensures that the sugar incorporates evenly, locking in that gorgeous, soft texture that melts in your mouth. Less separation, more deliciousness!
Storage and Serving Suggestions for Gluten Free Treats
So, you’ve made the perfect batch of no-bake brownie bites fudge, and now you have sixteen perfect squares staring up at you. Amazing! Now we have to talk about keeping them perfect. Even though this fudge is chock-full of sugar, which acts as a natural preservative, refrigeration is your best friend here to maintain that wonderful, creamy texture.
I always store mine in a single layer in an airtight container right in the fridge. They keep beautifully for up to a full week! If you’re making these way ahead of time—maybe for a holiday party or just because you love having quick Gluten Free Treats on hand—you can actually freeze them. Just make sure they are securely wrapped or stored in a freezer-safe container. They last wonderfully for about three months frozen!
When it comes to serving these little gems, think beyond just dessert! They are fantastic cut into smaller, bite-sized pieces for a quick afternoon energy boost. They go unbelievably well with a hot cup of coffee or a strong iced latte in the mid-afternoon slump. Seriously, that salty-sweet combination is just addictive.
If you are bringing these to a gathering, presentation matters! I like to arrange them on a simple white platter and maybe sprinkle just a tiny pinch of flaky sea salt over the top right before serving—it really highlights that peanut butter flavor. Or, if you want a little extra pizzazz, a drizzle of melted dark chocolate across the top ties everything together beautifully!
Making Gluten Free Dairy Free Recipes Variations of This Gluten Free Peanut Butter Fudge
One of the things I absolutely adore about this recipe is how accommodating it is! Since we are already dealing with gluten free baking recipes, making it completely dairy-free is just a snap. It keeps this recipe firmly in the running for the best Non Dairy Desserts list, in my opinion!
Remember how I mentioned earlier that using real butter is usually a must? Well, for this fudge recipe, butter is just acting as a rich fat source that melts nicely. If you need to make these fully Gluten Free Dairy Free Recipes, you simply swap out the sticks of regular butter for an equal amount of your favorite high-quality dairy-free butter sticks. I have tested several brands, and as long as it’s the stick variety (not the soft tub stuff), it blends in perfectly.
No one will ever guess these are Gluten Free Dairy Free Recipes—they still achieve that incredible, smooth finish!
Now, who doesn’t love a little adventure in their sweets? While the classic peanut butter flavor is divine, sometimes you just need an extra layer of deliciousness. Here are a couple of my favorite ways to spice up this base batch of fudge:
- Chocolate Chip Delight: Once you’ve pressed the fudge mixture into the pan, save a handful of mini semi-sweet chocolate chips and gently press them into the top. They soften slightly while chilling and create beautiful pockets of chocolate throughout the fudge blocks.
- Salted Finish: This is my go-to for gifting. Right after you smooth the top of the fudge but before it goes into the fridge, give the entire surface a light, even sprinkle of flaky sea salt. It cuts through the intense sweetness and really makes the peanut butter flavor pop! If you love salty things, this elevates it right up to gourmet status.
- Swirl In Some Goodness: If you melted some dark or milk chocolate separately (make sure it’s dairy-free for this variation!), you can dollop spoonfuls over the peanut butter fudge mixture in the pan. Then, take a butter knife and gently swirl the chocolate through the top layer to create a gorgeous marbled effect before chilling.
Experimenting with these small additions means that even though you are making one base batch, you get different types of Gluten Free Treats every time you prepare it. Isn’t that fun?
Frequently Asked Questions About Gluten Free Peanut Butter Fudge
I know you must have a few questions swimming around about making these incredible GF Desserts! When I first started experimenting with no-bake candies, I had tons of trial and error. That’s why I try to cover the most common hurdles right here so your first batch of Gluten Free Peanut Butter Fudge comes out absolutely perfect. Let’s tackle those last-minute worries!
Can I substitute the peanut butter in this recipe?
This is a tricky one! Since this recipe relies so heavily on the fat and structure of peanut butter to bind everything together, I really, really advise against substituting it in this specific formula. If you use almond butter or cashew butter, the fat content changes, and you end up needing way more powdered sugar, which throws off that beautiful, creamy texture we are aiming for. For this recipe, stick to the creamy peanut butter—it’s the backbone of the whole smash!
How do I prevent the fudge from becoming too hard when chilling?
Ah, the dreaded hockey puck fudge! This usually happens when the ratio of powdered sugar to the fat mixture is off, or if you overmix it once the sugar is added, whipping out all the necessary flexibility. The main thing to watch is the chilling time. If you chill it for much longer than the overnight recommendation, it tightens up substantially. If you find it’s getting too hard after a few days in the fridge, simply let the pieces sit out on the counter for 15 to 20 minutes before serving. That little bit of warmth brings the soft, melt-in-your-mouth texture right back!
Is this considered one of the best Gluten Free Snacks for portion control?
Absolutely! Because you cut this into 16 neat squares, it’s fantastic for portion control. These are rich, so one small square is usually plenty to satisfy that sweet tooth. I often pack them for hikes or long afternoons when I need a satisfying, dense energy boost, making them one of my favorite Gluten Free Snacks.
Can I use a different kind of sugar instead of powdered sugar?
No, you really can’t swap the powdered sugar here for granulated sugar. Powdered sugar, or confectioners’ sugar, is what gives fudge its signature smooth structure because it dissolves instantly into the melted fats. If you tried to use regular granulated sugar, you would end up with crunchy, grainy pieces in your mouth, which is definitely not the creamy dream we’re aiming for in these Gluten Free Treats. Stick to the powdered sugar for that perfect finish!
Share Your Amazing Gluten Free Peanut Butter Fudge Creations
Now that you’ve got your kitchen smelling like a peanut butter paradise, I sincerely hope you love these creamy, dreamy squares as much as my family does! The absolute best part of sharing these homemade fudge recipes is hearing from you all about your experience. Did you manage to keep your hands off them until they were fully chilled? Did you go for the flaky salt topping or maybe try the dairy-free swap?
Please, please, please leave a comment below! Tell me how many pieces you managed to get out of your pan—I always try for 16, but sometimes they disappear before I can even cut them! Hearing your successes really means the world to me and helps everyone else who is scrolling through see just how easy and wonderful this recipe is.
If you snap a picture of your beautiful, perfectly cut squares—whether they are stacked high for a party or hiding in the fridge for selfish snacking—tag me on social media! Seeing your results makes my day. Knowing that my steps helped you create these quick, satisfying Gluten Free Snacks successfully fills my cup. Happy fudging, everyone!
Amazing 16-Piece Gluten Free Peanut Butter Fudge
Ingredients
Equipment
Method
- Line an 8-inch or 9-inch square baking pan with parchment paper. Leave enough paper overhanging the edges to help you lift the fudge out later.
- Add the peanut butter and butter to a medium mixing bowl. Cover the bowl and microwave in one-minute intervals until the butter is melted.
- Remove the bowl from the microwave and add the vanilla and salt. Stir until the mixture is combined. The bowl may be hot.
- Add the powdered sugar and stir until everything is completely combined. The fudge mixture will become thick and difficult to stir.
- Press the peanut butter fudge into your prepared pan, smoothing the top with the back of a spatula or spoon.
- Cover the pan and chill for a minimum of 6 hours or overnight until firm.
- To cut the fudge, lift the parchment paper holding the fudge out of the pan and place it on a cutting board. Cut the fudge into squares.
- Store the fudge in an airtight container in the refrigerator for up to one week, or in the freezer for up to three months.