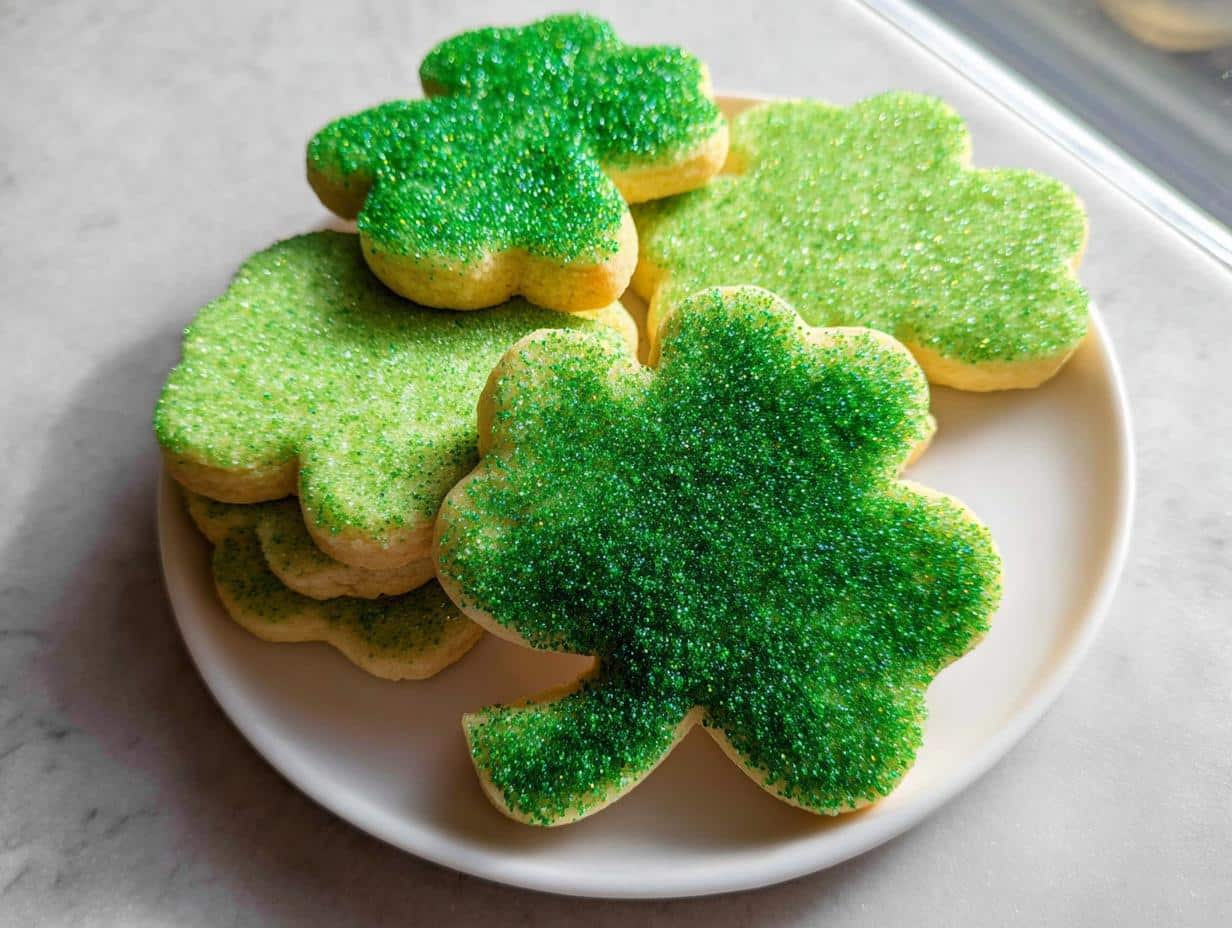
Oh, doesn’t St. Patrick’s Day just make you want to pull out the green sprinkles? I love baking for holidays, but sometimes the festive treats feel too complicated. That stops today! You need perfect, buttery cookies that don’t puff up into sad, round blobs when they hit the oven. I’m sharing my go-to recipe for Shamrock Sugar Cookies that hold their crisp edges beautifully, making them the ultimate canvas for your creativity.
As a Culinary Educator, my whole mission is making sure you feel confident, even when cutting out tiny shapes! These cookies are soft, flavorful, and utterly reliable, which is why they are my top choice for any colorful celebration. Trust me, these are exactly what you need for your St. Patrick’s Day fun. Click here to see more of my easy, show-stopping dessert recipes while you’re here!
Why These Shamrock Sugar Cookies Are Your New Holiday Favorite
I know, I know, everyone claims their sugar cookie recipe is the best. But these really are fantastic, especially when you need them to look professional! They come out soft but stable, which is the dream combo for holiday baking when you plan on going heavy on the decoration.
- They are deliciously soft and buttery, not cracker-crisp.
- They don’t spread! Seriously, try to make them puffy, they won’t budge.
- They are the perfect blank canvas for all your fun green icing ideas.
Perfect Texture for Decorating
The secret to keeping these amazing Shamrock Sugar Cookies perfectly shaped lies in a couple of key players. We use powdered sugar instead of granulated sugar, which keeps the dough smooth and slightly less prone to spreading. Plus, that little bit of cream of tartar actually helps stabilize the gluten structure. It’s baking science, but it tastes like pure fun!
Ideal for Irish Party Food
Because they hold up so well, these are perfect for serving a crowd. Whether you’re making huge platters of festive Irish Party Food or just need adorable treats for the kids, they look incredible stacked up. They are way more exciting than just a plain green cake—they’re mini works of edible art!
Essential Equipment for Perfect Shamrock Sugar Cookies
You don’t need a massive bakery setup for these, honestly! Having the right tools just makes the process so much smoother, especially when you’re trying to keep the kids happy and the dough cold. Since these are cut-out cookies, a good mixer is really your best friend here, but don’t worry if yours is a hand-me-down—we can make it work!
We really need equipment that helps us keep things controlled. Because we’re dealing with a dough that needs chilling and rolling out thin, the right surface matters a lot so we don’t end up fighting the batter.
Here’s what I always grab when I make these: check out this list of easy recipes for kids if you need more simple baking ideas!
- Stand mixer or hand mixer: This is key for creaming that butter and sugar just right. My old hand mixer struggles a bit with the cold dough, so if yours is weak, just be patient and scrape down the sides often!
- Parchment or Silpat lined baking sheet: Seriously, don’t skip this. Parchment paper makes cleanup nonexistent, and Silpats give you the most beautifully even bottoms.
- Cookie cutters: Obviously! For this recipe, you need a good, sturdy shamrock cutter. Make sure it’s one that doesn’t have too many thin, delicate points, or it might snap when you try to lift the dough.
Gathering Ingredients for Your Shamrock Sugar Cookies
Okay, let’s talk about the good stuff! Before we even think about turning on the mixer, we need to make sure everything is pre-measured and ready to go. I cannot stress this enough: for beautiful, consistent Shamrock Sugar Cookies, the ingredients must be prepped correctly. That means the butter has to be truly softened—not melted! Melted butter makes for greasy edges, and we don’t want that spread.
The key thing to watch here is the sugar. We are using powdered sugar (confectioners’ sugar) in the cookie dough itself, which helps them stay tender. Granulated sugar often leads to too much spreading. Pay close attention to those notes, because they are vital for success!
For the Soft Sugar Cookies
This list is for the base cookie itself. Everything goes into one bowl, which is always fun because it feels super fast once you get started!
- 2.5 cups all-purpose flour (that’s about 310g if you have a scale—it helps!).
- 1.25 cups powdered sugar (141g is the goal here).
- 1 cup unsalted butter, softened (make sure it’s room temperature, about 226g).
- 1 large egg.
- 0.5 teaspoon salt.
- 1 teaspoon baking soda (just a touch to help the spread a tiny bit).
- 1 teaspoon cream of tartar (this is our structure secret weapon!).
- 1 teaspoon vanilla extract.
- 1 teaspoon almond extract (optional, but I love the depth it adds!).
For the Simple Green Frosting
This is a basic buttercream that sets up just firm enough to handle some decorating work. You can always add more milk if you need it thinner, or more powdered sugar if you want it stiff for piping. We want that perfect green tone for our Shamrock Sugar Cookies!
- 2 cups powdered sugar (452g).
- 0.5 cup unsalted butter, softened.
- 2 teaspoons vanilla extract.
- 3 to 4 tablespoons milk (start with 3 and add the fourth slowly!).
- As needed Green Food Coloring (gel colors work best for bright pigment!).
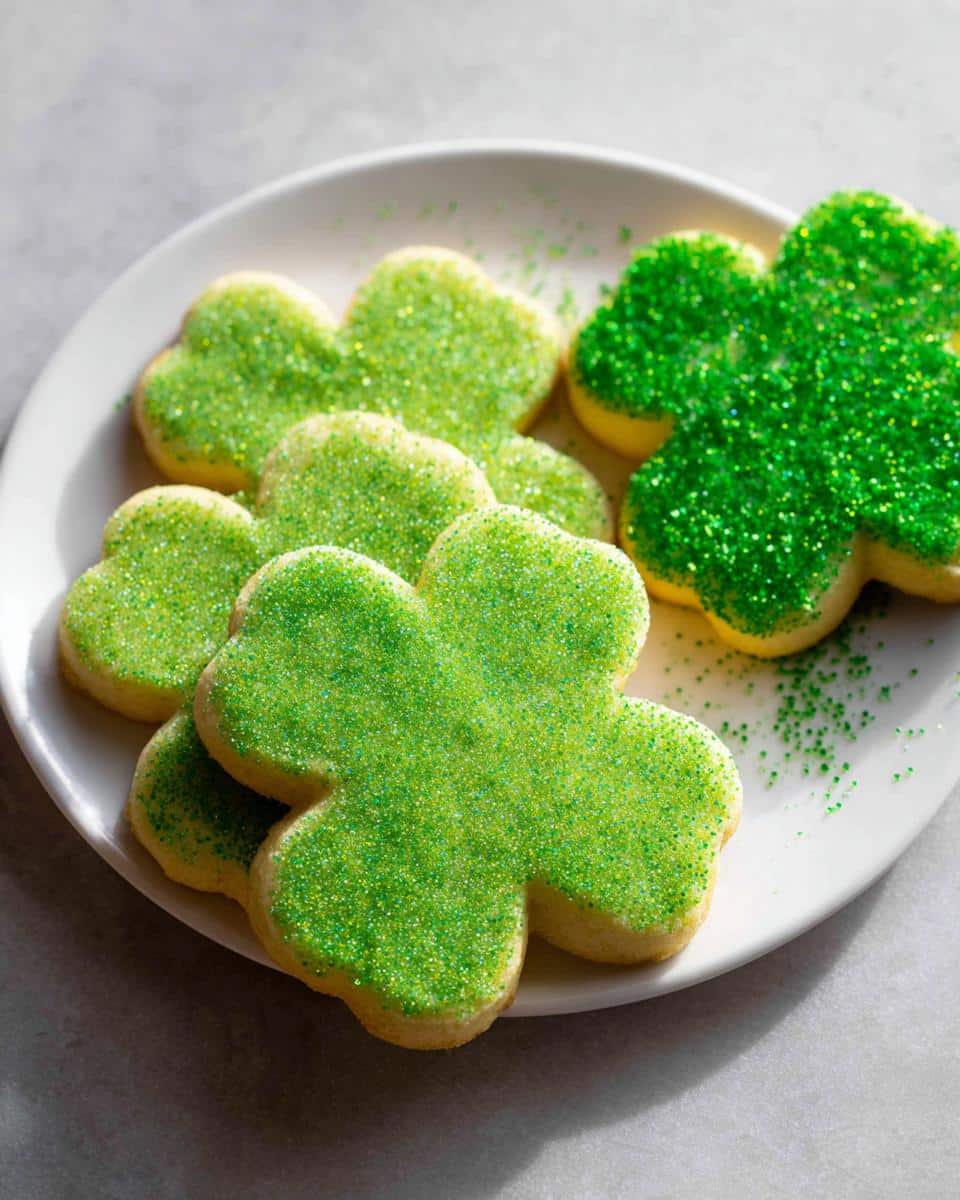
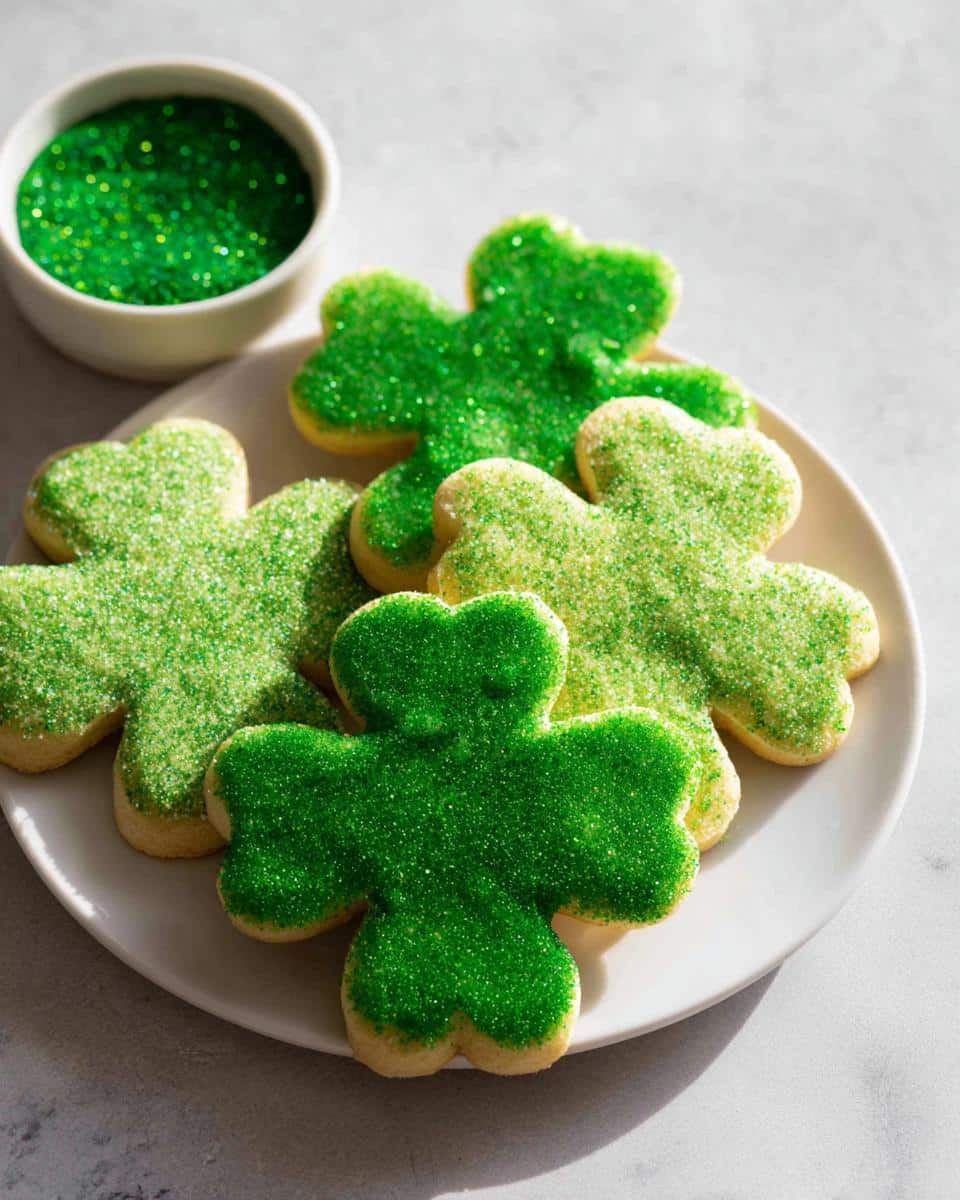
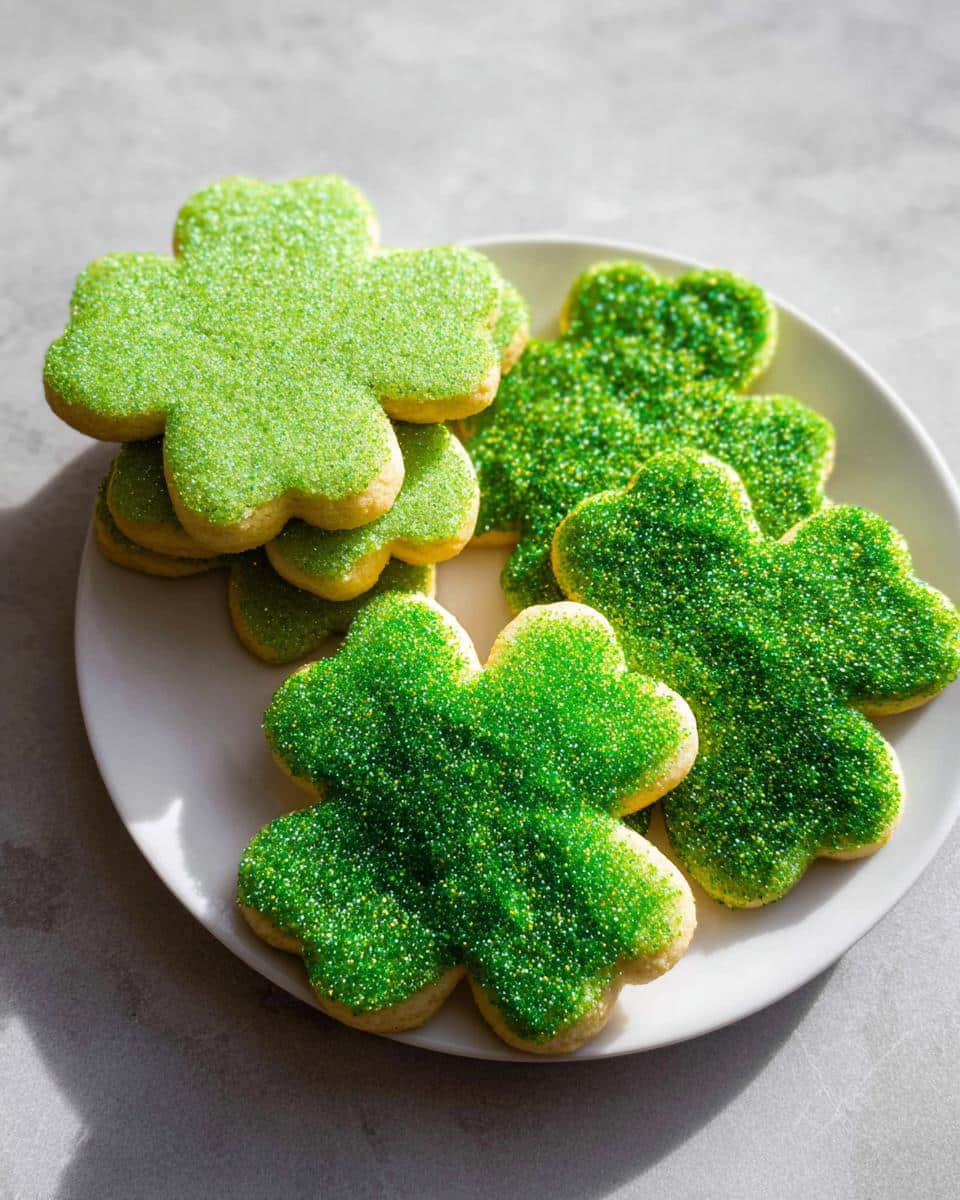
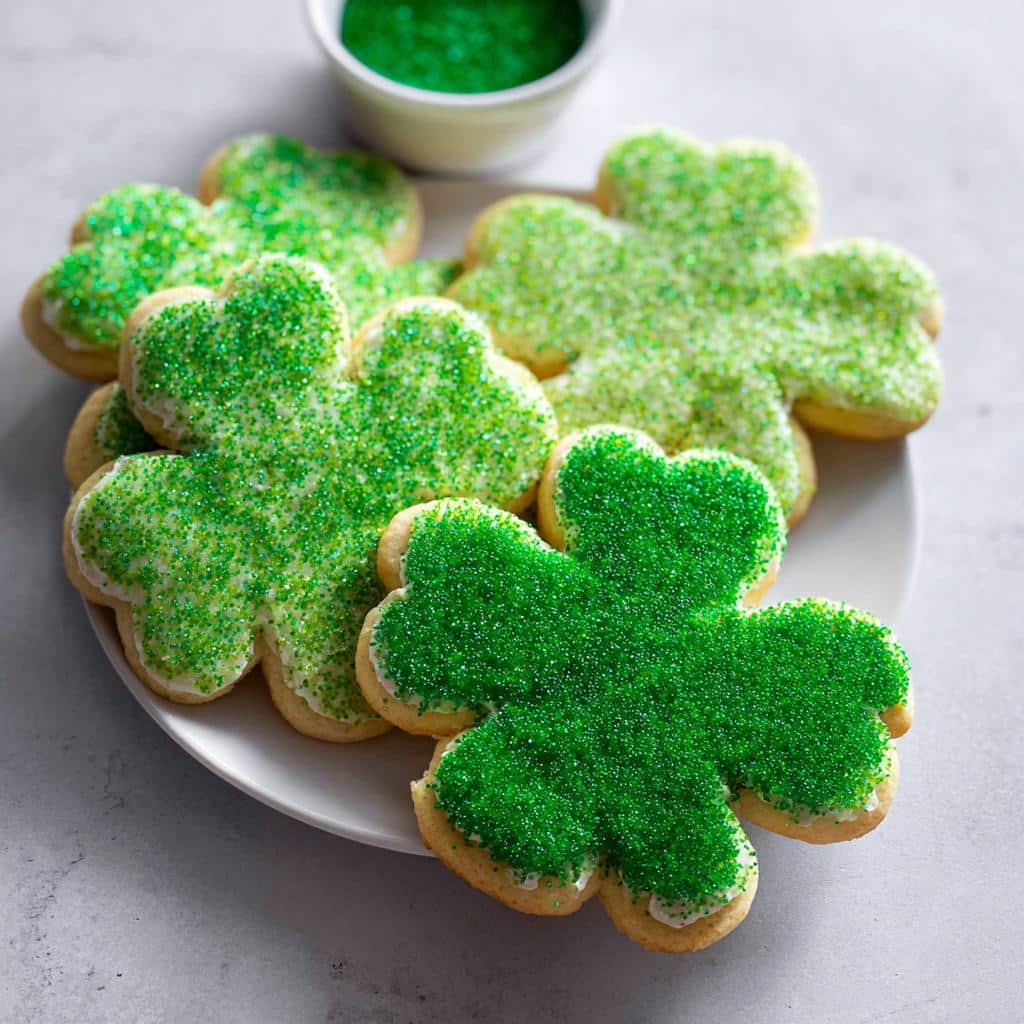
- As needed Green Sanding Sugar (for that satisfying crunch on top).
Step-by-Step Instructions for Making Shamrock Sugar Cookies
Okay, now for the best part: turning those ingredients into actual, gorgeous cookies! Baking is so much about process, and with cut-out cookies, timing is everything. If you follow these steps exactly, you’ll see why I call this my 100% reliable, no-fail technique for Shamrock Sugar Cookies.
Before we start mixing, remember this little piece of wisdom from my teaching days: when you introduce dry flour to fat, you want to be gentle at first! I always crank my mixer down to the absolute lowest setting for the first minute. You don’t want a flour cloud erupting across your kitchen, trust me. It’s easier to clean the sides after the flour is mostly incorporated than trying to vacuum it off the ceiling!
Mixing and Chilling the Dough
This process is super straightforward since everything goes into one bowl. Here’s how we get that perfect dough:
- Toss all your cookie ingredients—the flour, frosting sugar, softened butter, egg, salt, baking soda, flavorings, and cream of tartar—into your mixer bowl. Mix it slowly on low speed at first, always scraping down those sticky sides, until it all comes together and looks like actual cookie dough. No dry patches allowed!
- Now, we divide the experience! Take that big ball of dough and split it right down the middle. We’re not going to roll this on a floured counter; that adds too much flour and makes the cookies tough.
- Place one half of the dough onto a sheet of waxed paper on your counter. Put another sheet of wax paper right on top. Press it down gently with your palm to flatten it into a disk.
- Use your rolling pin between those two layers of paper until you get the dough about 1/4 inch thick. Remember to peel off the top sheet, flip the whole thing, peel off the other sheet, and keep rolling so it doesn’t get stuck to anything!
- Repeat that entire rolling process with the second dough half. Once both are rolled out, stack the sheets on a baking sheet and let them chill for at least 30 minutes. If you’re waiting till tomorrow, wrap them tightly and chill overnight. This chilling time is non-negotiable for sharp edges! Need some more streamlined ideas? Check out my favorite recipes that simplify baking.
Cutting and Baking Your Festive Sugar Cookies
Once the dough is firm and cold, it’s time for the fun part—cutting out those glorious shamrocks!
- Preheat your oven to 375°F (190°C). Make sure your baking sheets are lined with parchment or a Silpat mat.
- Take one chilled sheet of dough, peel off the top paper layer, and use your shamrock cutter to start stamping out shapes. Place them onto your prepared sheet, leaving a little space between them because they will expand just a tiny bit.
- Big tip: If you gather up the scraps and need to re-roll them, you MUST chill those newly cut cookies again for about 10 minutes before they go into the oven. Chilled cutouts = sharp edges.
- Bake them for about 6 to 10 minutes. How do you know when they are done? For a soft cookie, look only for the bottoms to be barely turning golden brown. If you like them crunchier, leave them in another minute or two until the tops look firm.
- Let them cool completely on the sheet for about five minutes before you carefully transfer them to a wire rack to finish cooling down. Do not even *think* about frosting until they are totally cool, or you’ll have a green puddle instead of icing!

Preparing the Green Frosting and Decorating
This frosting is fast, but texture is key here. We want it spreadable but thick enough to support those beautiful sanding sugars!
- In a clean bowl, beat your softened butter until it’s smooth and creamy—think fluffy clouds.
- Slowly add in the powdered sugar until you get a stiff, crumbly paste. Then, add the vanilla extract.
- Now, add your milk one tablespoon at a time. Keep mixing until it smooths out to a lovely, thick consistency that coats a spoon nicely. This is how you get perfect frosting coverage for your Shamrock Sugar Cookies.
- Add your green food coloring until you reach that vibrant St. Paddy’s Day shade you love.
- Time to decorate! Take a cooled cookie, generously spread the green frosting over the top. Immediately, before the frosting dries even a little, dip the frosted side directly into your shallow bowl of green sanding sugar. Press gently!
- Stand them up to let the excess sugar fall off, and you are done! They look instantly celebratory.
If you aren’t decorating right away, just leave the frosting off. You can frost them a day or two before the party when you have time to enjoy the process!
Tips for Perfect Shamrock Sugar Cookies Every Time
Even with the perfect recipe, sometimes these little dough discs try to rebel on us during baking. Don’t worry, though! Because I’ve taught so many classes on cut-out cookies, I know exactly what causes them to spread or stick. If you follow these simple pro tips, your Shamrock Sugar Cookies will look exactly like the shapes you cut them into!
I learned these tricks the hard way, usually involving scraping way too much dough off the bottom of a hot baking sheet. Now, I skip those messy steps entirely. If you want to check out a little more about my philosophy on making cooking approachable—that’s what I focus on here at Top Chicken Eats—you can read my story here!
Ingredient Temperature Matters
This seems so simple, but it trips up almost everyone! For these Shamrock Sugar Cookies, your butter needs to be soft—I mean, you should be able to press your finger into it and leave a distinct dent easily. However, if it’s greasy, shiny, or looks melted at all, stop immediately! Softened butter creams light and fluffy with the sugar, trapping the air we need for structure.
If your butter is too warm, those air pockets collapse right before they go in the oven, and boom—the cookies spread out flat before they even set. Cold butter is too hard to cream properly, resulting in a tough cookie. Aim for that sweet spot, usually achieved by leaving the sticks out on the counter for about an hour before you start mixing!
Baking Tips for Green Foods For Party
Let’s troubleshoot a couple of common issues when baking these beautiful Green Foods For Party treats. First, if you are worried about the cookies sticking to the sheet pan even with parchment, try chilling the cutouts right on the baking sheet for 10 minutes *after* placing them on the pan but *before* they go in the oven. That extra chill time really locks that shape in place.
Second, watch the color! Since these are relatively thin sugar cookies, they can go from perfectly baked to burnt edges quickly. If you notice your first sheet is browning too fast on the edges but the center still looks pale, that means your oven runs hot. Next time, lower the temperature by 15 degrees and add one or two minutes to the baking time. Better safe than sorry when you’ve got dazzling green sugar!
Storage and Make-Ahead Tips for St Patrick Day Food Ideas Party
The nice thing about these sturdy sugar cookies is that they are amazing for making ahead of time! Seriously, planning ahead is the key to enjoying the actual party, right? I always bake mine a couple of days before St. Patrick’s Day so I can focus on making some fun easy snacks and small bites the day of the big event.
You have options depending on when you plan to serve them. Unfrosted cookies are surprisingly resilient, but once you add that sugary green frosting, you want to seal in that freshness quickly.
Here is my game plan for keeping these **St Patrick Day Food Ideas Party** treats perfect until it’s time to celebrate:
Storing Frosted Cookies
Once you’ve gone to all the trouble of tinting that frosting green and dipping them in sugar, you want them to stay pretty! You can frost these cookies up to a day ahead of time, and they’ll be wonderful. The key is that the frosting needs to set completely—give it at least an hour at room temperature before you start stacking them.
Store them in a single layer in an airtight container. Don’t press plastic wrap directly onto the frosting layer, or you’ll mess up your beautiful work! These stay perfectly good on the counter for about three days. Honestly, mine never last that long, but the recipe note says three days, so there you go!
Freezing Tips for Success
If you need to make these weeks ahead, freezing is your best friend. You can freeze them either frosted or completely plain. If you freeze them frosted, just make sure that icing is totally hardened first. Lay them in a single layer in a freezer-safe container—I use those flat plastic ones—and put a layer of parchment paper between them before you put the lid on. They freeze beautifully for up to a month!
When you decide to thaw them, pull them out the night before you need them and let them defrost slowly in the container on the counter. Don’t open the container until they come to room temperature, or you will get condensation, which makes the sugar weep. If you freeze them unfrosted, you can defrost them and frost them the day before the party!
Frequently Asked Questions About Shamrock Sugar Cookies
I get so many great questions when people try this recipe for the first time, especially when they are planning an amazing spread of St Patrick Party Food! It’s wonderful that you’re reaching out. Baking should always feel like a conversation, not a monologue, so let’s clear up any little snags you might have before you roll out your dough.
Can I use this recipe for other St Patrick’s Day Food Ideas Party shapes?
Absolutely, yes! The beauty of using cream of tartar and powdered sugar is that this dough is incredibly stable. You can cut out squares, pints of beer, or even use them as bases for little green sandwiches if you wanted to try a fun twist on Irish Appetizers! As long as you are cutting shapes out of the rolled dough, this recipe handles it like a champ. Just remember the golden rule: if you re-roll scraps, chill them again before they hit the oven to keep those details sharp.
How do I make the frosting thinner for drizzling instead of spreading?
That’s a fun idea! Sometimes you want a thin glaze that just drips beautifully down the sides, right? The frosting recipe provided makes a pretty firm buttercream perfect for spreading thick decorations. If you want a thinner drizzle, just keep adding milk! You should be able to add one or two more tablespoons above the 4 suggested. Mix it slowly, tablespoon by tablespoon, until it flows easily off the back of your spoon. Keep in mind that a thinner consistency might take longer to dry, so plan your decorating schedule around that!
Are these the best Green Snacks for a quick bake?
Well, compared to dropping a quick bowl of brownies, no—they require a little patience because of that crucial 30-minute chill time. But hear me out! While the *active* mixing time is super low (maybe 15 minutes total!), they result in absolutely show-stopping cookies that look like they took all day. For St Patrick’s Day For Kids Treats, the visual payoff is huge! Once you get the hang of rolling between the wax paper, you’ll find them much faster than you expect. The payoff of having perfect, decorative cookies makes that chilling time totally worth it!
If you have any other questions about ingredient substitutes or decorating techniques, I’m always here to help! You can always reach out to me directly!
Estimated Nutrition for Your Shamrock Sugar Cookies
I always include the nutrition info because, while these are treats to be enjoyed, knowing what you’re serving up is important! I have to remind everyone that because we’re dealing with butter, two types of sugar, and frosting, these aren’t exactly diet food—they are holiday celebration food, after all! Just remember that these numbers are estimates based on the quantities listed in the recipe above and standard ingredient sizing.
If you are trying to track macros or dietary intake, please treat these figures as a general guide. I always encourage checking the labels on your specific brand of flour or butter, as that can change things slightly. For more details on my general approach to food labeling, you can check out my general disclaimer page.
Based on our recipe breakdown for one cookie (which makes about 24 servings), here are the estimated values:
- Calories: 150
- Fat: 7 grams
- Saturated Fat: 4 grams
- Carbohydrates: 20 grams
- Sugar: 10 grams
- Protein: 2 grams
- Sodium: 50 milligrams
- Fiber: 0 grams
- Cholesterol: 25 milligrams
See? They are definitely an indulgence, but totally worth it when they look as cute as these green shamrocks do on the platter! Enjoy every single bite!
Share Your Festive Shamrock Sugar Cookies Creations
Now, this is the moment I live for! You’ve mixed, you’ve chilled, you’ve cut out the most perfect little green shapes, and you’ve decorated them until they shimmer! I genuinely hope you had as much fun making these as I do every year.
Baking should always be shared, and I absolutely love seeing how you all interpret the decorating on these Shamrock Sugar Cookies. Did you go for simple green sanding sugar like I showed, or did you get completely wild with royal icing piped designs? Don’t keep those gorgeous creations secret!
Please, take a moment to leave a comment below and let me know how they turned out for you. Were they softer than you expected? Are you already planning which shape to cut next year? Rating these tells me the recipe is working well for everyone, which is the best news I can get!
If you’re sharing pictures on social media, tag me! I want to see that festive spirit in action. Your feedback helps keep these recipes honest and reliable for other home bakers. You can review the terms for using this site here: our terms of use. Happy St. Patrick’s Day baking!
Shamrock Sugar Cookies
Ingredients
Equipment
Method
- Combine all cookie ingredients in the bowl of a stand mixer fitted with the paddle attachment, or in a large mixing bowl if using a hand mixer. Mix on low speed, scraping the bowl occasionally, until the mixture forms a cookie dough. Mix on low speed initially so the dry ingredients do not fly out.
- Divide the dough in half. Place one half on a large sheet of waxed paper on a cutting board or flat surface. Place another large sheet of waxed paper on top of the dough. Press down into a flat disk with your palm. Roll the dough between the two pieces of wax paper until it is about 1/4 inch thick. Lift the top sheet of wax paper every few rolls, replace it, flip the dough over, peel the other wax paper sheet, replace it, and continue rolling.
- Repeat the rolling process with the second half of the dough. Place both rolled dough sheets, still between the wax paper, on a cutting board or cookie sheet. Refrigerate for at least 30 minutes, or wrap well and chill overnight.
- When ready to cut cookies, preheat your oven to 375°F (190°C).
- Cut cookies into your desired shapes and place them on a parchment or Silpat lined baking sheet. Re-roll the dough scraps as needed. If you re-roll dough, chill the cutouts for about 10 minutes before baking to help them keep their shape.
- Bake cookies for 6 to 10 minutes, depending on size. Remove them when the bottoms just start to brown for a softer cookie; bake longer for a crunchier cookie.
- Cool the cookies completely before frosting and decorating.
- To make the frosting, beat the butter until smooth in a large bowl with an electric mixer. Slowly mix in the powdered sugar, then add the vanilla and 1 tablespoon of milk at a time until you reach your desired frosting consistency.
- Tint the frosting green. Place the sanding sugar in a shallow bowl or plate. Frost a cookie, then dip the frosting side down into the sugar.
- Store cookies in a single layer in an airtight container for up to 3 days. You can freeze cookies in a single layer, then stack them in an airtight container (unstack before thawing). You can also freeze unfrosted cookies in an airtight container.