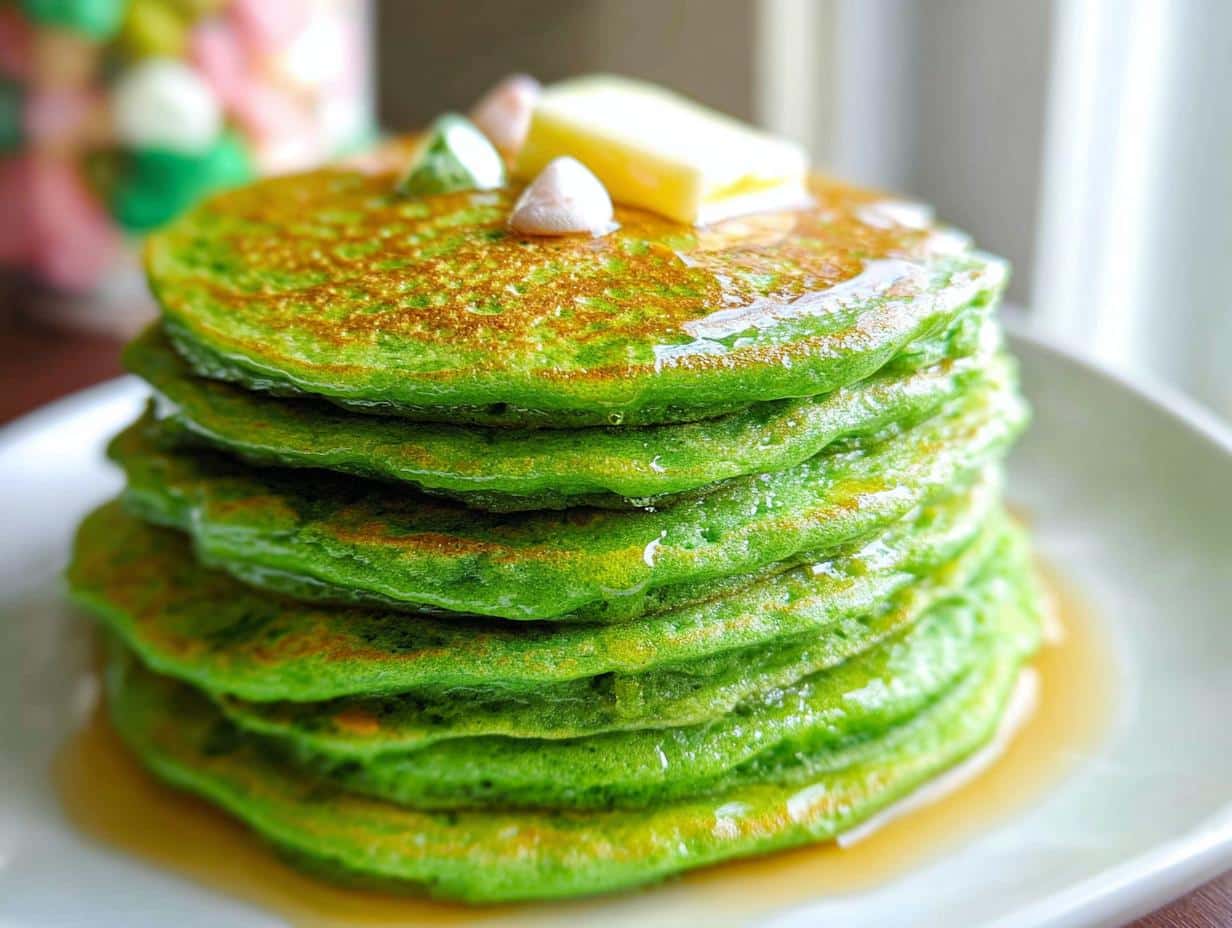
You know, some mornings just demand a little bit more sparkle, right? If you’re looking for the easiest way to kick off your St. Patrick’s Day celebrations right at the breakfast table, I’ve got you covered. Forget complicated green eggs and ham; we’re making the most fun, vibrant St. Patrick’s Day Pancakes you can imagine! These turn a basic morning routine into pure, home-centered joy, just like my Grandma taught me good food should be. They come together faster than you can find a four-leaf clover, and they look absolutely magical on the plate. For more ideas to start your day off right, check out all my breakfast adventures over at my breakfast archives!
Why You Need These St. Patrick’s Day Pancakes For Your Celebration
Honestly, trying to whip up a huge Irish feast when you’re still half-asleep just isn’t my style. That’s why these St. Patrick’s Day Pancakes are my go-to! They tick every box for a holiday morning without stressing anyone out.
- They are lightning-fast—we’re talking 25 minutes total, start to finish!
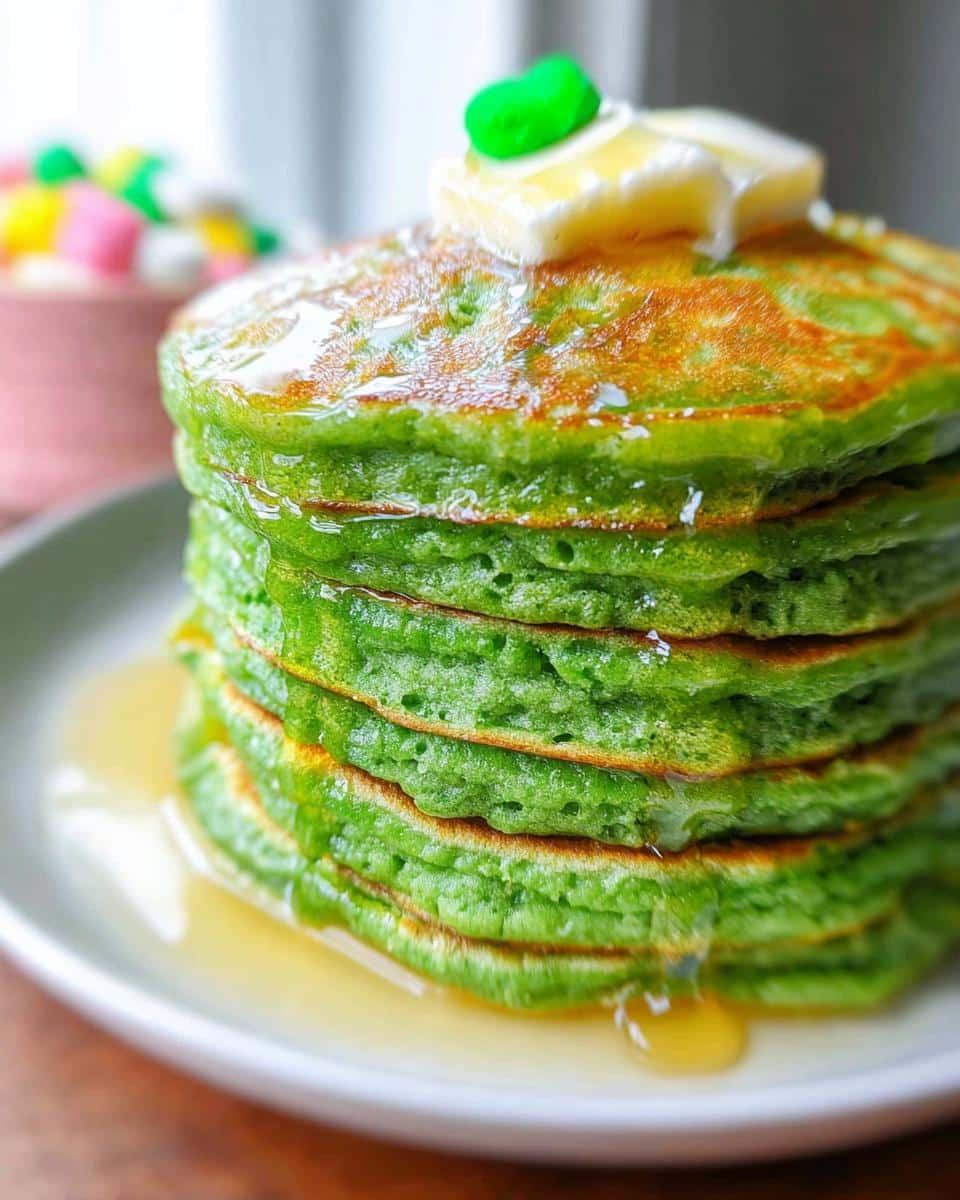
- The buttermilk makes them super fluffy, just like a classic pancake, but green!
- They are way more exciting than just plain batter for the kids (and me, let’s be honest).
- You get that perfect festive punch without needing complicated themed snacks. For more simple kid-friendly morning treats, take a peek at some of my easy recipes for kids!
Festive Presentation and Family Fun
The best part about making these pancakes is seeing everyone’s face when they slide onto the plate. That bright, cheerful green just screams celebration! It’s such a little thing, but taking five extra minutes to add that color makes the holiday morning feel instantly special. It sets the tone perfectly for whatever fun St. Patrick’s Day celebration tips you have planned for the rest of the day.

Essential Equipment for Perfect St. Patrick’s Day Pancakes
Before you even think about cracking an egg, you need to make sure your kitchen tools are ready. I’ve learned the hard way that scrambling for a whisk when you’re halfway through the wet ingredients is a recipe for an over-mixed, flat pancake disaster. Trust me on this one—getting your setup right makes that 25-minute total time totally doable!
You don’t need anything fancy here; we’re cooking classic comfort food, but organization is key. Here’s the short list of what you’ll want ready to go:
- A big large bowl. This is where everything comes together, so make sure it’s big enough to fold everything without sloshing batter onto your counter.
- A smaller medium bowl for mixing up the wet stuff. Keeping the wet and dry separate until the last minute is half the secret to fluffy pancakes!
- Your trusted frying pan or griddle. If you have an electric griddle, that’s fantastic for keeping a steady temperature.
- A good 1/4 cup measuring cup. This acts as our ladle, ensuring every pancake is the same size, which means they all cook evenly on the heat.
That’s it! No stand mixer required, just good old-fashioned elbow grease and the right containers. It’s all about being prepared so you can focus on getting that gorgeous green color just right.
Gathering Ingredients for Your St. Patrick’s Day Pancakes
Okay, now for the fun part—gathering the goods! Before you start assembling your vibrant St. Patrick’s Day Pancakes, you need to make sure you have everything measured out. Measuring accurately really matters when you’re dealing with baking powder and soda; it’s the difference between fluffy clouds and flat, sad disks. I like to organize everything into bowls before I even turn on the stove. It just streamlines the process, trust me.
Here is exactly what you need to pull off this colorful breakfast. I’ve separated them out just like I do in my own kitchen!
Dry Ingredients
- 2 cups all-purpose flour
- 1 Tablespoon granulated sugar
- 1.5 Tablespoons baking powder
- 0.5 teaspoon baking soda
- 0.5 teaspoon salt
Wet Ingredients
- 1 large egg, beaten well
- 3 Tablespoons oil (canola or vegetable), plus extra for preparing griddle
- 1.75 cups buttermilk
- 1 Tablespoon green food coloring (liquid, gel or paste). Remember to use this gradually to create your desired saturation!
For Serving
- As needed syrup and butter (for topping)
If you’re whipping up a bigger batch of St. Patrick’s Day treats, you can easily double this recipe! For more quick ideas that pair well, check out my section on easy snacks and small bites.
Ingredient Notes and Substitutions
This recipe is pretty straightforward, but buttermilk is crucial here. Buttermilk is acidic, and when it hits the baking soda and powder, that’s what gives you that phenomenal lift and fluffiness. It’s the secret sauce for really excellent pancakes!
But, I know buttermilk isn’t always in the fridge, so don’t panic! If you need a buttermilk substitute, just mix 1 1/2 tablespoons of vinegar or lemon juice with regular whole milk until you reach 1 1/2 cups total. You have to let that mixture sit for about five minutes until it thickens up a bit before you add it into the rest of your wet ingredients. If you’re worried about the green color not showing up, I promise, the food coloring is potent enough that even gentle cooking will keep the color bright!
Step-by-Step Instructions for Fluffy St. Patrick’s Day Pancakes
Now that we have all our ingredients neatly laid out, we can actually start cooking! These steps are simple, but remember: the secret to *any* great pancake, especially our festive St. Patrick’s Day Pancakes, is patience during the mixing stage. Don’t rush the process, even though the total time is so quick!
First things first, get your dry ingredients—that’s the flour, sugar, baking powder, soda, and salt—all whisked together in that large bowl. Then, make a little dip right in the center. That’s where the magic starts!
In your medium bowl, you’ll whisk up the egg, then add your wet team: the oil and buttermilk. Mix that up until it’s happy, then gently stir in your green food coloring until you get that perfect shade of emerald. I usually start with less and add more, aiming for a bright but not offensively neon color!
Mixing the Batter: The Key to Tender St. Patrick’s Day Pancakes
This step is non-negotiable if you want tender pancakes! You need to pour all those lovely wet ingredients right into the ‘well’ you made in the dry mix. Now, use a spoon or spatula and gently combine everything. And when I say gently, I mean it—mix only until the dry streaks just disappear. Seriously, don’t over-mix! Lumps are your friends here; they mean you haven’t developed the gluten too much, which keeps your pancakes soft and light, not tough and chewy.
Cooking Tips for Vibrant Green St. Patrick’s Day Pancakes
Before pouring, get your griddle or pan heated up to about 250 degrees F and give it a light coating of oil. We want gentle, even heat. If the pan is too hot when you pour your first batch of St. Patrick’s Day Pancakes, they’ll brown too fast before the inside cooks, and boom—you lose that brilliant green color! Cook them until the edges look nice and dry and you see bubbles popping all over the surface. That’s your cue to flip them over. Once you flip, they cook super fast on the second side!
When they look done, slide them onto a plate. If you want to keep them warm while you finish the batch, just pop them on a baking sheet in a very low oven (around 200F). For more fun pancake ideas that work for any holiday, you can always browse my collection of holiday pancakes and waffles!
Festive Pancake Decorations and Serving Suggestions
We’ve got the vibrant green color locked down, but presentation is where we really lean into the St. Patrick’s Day spirit! Making these St. Patrick’s Day Pancakes look as fun as they taste is half the battle. It’s so easy to take this simple breakfast and turn it into the centerpiece of your celebration.
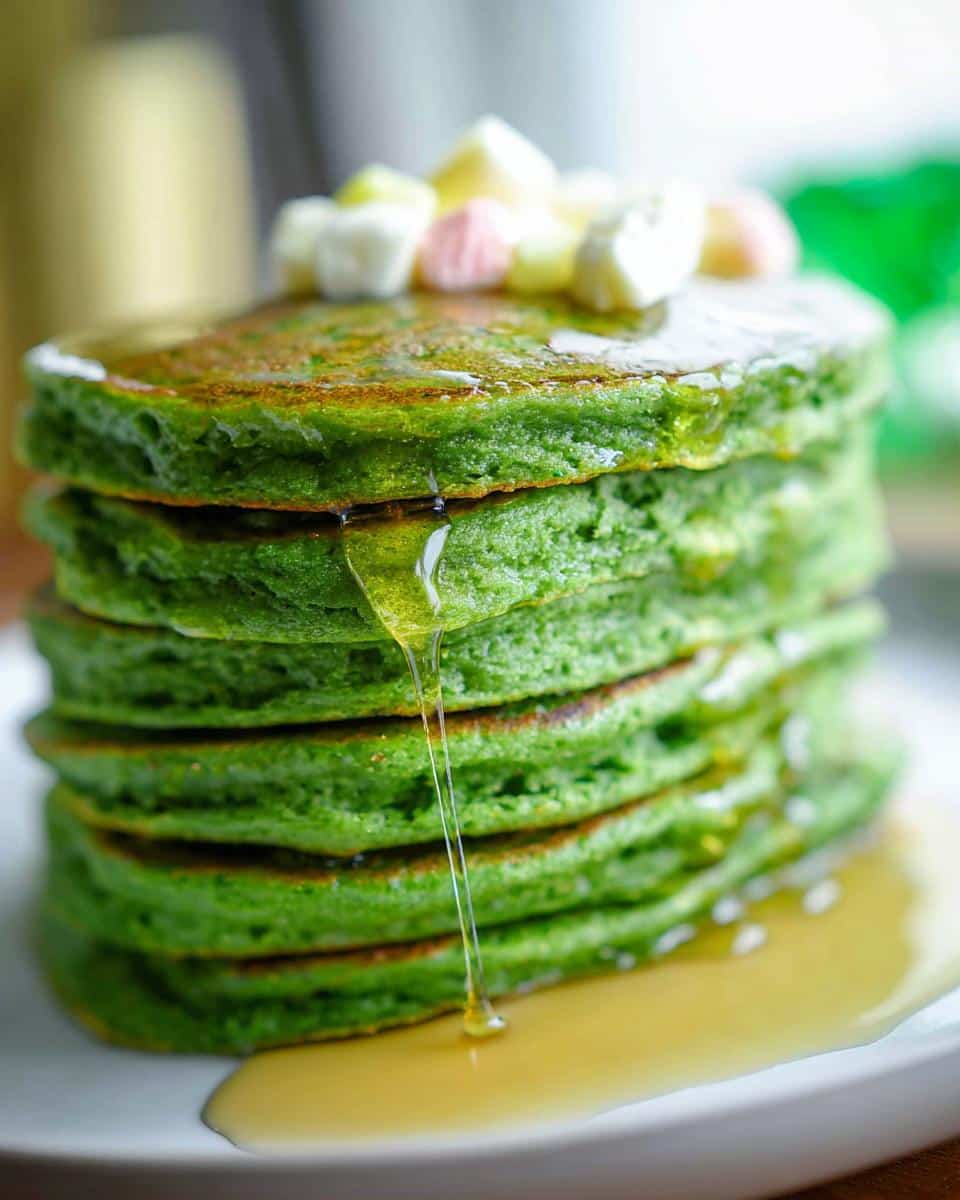
Forget boring syrup drizzles. Think layers of glorious green! I love stacking three pancakes high, maybe slightly offset, for that immediate ‘wow’ factor. Then, we need toppings. You can take simple whipped cream and tint it with a tiny drop of green coloring—it looks just like soft clouds or even shamrocks if you’re brave!
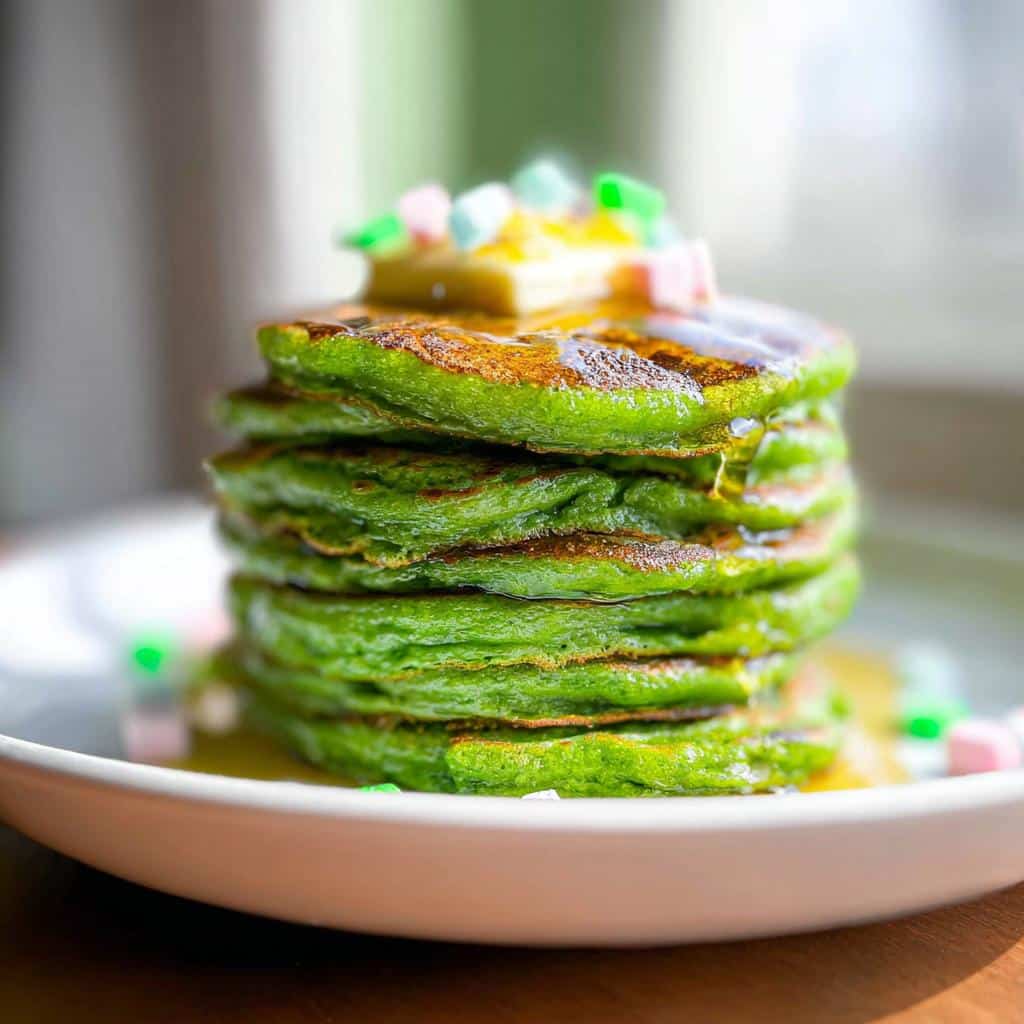
If you have any fun sprinkles lying around, pull them out! I keep a small container of rainbow sprinkles specifically for holidays, but for St. Paddy’s Day, I toss them with a tiny bit of green sugar before sprinkling them all over the top. It instantly elevates these into one of the best St. Patrick’s Day Food Ideas Party options!
To round out a truly green morning spread, consider adding some other easy green foods for party snacks nearby. Think about slicing up some green grapes or maybe even serving some avocado toast on the side for some healthy balance among all that deliciousness. If you’re looking for other sweet holiday bites that come together quickly, you have to try my recipe for my sweet marshmallow popcorn mix—it makes a fun, colorful addition to any holiday table!
And of course, traditional maple syrup is always welcome, but have you considered mixing a tiny bit of mint extract into your butter before melting it? That small flavor burst with the sweet pancakes is just heavenly for St. Patrick’s Day.
Tips for Success with Your St. Patrick’s Day Pancakes
I’ve made this recipe probably fifty times now, and even I slip up occasionally if I’m not paying attention! When you’re working with food coloring and baking soda, a few little adjustments can make all the difference between a perfect, vibrant stack and a slightly muddy looking one. These troubleshooting tips are the little nuggets of wisdom I scooped up along the way.
Here are the things I always double-check to make sure the batch turns out perfect every time:
- Control That Heat: This is my number one rule! If your pan is too hot, those delicious green batters will start browning immediately, and frankly, brown pancakes just don’t scream ‘St. Patrick’s Day.’ Keep your temperature modest—think medium-low to low. You want them to cook slowly enough for the inside to set and for that green to shine through.
- Don’t Fear the Lumps: I know you want smooth batter, but I’m telling you, stop mixing when you still see a few little flour streaks. Over-mixing is the fastest way to create tough, rubbery pancakes. That lumpy texture is actually your sign that they are going to be wonderfully tender and light on the inside once cooked.
- The Buttermilk Thickness Check: If you used the vinegar/milk substitute for buttermilk, let that mixture really sit for the full five minutes. If it hasn’t visibly thickened a bit, it won’t react properly with the baking soda. If it looks too watery when you blend it with the egg and oil, your resulting pancake might be flatter than we want.
- Color Adjustment Timing: When should you add the coloring? Not right before pouring! Add it when you mix the wet ingredients and let it sit in that buttermilk mixture for a minute or two before combining it with the dry ingredients. This lets the color distribute evenly through the liquid, so you aren’t scrambling to fix the color right when you should be pouring batter.
If you want to learn a bit more about where a lot of my love for home cooking comes from, you can read all about my journey and my family’s influence over at my ‘About Me’ page. Happy cooking, friends!
Storage and Reheating St. Patrick’s Day Pancakes
Don’t worry if you totally over-flipped and ended up with a giant stack of these gorgeous green beauties! Leftovers are one of the best parts of a holiday breakfast, right? Luckily, St. Patrick’s Day Pancakes freeze like a dream, making future mornings super easy. We want to keep that fluffy texture, though, so you can’t just toss them in a bag and call it a day.
For short-term storage, say if you have leftovers for the next day, just pop them into an airtight container in the fridge. They’ll keep well for about three days, though honestly, they are best eaten within 24 hours. When you’re ready to eat them again, I highly recommend reheating them in a dry skillet over medium-low heat for a minute on each side. This wakes up the texture without drying them out.
If you need to store them longer—maybe you’re making them ahead for next year, ha!—freezing is the way to go. Here’s my trick for perfectly preserved St. Patrick’s Day Pancakes:
- Cool Completely: You must let every single pancake cool down completely on a wire rack first. If you stack them warm, they will steam and get soggy nightmares.
- The Parchment Barrier: Place a square of parchment paper (or even wax paper) between each pancake. This stops them from sticking together into one giant green hockey puck!
- Seal Tight: Stack the papers-separated pancakes and wrap the whole stack tightly in plastic wrap, then tuck that into a freezer-safe bag. They should last beautifully for about two months.
When you’re ready to reheat those frozen St. Patrick’s Day Pancakes, forget the microwave unless you absolutely need them fast! The best way to bring back that soft, fresh texture is to pop the stack (with the parchment paper still between them, if you can manage it!) either right onto a baking sheet in a 350°F oven for about 10 minutes, or straight into the toaster slots for a quick crisp finish. It warms them all the way through without making them tough!
Frequently Asked Questions About Green Pancakes
I know you might have a few lingering questions—that’s what happens when you introduce bright green food into breakfast! Don’t worry, I’ve collected some of the things folks ask me most often about making these fun stacks. We want your morning to be smooth sailing, whether you’re feeding a big crowd or just making a special Saint Patrick Day food treat for the family.
Can I make these St Patrick’s Day Pancakes without buttermilk?
Absolutely, you can! While the buttermilk really is the best for that fluffy texture because of how it reacts with the baking soda, I gave a totally foolproof substitute in the notes. If you’re in a pinch, you can mix 1 1/2 tablespoons of white vinegar or lemon juice into regular milk until you have 1 1/2 cups total. Let it sit for about five minutes, and it thickens up just enough to act like buttermilk. It works perfectly for these green pancakes!
What is the best way to serve these as Irish Party Food?
To really make these the star of your Irish Party Food spread, think about presentation! Since pancakes are flat, you can make fun shapes or use them as components for other things. For example, instead of one big stack, you could cut the cooked pancakes into shamrock shapes using a cookie cutter—it’s fun for the kids, perfect for St Patrick’s Day For Kids Treats!
Another idea? Create mini pancake skewers! Alternate small, round green pancakes with colorful fruit like strawberries or bananas, and maybe even pieces of green melon if you’re going all-in on the green snacks theme. A little drizzle of chocolate or caramel topping here and there, and you’ve got an impressive-looking breakfast bar that everyone will love. People always ask for my recipes when they see them looking this festive!
If you try them and have more questions, feel free to reach out through my dedicated contact page here: I love hearing from you!
Share Your St. Patrick’s Day Pancakes Creations
Baking, for me, is always so much better when I know you all are enjoying it! My kitchen in Asheville feels connected to yours when I see pictures of the food we’ve made together. These St. Patrick’s Day Pancakes are so cheerful, and I absolutely live to see how you decorate yours!
Once you’ve flipped your last perfect green pancake, I would be thrilled if you’d take a snap of your stack! Tag me on social media—it seriously makes my day to see the love you put into your holiday mornings. Don’t forget to come back here and rate the recipe with stars. Your feedback helps other home cooks feel confident trying out fun holiday meals like this one.
And if for some reason your pancakes ended up looking a little more khaki than kelly green, that’s okay too! Every single attempt is part of the journey. As I always say, cooking isn’t about perfection, it’s about the love that brings it to the plate. If you have any concerns or just want to share a funny kitchen story, you can always check out the necessary legal details on my disclaimer page, but mostly, just share the joy!
I can’t wait to see your green creations. Happy St. Paddy’s Day!
St. Patrick’s Day Pancakes
Ingredients
Equipment
Method
- Combine dry ingredients (flour, sugar, baking powder, baking soda, and salt) in a large bowl. Make a deep dip in the middle of the dry ingredients.
- Beat the egg in a medium bowl. Add the oil and buttermilk and stir well. Stir in green food coloring.
- Pour the wet mixture into the well of dry ingredients inside the large bowl and combine thoroughly.
- Mix the batter only until just combined. The batter will be lumpy, which is correct for pancakes.
- Heat your frying pan or griddle to about 250F degrees. Lightly grease with additional vegetable oil, then use a 1/4 cup measuring cup to drop batter onto the pan.
- When edges begin to look dry and bubbly, flip them over.
- Serve hot with butter and syrup. You can also top with whipped cream, sprinkles, and Lucky Charms for a holiday look.