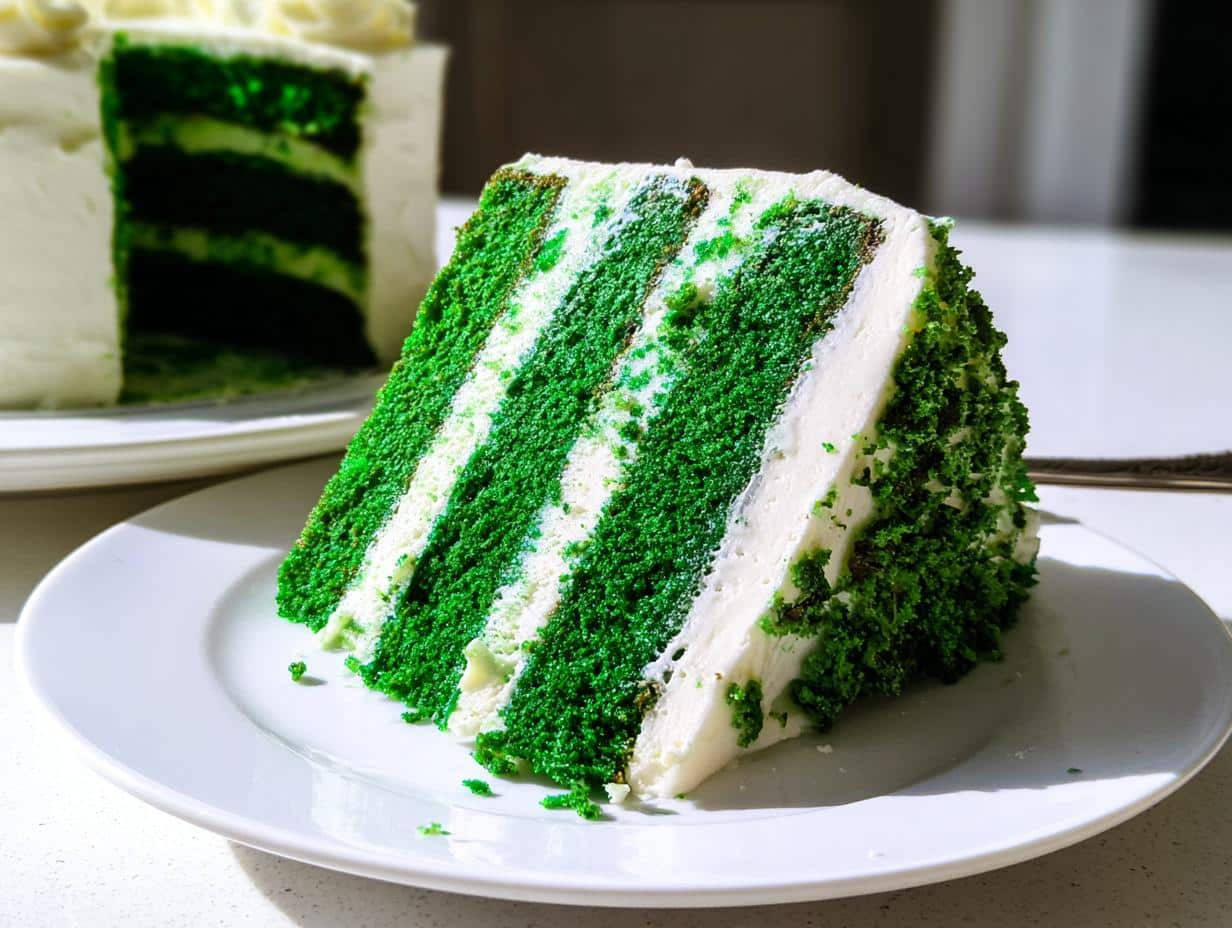
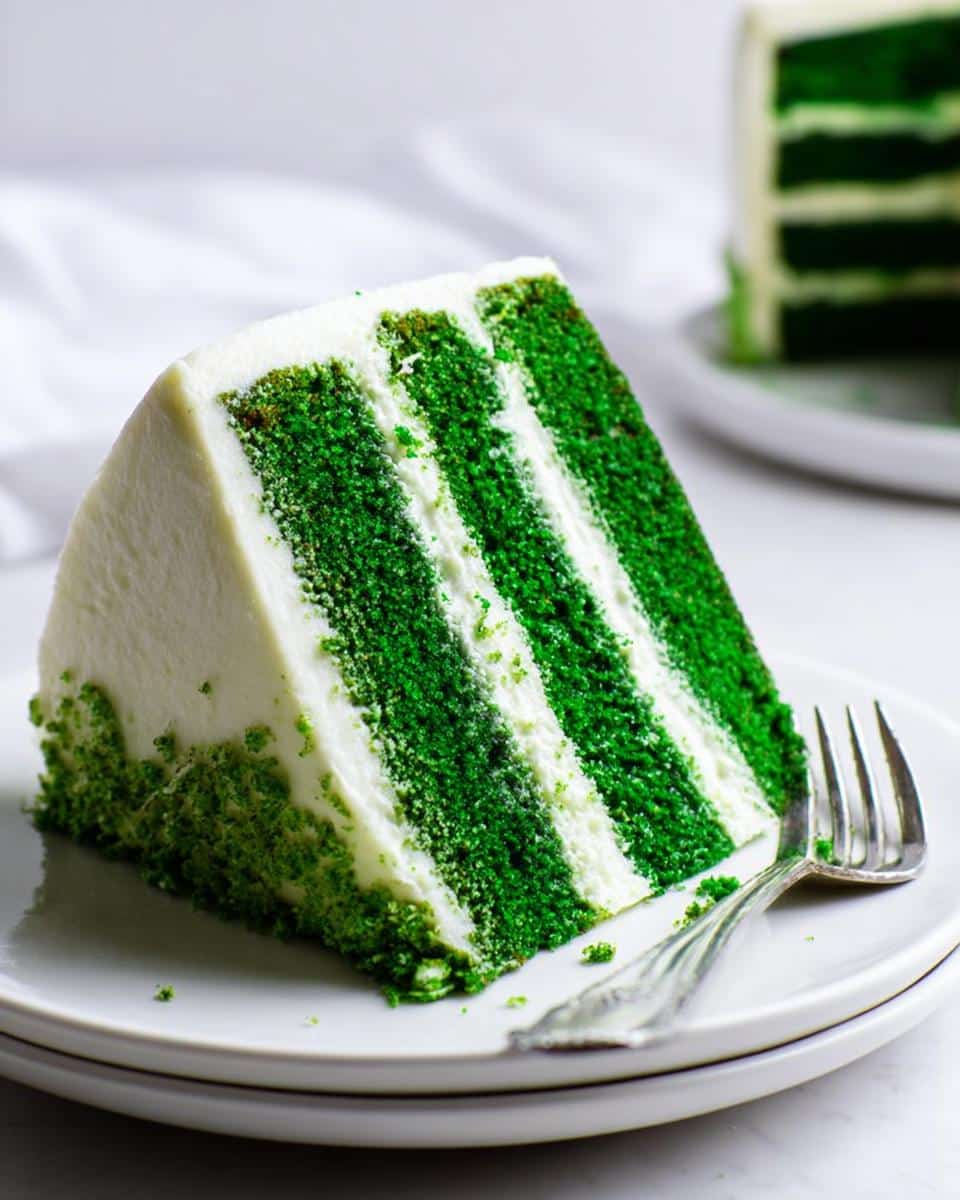
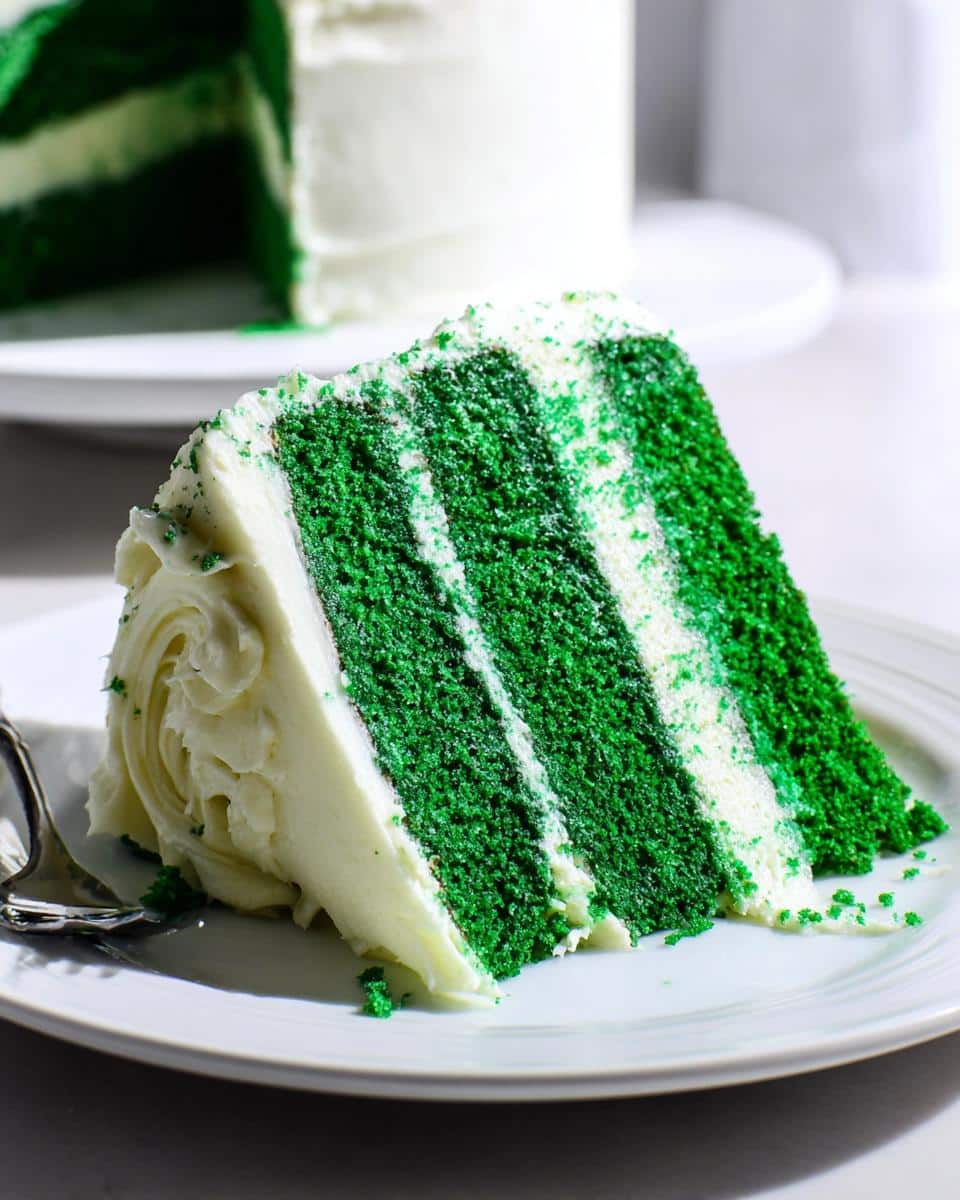
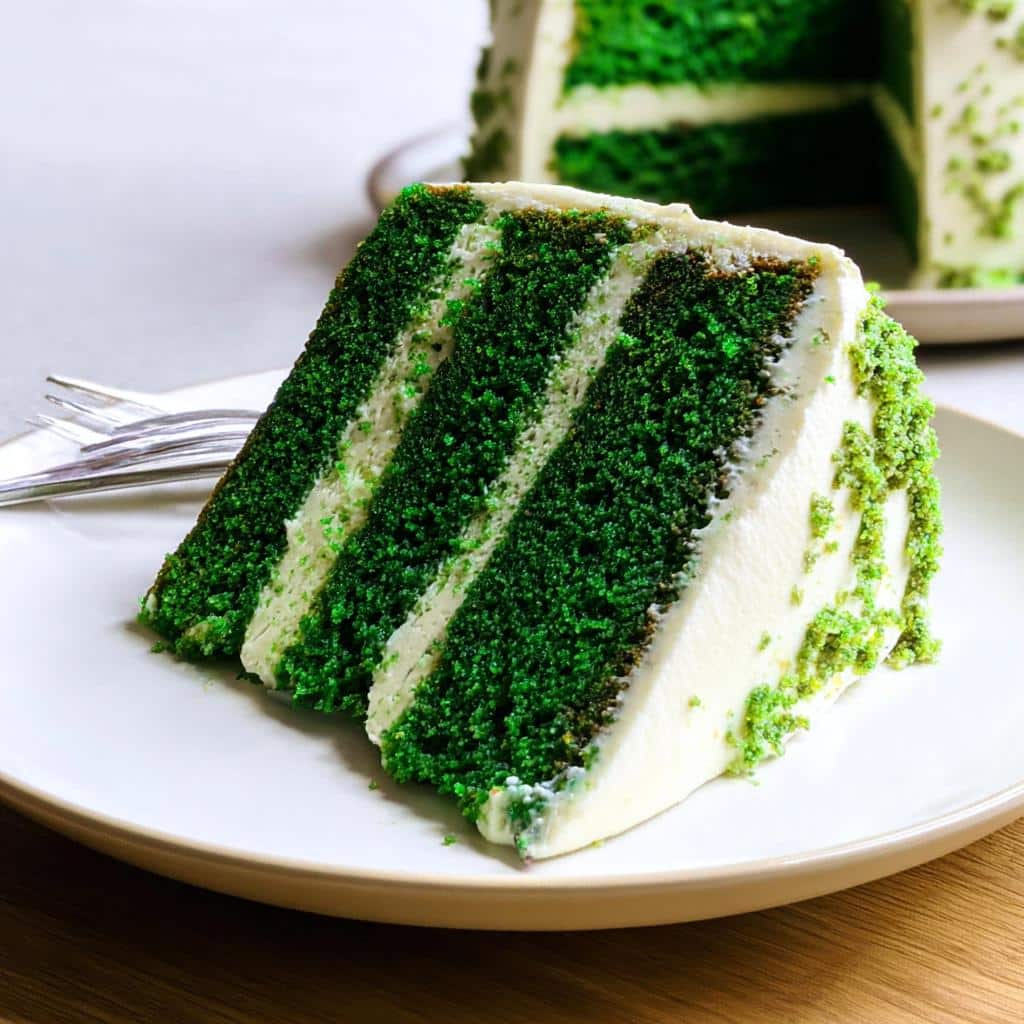
Listen, are you looking for that show-stopping dessert that just screams ‘celebration’? Because I’ve cracked the code! This Green Velvet Cake isn’t just a standard cake dyed green; it has that perfect, delicate crumb you dream about, combined with a rich, tangy cream cheese frosting that ties it all together. As a Registered Dietitian, I had to make sure we balanced the fun factor with flavor integrity, and trust me, this recipe hits the mark beautifully. It’s visually stunning, surprisingly easy for a showstopper, and guaranteed to be the life of any party—especially those great holiday baking moments!
Why This Green Velvet Cake Recipe Works for Your Next Celebration
If you’re trying to nail that perfect vibe for your next big get-together, this cake is your secret weapon. It delivers that wow factor without needing you to be a full-time pastry chef. Seriously, it’s the ideal centerpiece whether you’re hunting for great St Patrick Party Food or just need a colorful dessert.
- It’s visually striking—that vibrant color is exactly what you want for a festive display.
- It’s incredibly reliable, making it perfect for any event where you need foolproof results.
- This is the ultimate Irish Party Food staple that tastes way better than it looks!
Festive Color, Classic Taste
We aren’t messing around with flavor here. The color is purely for fun—we keep that beautiful, subtle cocoa note that defines true velvet cake. It’s indulgent, tender, and everything you expect from a classic comfort dessert, just dressed up for the occasion.
Simple Steps for Perfect Green Velvet Cake Layers
Don’t let the layers scare you! Mixing is straightforward, and since we use oil instead of just butter, the batter stays wonderfully smooth. This makes it so simple to whip up an impressive centerpiece for any Green Foods For Party theme.
Gathering Ingredients for Your Green Velvet Cake
We need specific things for a cake this special, but honestly, most of this is stuff you might already have! Getting the measurements right is key to that perfect, tender crumb. Since I’m a dietitian, I always double-check my ratios, and you should too, especially when dealing with the wet ingredients!
Ingredients for the Cake Layers
For the actual cake layers, you’ll need 2 1/2 cups of all-purpose flour combined with 2 1/2 teaspoons of cocoa powder, 1 teaspoon of baking soda, and 1/2 teaspoon of salt mixed together. Then, get your sugar—that’s 1 1/2 cups of granulated sugar—mixed with 1 1/2 cups of vegetable oil, 3 eggs, 1 tablespoon plus 1 teaspoon of vanilla extract, and 1 teaspoon of white vinegar. Don’t forget the 1 cup of buttermilk and, of course, the 1 tablespoon of green food coloring that gives us that amazing hue!
Ingredients for the Cream Cheese Frosting
Now for the best part: the frosting! You absolutely must have your 3/4 cup of unsalted butter and 8 ounces of cream cheese softened completely—room temperature is non-negotiable for a smooth texture, folks. Beat those together with 2 teaspoons of vanilla extract and 1/4 teaspoon of salt. You’ll need between 4 and 4 1/2 cups of powdered sugar, added slowly. If it ends up too thick, just mix in 1 to 2 tablespoons of milk or heavy cream until it’s perfectly spreadable. A few green sprinkles on top make it party-ready!
Expert Tips for Perfect Green Velvet Cake Baking
Baking something this vibrant means you need a few little secrets so your Green Velvet Cake turns out stunning, not stained! Since I’m a dietitian, I worry about consistency, and trust me, a few simple adjustments make all the difference between a good cake and a great one. You want that velvety texture without any weird baking quirks!
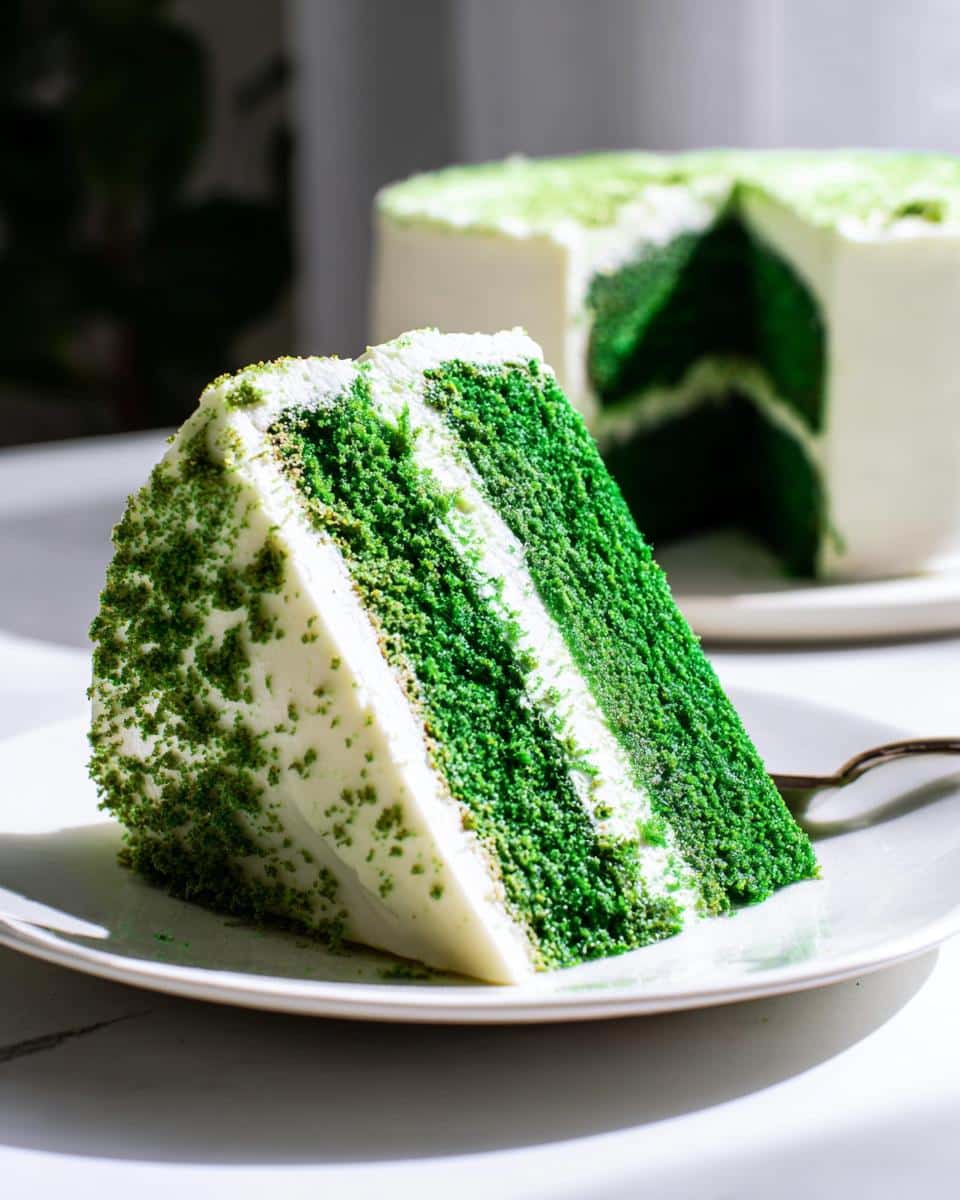
Achieving the Right Shade of Green
When it comes to getting that perfect look, skip the standard liquid food coloring bottles—they just add too much unwanted liquid. You really want to use gel food coloring if you can find it. Start with just a toothpick dip of the gel, mix it in really well, and then add more slowly until you hit that deep spring green. You can always add more color, but you can never take it out!
Preventing Domed Layers
Dealing with domes is the bane of layer cake bakers! Before you even put those pans in the oven, make sure your batter is divided *exactly* evenly between your pans; uneven amounts lead to uneven cooking. Also, keep your oven door shut tight while they bake for the first 25 minutes. Peeking too early lets the heat rush out, which can cause those layers to sink right in the middle. We want flat tops for easy frosting!
If you read anything else about baking cake trouble-shooting, check out my general advice right here—it covers a lot of common kitchen issues!
Step-by-Step Instructions to Make Green Velvet Cake
Alright, let’s get down to business! Making this gorgeous Green Velvet Cake is a process, but I promise it flows beautifully, especially if you prep your pans first. Remember, we are aiming for tender, not tough, so we need to be mindful when mixing. Get your 3 (8-inch) round cake pans ready to go before you even touch the mixer!
Preparing the Cake Batter for Green Velvet Cake
First things first: Preheat your oven to 350 degrees. Then, treat those pans right! Spray them well, cut out parchment circles for the bottoms, and spray the parchment too. It’s insurance against sticking that I would never skip! In a small bowl, just whisk together your dry stuff: the flour, cocoa powder, baking soda, and salt. Set that aside.
In your big bowl, turn that electric mixer to medium and beat the sugar, oil, eggs, vanilla, and vinegar until it looks super smooth—about two minutes of whisking. Now, keep the mixer running on low speed. Add your dry mixture in bits, beating only until it barely comes together. Stop! Scrape the bowl sides down, and then slowly add the buttermilk followed by that essential tablespoon of green food coloring. Give it a final fold with a spatula to ensure all that flour from the bottom is mixed in. Seriously, don’t overmix this part!
Baking and Cooling the Layers
Once the batter is that perfect shade of green, divide it evenly between your three prepared pans. Pop them in the 350-degree oven and plan for 30 to 40 minutes. You’re looking for a cake tester or toothpick inserted right in the center to come out clean—that means it’s done!
Resist the urge to touch them immediately! Let those layers hang out in their pans on a wire rack for about 20 minutes. Once that time is up, run a thin knife around the edges and gently flip them out onto the wire racks to cool completely. You cannot frost a warm cake, trust me on this; it’ll be a melted, sloppy mess. We need them totally cool before proceeding!
Making and Applying the Cream Cheese Frosting
Time for the magic topping! Make sure your 3/4 cup butter and 8 ounces of cream cheese are perfectly room temperature—if they’re too cold, your frosting will be lumpy. Beat them smooth first, then add your vanilla and salt. Keep the mixer on low and slowly add 4 cups of powdered sugar until it’s incorporated. Once that’s mixed, crank it up to medium and beat it until it’s fluffy. If you need it thinner to spread, just drizzle in a tablespoon or two of milk; if it’s too loose, add a bit more sugar. It should hold its shape nicely!
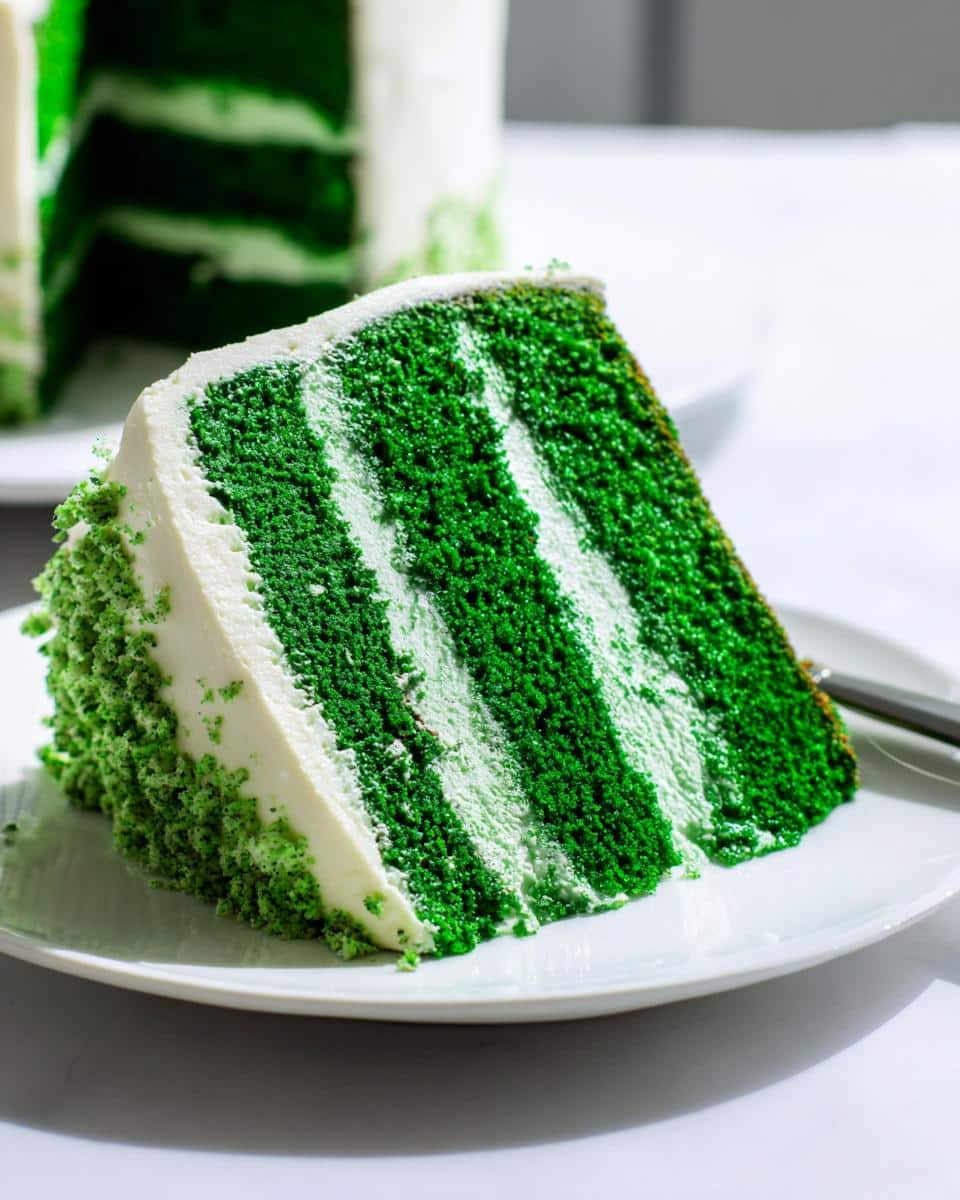
When your layers are cool, level them if needed. Put down the first layer on your serving plate, spread on a generous coat of that tangy frosting. Stack the next layer, frost it, top with the final layer, and then use your remaining frosting to cover the top and sides completely. If you’re baking this for one of those fun St Patrick’s Day For Kids Treats, toss some green sprinkles on top!
Equipment Needed for Your Green Velvet Cake Project
You don’t need a professional bakery setup for this beauty, but having the right gear makes the process so much smoother! Before you start mixing, grab these essentials so you’re ready to go. We’re keeping it simple, but effective, to ensure those layers bake out perfectly for your next big event or Irish Appetizers spread.
You will definitely need three 8-inch round cake pans—this ratio works best for the batter quantity so you get nice, even layers. An electric mixer is a lifesaver for creaming that butter and cream cheese properly, so dust yours off! Lastly, have a sturdy wire rack on hand for cooling everything down before we even think about frosting.
Serving Suggestions for This St Patrick Day Food
So, you’ve got this incredible Green Velvet Cake cooling down—now what about the rest of your menu? If you are planning a big bash centered around St Patrick’s Day Food Ideas Party, you need lighter fare to set the stage for this amazing dessert. Think about pairing it with some savory, simple Irish Appetizers earlier in the day so no one gets too full!
I love serving a small slice alongside a light Irish coffee or maybe just a cup of strong black tea. It cuts through the richness of the cream cheese frosting beautifully. For kids looking for cute St Patrick’s Day For Kids Treats earlier in the day, small squares of this cake work wonders!
Storage and Reheating Instructions for Green Velvet Cake
This beautiful Green Velvet Cake keeps really well, which is great because you might want leftovers! If you have any cake left after the party, just cover it tightly—I use plastic wrap followed by foil if I’m freezing it—and pop it in the fridge. It stays nice and moist in there for up to 3 days. If you need longer storage, which happens when you bake ahead, wrap it super tight and stick it in the freezer. It’s good for up to two months frozen, and honestly, it tastes almost as good thawed!
Frequently Asked Questions About Green Velvet Cake
I get so many questions after people try this recipe for the first time, especially when it’s their first time making a layered cake for a big holiday! Let’s clear up a few things so your next batch of Green Velvet Cake is absolutely perfect, whether you’re stocking up on St Patrick’s Day Appetizer Ideas or just baking for fun.
Can I make this Green Velvet Cake recipe without cocoa powder?
You technically *can*, but I wouldn’t recommend it if you want that classic velvet flavor! The cocoa powder in red velvet—and therefore green velvet—isn’t there to make it chocolatey, not really. It reacts with the buttermilk and vinegar slightly, which helps boost the texture and deepens the overall flavor profile. If you leave it out, you end up with a plainer vanilla cake. It will still be great, but you lose that signature velvet richness!
What is the best way to transport this St Patrick’s Day Appetizer Ideas cake?
Transportation is always stressful when you have a beautifully frosted cake! My best tip is to chill the finished, frosted cake in the fridge for at least an hour before you move it. This hardens the cream cheese frosting so it’s much less likely to smear. Drive carefully, of course, but the biggest secret is to place the cake box on the floor of the passenger side—it’s the most level surface in most cars!
Are there good Green Snacks alternatives for kids if they don’t like cake?
If the little ones aren’t big cake fans, you can totally pivot! If you enjoyed making this, you might also love my recipe for festive Green Snacks popcorn—it’s quick, customizable, and you can use the same gel coloring without adding much moisture. It’s a much lighter option for a big St Patrick Party Food spread!
Nutritional Estimates for Green Velvet Cake
Now, I know many of you are watching your macros—and trust me, I am too! Since I approach this cake as a delicious celebration treat, the full nutritional breakdown for rich velvet cake layers and cream cheese frosting can get a little hefty. The estimates below are based on general ingredient averages, so please remember these are exactly that: estimates!
When I calculate nutrition for these celebratory desserts, I always use a standard serving size of 1/12th of the entire cake. Keep in mind that ingredient brands and the exact amount of powdered sugar you use in the frosting will shift these numbers! For instance, using real butter instead of lower-fat cream cheese definitely impacts the fat content, but it makes the frosting taste infinitely better, so it’s a trade-off I’m absolutely willing to make.
Here is a general, estimated breakdown per serving (1 slice):
- Calories: [Estimate Here]
- Total Fat: [Estimate Here]
- Saturated Fat: [Estimate Here]
- Carbohydrates: [Estimate Here]
- Sugar: [Estimate Here]
- Protein: [Estimate Here]
If you are interested in how to lighten up a classic cream cheese frosting without losing that essential tang, let me know in the comments! Sometimes using Greek yogurt instead of some of the butter can make a difference, though it seriously changes the texture, so it’s a project for another day!
Green Velvet Cake
Ingredients
Equipment
Method
- Preheat the oven to 350 degrees. Spray 3 (8-inch) round cake pans with cooking spray. Line the bottom of the pans with parchment, spray the parchment, and set pans aside.
- Stir together the flour, cocoa powder, baking soda, and salt in a small bowl. Set aside.
- Combine the sugar, oil, eggs, vanilla, and vinegar in a large bowl. Beat with an electric mixer set to medium until very smooth, about 2 minutes. Scrape down the sides and bottom of the bowl as needed.
- With the mixer on low, gradually add the dry ingredients and beat until just incorporated. Scrape down the sides and bottom of the bowl.
- With the mixer on low, beat in the buttermilk, then the food coloring. Use a rubber spatula to mix the batter a few times, scraping up from the bottom to ensure the flour is totally mixed in.
- Divide the batter evenly between the prepared cake pans and bake 30 to 40 minutes, until a cake tester inserted into the center of the cake comes out clean.
- Set the pans on a wire rack to cool for 20 minutes, then run a knife around the edge of each cake layer. Gently invert each cake layer onto wire racks to cool completely before frosting.
- Beat the butter and cream cheese in a medium mixing bowl until smooth.
- Beat in the vanilla and salt. With the mixer on low, gradually beat in 4 cups of powdered sugar.
- Once all the sugar is incorporated, turn the mixer to medium and beat until the frosting is smooth. If the frosting is too thick, beat in a little milk. If it is too thin, beat in more powdered sugar.
- Use a long serrated knife to trim the cake layers if they have domed. Place one cake layer on a cake stand or cardboard cake circle and spread a layer of frosting on top.
- Top with a second cake layer, more frosting, and then the third layer.
- Frost the cake with the remaining frosting and decorate as desired. Serve.