
There are some flavor pairings in this world that just feel destined to be together, aren’t there? Think about salt and caramel, or dark berries and cream. Well, for me, few combinations speak to my historian’s heart quite like the meeting of deep, dark chocolate and sparkling cool mint. As a culinary historian, I spend my time tracing why certain tastes stick around, and this one has certainly lasted the test of time!
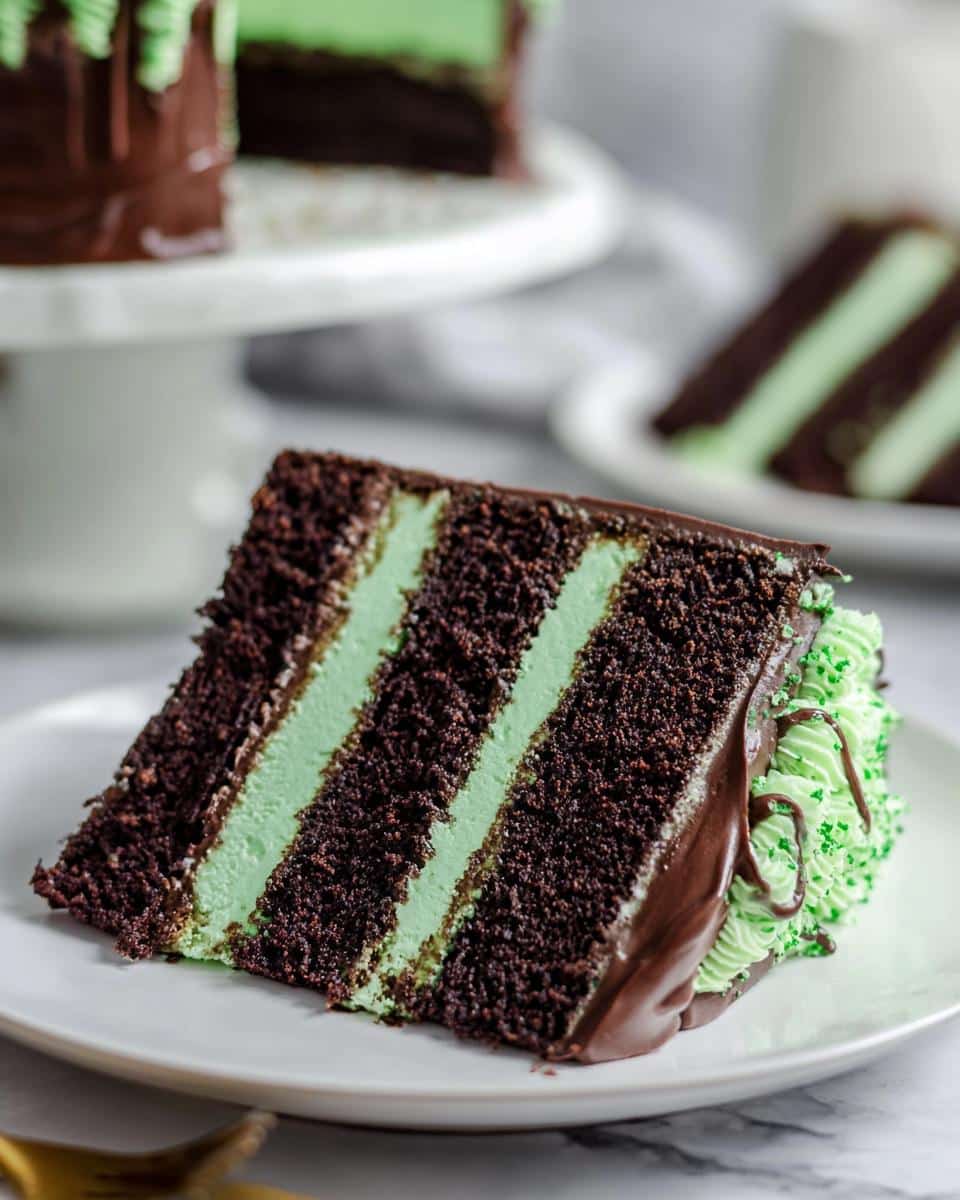
Today, we’re making a truly spectacular Chocolate Mint Cake. It’s rich, it’s celebratory, and honestly, it makes any gathering feel just a touch more special. We’re ditching the overly artificial flavors and leaning into a classic, decadent pairing that I know you’re going to cherish for years to come. This cake is the perfect centerpiece for everything from a birthday bash to just needing a truly stunning end to a regular Tuesday dinner.
If you’re curious about the kind of history that goes into my cooking philosophy, you can always read a bit more about my journey over at the About Page. But right now, let’s focus on getting that perfect, moist crumb. I promise, this recipe is deeply satisfying.
Why This Chocolate Mint Cake Recipe Stands Out
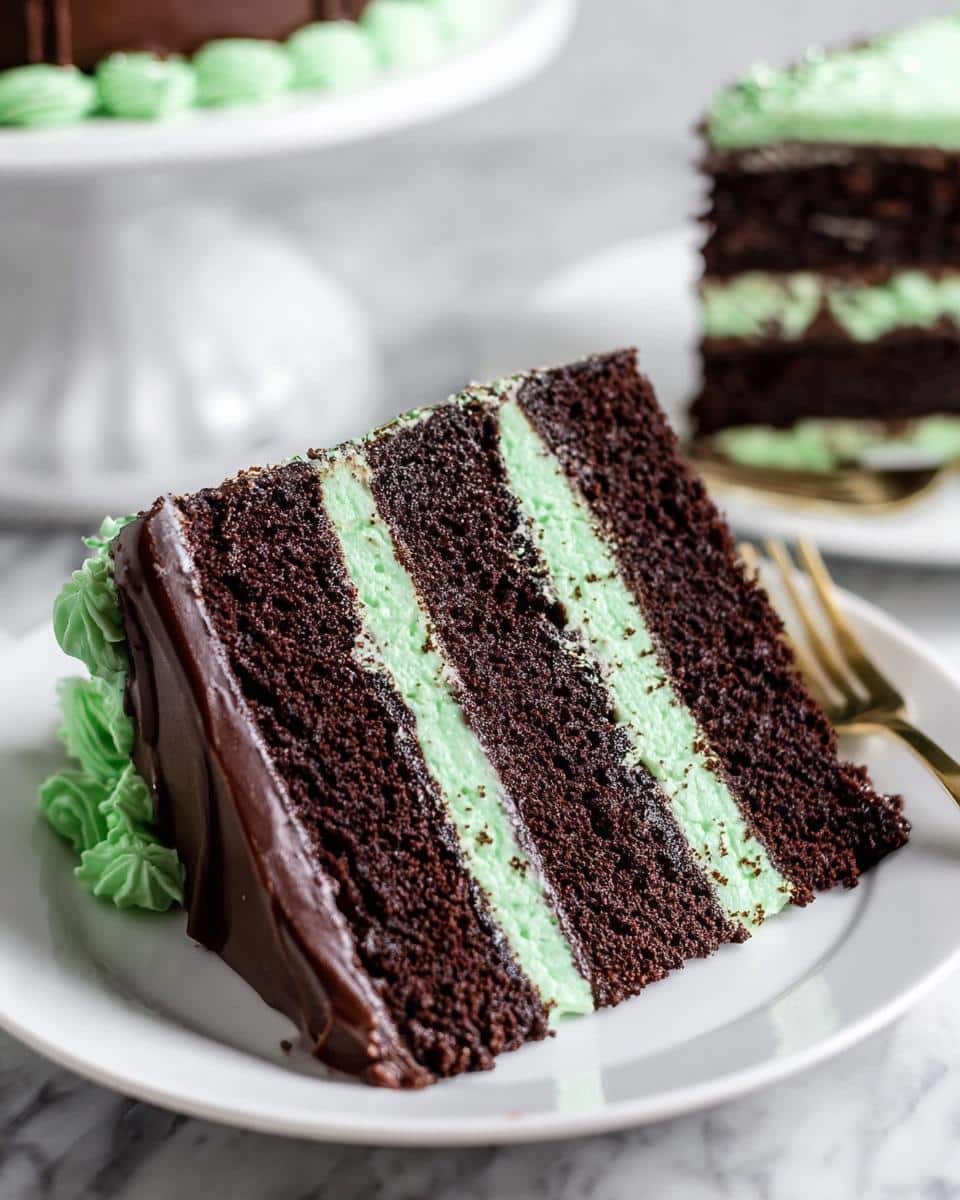
Look, there are chocolate cakes, and then there are cakes that sing! What makes this Chocolate Mint Cake recipe truly special is that delicate dance between the deep, almost smoky cocoa and that bright, clean kiss of pure mint. It’s a pairing designed for celebration, not just for eating.
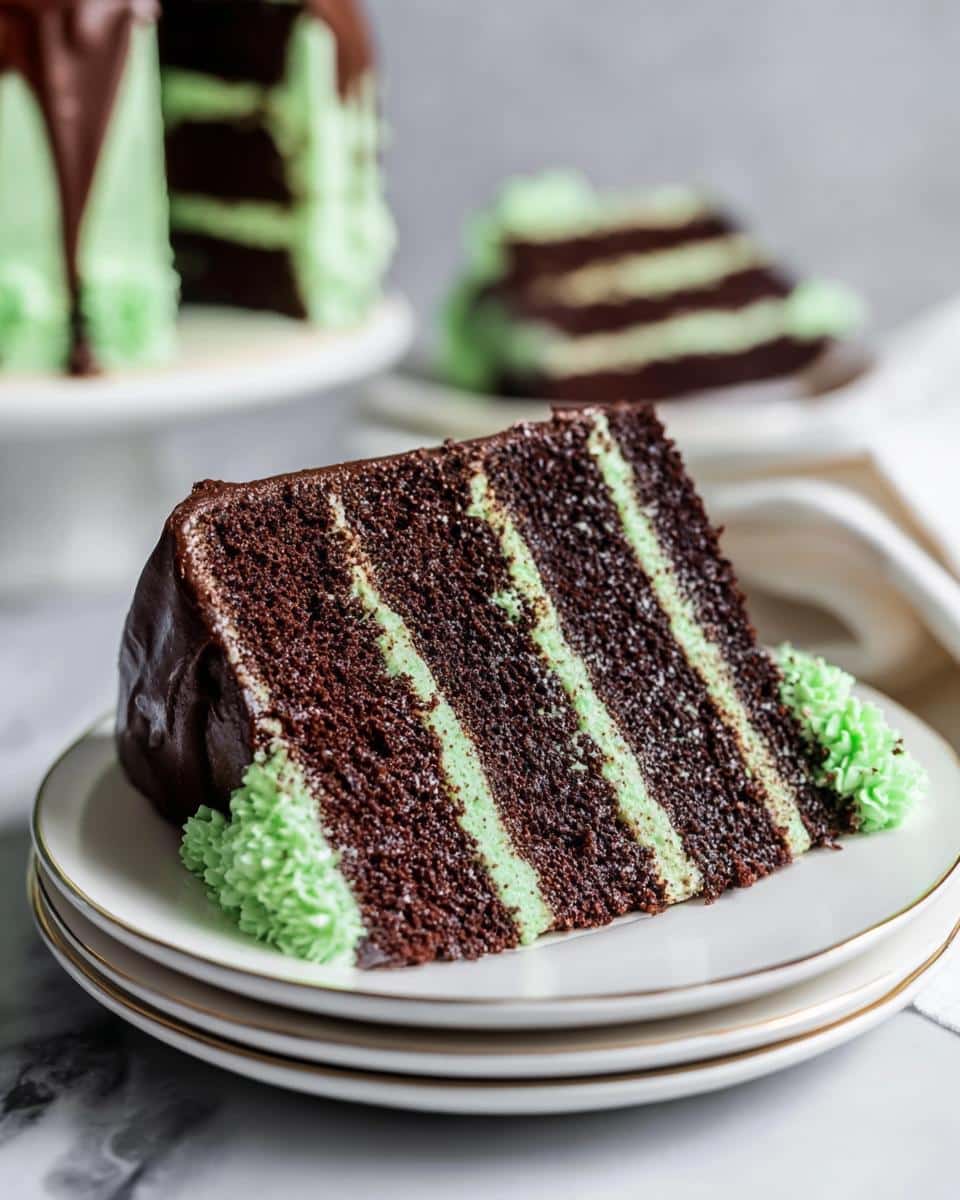
You’ll find that this structure is incredibly reliable, making layering simple even if you’re new to stacked cakes. It just holds together beautifully!
- Achieves a naturally dense yet tender chocolate crumb.
- The mint frosting delivers refreshing coolness without tasting toothpaste-y.
- It’s a showstopper for any occasion, especially when you want that festive green shade!
This is the kind of reliable recipe you’ll want to bookmark for all those future sweet needs. You can see more simple-yet-stunning easy dessert recipes over here, but trust me, stick with this one!
A Flavor Profile Rooted in Tradition
People have been pairing chocolate and mint for ages; it’s not a new trick! It harkens back to those old-fashioned candies we used to get, that immediate cooling sensation that cuts right through the richness of good dark chocolate. It’s that sophisticated contrast that keeps people coming back for a second slice every single time. It truly feels timeless when you taste it.
Perfect for Your Next St Patrick Day Food Gathering
If you’re thinking about St Patrick Day food, this is your absolute winner. While some folks look for heavy Irish Party Food, I say you bring the party flavor with dessert! A quick drop of green coloring—and suddenly, your exquisite Chocolate Mint Cake becomes the best looking green snack on the table. It’s festive, easy to serve, and wildly popular with everyone, kids included!
Gathering Ingredients for Your Chocolate Mint Cake
Before we dive into the actual assembly—and trust me, the mixing is half the fun with this one—we need to gather our supplies. Baking, especially when you are trying to achieve rich color and perfect structure, relies entirely on having the right things measured out perfectly. I always tell folks that grabbing everything first, what we call ‘mise en place,’ saves you so much stress later, especially when dealing with batters that move quickly!
One thing I’ve learned from years of testing classic recipes is temperature matters! For the best emulsification in the cake, try to use room temperature eggs and buttermilk if you can manage it. It just helps everything blend smoother when those wet ingredients meet the fats.
Cake Ingredients
These dry goods and liquids set the foundation for that incredibly dark, moist cake base. Don’t skimp on the cocoa here; a good Dutch process makes all the difference in that deep chocolate hue we are aiming for!
- 2 2/3 cups all-purpose flour (that’s about 330 g)
- 2 cups granulated sugar (400 g)
- 1 cup light brown sugar, firmly packed (200 g)
- 1 cup Dutch cocoa powder (112 g plus 2 extra Tablespoons for good measure!)
- 2 1/4 teaspoons baking soda
- 1 1/4 teaspoons salt
- 1 cup neutral cooking oil (I prefer avocado or canola, 240 ml)
- 3/4 cup unsalted butter, melted (170 g)
- 3 eggs, room temperature preferred
- 2 teaspoons vanilla extract
- 1 1/2 cups buttermilk, room temperature preferred (354 ml)
- 3/4 cup very hot/boiling coffee (If you absolutely can’t do coffee, you can use hot water instead, 177 ml)
Mint Frosting Ingredients
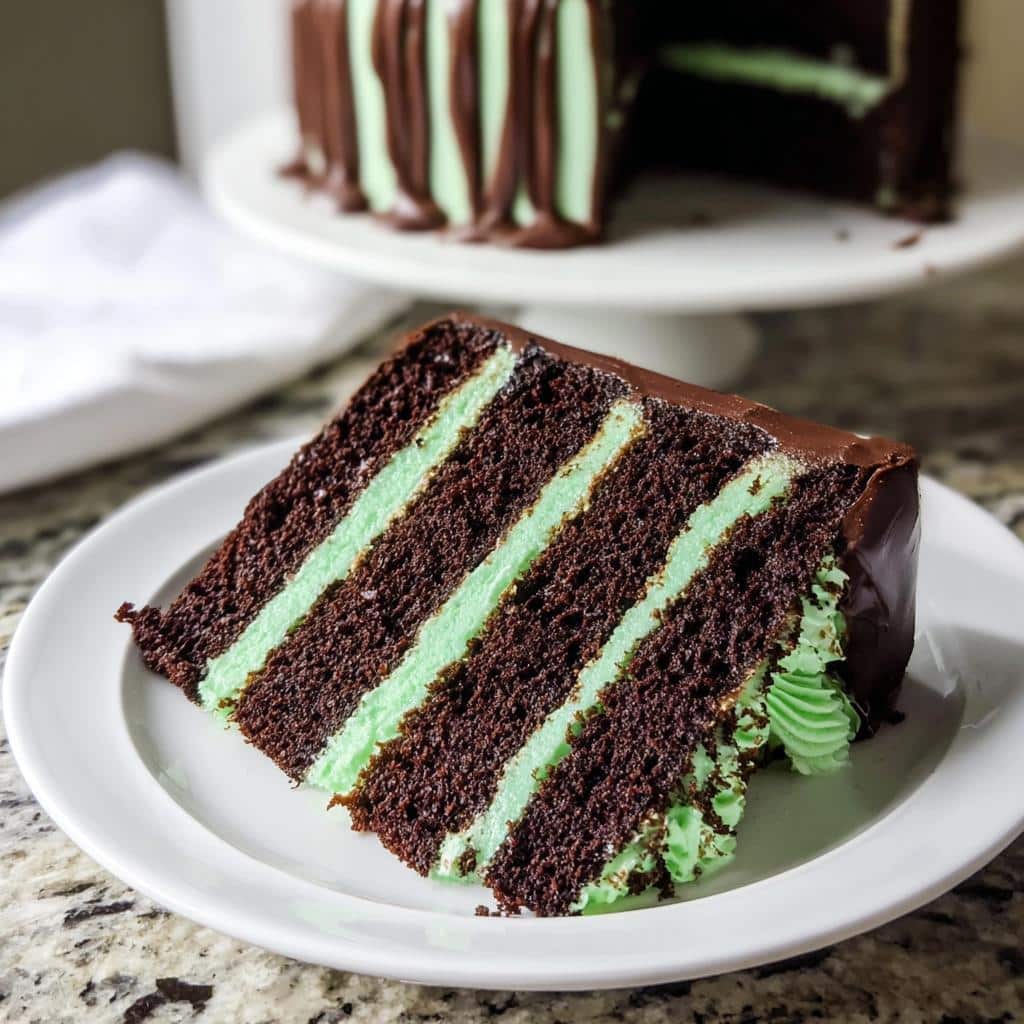
This frosting is going to be thick, luscious, and perfectly peppermint-y. Remember, you want your butter softened—not melted—so it can whip up light and airy instead of turning greasy. If you want that vibrant green from the photos, have your food coloring ready to go!
- 1 1/2 cups unsalted butter, softened (339 g)
- 6 cups powdered sugar (750 g)
- 2 teaspoons peppermint extract (this is where the real cool flavor comes from!)
- 1/2 teaspoon vanilla extract
- 1/4 teaspoon salt
- 1-4 Tablespoons heavy cream (we add this slowly for texture)
- Optional: Mint colored food coloring (like Americolor Mint) if you’re going for that party look.
Step-by-Step Instructions to Make the Chocolate Mint Cake
Now for the fun part! Getting this beautiful dark cake into the oven takes just a little bit of layering, but trust me, the payoff is huge. We are moving fast here, so make sure those pans are ready to go. We want to keep the momentum up once the dry ingredients meet the fats!
Preparing the Cake Layers
First things first: turn that oven on! You’ll want it humming at 350F (175C). Take your three 8” round pans, grease ’em up really well, dust them with flour, and don’t forget to line the bottoms with parchment paper—that’s your insurance policy! In a big bowl, whisk together all the major dry players: the flour, both sugars, the cocoa, baking soda, and salt until they look like one uniform, dusty pile.
Mixing the Chocolate Batter
Here’s where the magic starts getting liquid. Pour in your oil and your melted butter and just stir until you’ve moistened every speck of that flour mixture. It’s going to look super thick and almost pasty right now, which is exactly what we want! Next, beat in your eggs and that vanilla extract until it smooths out. Then, slowly drizzle in the room-temp buttermilk while mixing gently till it’s all combined. Finally, slow and steady, pour in that very hot coffee—or water—and stir until you reach that perfect, pourable batter. Remember to scrape down the sides and bottom of that bowl! You don’t want any dry pockets hiding.
Baking and Cooling
Divide that gorgeous batter evenly between your three prepared pans. Pop them onto the center rack and set your timer for 35 to 38 minutes. You’re looking for that classic sign: a toothpick coming out clean or with just a few moist crumbs attached. Once they’re done, let them cool inside the pans for 15 minutes exactly. Then, run a little knife around the edge, invert them onto a wire rack, and let them cool completely. Seriously, don’t frost them warm!
Creating the Refreshing Mint Frosting
While those cakes are cooling, whip up your frosting! Use your electric mixer to beat that softened butter until it’s light and fluffy—about two minutes. Now, slowly—and I mean *slowly*—add in that powdered sugar, one half-cup at a time, keeping the mixer on low so you don’t create a sugar cloud explosion in your kitchen. Once the sugar is mixed, add your peppermint extract, vanilla, and salt. If you want that vibrant color, stir in your mint food coloring now. If it’s too stiff, add heavy cream one tablespoon at a time until you get that perfect, creamy, spreadable consistency.
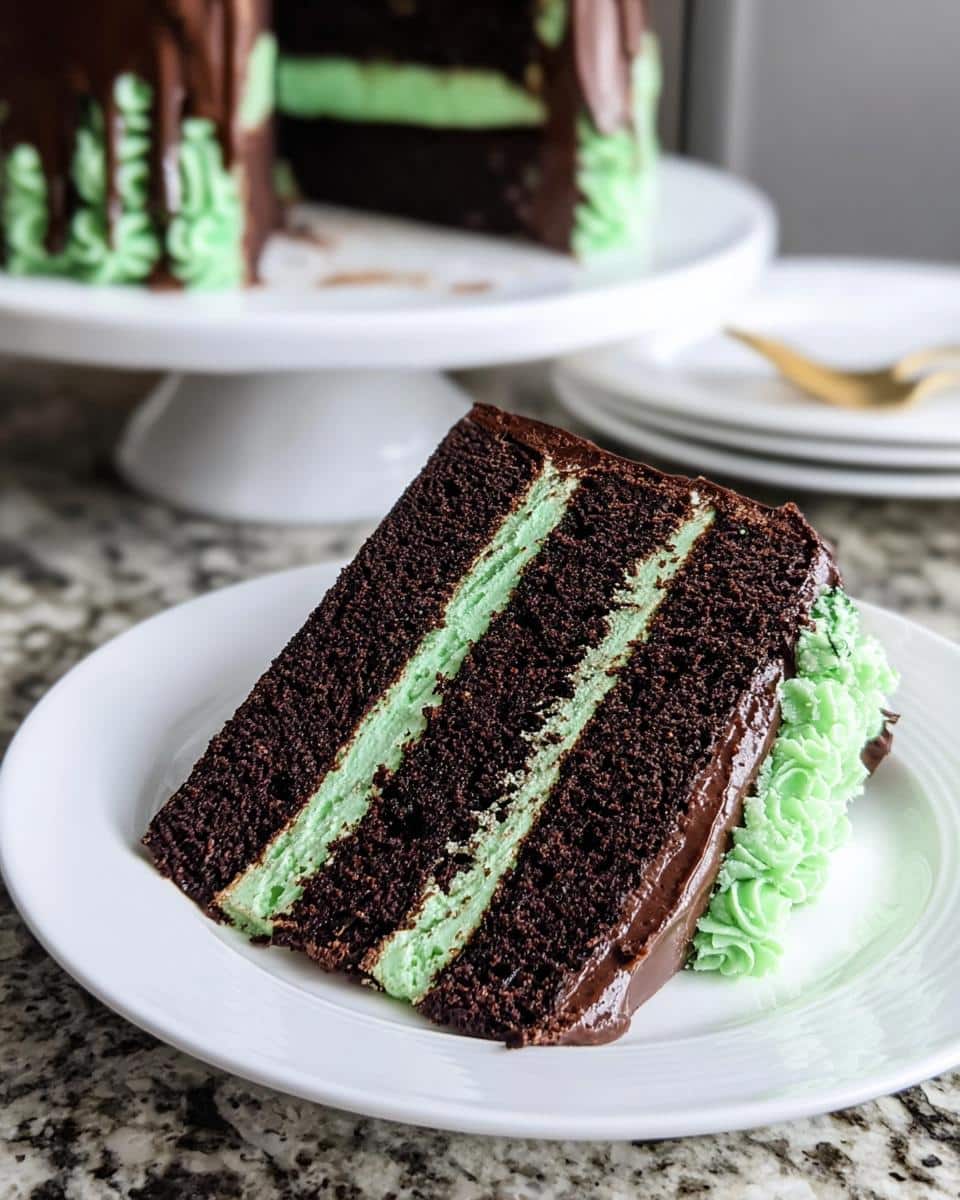
Assembling Your Layered Chocolate Mint Cake
Once everything is chill and solid, it’s time to build. Make sure your layers are level, trimming any domes with your cake leveler if needed. Put a dollop of frosting on your serving plate to anchor the first layer. Spread a healthy layer of mint frosting on top, stack layer two, frost it, stack layer three, and then comes my favorite trick for clean sides: apply a *thin* layer of frosting all over the whole exterior—we call that the crumb coat. Pop that temporarily frosted Chocolate Mint Cake into the freezer for just 15 minutes to set that coat. Then, finish it up with your final, glorious layer of frosting decoration!
- Find more fun baking projects perfect for kids while you wait for your cakes to cool!
Expert Tips for a Perfect Chocolate Mint Cake
Even with a stellar recipe in hand, the difference between a good cake and a truly memorable bake always comes down to those little tweaks—the things you only learn after making the recipe a few times. As a historian, I love seeing how small adjustments honor the roots of a dish while making it work better for us today. We want structure, richness, and that signature cooling bite!
When you’re focused on big flavor components like cocoa and mint, quality matters more than ever. Don’t be shy about treating your ingredients right; they definitely pay you back in the final taste!
Ingredient Quality and Temperature
Let’s talk about that cocoa powder first. Because this cake relies so heavily on that deep, almost brooding chocolate flavor, use the best Dutch-process cocoa you can find. It dissolves beautifully into that hot coffee and gives you that incredibly dark, nearly black crumb without adding bitterness. It’s worth hunting down a quality container!
Remember what I said earlier about temperature? If you’re rushing things, cold eggs and cold buttermilk hit that fat mixture (oil and melted butter) and they just don’t want to combine nicely. This leads to a slightly curdled or broken batter, which often results in a denser, less tender cake. Always let those eggs and buttermilk sit out for at least 30 minutes before starting. You’ll notice the difference in how smoothly everything incorporates.
Adjusting Frosting Consistency
Buttercream is famously temperamental, right? The key here, as noted in the ingredient list, is the heavy cream. It’s your volume control button for texture. If you find your frosting seems incredibly stiff—maybe your kitchen is humid or your powdered sugar was packed too tightly—just add the heavy cream one tablespoon at a time. Mix it well after each addition until it loosens up just enough to be easily spreadable. You’re looking for a texture that looks light but still holds a stiff peak.
Now, if you accidentally add too much cream and it starts looking slightly runny (which happens to the best of us!), don’t panic! That’s a quick fix. Just grab about a half cup more of powdered sugar, slowly mix it in on low speed, and watch it firm right back up. This recipe is forgiving, but you have to work with it patiently!
If you’re looking to make a batch of these for a big spring celebration and need extra tips on making fluffy frostings for lots of treats, I wrote a little piece on making fluffy alternatives like this one that can help keep your frosting game strong!
Storage and Make-Ahead Options for Your Chocolate Mint Cake
One of the best things about a sturdy layer cake like this one is that it travels well and holds up beautifully over a few days, which is just fantastic when you’re planning for a big party. You definitely don’t want to stress about baking something the morning of an event!
Remember, since this Chocolate Mint Cake has a substantial amount of butter in that gorgeous mint frosting, temperature makes a big difference in holding its shape and texture. I’ve always found that temperature control is key to making sure that frosting doesn’t get too soft or weep.
If you make this cake a day ahead—which I encourage you to do—you have a few fantastic options for keeping it fresh. The main thing to remember is that the deep chocolate flavor usually actually deepens and improves overnight. That’s a win in my book!
- Room Temperature Storage: If you’ve frosted the cake, you can keep it in an airtight container at room temperature for up to 2 days. This keeps the cake crumb wonderfully soft. Just make sure your kitchen isn’t too warm, or that buttercream might start looking sad.
- Refrigerator Storage: For longer freshness, the fridge is your friend, keeping the cake good for up to 5 days. When you take it out, let it sit on the counter for a good hour before slicing. Cold cake can taste dense if you cut into it straight from the cold!
- Freezing for Future Parties: This cake freezes like a dream, which is great for planning ahead for your next big event. You can tightly wrap the whole cake—or even individual unfrosted layers—and tuck them safely away in the freezer for up to 3 months. If you freeze it frosted, make sure it’s wrapped securely in plastic wrap *and* then foil to prevent freezer burn.
If you need a reminder on how to get those slow-cooked flavors without spending all day in the kitchen, check out some of my favorite easy crockpot dinner recipes—planning ahead shouldn’t just apply to dessert!
Ingredient Substitutions and Variations for This Cake
Part of the joy of baking is learning how to adapt a beloved recipe to fit what you have on hand or what your family prefers. While I stand by the recipe as written—because those exact measurements create the right structure—we absolutely can play around with the final touches! This gives us endless possibilities for fun Green Snacks or even slight flavor shifts for different celebrations.
My notes mention a couple of ways to take this cake in a slightly different direction, depending on whether you have a big crowd or just want to change up the texture slightly. Don’t feel pressured to stick exactly to my blueprint; think of this as a template for your own kitchen creativity!
Flavor Twists: Making Green Snacks Unique
The peppermint extract is powerful, so if you find pure peppermint a bit too sharp for your liking, you can certainly blend it with a tablespoon or two of pure spearmint extract instead. Spearmint offers a softer, sweeter finish. Or, if you’re making this for a party where the mint might be too overpowering for some folks, try dialing back the peppermint extract to just one teaspoon and substituting that flavor volume with an extra splash of vanilla.
Remember, we used hot coffee primarily to bloom the cocoa powder and deepen that chocolate note. If you’re making this for kids and want to avoid caffeine entirely for your Green Foods For Party spread, you can simply use boiling water, like the recipe suggests. However, for a richer, more complex chocolate flavor, I sometimes try a small amount of intensely brewed espresso instead of coffee.
For decoration, the notes mention two other ways to load up on flavor! If you’re using the ganache drip I referenced—which pairs so beautifully with the cake—you’ll want to make sure you check out that separate recipe for the right ratios. Or, if you want a fun texture, skip the smooth frosting swirls and press mini chocolate chips all around the outside of the cake after the final coat. That turns it into a chocolate chip-mint delight!
Frequently Asked Questions About the Chocolate Mint Cake
It’s funny how often the same questions pop up once a recipe gets popular! I think that’s a wonderful sign that folks are eager to try it out. As a culinary historian, I love seeing how people adapt these classics, but sometimes you just need a direct answer so you can get baking! Here are the most common things folks ask me about making this gorgeous Chocolate Mint Cake.
Can I make this a single-layer cake?
Oh, absolutely, you can! If you don’t need the height of a three-layer stack, you can easily pour all the batter into one greased and lined 9×13 inch pan. Just know that because the batter is now much deeper, you’ll need to increase your baking time quite a bit—probably closer to an hour, maybe a little more. You must test it with a toothpick right in the center. If you bake it for less time, the middle will definitely collapse when it cools down, and no one wants a sad, sunken center!
What makes this a great St Patrick Party Food?
This is perhaps the best St Patrick Party Food you can serve! Why? Because the mint frosting is begging for that little drop of green food coloring. Suddenly, you have this stunning, festive dessert that pairs perfectly with noisier appetizers. People love that burst of cool refreshment after eating savory things. It’s bold, it screams celebration, and it looks fantastic on any dessert table, making it ideal for St. Patrick’s Day spreads.
If you’re putting together a bunch of celebratory bites, you might want to check out some of my favorite easy snack ideas to round out your party menu!
Equipment Needed for Baking Success
A great recipe means nothing if you don’t have the right tools to execute the vision! When I was researching old baking methods, I noticed that even with simple tools, people were incredibly precise about what they used. For this Chocolate Mint Cake, we aren’t asking for anything too fancy, but having these specific items ready makes the whole process flow beautifully.
Having the right pans ensures those layers bake evenly, which is essential for flat tops and easy stacking. It removes so much guesswork from the process, letting you focus purely on the flavor combination!
- 8” Round Cake Pans: You’ll need three of these. Having three identical pans is the secret to three equally thick, beautiful layers that stack up like a dream. If you only have two, you’ll have to bake in batches, which means you need to store the first cooled layer very well while the second bakes.
- Mixing Bowls: You’ll want a couple of sturdy mixing bowls—one for your dry ingredients and a larger one for combining everything. Since we mix the liquids into the dry, a wide bowl helps you scrape the bottom easily.
- Cake Leveler: This might seem optional, but trust me, if you want professional-looking layers, this is your best friend. It lets you shave off that little dome on top of your baked layers so they sit perfectly flat when you stack them up later. It saves tons of time compared to using a serrated knife!
If you ever run into issues with the recipe, or just want to tell me how your layers turned out, don’t hesitate to get in touch with me over at the Contact Us page. Happy baking, friend!
Serving Suggestions for Your Chocolate Mint Cake
Now that you have this magnificent, cool, and chocolatey tower sitting perfectly on your counter, the question becomes: how best to serve it? A cake this bold doesn’t necessarily need much adornment, but the right pairing can take it from delicious to an unforgettable experience. As a culinary historian, I always look for ways to balance the profile—that deep cocoa needs something bright!
For everyday enjoyment, a simple, steaming mug of hot coffee is the perfect counterpoint to the richness of this Chocolate Mint Cake. The heat and slight bitterness just wake up the mint perfectly. However, if you’re looking to utilize this showstopper for a bigger event, perhaps incorporating it into your spread of Irish Appetizers (even though it’s dessert!), here are a few ideas.
If you’re serving this after a heavier meal, sometimes you need a little palate cleanser on the side. A small bowl of fresh raspberries or perhaps some thinly sliced strawberries can offer a lovely, tart contrast that cuts through the buttercream beautifully. It feels fancy without being complicated!
For the kids at your St. Patrick’s Day bash who might shy away from intense coffee, a tall glass of cold milk—or even a non-dairy alternative—is the ultimate classic pairing. It’s simple refreshment that lets the chocolate and mint flavors truly shine without fighting for attention.
And if you need ideas for what to drink alongside your dessert that keeps things cozy, I put together a list of my favorite warm beverages, perfect for sipping as you enjoy every last bite of that beautiful Chocolate Mint Cake. Check out my cozy drinks and breakfast sides roundup to find the perfect match!
Legal and Policy Information
As much as I try to map out every single measurement and process to deliver the most reliable recipe possible, baking is still an art, and ingredients vary! When you’re tracing the history of a dish, you realize perfect standardization wasn’t always the goal, and that carries over into how we handle the data shared here on the site.
When you see nutritional information mentioned anywhere on this site—which we only include for reference, mind you—it’s important to remember that it’s a guideline. I want to be upfront about that so there are no surprises, especially if you are tracking specific dietary needs.
Nutritional Estimate Disclaimer
If we provide any data regarding calories, macros, or general nutritional content for this cake, please know that this number is an *estimate* only. It’s calculated using standard software based on the average values for the ingredients listed. Your final nutritional output will change based on specific brands you purchase, how much ingredient you actually use, and how much fat the cake might absorb during baking. Think of it as a fun reference point, not a scientific guarantee!
Now, for the necessary housekeeping: For the full rundown on how this site operates, please take a moment to review our official Disclaimers and Policies page. And if you’re interested in how we keep your information safe while you browse through all these historical recipes, our Privacy Policy has all the details you need.
Chocolate Mint Cake
Ingredients
Equipment
Method
- Preheat oven to 350F (175C). Grease and flour three 8” (23cm) round pans, line the bottoms with parchment paper, and set them aside.
- In a large mixing bowl, whisk together flour, sugars, cocoa powder, baking soda, and salt until well combined.
- Add oil and melted butter and stir until all of the dry ingredients have been moistened. The batter will be thick.
- Add eggs and vanilla extract and stir well until the batter is smooth and uniform.
- Gradually add buttermilk, stirring until the batter is completely combined.
- Slowly pour hot coffee into the batter and stir until uniform. Scrape the sides and bottom of the bowl and stir again.
- Evenly divide the batter between the prepared cake pans. Bake in the center rack of the preheated 350F (175C) oven for 35-38 minutes, or until a toothpick inserted in the center of each cake comes out clean or with a few moist crumbs. Rotate cakes during baking if your oven bakes unevenly.
- Allow cakes to cool in their pans for 15 minutes. Run a knife along the edge to loosen the cakes from the pan, then carefully invert them onto a cooling rack to cool completely before frosting.
- Prepare the frosting: In a large mixing bowl, use an electric mixer to beat the butter until creamy and smooth.
- Gradually add sugar, about a half cup at a time, using your electric mixer on low speed until combined before adding the next portion.
- Once all the sugar is added, add salt, vanilla, and peppermint extracts and stir until completely combined. If you want colored frosting, stir in food coloring until the desired color is reached.
- Add one Tablespoon of heavy cream and beat until well incorporated. Add more cream as needed until the frosting is smooth, creamy, and easily spreadable.
- Level the cakes if needed and evenly cover them with frosting. Apply a thin crumb coat of frosting around the exterior, place the cake in the freezer for 15 minutes to set the crumbs, then remove and finish decorating with an even layer of frosting.