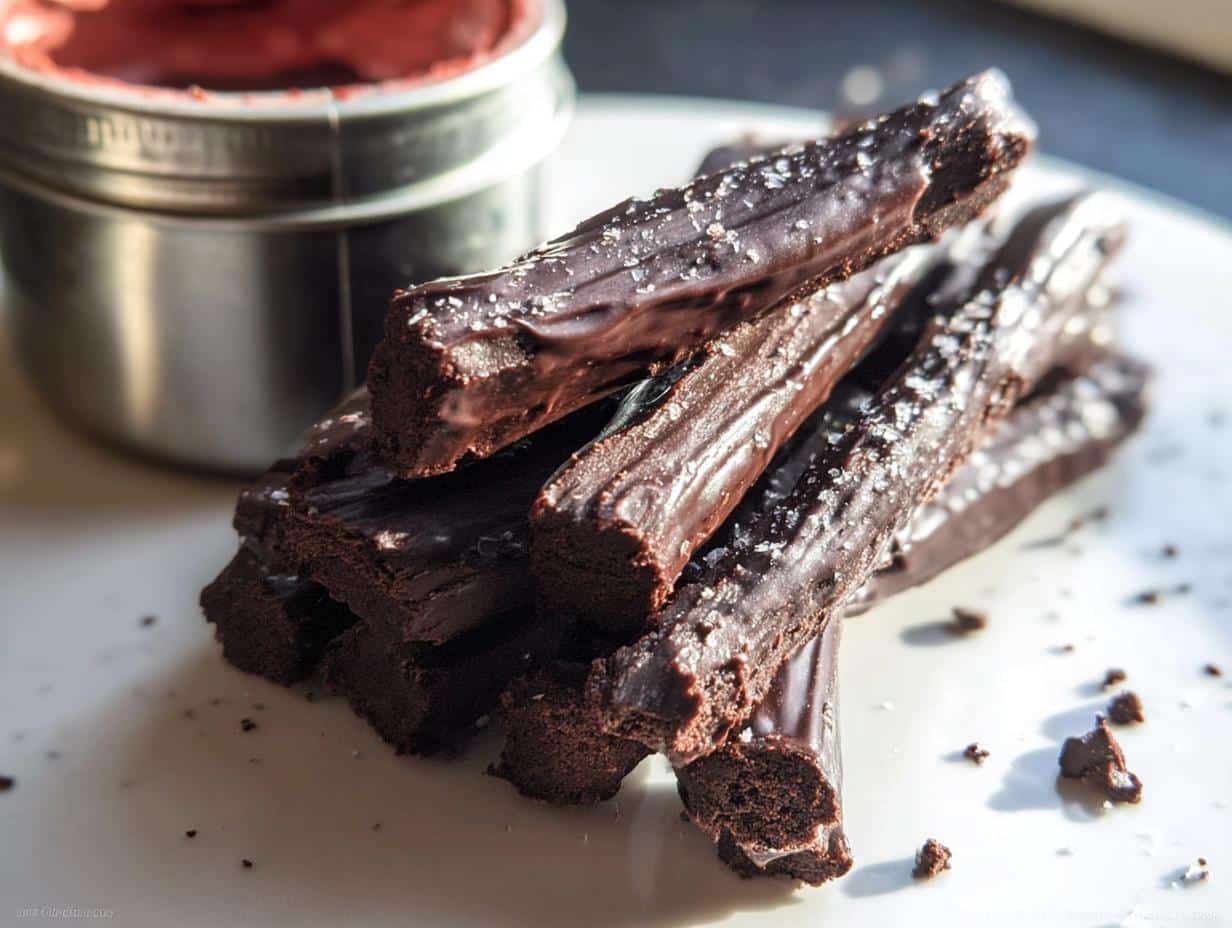
If you, like me, believe that desserts should always come with a bit of fun and surprise, then you are going to absolutely adore this next creation. I’m always looking for ways to turn everyday classics into something joyful when baking, and these food illusion desserts really deliver! We are taking the rich, fudgy core flavor of a perfect brownie and transforming it into the most unexpected shape imaginable: French fries. Trust me, the look on people’s faces when these Brownie French Fries come out is priceless. It’s baking that doesn’t take itself too seriously, and that’s where I find the most joy in the kitchen!
Why You Will Love Making These Brownie French Fries
Honestly, these aren’t just a dessert; they are an experience! I love any recipe that makes people stop, stare, and then laugh when they realize the illusion. These particular brownie fries tick every box for fun, easy baking, and I think you’ll find yourself making them again and again for unexpected treats.
- They are the ultimate surprise! Serving something that looks savory but tastes intensely chocolatey is fantastic for pot luck dishes for a crowd or even as a quirky April Fools dinner centerpiece.
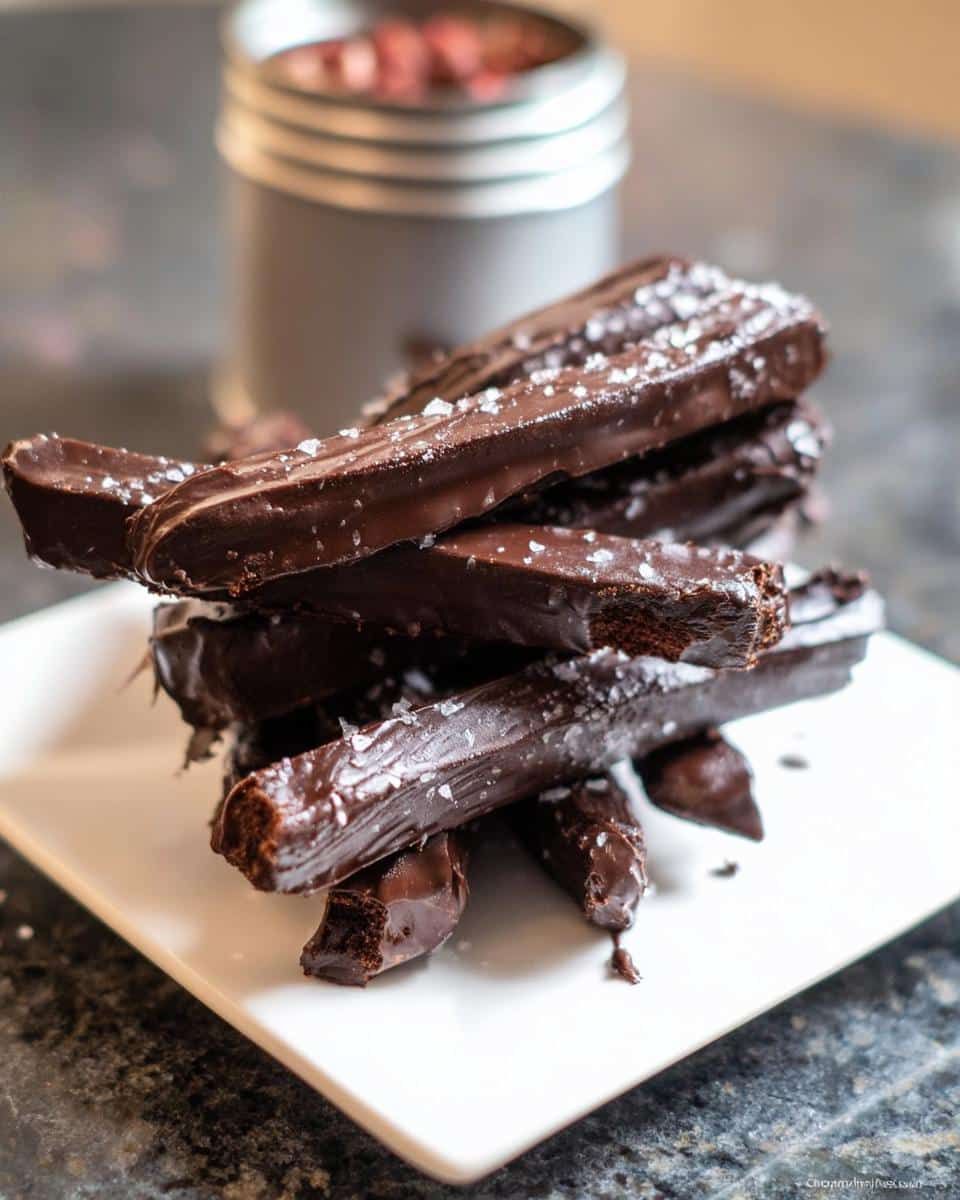
- The texture is spot on. We aren’t messing around with cakey brownies here; these are dense enough to hold that fry shape perfectly after baking and cooling.
- They are incredibly customizable for dipping. Think beyond regular toppings—a creamy dipping sauce makes this interactive fun.
- The active prep time is surprisingly quick! You spend more time letting them chill than actively mixing, which is great for busy days. Easy snacks that look this impressive shouldn’t be hard!
- They look amazing in photos! If you love sharing your baking successes, these will definitely stop the scroll.
Gathering Ingredients for Your Brownie French Fries Recipe
Okay, let’s talk supplies! The secret to making sure these turn out like rich, fudgy brownies and not some weird, dry cake is using the right components. Since we’re transforming the shape, we need the base to be super dense and chocolaty before we even think about cutting them into fries. Don’t stress about finding anything weird here; these are mostly pantry staples, which makes them great for last-minute celebrations, like a fun batch for Easter baking ideas!
We break the ingredients down into two easy parts: the actual brownie mix and the beautiful chocolate coating that gives them that final, satisfying crunch.
For the Brownie Base
Remember, the better the chocolate you use here, the richer these will taste. I always opt for good quality semi-sweet. They need to set up firm enough to handle the cutting and dipping process we’re heading toward.
- 1 cup all-purpose flour
- 1/4 cup Dutch-processed cocoa powder (this gives that deep, dark color!)
- 1/2 teaspoon salt
- 8 oz semi-sweet chocolate (for melting into the batter)
- 1/2 cup unsalted butter (that’s one standard stick!)
- 3/4 cup sugar
- 3 large eggs
For the Coating and Topping for Brownie French Fries
This is where this dessert shines! The coating isn’t just for looks; it seals in that fudgy center. And that sprinkle of salt? It’s non-negotiable for balancing the sweet richness of these chocolatey Brownie French Fries.
- 10 oz semi-sweet or dark chocolate, melted (for dipping)
- To taste Fleur de Sel or Maldon salt (for sprinkling)
Essential Equipment for Perfect Brownie French Fries
You don’t need anything too fancy to pull off this illusion, which is part of why I love it so much! Having your tools ready before you start mixing means no panicking when the batter is ready to go into the oven. For this particular recipe, there are just a few must-haves to ensure you get a nice, even bake and a clean cut later on.
First up, you absolutely need a sturdy 9 x 13 inch baking pan. This size is what locks in that perfect thickness we need for cutting fry shapes. If your pan is too deep, the middle might stay raw while the edges bake too much! We want consistency.
Next, you’ll want a couple of bowls—a small bowl for mixing your dry ingredients and a medium one for combining the wet before everything comes together. But the real star of the show for melting chocolate? You need a double boiler setup. Seriously, don’t risk burning that beautiful coating chocolate by microwaving it alone! A double boiler melts it gently and keeps it perfectly smooth for dipping later. That’s it—no stand mixer required!
Step-by-Step Instructions to Make Brownie French Fries
Alright, let’s get into the fun part! Making these is just like making regular brownies, but we pay a little extra attention to the chilling time because we need a solid foundation for cutting. Follow these steps, and you’ll be serving up the best dessert illusion on the block!
Preparing the Brownie Batter and Baking
First things first, let’s get that oven warm. You’ll want to preheat your oven to 350 degrees F. Go ahead and get that 9 x 13 inch baking pan lined with parchment paper—this is the secret to lifting the whole slab out later without breaking our beautiful base!
Time to mix! In a small bowl, whisk together the flour, that wonderful Dutch-processed cocoa powder, and the salt. Set that dry mix aside. Now, for the gooey part: melt that 8 ounces of chocolate along with the butter together slowly using your double boiler. Once that’s smooth, whisk the sugar and eggs in a separate bowl until they’re nice and combined, then stream that into the melted chocolate mixture.
Gently stir the flour mixture into all that chocolate goodness until everything is just combined. Don’t overmix! Seriously, overdoing it makes for less fudgy results. Pour the batter into your prepared pan and spread it out evenly. Bake for just 15 to 20 minutes. Here’s my tip: I always pull mine out when the center still jiggles just a *tiny* bit. They firm up perfectly as they cool, giving you that dense texture we need for cutting.
Cutting and Freezing for the Fry Shape
This is the moment of truth! You absolutely must let the brownies cool completely—I mean *completely*—before you attempt to cut them. A warm brownie will just smear everywhere. Once fully cooled, lift the whole block out using the parchment slings you left hanging over the edges. Now, think like you are cutting fries.
First, cut the entire slab lengthwise into maybe three long strips, depending on how thick your pan is. Then, take those strips and cut them crosswise into fry-like sticks. They should be about the size of regular french fries! If you’re in a rush or want super crisp edges, try freezing these cut fries on a baking sheet for about 30 minutes. It makes dipping so much cleaner!

Coating and Finishing Your Brownie French Fries
Grab your remaining 10 ounces of chocolate. Melt this down gently over that double boiler until it’s silky smooth—we want a perfect, thin covering for our fries. Working with the chilled or room-temp fries makes coating much easier.
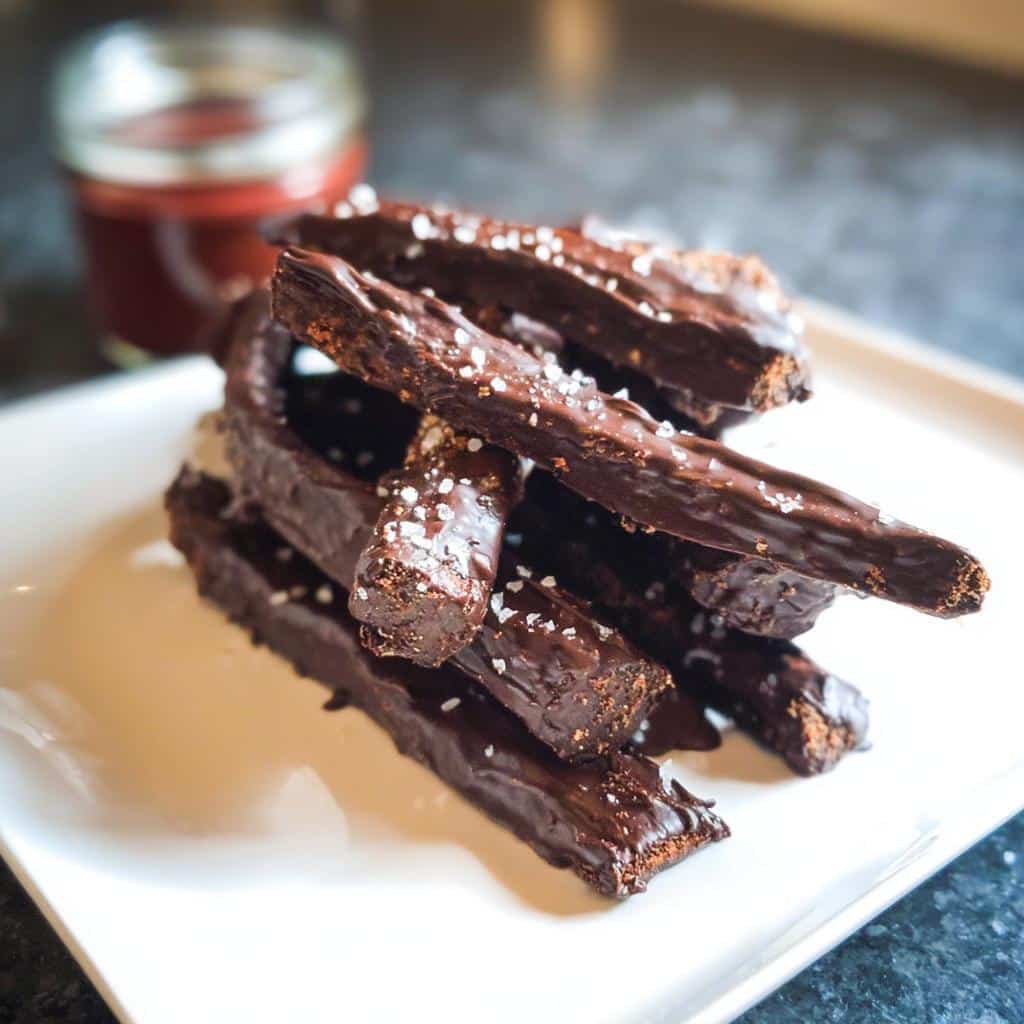
Dip each brownie fry into the melted chocolate, letting the excess drip off naturally. You can use a fork or dipping tool for this. Place the coated sticks onto wax paper or parchment paper. Before that chocolate sets, sprinkle them lightly with Fleur de Sel or Maldon salt. That salty crunch finishes the illusion and honestly makes these the best Brownie French Fries you’ll ever taste!
Let them sit out until the chocolate coating hardens up before serving.
Tips for Success When Making Brownie French Fries
Even though this is a playful recipe, we still want to nail the texture! A floppy, crumbling brownie fry just doesn’t work for dipping, right? Here are a few things I learned from testing batches when I first developed this—especially when trying to make sure they looked just like the real deal.
First, and I can’t stress this enough, you HAVE to wait for the brownies to be fully chilled before cutting. Seriously, if they are even slightly warm, you’ll just end up with a dense chocolate smear instead of nice, clean-cut fries. I sometimes cheat and put the baked pan in the freezer for 20 minutes after it comes to room temperature to firm things up fast. That really helps you get those sharp edges!
Next, let’s talk density. Remember in the baking steps I mentioned pulling them slightly underdone? That’s crucial. We want that classic fudgy center. If you overbake them when you initially bake the slab, they will become too cake-like and crumbly when you try to cut them post-cooling. Check them right when the center stops jiggling violently—they will cook the rest of the way while cooling.
When you are dipping into that final chocolate coating, don’t try to dunk the whole thing! Gently hold the fry with tongs or a fork and just dip about 80% of it into the melted chocolate. Leave the very end clean, or give it just a tiny drizzle. This small area of exposed brownie keeps the illusion alive because it looks like the fry was pulled straight out of the fryer oil, not double-dipped in batter! If you’re looking for more fun ideas, check out my category for easy dessert recipes!
Serving Suggestions for Your Fun Brownie French Fries
Now that your amazing, illusion-making food illusion desserts are done—coated, salted, and set—how should you serve them? The presentation is half the fun here! To really blow people away, presentation is everything. Don’t just serve them on a regular plate; lean into the theme!
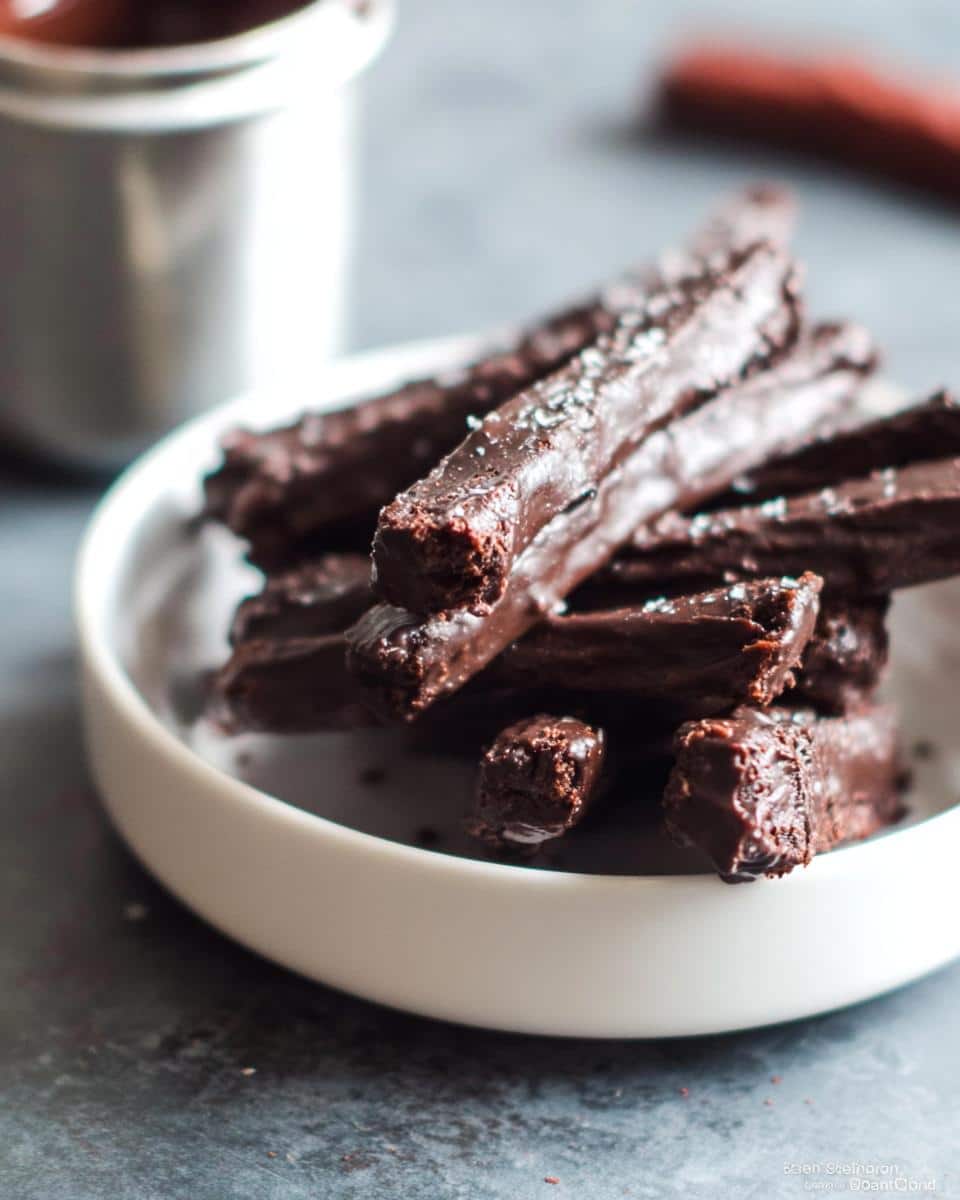
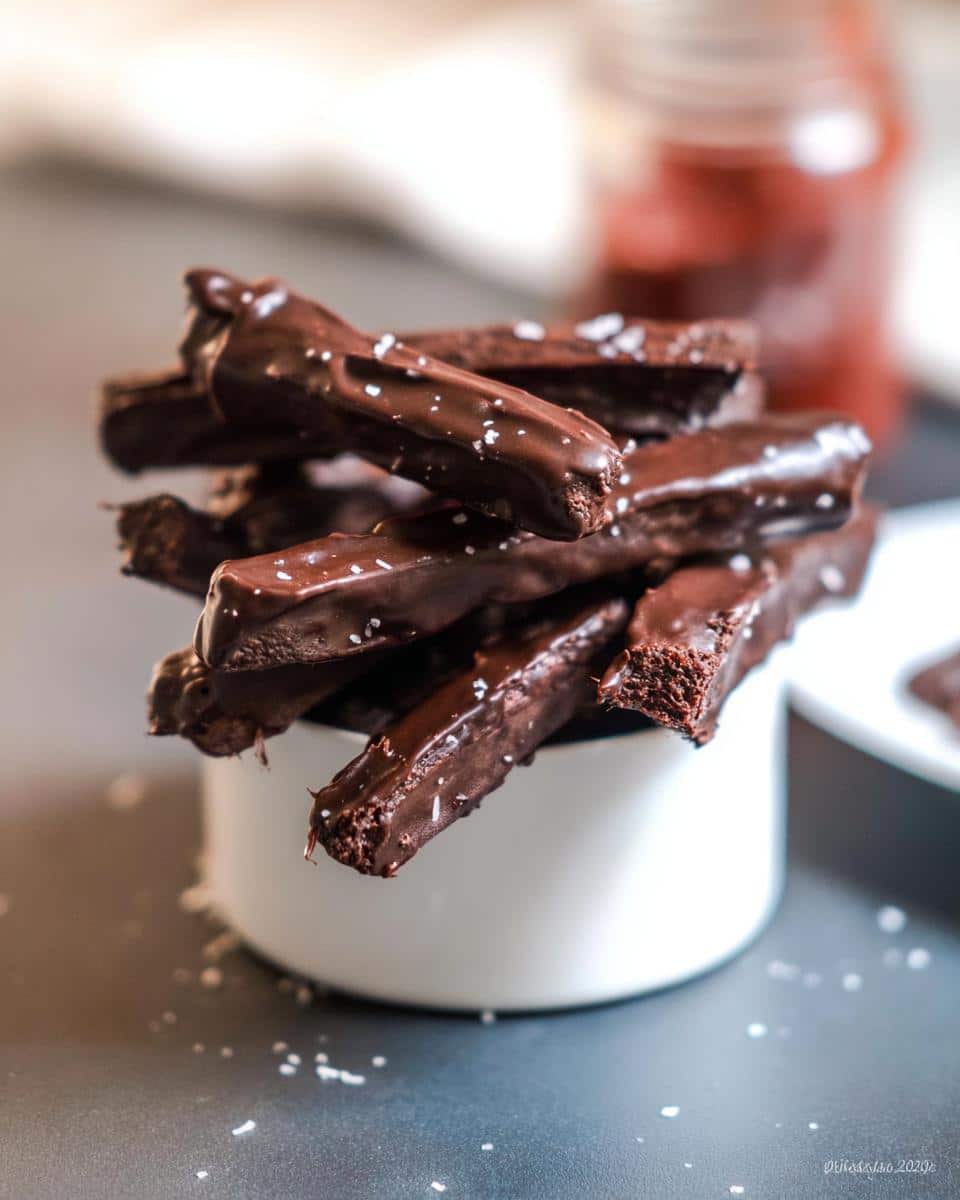
I love serving these up in small, white paper fry containers, the kind you get at a fair or boardwalk stand. If you don’t have those, nice little paper cones work great too! This presentation immediately signals ‘fries’ to everyone, making the reveal even better when they taste the chocolate.
The real magic, though, comes from the dipping sauces. Since these are rich brownies, you need something contrasting. A light, slightly tangy sauce cuts through the richness beautifully. Here are my go-to ideas:
- White Chocolate Drizzle: If you melt a little white chocolate, you can drizzle it over the top after the dark chocolate has set. It looks a bit like mayonnaise or ranch dressing from a distance—perfect for the prank!
- Raspberry Coulis: This is my favorite! It’s bright red, tastes fantastic with dark chocolate, and looks just like ketchup when sitting next to the fries in a small cup. It’s a great way to offer something that feels slightly more special than just plain chocolate.
- Vanilla Bean Ice Cream: If presentation isn’t your main goal, just serving a few fries tucked into the side of a scoop of really good vanilla ice cream is divine. It’s great for a simple night in—maybe you’re looking for a quick dessert after a low-cal snack earlier in the day!
For parties, set up a little ‘Dipping Bar’ where people can grab their fries and then choose their sauce. It makes the whole dessert interactive, and I guarantee everyone will be talking about these for weeks!
Storage and Reheating Instructions for Brownie French Fries
So, you made a massive batch of these adorable treats (which I totally understand, who can stop at one batch?), and now you need to know how to keep them looking and tasting amazing. The biggest concern keeping these fudgy fries perfect is that gorgeous chocolate coating we worked so hard to apply!
The good news is that brownies are generally freezer and fridge-friendly heroes. You want to store them in an airtight container. If you’re stacking them, put a layer of wax paper or parchment paper between the layers. This stops the chocolate coating on the bottom layer from getting messy or sticking to the top of the layer beneath it when they warm up slightly in the room.
If you’re planning to keep them longer than three days, the freezer is your friend! I find that air-tight containers, maybe with a paper towel tucked onto the top to absorb any condensation, work great for up to a month. Because they are already cut into small pieces, they defrost really quickly, too.
Serving Room Temperature vs. Chilled
These are honestly best served closer to room temperature. When they are cold from the fridge, the brownie part is super fudgy and dense—which some people might prefer—but the chocolate shell can get a bit hard to bite into. Giving them about 15 to 20 minutes out on the counter before serving should be perfect, especially if they were stored in the fridge. That slight warming brings out the richness of the chocolate base again.
Can I Reheat My Brownie French Fries?
Honestly, I wouldn’t recommend reheating them in the traditional sense, especially after you’ve coated them in chocolate. Popping them in the microwave will melt that beautiful coating right off, leaving you with a messy puddle! If you really feel they need it, room temperature is the way to go. If they were frozen, just let them sit out for 20 minutes, and they’ll be spot on. This way, you maintain that fun, fry-like texture!
The wonderful thing about fudgy brownies is that they hold up so well, so don’t stress about leftovers; just keep them sealed up tight!
Frequently Asked Questions About Brownie French Fries
I figured you might have a few lingering questions about pulling off this incredible dessert illusion! It’s only natural when you’re working with something this fun. Don’t worry; I’ve got the answers you need to make sure your Brownie French Fries turn out perfectly!
Can I make this recipe ahead of time for a party?
Yes, absolutely! In fact, I highly recommend it. The brownies themselves need to cool completely before cutting, which takes several hours anyway. You can bake the slab, cut the fries, and even apply the chocolate coating a day ahead of time. Once the chocolate sets, store them in an airtight container at room temperature or chill them slightly. This makes them perfect for last-minute pot luck dishes for a crowd!
Is skipping the freezing step a big problem?
It’s not a disaster, but I strongly suggest at least a 30-minute chill! If you cut the brownies while they are room temperature, the edges tend to drag, and you get a crumbled, soft edge rather than a crisp fry shape. Freezing them solidifies the base and the coating just enough to give you those sharp, professional-looking edges. If you don’t freeze, just be very gentle when cutting and dipping!
Can I make these into a low-cal snack substitute?
That’s a wonderful idea, but I’ll be honest—the brownie base requires a decent amount of fat (butter and chocolate) to stay fudgy and sliceable. If you switch out too much of the sugar or fat for ‘healthier’ swaps, you risk ending up with a very crumbly, cake-like product that won’t hold the fry shape when dipped. This recipe is designed for indulgence! If you’re looking for healthy snacks, I have a few fruit-based options on the site, but for this illusion, we need that richness!
My chocolate coating looks dull, what went wrong?
Dull chocolate usually means one of two things! If you used chips instead of quality baking bars, they contain stabilizers that don’t melt as beautifully. More often, though, it means some water or steam got into your melted chocolate via the double boiler setup. Even a tiny drop of water causes the chocolate to seize up and look grainy or dull when it cools down. Make sure your bowl sitting over the water is completely dry and positioned high enough so that steam doesn’t splash up!
About the Creator: Sarah Bennett and Making Brownie French Fries
Sarah Bennett is a Culinary Educator and Visual Storyteller at Top Chicken Eats. Based in Seattle, she blends teaching and photography to make playful, creative cooking feel simple and rewarding. I truly believe that baking should always be fun, and these Brownie French Fries are the perfect example of taking a comforting classic and giving it a joyful, surprising twist. My goal is always to show you how simple it is to add a bit of creativity to your kitchen without getting stressed out over perfection. I hope seeing how these surprisingly easy dessert fries come together inspires you to be playful with your next bake!
Brownie French Fries
Ingredients
Equipment
Method
- Preheat your oven to 350 degrees F. Line a 9 x 13 inch baking pan with parchment paper.
- Mix the flour, cocoa powder, and salt together in a small bowl. Set this dry mixture aside.
- Melt the 8 ounces of chocolate and the butter together using a double boiler. In a separate bowl, mix the sugar and eggs. Add the egg mixture to the melted chocolate mixture.
- Stir the flour mixture into the chocolate mixture until you have a smooth batter with no lumps. Pour the batter into the prepared baking pan and spread it evenly.
- Bake for 15 to 20 minutes, or until the center is no longer jiggly. Remove the pan from the oven and let the brownies cool completely.
- Cut the cooled brownies into thin, fry-like shapes. You can cut the pan in half lengthwise, then cut several times the opposite way. You can optionally freeze the fries on a baking sheet to make dipping easier.
- Melt the remaining 10 ounces of chocolate over a double boiler. Dip each brownie fry into the melted chocolate to coat it. Sprinkle the coated fries with the finishing salt. Place them on wax paper to let the chocolate coating harden.