Mornings can be chaos, can’t they? You’re reaching for takeout or skipping breakfast altogether just to get out the door on time. I know I’ve been there. When I’m digging through my notes on classic comfort foods, I often think about how to make those comforting flavors practical for modern life. That’s exactly where these Banana Bread Muffin Tops come in. Forget pouring batter into a full muffin tin and waiting forever! This recipe delivers that unbelievable, super moist interior and that slightly crisp, crackly top we all love, but in a fast, perfectly portioned bite. It’s the familiar, deep flavor of homemade banana bread, ready when you are, and it’s truly one of my favorite ways to bring tradition to the breakfast rush. For more quick ideas like this, check out all my favorites in the breakfast category!
Why These Banana Bread Muffin Tops Are Your New Favorite Quick Banana Bread (Keyword Focus)
I get asked all the time how to capture that ultimate banana bread comfort without needing two hours to bake a loaf, and this is the answer. These aren’t just small muffins; they are the *tops*—the absolute best part—of the loaf, baked in record time. They become my go-to when I need a genuinely satisfying Quick Banana Bread fix without any fuss or mess. Trust me, once you see how fast these come together, you’ll swap out your regular loaf plan!
We skip a few traditional steps in favor of speed and portability, but we never sacrifice the flavor. It’s all laid out here for you:
- They are unbelievably fast to prep—we’re talking 15 minutes tops before they hit the oven.
- Portability is key! These are perfect grab-and-go treats for lunchboxes or a mid-afternoon snack.
- The texture hits just right every single time.
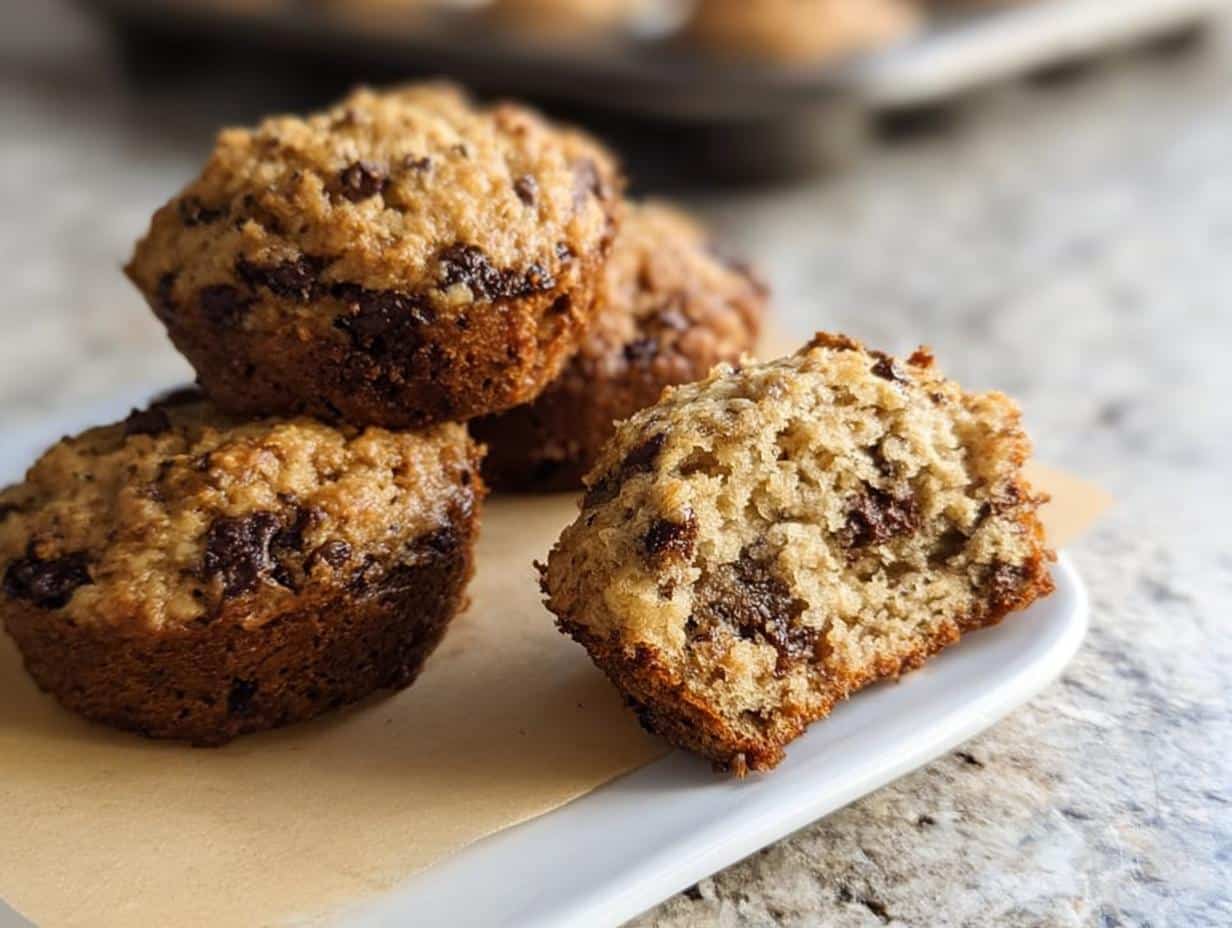
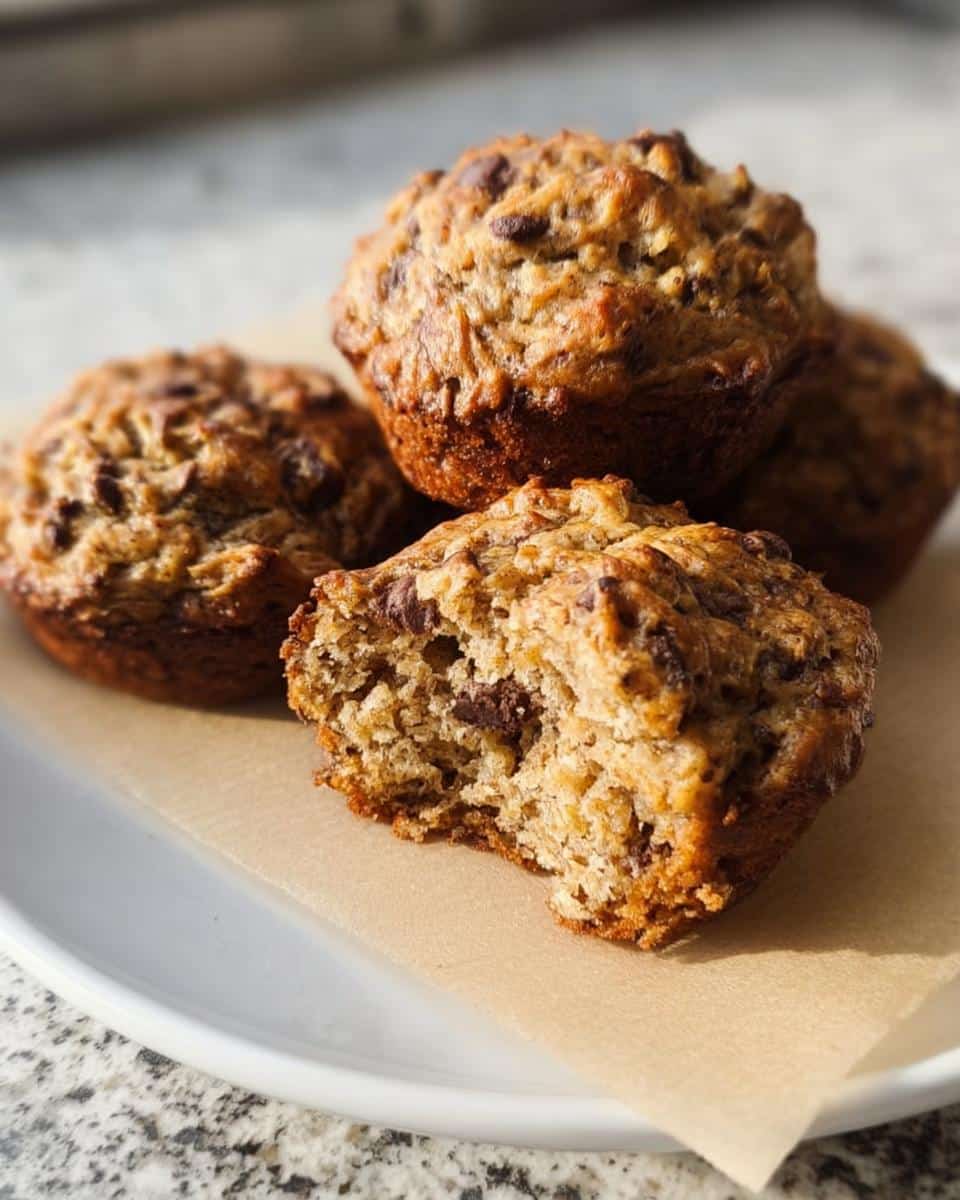
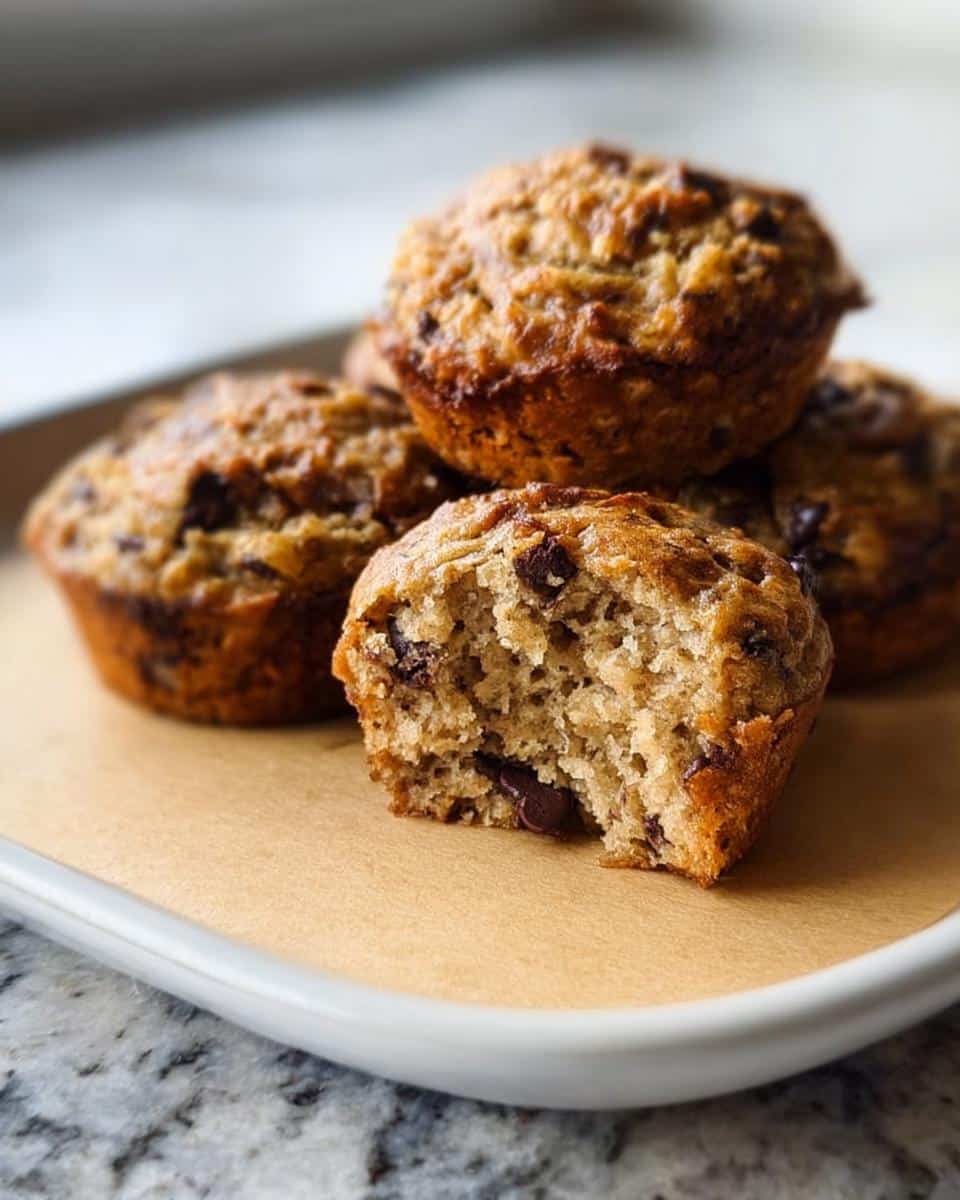
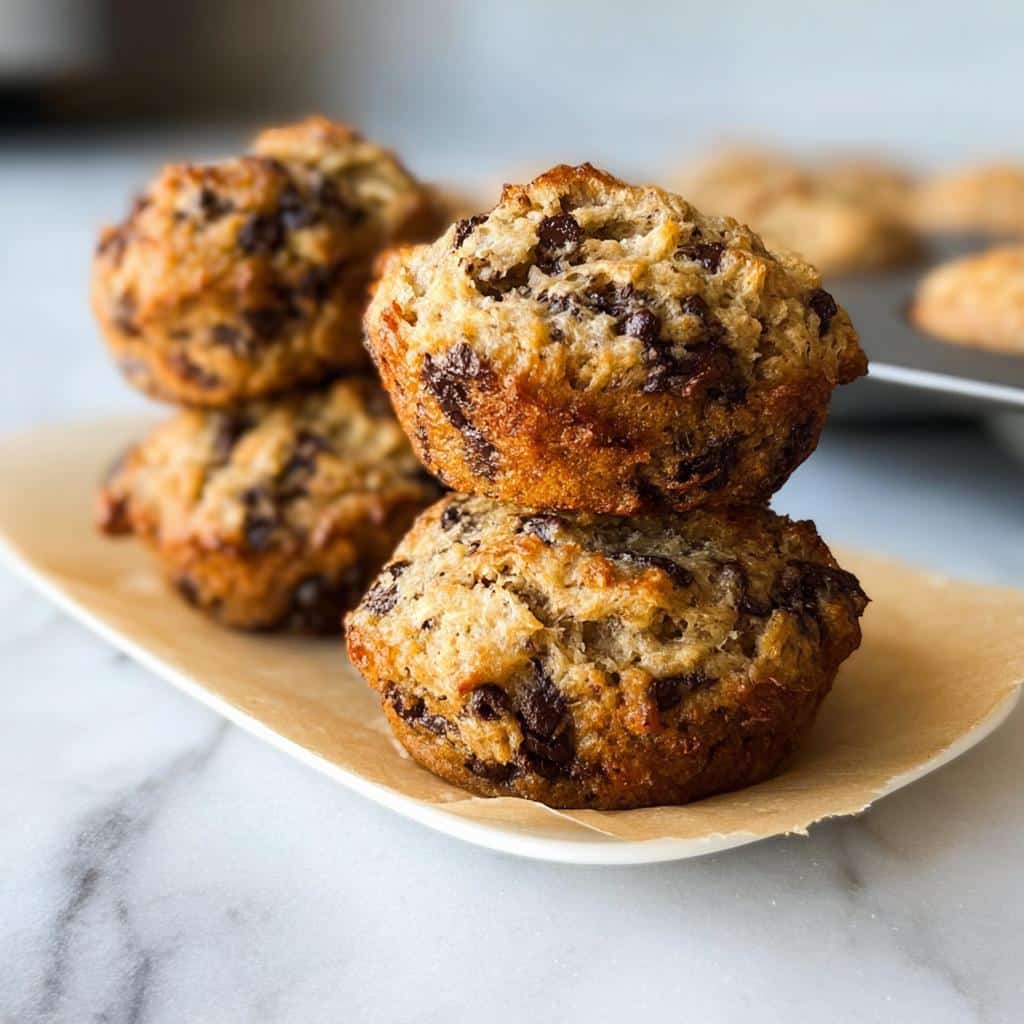
Perfect Texture: Moist Center Meets Crispy Edge
This is where the magic happens, truly. Because we are processing the oats and mixing everything gently, the result isn’t cakey; it’s dense and unbelievably moist inside. But since they bake open-faced on a sheet, the edges get just enough heat to turn golden brown and a little crisp. It’s that textural showdown, right in your hand!
Kid-Friendly and Family Approved Banana Bread Muffin Tops
My family loves these because they are perfectly sized and feel like a treat, but they use wholesome ingredients. If you’re packing snacks or need something easy for the little ones who often don’t finish a whole slice of bread, these Banana Bread Muffin Tops are genius. They satisfy that sweet tooth but keep everyone happy until dinner, and cleanup is next to nothing because we use parchment paper!
For more easy-to-grab goodness, don’t forget to check out my favorite easy snack recipes.
Gathering Ingredients for Super Moist Banana Bread Recipe (Keyword Focus)
Okay, let’s talk about what goes into these incredibly portable treats. The secret to that deep, comforting flavor that reminds you of the Best Ever Banana Bread? It all starts with the bananas! As a guy who studies the history of flavor, I can tell you that the riper they are—I mean *truly* speckled and soft—the more natural sugar and moisture you get. This is essential for our Super Moist Banana Bread Recipe because we aren’t using a ton of added sugar. These bananas do all the heavy lifting!
Since this recipe is naturally gluten-free and skips refined flours completely, we rely on oats to give us structure, but we use them in two distinct ways. You’ll see that separation clearly when we get to the mixing stage, but make sure you have both the amounts ready to go when you gather everything now.
Muffin Tops Ingredients: Clarity on Measurements
When collecting your items, pay close attention to the prep notes, especially for the fruit. You need two large, truly ripe bananas, which should weigh in around 230 grams once you peel them. Next up are the dates; make sure they are pitted, and measure out 1/2 cup, which we estimate to be about 125 grams of those sweet Medjool jewels. For your fats, grab 1/4 cup of virgin coconut oil, nice and soft, then the essentials: one teaspoon of pure vanilla extract for brightness, one teaspoon of cinnamon, one teaspoon of baking powder, and a scant half teaspoon of sea salt (that’s 1/4 plus an extra tiny pinch!). Finally, you need your oats separated: 1.5 cups reserved for processing in the food processor, and the other 1/2 cup to be stirred in later by hand. Oh, and don’t forget those 3 to 4 tablespoons of chocolate chips—or walnuts if that’s your preference!
Equipment Needed for Best Banana Bread Recipe Moist Results
Now, one thing I learned studying old recipes is that while the ingredients matter, the right tools make everything smoother. You don’t need a million gadgets, which is perfect for a quick snack like this, but there are four heavy-hitters essential for this specific recipe to work right, especially since we are relying on crushing those oats to create structure.
First, since we are mixing everything right in the processor, you absolutely need a food processor. That’s what turns the oats into our “flour” alternative and blends the dense dates and bananas into that smooth base. Don’t try to mash this by hand!
Next, since these bake open-faced, you’ll need a sturdy, large baking sheet. You’re spooning mounds of dough onto this sheet, so make sure you have space so they don’t run into each other while baking. That size prevents overcrowding.
For cleanup—and this is critical, especially with date-based batters—you must grab some parchment paper. This keeps the bottoms from sticking and ensures you can lift the entire batch off the hot metal tray evenly. Seriously, don’t skip the paper!
Finally, you’ll want a cooling rack handy. As the instructions show, these need to cool slightly on the sheet and then finish cooling completely on the rack. If you leave them on the hot pan, the steam trapped underneath will make the bottoms soggy where the moisture is trying to escape. We want that slightly crisp edge all around!
Step-by-Step Instructions for Perfect Banana Bread Muffin Tops (Keyword Focus)
Getting these Banana Bread Muffin Tops baked right requires us to follow the order strictly, especially since most of the structure comes from the food processor doing the heavy lifting. Don’t worry about everything smelling delicious already; that’s the ripe bananas and cinnamon doing their job!
First things first: turn your oven on! You need it set right to 350°F (175°C). Get that large baking sheet lined with parchment paper so you don’t scramble later trying to grease a pan properly. That sheet needs to be ready before the batter comes together. For tips on handling baking for little ones, check out my guide on easy recipes for kids!
Processing Wet Ingredients and Chopping Oats
Now, gather your crew in the food processor bowl. Start with the heavy hitters: those two peeled, soft bananas, the packed dates, your coconut oil, and the vanilla extract. Let that processor run for a full minute. You want it entirely smooth and creamy—no chunks of date hiding in there! Next, add your spices and leavening: the cinnamon, baking powder, and sea salt. Pulse that again just until everything looks uniformed.
This next part is where we create our structure. Add the 1.5 cups of rolled oats—the ones we want to break down, not fully pulverize. This is James’s favorite trick: pulse it for only 4 or 5 short seconds. You are going for a coarse meal, not oat flour. That bit of texture keeps the inside from getting gummy. Once pulsed, take the blade out, stir in the remaining 1/2 cup of whole oats and those chocolate chips by hand. Just a gentle fold so you don’t activate too much structure. That’s the difference between a standard muffin and a perfect dense bite!
Scooping and Baking Your Banana Bread Muffin Tops
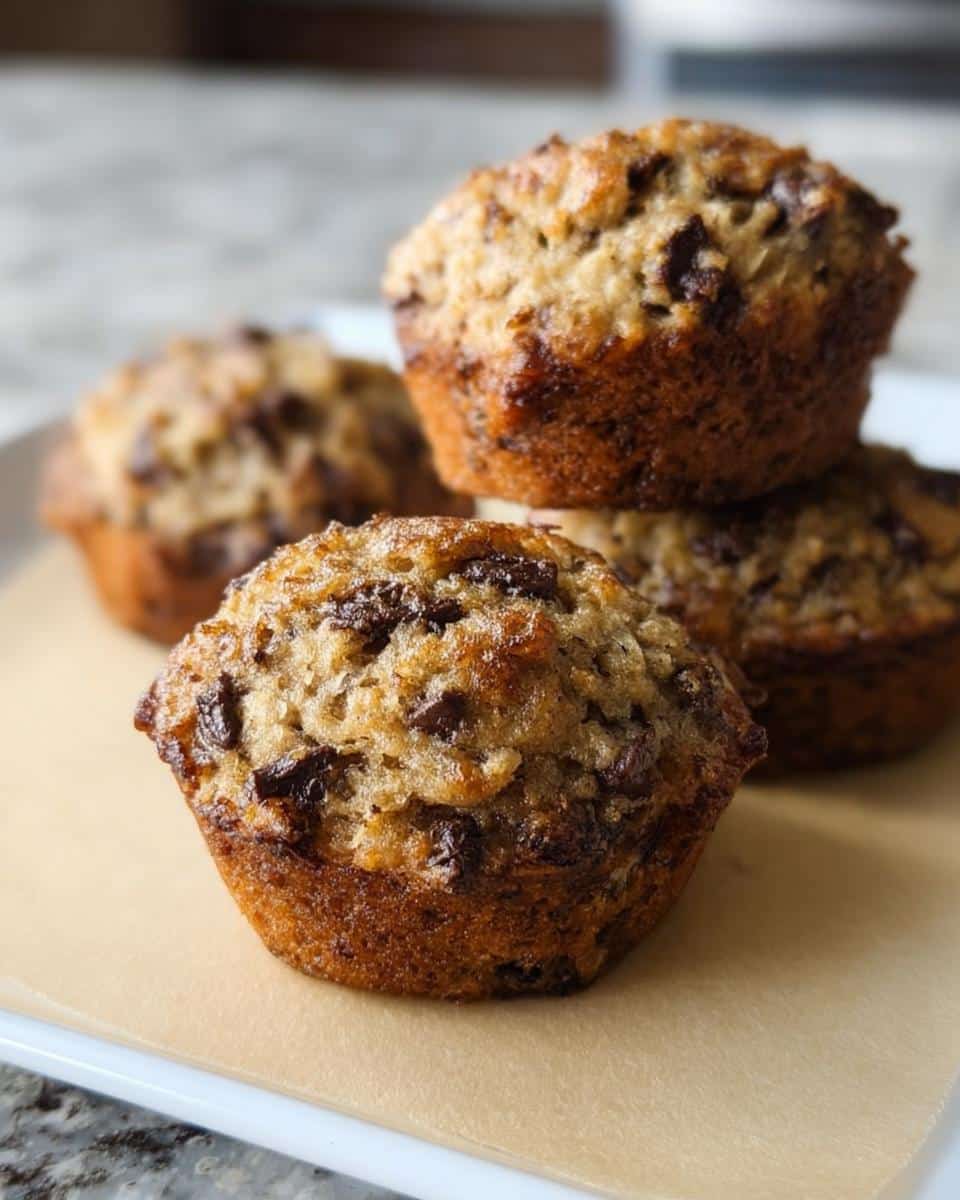
This is critical for getting that great top texture. You are going to scoop large spoonfuls—about 3 to 4 tablespoons worth—onto that parchment-lined sheet. Here is the huge thing: you must leave them in mounds! Do not flatten them down with a spoon or your fingers. They need to bake upward, not outward, to get that signature shape.
We bake these in two stages, which really helps them set. Pop the sheet in for 10 minutes right at 350°F. After that initial bake, pull them out, rotate the pan—we want even cooking!—and then bake for another 7 to 9 minutes. You’re looking for the bottoms to be nicely golden brown. They shouldn’t look wet at all. Remember, we want the ultimate Quick Banana Bread feel!
Once you pull them out, resist the urge to move them immediately! Let them sit right there on the sheet for 10 minutes. Then, gently lift them onto a wire rack to cool completely. If you move them too soon, the weight of the soft center might cause them to tear a bit. Patience pays off for the best Banana Bread Muffin Tops!
Tips for Success When Making Banana Bread Muffin Tops (Keyword Focus)
Baking is about intuition as much as measuring, and when you’re making something as unique as Banana Bread Muffin Tops, a few little tricks can elevate them from good to absolutely legendary. Because we aren’t using standard flour here, the timing and moisture level are everything. I’ve learned these must-dos over years of testing what makes a great, portable snack!
First up, I can’t stress enough: use the mushiest bananas you can find! If they are just yellow with a few brown spots, they won’t give you that natural, deep molasses sweetness. You want bananas that look like they might be too far gone to eat normally. Those are the ones that turn into the best, most flavorful base for our Banana Bread Muffin Tops. Never settle for barely ripe!
Secondly, once you add that final 1/2 cup of whole oats and the chocolate chips, you need to treat that batter with respect. Stop mixing the second everything is incorporated. If you overmix that final step, you risk making the oats break down too much, and suddenly, you’re getting a dense, slightly gluey center instead of that beautifully tender crumb we are aiming for. Fold gently, just until you don’t see dry streaks.
The third win for texture comes from how you handle the heat. Remember what I said about baking them on a sheet and not pressing them down? That open surface area is what gives you the crisp edge. Don’t be tempted to cover them with foil or bake them in a deep muffin tin. Baking them directly on parchment paper allows the bottom edges to caramelize slightly while the top sets perfectly. It’s that contrast that sets these apart from just a sad, flat cookie.

If you want to explore more great gluten-free baked goods—which is what we are essentially making here with our oat base—take a look at my favorites over in the easy gluten-free recipes section. Happy baking!
Variations and Serving Suggestions for Homemade Banana Bread Recipe
One of the best things about keeping a classic recipe close is adding your own signature touch, even to these speedy Banana Bread Muffin Tops. Since the base is so naturally sweet from those ripe bananas and dates, it’s really versatile. You don’t need to mess with the core technique, but I love switching up the mix-ins depending on what I have on hand or what the kids are craving that day.
If chocolate chips aren’t your thing—or if you just ran out!—I highly recommend swapping them out for nuts. Chopped walnuts or pecans are fantastic. They provide an extra bit of crunch that contrasts beautifully with the moist interior. Just make sure they are roughly chopped; we don’t want giant chunks throwing off the scooping shape too much.
For the spice lovers, don’t stop at cinnamon. A small pinch of nutmeg, maybe 1/4 teaspoon, mixed in with your dry ingredients, deepens that cozy, baked flavor profile beautifully. It makes them taste like they’ve been slow-roasting all morning, even though they were fast in the processor!
When it comes to serving these, they are designed for speed, but they are delicious with very little effort. Honestly, they are perfect straight off the cooling rack with a cup of strong coffee. They hold up beautifully to a smear of butter, too, even though they are already moist from the coconut oil. If you’re looking for other quick meal ideas or savory twists—because sometimes breakfast needs a sharp contrast—you should definitely check out my ideas in the easy savory recipe ideas category.
If you’re feeling fancy, a small dollop of Greek yogurt, perhaps laced with a tiny bit of honey, makes these feel more like a proper brunch item than just a grab-and-go snack. Either way, they disappear way too fast in our house!
Storage and Reheating Banana Bread Muffin Tops
Because these are made with oats instead of traditional flour, they handle sitting out slightly differently than standard cakes, so we need to be mindful of keeping that signature moisture locked in. The most important rule, before you even think about putting them away, is waiting until they are completely cool. I mean stone cold! If you seal them up while they are even slightly warm, that trapped steam is going to hit the sides and bottom, and we’ll lose that lovely crisp edge we worked so hard to achieve.
Once they’ve cooled completely on the rack, toss them into an airtight container. I prefer glass containers, but any good sealable container works fine. They usually stay wonderfully fresh on the counter for about three days. You can keep them in the fridge too, but sometimes the cool air zaps the texture a little bit. If you go the fridge route, try setting them on the counter for about 15 minutes before eating to let them warm up just a hair.
Now, if you’re making a massive batch—which you totally should, because they disappear fast—the freezer is your best friend. Lay the cooled muffin tops in a single layer on a baking sheet and pop that right into the freezer for about an hour until they are solid. Then you can transfer them into a heavy-duty freezer bag. They keep beautifully for up to three months this way! When you need one, just pull it out while you’re making your coffee and let it thaw on the counter for about 20 minutes. It tastes almost exactly like it just came out of the oven!
Frequently Asked Questions About Banana Bread Muffin Tops
Q1: Can I make this without a food processor?
Oh man, you’re going to make this harder on yourself, but yes, you truly can try! The food processor is key because it quickly crushes those dates and pulses the oats into a coarse flour substitute. If you don’t have one, you’ll need a powerful blender, or honestly, you’ll have to mash those bananas and dates by hand until they are completely smooth—and that takes serious elbow grease! For the oats, you’d need to grind up 1.5 cups in a separate, powerful spice/coffee grinder until it looks like coarse sand, which is tricky to do without turning it into powder. I really recommend finding a friend with a processor for this specific recipe!
Q2: Are these truly healthy banana bread bites?
Compared to regular cupcakes or even some store-bought muffins, I certainly think so! They lean heavily on whole foods, which I always champion. We’re using ripe bananas and Medjool dates for almost all the sweetness, which means a good dose of natural fiber and nutrients. Plus, we rely on gluten-free oats for structure, making these fantastic as Healthy Banana Bread Bites. They aren’t zero-calorie, of course, but they replace highly processed sugars and flours with whole fruit, which is always a win in my book for a quick snack.
Q3: Why are my muffin tops flat?
If yours spread out like pancakes instead of staying in those beautiful, tall mounds, it almost always comes down to two things, and this is important for getting the right look! First, make sure your baking powder is fresh. If it’s old, it won’t give you that little lift you need. Second, and this is the big one: you cannot flatten the dough before baking! When you spoon the dough onto the sheet, leave it as a high, rustic scoop. If you press it down, you’re removing all the air pockets and essentially making a thick cookie instead of a proper top.
Q4: Can I use regular flour instead of GF oats?
You absolutely can substitute the oats with regular all-purpose flour if you need to make a batch right now. Since the recipe calls for 2 cups of oats total (1.5 cups processed, 0.5 cup whole), you can generally swap that for 2 cups of all-purpose flour. However, you need to adjust your technique. If you use standard flour, you won’t need the food processor for grinding! You can just whisk the flour, baking powder, and cinnamon together in a bowl. Keep in mind that swapping the oats changes the flavor and texture profile completely, making it more like a very dense cake than the rich, slightly chewy texture these Ripe Banana Recipes are known for.
For more insight into my recipe testing and where these ideas come from, you can read about my approach to food history on my About page!
Estimated Nutritional Snapshot for Banana Bread Muffin Tops
Now, I want to be upfront with you all. Because this recipe uses whole, natural ingredients like dates and oats—and no refined white sugar—the nutrition profile is way better than your average packaged muffin. Since I’m a baker and a flavor historian, not a registered dietitian, these numbers are just an **estimate** based on calculating the main ingredients per serving (12 muffin tops). Don’t treat this like gospel; it’s just a guide to show you these are a fantastic, energy-boosting treat!
When I look at what fuels my family, I focus on what we’re getting out of the food, and these deliver good fiber from the oats and dates. Here is a rough breakdown for one of these delicious bites:
- Calories: Around 150-170 (This varies a lot based on the size of your bananas and how much oil clings to them!)
- Fat: Approximately 6-7 grams (Mostly from the coconut oil choice)
- Carbohydrates: Roughly 25-28 grams
- Protein: About 3 grams
- Fiber: A solid 3-4 grams, thanks to those oats!
Remember, this is for one single-serve bite, which is perfect for controlling portions when you’re grabbing something quick on the way out the door. You get that satisfying sweetness, and you know exactly what went into them because you made them yourself!
Banana Bread Muffin Tops
Ingredients
Equipment
Method
- Preheat your oven to 350F (175C) and line a large baking sheet with parchment paper.
- Add the peeled bananas, pitted dates, coconut oil, and vanilla extract into a food processor. Process until the mixture is smooth. Let the processor run for about one minute.
- Add the cinnamon, baking powder, and salt to the mixture. Process again until all ingredients are combined.
- Add 1.5 cups of the rolled oats and process for only 4 to 5 seconds. You want to roughly chop these oats, not fully blend them.
- Remove the food processor bowl from the base. Remove the blade and set it aside. Carefully stir in the remaining 1/2 cup of rolled oats and the chocolate chips by hand.
- Spoon a large portion of dough, about 3 to 4 tablespoons for each, onto the prepared parchment paper. Do not press the dough down to flatten it; leave it in a mound on the baking sheet.
- Bake the muffin tops for 10 minutes. Rotate the pan, and then bake for an additional 7 to 9 minutes until the bottoms are golden brown.
- Immediately transfer the baking sheet onto a cooling rack and let it sit for 10 minutes. Then, lift the muffin tops off the sheet and place them directly on the rack to cool completely.