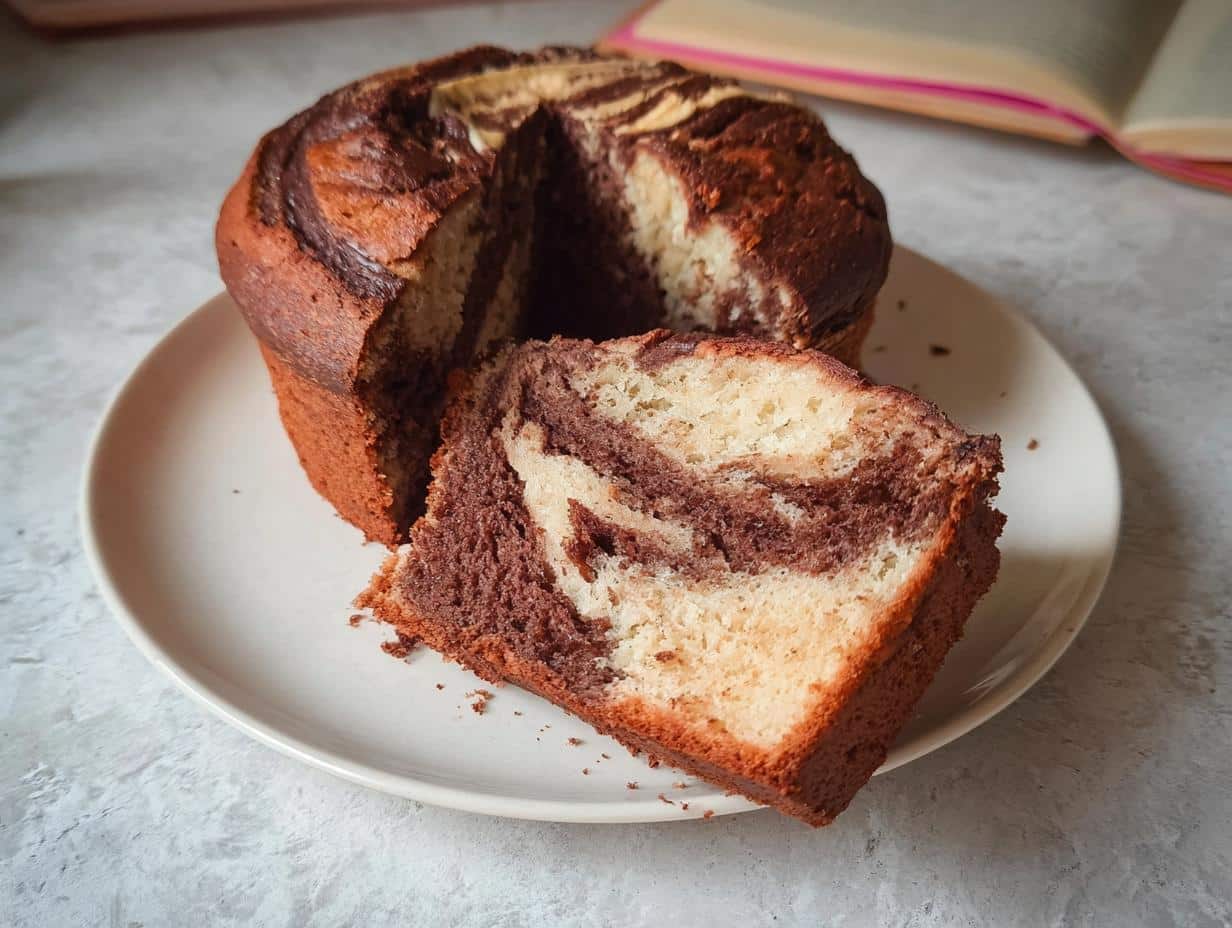
Doesn’t a beautiful swirl instantly make any treat feel a little more special? I absolutely love baking things that look way more complicated than they actually are. That’s why I’m obsessed with this Banana Bread Marbré Vanille–Chocolat. Seriously, it’s my go-to when I need that comforting banana flavor but want something that wows people at brunch. As a Flavor Strategist, I preach balance, and this recipe nails it: rich banana comfort wrapped up in a stunning chocolate and vanilla ribbon. It’s unbelievably easy, trust me!
If you’re looking for an impressive treat without any fuss, you’ve found the right home for your next bake. Hop over to my favorite breakfast recipes for more easy wins sometime, like all my brunch favorites!
Why This Banana Bread Marbré Vanille–Chocolat Stands Out (E-E-A-T)
What makes this recipe pop isn’t just the gorgeous swirl; it’s how simple it is to get such an impressive result! If you’re after that perfect presentation without spending all day in the kitchen, this Banana Bread Marbré Vanille–Chocolat is your answer. It truly is one of the easiest ways to elevate banana bread.
As a Flavor Strategist, let me tell you that the secret is in the ratio of bananas to batter. We use three very ripe bananas—the browner, the better—to saturate the base mixture perfectly. This deliberate moisture level ensures the final product stays tender and never dry, even when you reheat leftovers. It just tastes better and keeps its structure! You can find more of my go-to easy bakes perfect for little treats, like these easy snacks.
Achieving the Perfect Moist Banana Bread Recipe Moist Texture
If you want that coveted moist banana bread texture, you must start with the bananas themselves! Forget yellow bananas; we need the ones that look like they’ve had a rough week—mostly black spots on the skin. Those are packed with concentrated sugars and moisture. I call this the foundation for a Super Moist Banana Bread Recipe.
The puree process in the blender helps break those fibers down completely, distributing that moisture evenly through the entire batter before we even deal with the vanilla or chocolate sections. It makes a huge difference!
Ingredients for Your Banana Bread Marbré Vanille–Chocolat
Okay, gathering our supplies is the next big step for making this gorgeous Banana Bread Marbré Vanille–Chocolat. Remember, quality inputs equal quality outputs! I’ve listed exactly what you need below, broken down so you don’t mix up your vanilla additions with your chocolate ones later.
- For the Banana Bread
- 3 very ripe bananas (peeled)
- 110 g softened butter (room temperature)
- 120 g granulated sugar
- 2 eggs
- 250 g all-purpose flour
- 5 g baking powder
- For the Vanilla and Chocolate Batters
- 1 tsp liquid vanilla extract
- 100 g dark chocolate (melted)
Ingredient Notes and Substitutions
Before you start blending, let’s talk bananas. For the best results, ‘very ripe’ means the skins should be entirely brown or nearly black. Seriously, the browner they are, the sweeter and moister your bread will be. That natural sugar content makes such a difference!
Now, if you find yourself out of butter, don’t panic! Since this is a comfort bake, butter really adds that classic richness, but you absolutely can substitute it with the same amount of neutral oil, like canola or vegetable oil, for a slightly different but still delicious crumb. If you ever want to dive deeper into healthy swaps for baking, check out some of my gluten-free recipe ideas for other ingredient inspiration.
Step-by-Step Instructions for Easy Banana Bread Recipe 3 Ingredients Healthy
Getting this Banana Bread Marbré Vanille–Chocolat together is surprisingly quick! We start by getting all that base banana flavor mixed up first. Grab your blender and toss in two of those ripe bananas, the sugar, the eggs, and your softened butter. Blend it until it’s just completely smooth—no chunky bits allowed!
Next, pour that lovely banana puree straight into a big mixing bowl. Gently fold in your flour and baking powder until you see *just* combined. Don’t overwork it, or things get tough! Now, here’s the fun, slightly mathy part: weigh your total batter and split it evenly into two bowls.
In one bowl goes that teaspoon of vanilla extract. In the other, fold in your melted dark chocolate. Now you have your two distinct batters ready to go! This division step is what makes this recipe so accessible, even if you are aiming for an easy recipe for kids to help with.
Lightly grease that 20cm silicone round pan—silicone is a lifesaver here! Start pouring the vanilla and chocolate batters in alternately, like layers of sand on a beach. This alternating pour sets up the marble perfectly.
Creating the Signature Marble Effect in Your Banana Bread Marbré Vanille–Chocolat
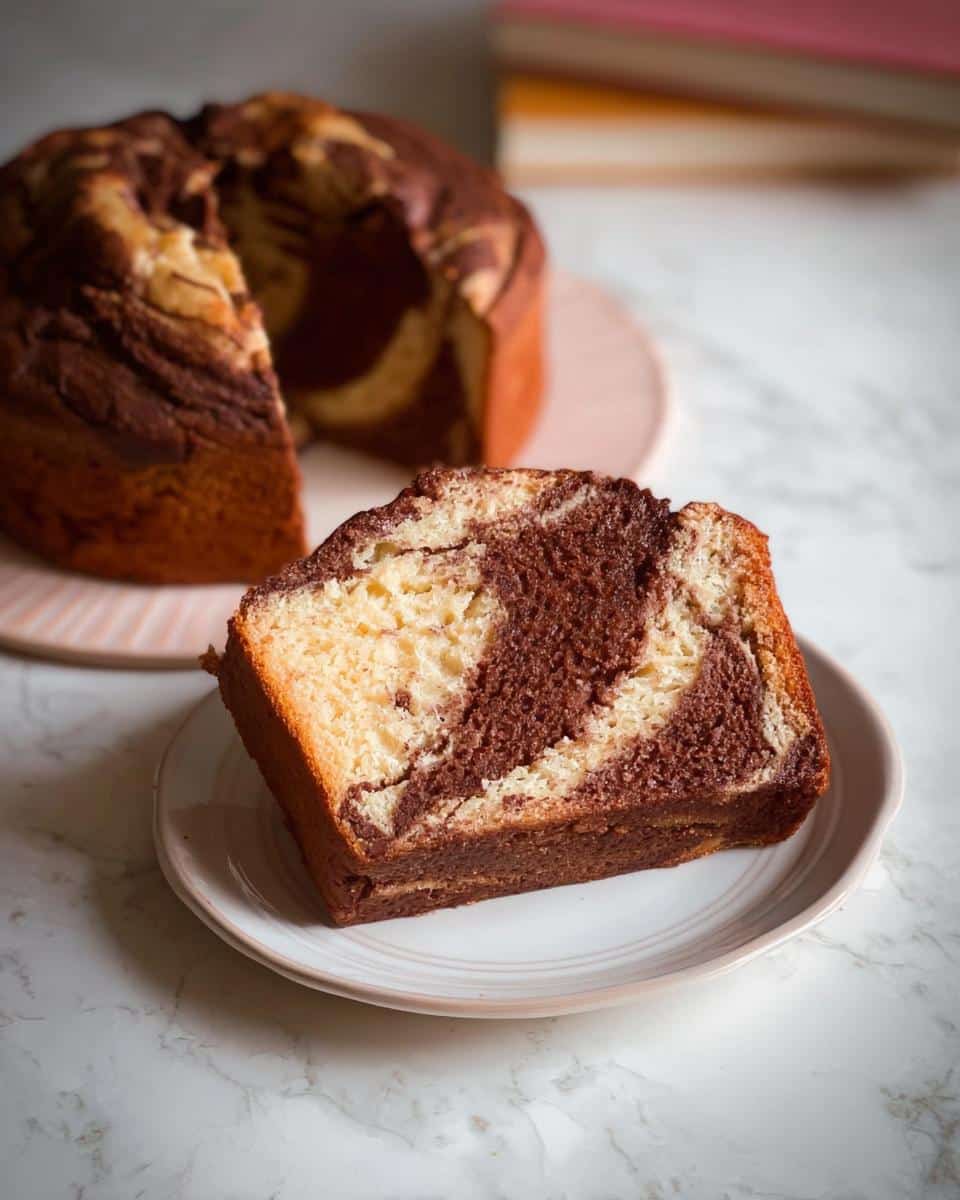
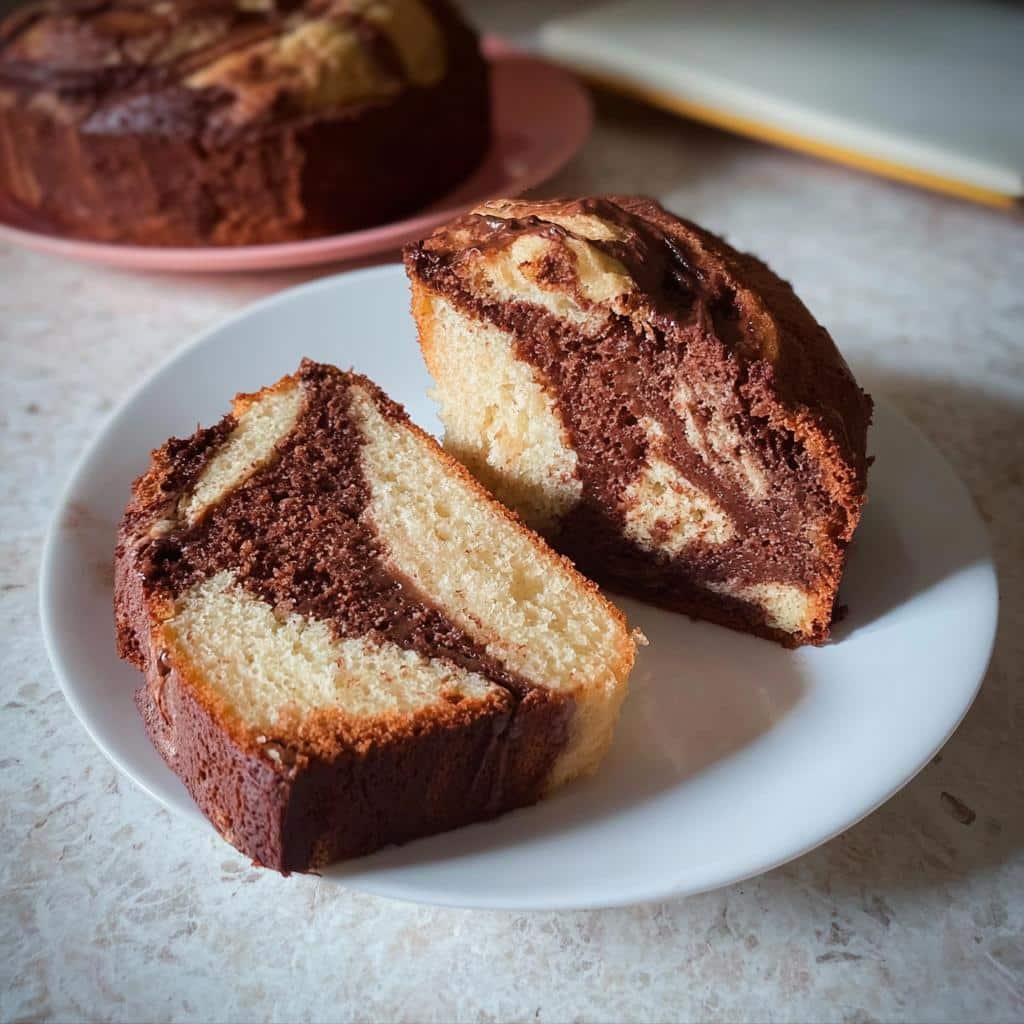
This swirling step is where the magic happens! After alternating your vanilla and chocolate batters for the Banana Bread Marbré Vanille–Chocolat, take a knife—a thin one works best—and gently draw it through the batter a few times. I mean just a couple of passes. Seriously, don’t go crazy!
The goal is distinct ribbons, not one muddy brown mix. If you over-swirl, you lose the contrast between the light vanilla and the rich chocolate. I try to do just one figure-eight pattern right down the middle and stop. You want definition when you slice it!
Finally, take that last banana, slice it in half longways, and lay those two pieces right on top of the swirling batter. Pop it into an oven preheated to 180°C (fan setting) and let it bake for about 60 minutes. Remember to use that skewer test to make sure the center is completely done before you pull it out!
Tips for the Best Ever Banana Bread Moist Success
Even with a fantastic recipe like this Banana Bread Marbré Vanille–Chocolat, a few little tricks can take it from good to absolutely legendary. Everyone wants the bragging rights for the Best Ever Banana Bread Moist version, right? These aren’t huge changes, but they show the difference between baked goods and *great* baked goods!
First, let’s talk about your oven. I swear by checking my oven temperature with a separate thermometer, especially for something that bakes for an hour like this one. Fan settings (180°C) are great because they circulate heat, but if your oven runs hot, you risk setting the outside before the middle is cooked. If you’re a gadget lover, some Thermomix or connected ovens can help with that precision automatically, though I still check mine regularly! See some of my favorite settings for advanced mixers here: Thermomix baking tips.
My second must-do tip involves the pan preparation, especially since we’re working with a batter that has two different moisture levels (vanilla vs. chocolate). Use good quality grease and flour, or better yet, a generous swipe of cake goop—you know, that homemade release paste I always talk about! This ensures that when you flip your beautiful marbled cake out, it releases perfectly intact, showing off those swirls.

And speaking of the swirl: don’t slice or swirl the chocolate mixture into the vanilla mixture until the very last second. When you start swirling, treat the batter gently. Remember, we’re trying to keep those two colors separate enough to look marbled in the final Banana Bread Marbré Vanille–Chocolat. Over-mixing here is the quickest way to lose that impressive visual appeal we worked so hard for!
Equipment Needed for Banana Bread Marbré Vanille–Chocolat
Planning ahead means a smoother baking session, and for this gorgeous marbled loaf, you don’t need a huge arsenal of specialized tools. Luckily, this isn’t one of those recipes where you need twenty bowls. We keep things streamlined!
Here’s what you’ll need pulled out before you start mashing those ripe bananas:
- Blender or food processor (This is my secret weapon for getting that smooth base puree—so much easier than hand-mashing!)
- 20cm silicone springform pan (Silicone is fantastic for clean releases, especially with delicate marbled batters.)
- Mixing bowls (You need at least two, plus one for starting the initial puree mix if you aren’t using the blender jar itself to hold the base batter.)
See? Very straightforward. Having the right pan size makes all the difference for even baking, so make sure that 20cm round pan is clean and ready to go when it’s time to pour the two batters!
Storage and Reheating Instructions for Homemade Banana Bread Recipe
Once your beautiful marbled creation has cooled completely—and resisting slicing into it is the hardest part, trust me—you’ll want to store it properly so it stays fresh. This recipe, thanks to all that banana power, tends to hold up really well, making it a fantastic Homemade Banana Bread Recipe to make ahead of time.
For keeping it fresh at room temperature, wrap the cooled loaf tightly in plastic wrap first, and then tuck that into a zip-top bag or an airtight container. On the counter, it will be perfectly delicious for about three to four days. I usually aim to eat it within those first few days because that fresh-out-of-the-oven softness is unbeatable!
If you know you won’t get through it that quickly, the fridge is your friend. Storing it wrapped tightly in the refrigerator extends its life easily to a week, maybe ten days. Just be warned: the cold can slightly firm up the texture, but we have a quick fix for that!
When you’re ready to enjoy a slice from the fridge or one that’s a couple of days old, you absolutely have to reheat it slightly. Pop a slice on a microwave-safe plate and zap it for just 10 to 15 seconds. That quick burst of heat melts the residual fats back into the crumb, making it feel nearly fresh-baked again. We want that moisture back, not a dry hockey puck!
If you are prepping ahead for gifts or a party, this bread freezes beautifully too! Wrap individual slices tightly in plastic wrap, then foil, and toss them in the freezer for up to three months. When you’re ready, thaw overnight on the counter and then give it that quick microwave zap to bring back the *oomph*. You can read about my approach to data privacy and how I keep my site secure right here: My Privacy Policy.
Troubleshooting Common Issues with Your Banana Bread Marbré Vanille–Chocolat
Even when following the best instructions, sometimes baking throws a little curveball our way! Don’t worry if your beautiful Banana Bread Marbré Vanille–Chocolat doesn’t look exactly like the picture the first time. Troubleshooting is part of the fun of being a home baker, and I’ve certainly had my share of banana bread fails over the years while perfecting this ratio.
Let’s talk about the two most common hiccups I see readers run into when they are trying to achieve this stunning marbled bread. If you ever have questions about recipe accuracy or general site practices, you can always double-check my general site disclaimer.
Batter Sinking or Remaining Too Wet in the Center
If your bread sinks dramatically after cooling, or if your skewer comes out completely goopy despite baking for the full 60 minutes, we usually have one of two culprits: under-ripe bananas or over-mixing the flour.
Remember what I said about those bananas? If they weren’t brown enough, they didn’t release enough natural sugar and moisture to hydrate the batter properly. If the spots weren’t black enough, your cake basically baked up dry in spots and damp in others, causing it to collapse in the middle!
The other big issue is over-mixing once the flour goes in. Once you add the dry ingredients to the wet puree, you only want to mix until you see the last streaks of flour disappear. Mixing too long develops the gluten, creating tunnels and a dense, gummy texture that traps moisture where it shouldn’t be, leading to that wet center. Slow down, mix gently, and trust the process!
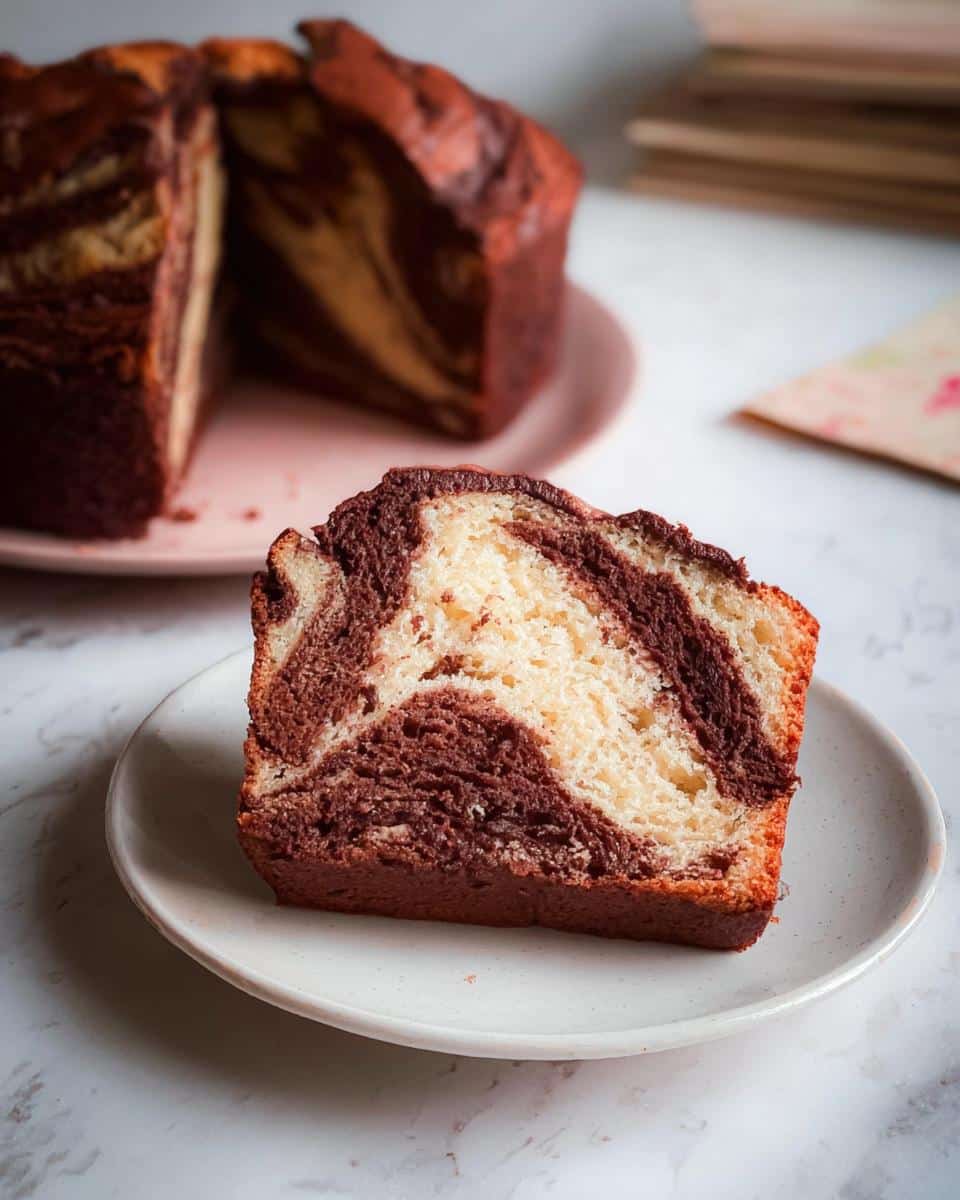
The Marble Effect Disappears Completely
This is a purely aesthetic issue, but boy, is it disappointing when you expect ribbons and get a mostly solid brown loaf! This tells me you got a little too detailed with your swirling technique when making your Banana Bread Marbré Vanille–Chocolat.
The key to maintenance here is restraint. When you pour the vanilla and chocolate batters alternately into the round pan, the design is already set up. That subsequent swirling motion is just meant to connect the layers a tiny bit.
If you draw that knife through the batter more than three or four times, the two batters incorporate too much, and the colors blend into a muddy single color. Next time, try just plunging the knife straight down to the bottom once on one side, and once on the opposite side, and that’s it. You want those clear, visible trails of contrast running up to the surface!
Frequently Asked Questions About Banana Bread Marbré Vanille–Chocolat
I know you might have a few little questions bubbling up—that’s totally normal when trying a new recipe, especially one that looks this pretty! I want you to feel super confident tackling this Banana Bread Marbré Vanille–Chocolat. Here are some of the things I get asked most often in my DMs.
If you’re reading this and thinking, “Can I just throw this together faster?” Don’t forget to check out my notes on making a Quick Banana Bread variation if you ever need speed!
How ripe do my bananas really need to be?
This is my favorite question because it’s the key to true banana flavor! To get the best moisture and sweetness for your Banana Bread Marbré Vanille–Chocolat, you need what I call ‘black spot confetti’ bananas. They should be mostly black or heavily speckled. Think of these as your ultimate source for Ripe Banana Recipes. If they are still mostly yellow, they just don’t have the sugar concentration needed to carry the flavor punch when baked.
Can I skip the blender and just mash the bananas?
You totally *can* mash them by hand if you don’t want to use the blender—it just changes the texture ever so slightly. If you mash by hand, you’ll end up with some smaller banana chunks in the base batter, which is totally fine if you like texture! However, using the blender ensures that base puree is super velvety, which helps keep the finished product a consistent, Super Moist Banana Bread Recipe texture throughout, even in the vanilla sections.
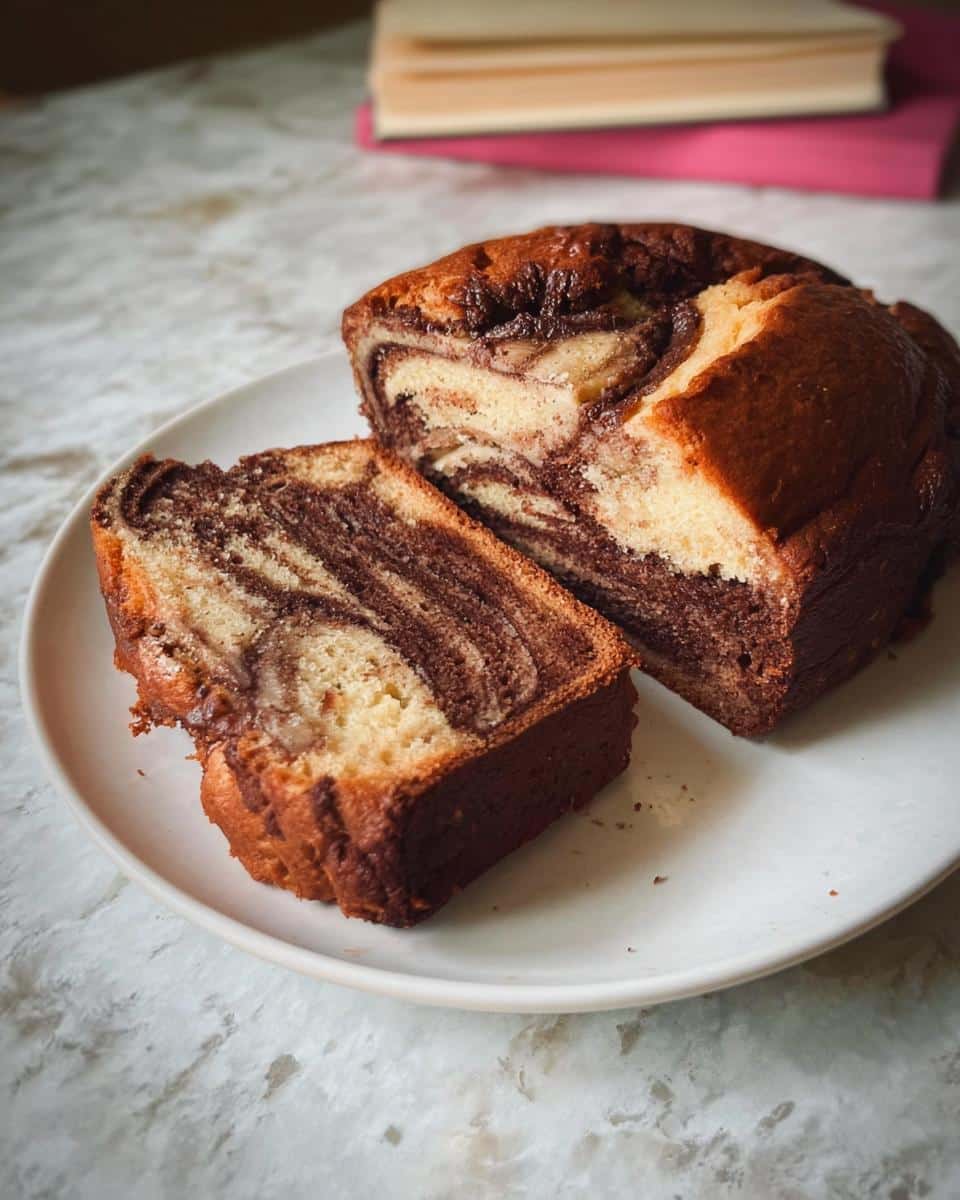
I only have a loaf pan. How should I adjust the baking time for this Banana Bread Marbré Vanille–Chocolat?
That’s a great question, and you definitely don’t need a special round pan! As I mentioned in the notes, you can use a standard loaf pan—just watch the time closely. Because loaf pans are deeper, it takes longer for the heat to reach the very center. You might need to bake it for an extra 5 to 10 minutes, but trust your skewer! If the outside starts getting too dark before the center is done, just lightly tent a piece of foil over the top for the last 15 minutes of baking. It should still look gorgeous!
Is this 4 Ingredient Banana Bread?
Oh gosh, no! I wish! While I love simple baking, four ingredients won’t give you the lift, the swirl, or the rich flavor we’re aiming for here in the Banana Bread Marbré Vanille–Chocolat. This recipe uses about 8 distinct ingredients to get that perfect marbled look and moist crumb. If you’re looking for true minimalist baking, that falls more into the realm of 4 Ingredient Banana Bread, which is a completely different texture profile we can explore another day!
Why do I need to weigh the batter before dividing?
This is a trick all about balance! We are dividing the base banana puree batter exactly in half so that one side holds the vanilla and one side holds the chocolate. If you just eyeball the pour, one side might get less vanilla and more chocolate, throwing off the flavor balance we worked so hard to achieve. Weighing it guarantees that the final marbled slice of your Banana Bread Marbré Vanille–Chocolat has exactly 50% vanilla flavor and 50% chocolate flavor. It’s the key to making sure every bite performs perfectly!
Estimated Nutritional Data for This Recipe
So, we’ve talked flavor, texture, and how to get that Instagram-worthy swirl, but as a Registered Dietitian, I know a lot of you are also curious about what exactly is going into that gorgeous slice of marbled goodness! Here are the estimated nutritional breakdowns for one slice of this Banana Bread Marbré Vanille–Chocolat.
Now, please remember these numbers are just estimates based on the ingredients I listed—and they assume the bake divides perfectly into 8 slices! If you use different brands of sugar or slightly different chocolate ratios, the final count will change a little bit. Baking is chemistry, but life is messy, so take these as a guideline, not a hard rule!
- Calories: 350
- Carbohydrates: 50g
- Fat: 15g (This includes about 9g of saturated fat from the butter and cocoa solids)
- Protein: 6g
- Sugar: 28g (Most of this is natural sugar from the ripe bananas and molasses in the brown sugar, if you used it!)
- Fiber: 3g
I tried really hard to balance the richness with the natural sweetness of the bananas so it doesn’t feel overly heavy, which is why I focus on using quality ingredients here. If you want to make a lower-sugar version for the kids, that’s something we can explore next time! If you have any questions about this recipe or just want to say hi, feel free to reach out via my Contact Us page!
Marbled Vanilla Chocolate Banana Bread
Ingredients
Equipment
Method
- In a blender, combine two peeled and sliced ripe bananas, granulated sugar, eggs, and softened butter. Blend until you have a smooth puree.
- Pour this puree into a mixing bowl. Add the flour and baking powder. Mix until just combined.
- Weigh the total batter. Divide the batter weight equally into two separate bowls.
- In one bowl, stir in the liquid vanilla extract. In the second bowl, stir in the melted dark chocolate.
- Lightly grease the inside of a 20cm round silicone pan. Pour the vanilla batter and the chocolate batter alternately into the pan.
- Use a knife to lightly swirl the batters together to create a marbled effect.
- Peel and slice the remaining banana in half lengthwise and place it on top of the batter.
- Preheat your oven to 180°C (350°F) using the fan setting.
- Bake the banana bread for 60 minutes. Check for doneness by inserting a skewer into the center; it should come out clean.