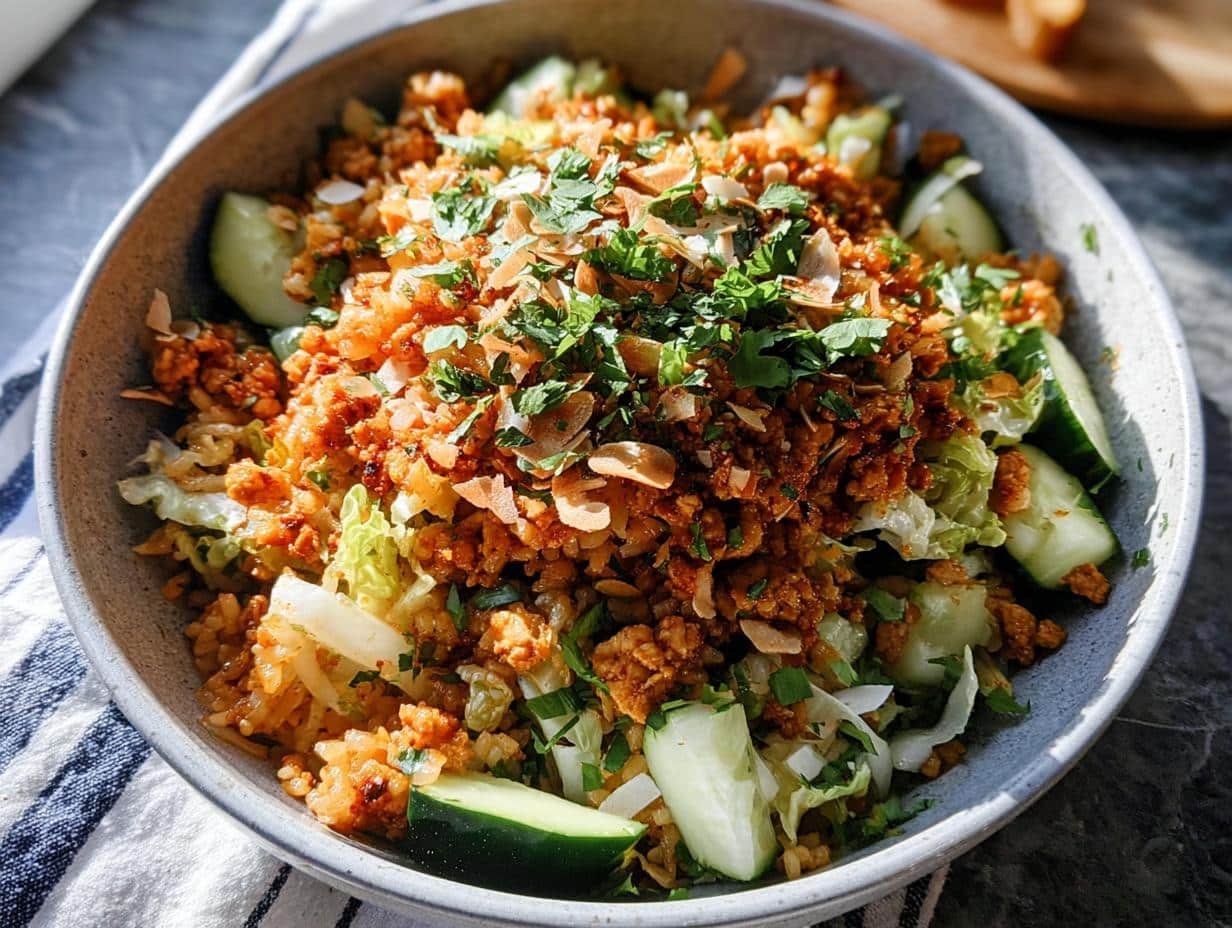
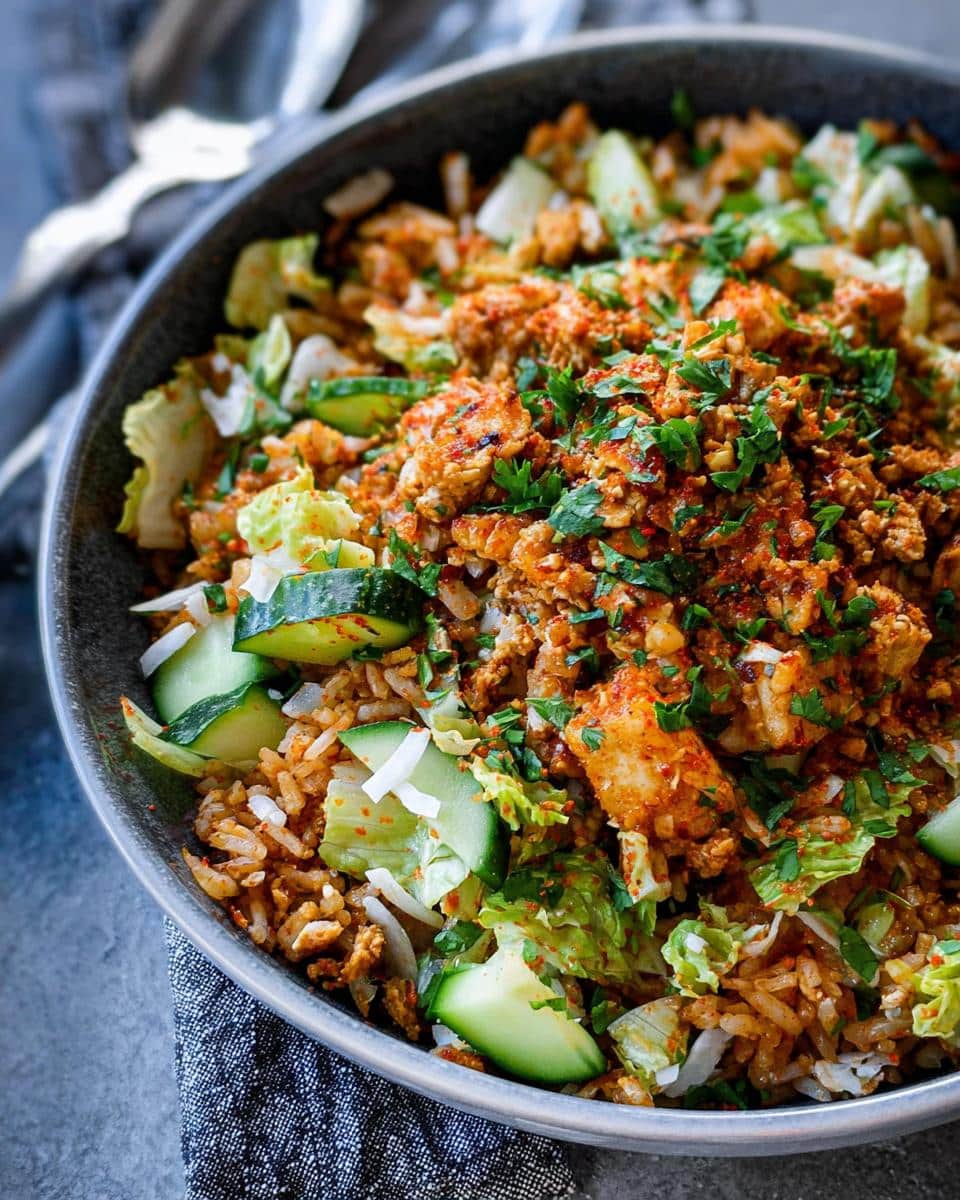
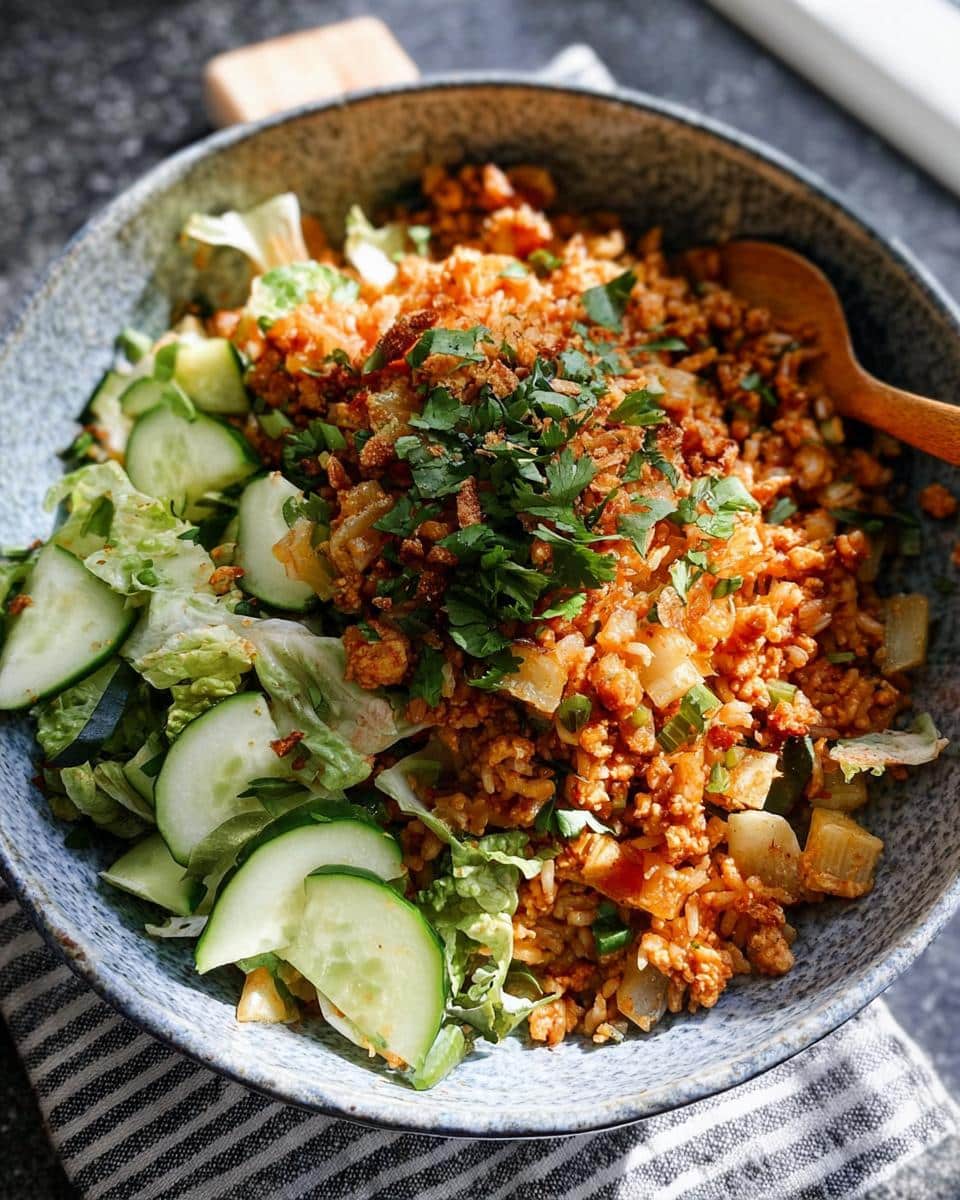
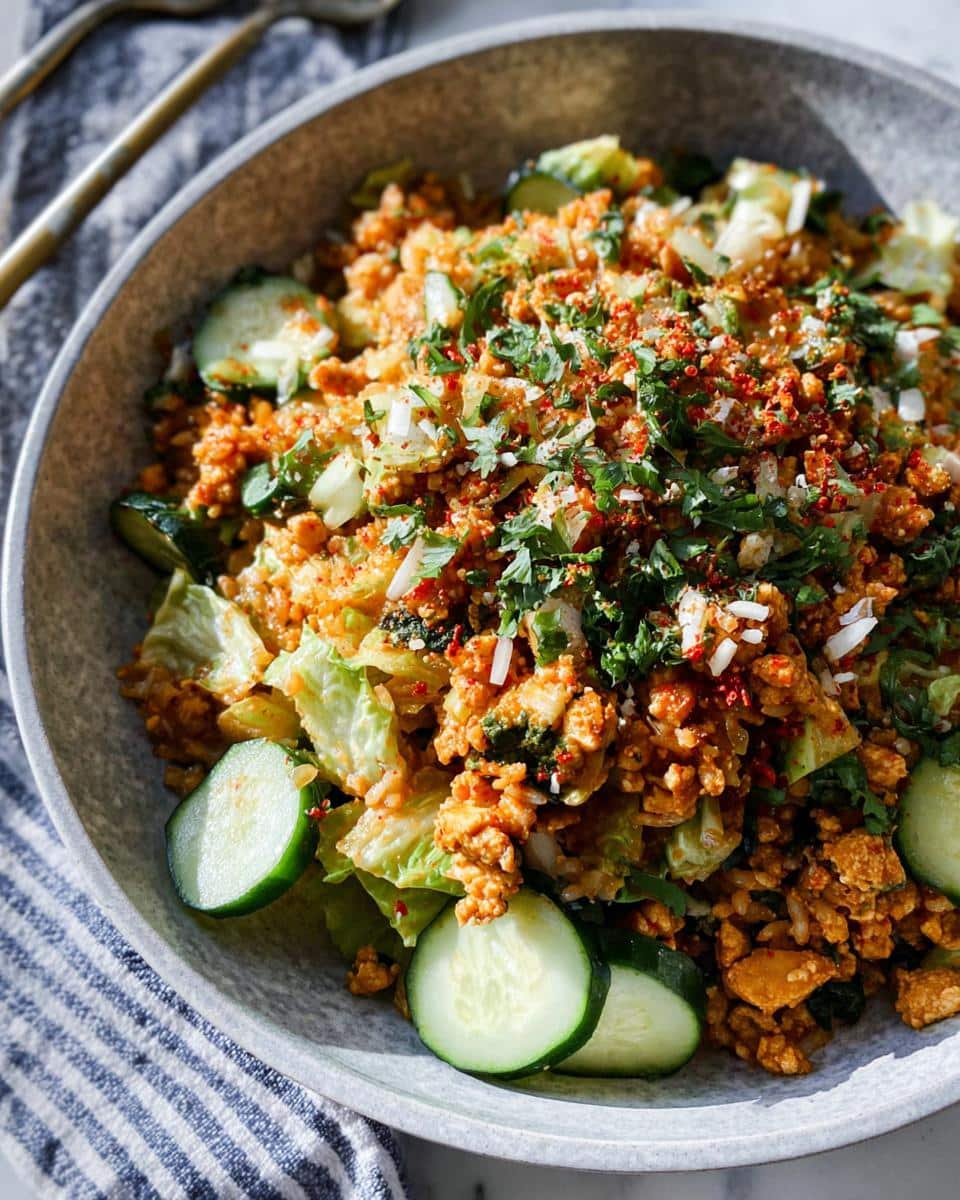
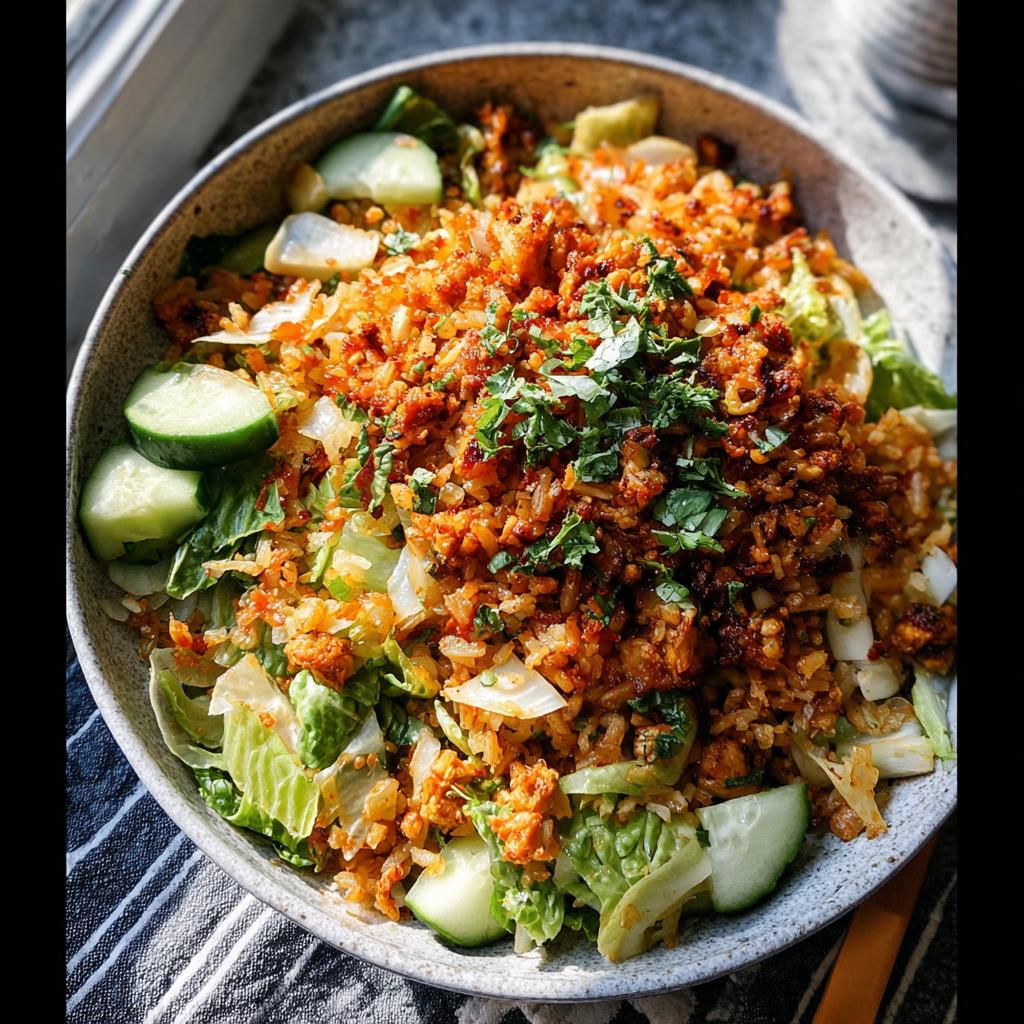
There’s just something about a dish where the textures fight each other in the best possible way, isn’t there? I’ve spent so much time tracing how cultures across the globe—from our own Southern favorites to deep Asian traditions—have all independently figured out that heating grains until they crackle and crisp up just tastes better. That concept is the heart of this Gluten Free Crispy Rice Bowl. It’s wonderfully satisfying, naturally free of gluten, and packs this amazing punch of flavor with coconut curry chicken. I truly think this balance of tender chicken, fresh crunch, and that perfectly crackly rice is what makes a meal feel complete. Come join me in the kitchen; we’re building a masterpiece here.
The Cultural Story Behind the Gluten Free Crispy Rice Bowl
Crispy rice isn’t just a trend; it’s basically global comfort food history condensed onto one pan. Think about it: whether it’s the bottom-of-the-pot rice in a Spanish paella or the scorched grains in a Persian tahdig, every culture figures out that the crusty bits are the best bits. That love for texture is exactly why the Gluten Free Crispy Rice Bowl sings so well today.
We take that ancient wisdom and dress it up modern style. When you bake that cooked rice until it shatters, you create an earthy, nutty counterpoint to the creamy curry sauce flowing over the top. It brings a necessary crunch that dried-out, shelf-stable grains just can’t achieve. This dish really honors that tradition of making every grain count by transforming simple rice into something spectacular.
Ingredients for Your Gluten Free Crispy Rice Bowl
When we build a bowl meal, the quality of the components really matters, right? Especially since we’re sticking to naturally gluten-free ingredients here; we need to make sure everything pulls its weight in flavor and texture. I’ve listed everything out just as I use it, divided into easy groups so you can organize your prep work. Using up that last bit of coconut milk in the dressing is one of those tidy tricks that keeps waste down too! Let’s see what we need for these wonderful easy gluten free recipes.
For the Coconut Rice
- 1/2 cup Jasmine rice (Rinsed)
- 3/4 cup Coconut milk
- 1/4 cup Chicken broth or water
- 1 3/4 tsp Salt (Divided)
- 1/2 tsp Garlic powder
- 1/8 tsp Black pepper
For the Coconut Curry Chicken
This is where we load up on flavor for a great High Protein Gluten Free meal!
- 1 lb Ground chicken
- 2 large Garlic cloves (Minced)
- 2 tbsp Red curry paste (Use 3 tbsp for more flavor)
- 1 tsp Packed brown sugar
- 1/4 cup Coconut milk (Remaining from the 3/4 cup total)
For Assembly and Vegetables
- 1 medium English cucumber (Chopped)
- 1 large Red pepper (Thinly sliced)
- 1/2 cup Cilantro (Roughly chopped)
- 1/2 cup Coconut (Unsweetened, for toasting)
- 6 cups Romaine (Chopped)
Coconut Lime Dressing
This dressing uses up the final bit of that coconut milk, ensuring we keep this recipe fitting for Dairy Free Gluten Free Recipes.
- 2 tbsp Lime juice
- 1 tbsp Rice vinegar
- 2 tbsp Coconut milk (Remaining from the original amount)
- 1/4 tsp Salt
- 1 tbsp Honey
How to Make the Perfect Gluten Free Crispy Rice Bowl
Okay, this is where the payoff starts! We’re breaking this down into manageable stages, just like any good Gluten Free Dinner plan. Since we need that rice chilled for crisping later, we tackle that first. Then we build the flavor with the chicken, and finally, we toss everything together for that stunning texture contrast. Pay attention to that resting time; it’s key!
Preparing the Coconut Rice Base
You want to start by combining your rinsed rice with the 3/4 cup coconut milk, broth or water, and 1/2 teaspoon of salt in a saucepan. Get that boiling, then drop it down to a nice low simmer, covered, for 15 minutes. Now, here’s the mandated rest: remove it from the heat and let it sit, still covered, for another 10 to 15 minutes exactly. Once that’s done, fluff it up with a fork and this is important—spread it thin on a baking sheet and chill it down until it’s cool. That cold rice is what gives us the crust later.
Achieving Crispy Rice Texture in the Oven
Heat your oven up to 425 degrees. Take that chilled rice and spread it back out on the sheet. Give it a light spray of oil—we want dry heat to do the work—and sprinkle it with salt, pepper, and garlic powder. Bake it for 20 minutes. Then, pull it out, give it a good stir to expose new sides, and pop it back in for another 15 to 20 minutes until it’s visibly brown and truly crispy. As it cools a bit, it will keep setting up that amazing texture we love!
Cooking the Coconut Curry Chicken
Time for the protein! Get a skillet hot over medium heat and add your ground chicken and 1/2 teaspoon salt. Break it up with your wooden spoon until it’s just about done. Add the minced garlic and cook until you can really smell it, maybe a minute or two. Then, stir in that red curry paste, cook it for a moment to wake up the spices, and finally, pour in that last 1/4 cup of coconut milk and the brown sugar. Simmer that down until it thickens into a lovely coat for the chicken. This keeps our Healthy Gluten Free Recipes packed with flavor.
Assembling Your Gluten Free Crispy Rice Bowl
While everything finishes, toss your romaine, cucumber, red pepper, and cilantro together in a big bowl with your Coconut Lime Dressing. For the grand finale, grab your crispy rice and start layering! Put some of the salad base in your serving bowls, add a scoop of the curry chicken, and then sprinkle that glorious rice on top. Oh, and don’t forget to push that 1/2 cup of coconut onto the baking sheet for the last couple of minutes of the rice baking time so it toasts beautifully before you sprinkle it over the whole bowl!
Tips for Success When Making Your Gluten Free Crispy Rice Bowl
Making truly crispy rice isn’t just about the heat; it’s about the moisture management leading up to that heat. I’ve learned a few tricks over the years testing countless rice batches for easy savory recipe ideas, and they all apply perfectly here. If you nail these small steps, you move from good rice to *great* rice.
First, don’t rush the chilling process. That rice needs to be completely cool, almost cold, before it hits the oven or it just steams itself instead of crisping. If you’re short on time, spread it on a thin metal sheet—metal draws the cold faster than glass.
When dealing with the chicken curry, remember the sauce is meant to be thick. If it looks too soupy after simmering, pull the lid off for the last few minutes. You want your ground chicken coated beautifully when you stir it, not sitting in a puddle. A thick sauce clings better to the crispy rice, which is fantastic for texture contrast!
My personal taste, and this is just me coming from a Texan who loves deep, smoky flavors, is to cook the rice a little darker than the recipe strictly calls for. I like those deeper brown spots—they taste almost nutty! Don’t be afraid to let those edges char just a little bit in the oven; trust your nose when you smell that toasty aroma. That’s the sign of a successful Gluten Free Crispy Rice Bowl base.
Also, make sure your fresh vegetables, especially the cucumber, are patted dry before assembling. Excess water from raw veggies will soften that beautifully crunchy rice too quickly once everything meets in the bowl.
Ingredient Notes and Substitutions for This Gluten Free Dinner Ideas Recipe
When we talk about making sure a recipe fits our lifestyle—whether that means keeping it gluten free or swapping proteins—it’s vital to understand what each part is doing. This dish is wonderfully adaptable, which is why it makes such a reliable staple for Healthy Gluten Free Recipes. Don’t get stressed if you don’t have exactly what I listed!
Let’s talk about the star protein: ground chicken. It cooks fast and absorbs flavor beautifully, but if you’re looking to switch it up, ground turkey works virtually identically. If you’re leaning towards a vegetarian route for your next batch of Gluten Free Dinner Ideas, firm or extra-firm tofu is a brilliant swap. Just press the tofu really well to get out the water, crumble it up, and toss it in the skillet just like the chicken—you might need a little extra oil, though!
Adjusting the Heat Level: That red curry paste is where all our main heat lives, so this is your customization point. I asked you to use 2 tablespoons, but I mentioned that using 3 tablespoons makes it punchier. If you happen to be sensitive to spice, start with just one tablespoon, cook it down completely, and then taste the sauce before you add the final bit of coconut milk. You can always add more heat, but you can’t take it out!
Also, regarding that coconut milk: since we are intentionally using it for richness while keeping the dish dairy-free, finding a satisfying substitute is important. For the rice, you really want the fat content, so if you can’t do coconut, a high-fat oat milk or even cashew cream works wonders. Never use a low-fat or skim milk here, or your rice will end up dry and disappointing. These little tweaks ensure you keep exploring delicious Air Fryer Gluten Free Recipes or stove-top meals with confidence!
Make-Ahead and Gluten Free Meal Prep Strategies
Listen, I know life gets busy, and sometimes you just need dinner to assemble itself after a long day. That’s why I love figuring out how to turn a recipe like this into a perfect spread for Gluten Free Meal Prep. The beauty of this bowl is that you prepare the three main components—the rice, the chicken curry, and the fresh veggies/dressing—all separately.
You can totally cook the coconut rice up to two days ahead of time. Once it’s cooked, follow the instruction to chill it completely. This is non-negotiable for me, as chilled rice crisps up faster and better than room-temperature rice when you bake it for that final crunch.
The chicken curry sauce is also fantastic for making ahead. Cook the chicken and sauce as directed, let it cool completely, and then store it in an airtight container in the fridge. You can keep the sauce rich and delicious for about three days this way. I usually whip up a double batch of the chicken mixture when I’m cooking anyway!
Here is the absolute most important rule for successful Gluten Free Meal Prep with this dish: Keep the crispy rice component totally separate from everything else. Store the greens, the dressing, and the chicken all sealed up nice and tight. When you’re ready to eat, you’ll take out your cold, cooked rice, spread it on a pan, and quickly bake it again to bring back that audible crunch. I’ve found that even putting the crispy rice in the container with the dressing makes it sad and soggy by lunch the next day. Prep smart, eat happy!
If you want to learn more about organizing your recipes for the week, check out my thoughts on sustainable weight loss recipes for weeknight planning—it uses many of the same principles!
Variations on the Gluten Free Crispy Rice Bowl
One thing I always preach about bowls, whether they are Mediterranean or fully Asian-inspired, is that they should be flexible. They are built for using up what you have and adjusting to whatever flavor mood you’re chasing that night. Since the structure—crispy rice, rich sauce/protein, fresh crunch—is solid, we can swap things around and still have an amazing Gluten Free Crispy Rice Bowl.
If you’re looking to pivot away from the coconut curry chicken, you have so many paths you can take to keep this feeling fresh. For instance, if you want something vibrant and herbaceous, you could lean into a lighter profile, almost like some clean eating recipes style. Skip the curry paste entirely. Use a marinade rich in lemon juice, oregano, and garlic on salmon or shrimp, then roast it instead of using ground chicken. That leans beautifully into a more Mediterranean Gluten Free Recipes vibe, although you’ll still get that satisfying crunch from the rice!
To keep the protein high, you can substitute almost anything cooked. Think thinly sliced flank steak seasoned with smoked paprika and cumin, or perhaps some crumbled, heavily seasoned lentils if you want something plant-based but still hearty. The sauce is the element you need to swap out to match the protein, of course.
For instance, if you go with shrimp, ditch the coconut milk and make a quick pan sauce with white wine, fresh herbs, and a tablespoon of butter substitute to keep it dairy-free. If you’re keeping the chicken but want a completely different profile, try swapping the curry paste for a low-sodium teriyaki glaze and adding sautéed mushrooms while you cook the ground chicken.
Don’t forget the vegetables are completely interchangeable too. If red peppers aren’t your thing, try roasted sweet potatoes for sweetness or finely shredded carrots dressed lightly in rice vinegar for acidity. The constant—the beautifully shatteringly crispy rice—is what ties all these different cultural expressions together into one perfect, customizable bowl.

Storage and Reheating Instructions for Leftover Gluten Free Crispy Rice Bowl
Now, let’s talk about the sad reality of leftovers: sogginess. We’ve worked hard to get that rice unbelievably crispy, and the last thing I want is for you to pull out your containers the next day only to find mush. The key to keeping this Gluten Free Crispy Rice Bowl recipe delicious for days is strict separation! Seriously, treat the components like they’re highly allergic to each other.
The absolute biggest rule is this: The rice and the wet stuff must live apart. Store the coconut curry chicken (which has a sauce) completely separate from the fresh, crispy rice. If you stored them together, that sauce would soak into the grains overnight, and you’d just have regular, sticky rice the next day, not the crunchy base we worked for!
When you pack your lunch containers, make three distinct sections. One for the salad greens and dressing (toss the dressing right before you eat, if possible, but if you must mix it, make sure the lettuce is very dry). One container holds the chicken curry. And the third, small container holds the baked, crispy rice. This separation is the secret to extending the life of your meal prep!
When it’s time to eat, you need to wake that rice back up. You never want to microwave the crispy rice; a microwave turns starches chewy almost instantly. Instead, spread the leftover rice back out onto a small baking sheet—just like we did the first time—and pop it into a 350°F oven or even an air fryer for about 5 to 7 minutes. You just want it warmed through and that exterior to crackle again. Trust me on this! It transforms the leftover experience.
For reheating the chicken curry, the microwave is actually fine here because it’s saucy. Give it a quick minute or two, maybe stirring halfway through, until it’s steaming hot. Then, load up your bowl: hot chicken over fresh greens, and sprinkle that newly reheated, crunchy rice right on top at the very last second. That way, you get that wonderful hot/cold, crunchy/creamy bite every single time.
Frequently Asked Questions About This Gluten Free Bowl Recipe
I always love hearing what you all are wondering about! When you’re digging into Healthy Gluten Free Recipes, or looking for dependable Gluten Free Dinner Ideas, it’s fair to have questions about substitutions and technique. I’ve gathered a few of the most common ones I get asked about this crispy rice bowl format.
Can I use a different type of rice for this Gluten Free Crispy Rice Bowl?
That’s a fair question, but here’s the thing: for this specific technique, I really push you toward a short-grain rice like the Jasmine we used, or even sushi rice. Why? Because you need that starch content to get sticky when it cooks conventionally. When that sticky rice cools, it holds its shape just perfectly enough so that when we bake it, the exterior can dry and crisp up beautifully while the inside stays slightly tender. If you used a long-grain rice like Basmati, it would stay too separated, and you’d end up with crispy, separate grains rather than that cohesive, shatterable crust you want for the best Gluten Free Crispy Rice Bowl experience.
Is this recipe suitable for a High Protein Gluten Free diet?
Absolutely! The ground chicken we use already loads this up with lean protein, making it a fantastic centerpiece for a High Protein Gluten Free meal. If you wanted to push that protein number even higher without adding a lot of extra cooking steps, I have a great tip! While you’re assembling the bowl, stir in about a half-cup of shelled edamame along with your chopped cucumber and peppers. Edamame adds a lovely little pop of green and boosts that protein quotient significantly, plus it’s naturally gluten-free, of course. It works beautifully with the curry flavor, too!
How can I make this a Dairy Free Gluten Free Recipes option if I don’t use coconut milk?
We designed this recipe to be naturally dairy-free already, thank goodness, since coconut milk is doing most of the heavy lifting! But if you really, truly cannot stand coconut—maybe you’re just not a fan of the flavor profile—you can absolutely swap it out while maintaining that richness needed for both the rice and the dressing. For the most success in the rice, look for a high-fat, full-fat oat milk or a homemade cashew cream. You need that fat content to mimic the richness of the coconut milk; otherwise, the rice will be tougher. For the dressing, the same rules apply: full-fat oat milk stirred really well will give you the creamy emulsification you need to carry the lime and vinegar!
For more insight on sticking to your dietary needs while enjoying incredible food, feel free to look at what I’ve written over on our general recipe safety page.
Gluten Free Crispy Rice Bowl
Ingredients
Equipment
Method
- Combine the rinsed rice, 3/4 cup coconut milk, water or broth, and 1/2 teaspoon salt in a medium saucepan. Bring the mixture to a boil over medium heat. Reduce the heat to a simmer, cover, and cook for 15 minutes.
- Remove the saucepan from the heat and let it sit, covered, for another 10 to 15 minutes. Fluff the rice with a fork. Spread the rice on a baking sheet and place it in the refrigerator until chilled or at room temperature if preparing ahead.
- Preheat your oven to 425 degrees Fahrenheit. Spread the chilled rice on a large baking sheet. Spray lightly with non-stick oil. Sprinkle with 1/2 teaspoon salt, pepper, and garlic powder. Bake for 20 minutes. Stir the rice, then return it to the oven and bake for another 15 to 20 minutes until the rice is brown and crispy. Set aside; it will crisp more as it cools.
- Heat a medium skillet over medium heat. Add the ground chicken and 1/2 teaspoon salt. Use a wooden spoon to break up the chicken as it cooks. When the chicken is almost fully cooked, add the minced garlic and cook for 1 to 2 minutes.
- Add the curry paste to the chicken mixture and stir to combine. Cook for 1 to 2 minutes. Stir in the remaining 1/4 cup coconut milk, the remaining 1/4 teaspoon salt, and brown sugar. Bring the mixture to a boil, then reduce to a simmer. Simmer until the sauce thickens, about 5 to 6 minutes. Season to taste.
- When the rice is almost crispy, push it to one side of the baking sheet and add the 1/2 cup of coconut flakes to the empty space. Bake until the coconut is lightly toasted, about 2 minutes. Watch carefully, as coconut burns quickly.
- While the rice and chicken cook, prepare the lettuce and vegetables. In a large serving bowl, combine the chopped romaine, cucumber, red pepper, cilantro, and dressing. Season with salt and pepper and toss to combine.
- To assemble the bowls, add half of the coconut curry chicken, half of the crispy rice, and half of the toasted coconut to the salad mixture. Toss everything until combined. Sprinkle the remaining chicken, rice, and coconut over the top. Garnish with fresh cilantro.
- For the dressing: In a small bowl, whisk together the remaining two tablespoons of coconut milk, lime juice, rice vinegar, 1/4 teaspoon salt, and honey. Season with salt and pepper to taste.