
There’s something truly magical about a classic Italian dessert, isn’t there? That perfectly balanced bite of bitter espresso, decadent cream, and sweet cocoa—it just stops you in your tracks. The first time I truly understood tiramisu was at a tiny café in Boston’s North End. It was silky, wonderfully complex, and not too heavy, and I remember thinking right then that this shouldn’t be reserved only for special occasions!
When I started making it at home, I loved the ritual, but I didn’t always have hours to spare. That’s why developing this Quick Thermomix Tiramisu for you has been such a joy. The Thermomix makes the incredibly smooth mascarpone cream in minutes, turning what felt like a grand project into something totally achievable tonight.
I’m Emma Brooks, a Registered Dietitian and Flavor Strategist here at Top Chicken Eats. My goal is always to show you how food can nourish both the body and soul, which absolutely includes enjoying wonderfully comforting desserts like this one. This recipe gives you that nostalgic, impressive result without the lengthy fuss.
Why This Quick Thermomix Tiramisu is Your New Favorite Dessert
I know you have a stack of desserts you *want* to make but never seem to find the time for? This is the recipe that breaks that cycle! It truly delivers that impressive, layered look of an authentic Italian dessert, but we get it done so fast, it feels like cheating.
- It’s surprisingly fast—we’re talking assembly in about 20 minutes total before chilling!
- The texture is pure silk; the Thermomix handles the whisking for us.
- It’s the perfect elegant ending for quick weeknight dinners or unexpected company. Check out more of my favorite fast recipes here!
Speed and Simplicity for Busy Cooks
Forget waiting for eggs and sugar to fluff up for what feels like forever—the machine does the heavy lifting so quickly. We skip a lot of the traditional steps that slow a homemade tiramisu down. This means you can decide you want tiramisu after dinner and still have it ready for tomorrow!
Achieving Authentic Creaminess with Your Quick Thermomix Tiramisu
The real magic is that flawless mascarpone mix. You know how whipped cream can sometimes look a little sad? Not here! The Thermomix blends the yolks, sugar, and mascarpone into a stable, ultra-smooth cream that holds its shape beautifully when layered. Honestly, achieving this texture used to take me ages with electric beaters, but our Quick Thermomix Tiramisu is perfectly rich every single time.
Essential Ingredients for Quick Thermomix Tiramisu
When you want a dessert to come together fast, you need to make sure your ingredients are ready to go! Trust me on this. Having everything measured out before you even turn on the Thermomix saves so much stress. This recipe relies on just a few high-quality things to get that incredible Italian flavor.
For the Coffee Soak
This is where the flavor foundation happens. You’ll need:
- 250 ml espresso coffee—make sure it’s strong!
- 40 ml Kahlua (This is totally optional, but it adds such a lovely depth. Skip it if you need to!); 1 cup espresso coffee is about what you need.
For the Mascarpone Cream
The cream needs to be rich, so don’t skimp here. We are using 6 large egg yolks for that perfect, dense texture, so make sure yours are fresh. You also need:
- 3/4 cup caster sugar (that’s about 165g, so weigh it if you can!)
- 750 grams mascarpone (that’s roughly 3 cups, but I always measure the grams just to be safe).
- 1 teaspoon vanilla bean paste (If you only have extract, use that, but the paste gives those lovely little black specks!).
For Assembly and Finishing
Once the cream is ready, it’s assembly time! Have your 18 x 29 cm tray right next to you. You will need:
- About 30 Savoiardi ladyfinger sponges—you might need a few more or less depending on how tightly you pack them in!
- Cocoa powder, generously sprinkled to taste for the beautiful final dusting.
Step-by-Step Instructions for Quick Thermomix Tiramisu
Okay, here’s where the machine really shines and we pull this beautiful dessert together fast! Remember, because we’re working with raw eggs to get that traditional lift, precision matters here, but it’s still so much faster than any other method I’ve tried. Everything moves quickly once you start whipping the base.
Preparing the Coffee Soak and Egg Base
First things first, we need that espresso soaking liquid ready to go. Brew your coffee—strong is best! Pour it into a regular medium bowl and stir in the Kahlua, if you’re adding that little kick. Set that aside to cool down a bit while we handle the eggs.
Now, clean out your Thermomix bowl and pop in that Butterfly whisk attachment. Add your egg yolks and the sugar. Mix this for 6 minutes on Speed 4 at 37 degrees. This step gently heats and thickens those yolks—it’s basically making a quick zabaglione!
Expert Tip for Pregnancy Safety: If you are making this while pregnant or serving it to someone who is, you need to make sure those yolks are fully pasteurized. Just set the temperature to 75 degrees Celsius instead of 37 degrees for the last couple of minutes of mixing. We want to heat it through properly to kill any bacteria.
Creating the Silky Mascarpone Cream for Quick Thermomix Tiramisu
Once the yolks are fluffy and pale, it’s time for the cream. Make sure you take the Butterfly whisk out of the bowl—we don’t want that thing flying off!
Set the machine to run for 3 minutes on Speed 3. While it’s gently mixing the yolks, slowly drizzle in the mascarpone cheese and the vanilla bean paste right through the hole in the lid. Don’t dump it all in at once! Adding it slowly while mixing on a medium speed ensures we fold it in properly rather than just beating all the air out. This step gives us the stable, smooth texture that makes this Quick Thermomix Tiramisu so special.
Assembling Layers of Your Quick Thermomix Tiramisu
It’s showtime! Get your cooled coffee soak, your ready cream, and your 18 x 29 cm tray right next to your Thermomix.
Listen to me carefully here: you must work fast when dipping the ladyfingers. Grab one sponge and dip *each side* for barely a second—seriously, just a quick dunk! If you soak them too long, soggy tiramisu is guaranteed! Let any extra drips fall off before placing these coffee-soaked sponges in a single layer at the bottom of your tray. Use cut pieces to fill any gaps.
Now spread half of that gorgeous mascarpone cream evenly over the sponge foundation. Repeat the dipping mess again for the second layer of sponges, top with the remaining cream, and spread it smoothly. If you feel like being extra fancy, you can use a piping bag, but honestly, a spatula works great.
If you have family looking for easy baking projects, they can handle the dipping part, but make sure they know the rule: quick, quick, quick!
Chilling and Serving
Cover that beautiful tray tightly with plastic wrap or a lid. We need patience now, even though we worked quickly before! You absolutely must chill this for a minimum of 4 hours, but honestly, overnight is where the real flavors marry up perfectly. Trust the process here.
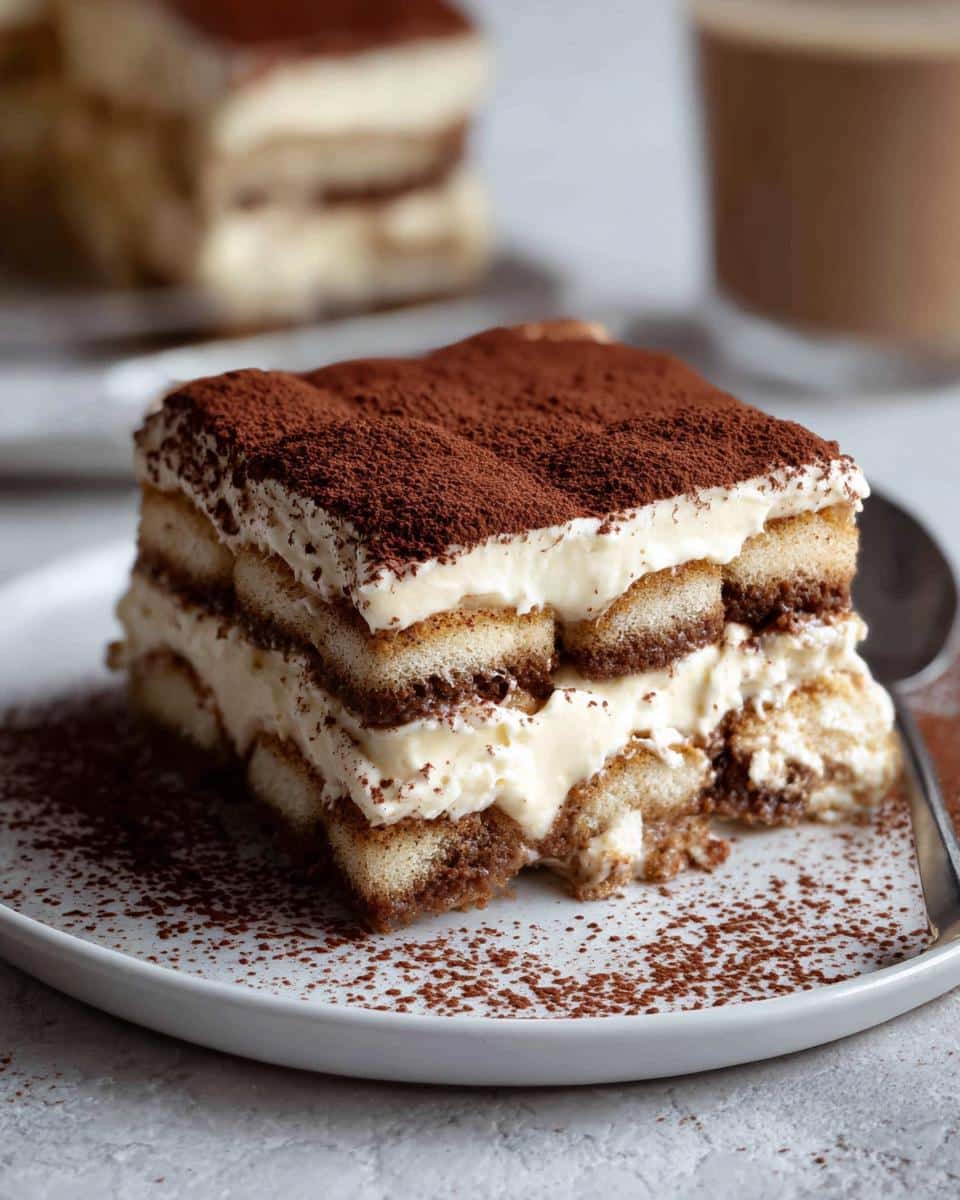
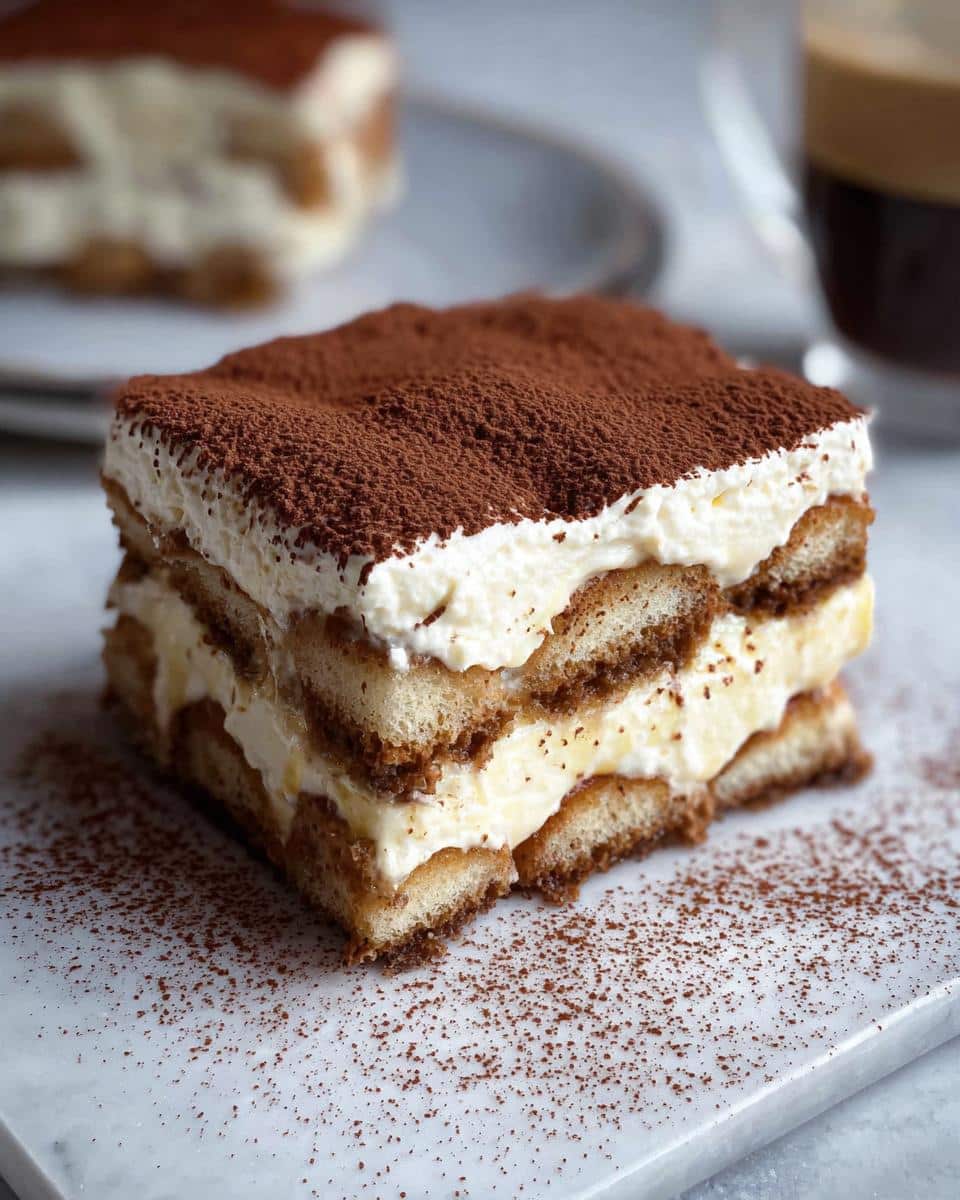
Right before you serve your perfect Italian dessert, dust the top generously with cocoa powder. A nice, thick, slightly bitter layer of cocoa contrasts beautifully with the sweet, cool layers underneath. Enjoy!
Tips for Perfect Quick Thermomix Tiramisu Assembly
Even though this is our Quick Thermomix Tiramisu, assembly is still where we can accidentally turn a masterpiece into a mess! I’ve learned a few tricks over the years to ensure your layers stay distinct, firm, and beautifully creamy, not soupy. These little guardrails really help take the guesswork out of layering.
Mastering the Sponge Dip Technique
If you take one thing away from this whole recipe, please let it be this: the ladyfingers are sponges in name only when it comes to liquid! They absorb coffee like a thirsty little kid the second you look away. You want them damp, not drenched.
I always hold the ladyfinger between two fingers and dip the first side straight down for about one second, flip it, dip the other side for one second, and pull it out immediately. Seriously, count *one Mississippi*, then flip. Any longer and you’re risking that wet layer at the bottom, which is the absolute number one pitfall of fast tiramisu. Don’t worry if the very center doesn’t look fully soaked; the rest of the moisture will wick through during the long chill time.
Ingredient Temperature Matters for Cream Stability
When you are mixing up that beautiful mascarpone cream in the Thermomix, the temperature of your dairy can really affect the final texture. If your mascarpone is too warm, it can get a little grainy or separate when you beat it, even with the Butterfly whisk doing the work.
Make sure your 750 grams of mascarpone is chilled straight from the fridge, but not rock hard. It should still be soft enough to easily scoop out of the container. If it’s too cold, it won’t incorporate smoothly with the warm, thick egg base. If you happen to chill it too much, just let it sit on the counter while you make your coffee soak—about 10 minutes should do the trick. A smooth start means a stable cream!
If you are looking for some other appliance tips, I put together this disclaimer page that covers maintenance for various kitchen tools!
Variations on Quick Thermomix Tiramisu
While this Quick Thermomix Tiramisu hits that perfect sweet spot between coffee, cream, and cocoa, I love that it’s also a fantastic base for playing around with flavors! It’s fun to put your own spin on a classic Italian recipe, especially when the base machine work goes so quickly.
Because the Thermomix handles the heavy lifting of the cream so efficiently, you can dedicate your extra energy to experimenting with the soak or even adding subtle layers of crunch. Don’t be afraid to move outside the traditional boundaries a little bit!
Flavor Twists for Your Quick Thermomix Tiramisu
The easiest place to change things up is definitely in that espresso soak. If you’re not a huge coffee fan, or if you’re making this for people who can’t handle caffeine, this is where you can get creative. Think about replacing that strong espresso with something equally fragrant.
Instead of coffee, try a strong decoction of chai tea—it brings in beautiful spice notes like cardamom and clove, making it wonderfully warming! Or, if you love rich, nutty flavors, use a roasted chicory blend instead of coffee. The resulting dessert is still deeply flavored and absolutely cozy, fitting right in with those lovely Autumn Recipes we all crave.
When it comes to the liqueur, Kahlua is my go-to because it blends seamlessly, but you could swap that out too! Amaretto gives you lovely almond undertones, or a good quality dark rum will deepen the entire flavor profile significantly.
If you’re looking for other customized desserts, I have tons of fun ideas, especially around the holidays, over on my Christmas cookie recipes page where portion control is half the fun!
Storage and Make-Ahead for Your Quick Thermomix Tiramisu
One of the best things about making any layered dessert, especially one with creamy fillings like our Quick Thermomix Tiramisu, is that it actually *improves* with time. This is fantastic news for busy cooks like us who need to prep ahead for entertaining!
Because the coffee needs time to soak into those ladyfingers and the mascarpone cream needs to firm up, this dessert is actually designed to be made in advance. Plan on chilling it for at least four hours, but honestly, I think it tastes even better on Day Two when all those flavors have really had a chance to mingle.
You can safely keep your covered tiramisu in the refrigerator for up to three days. Just try not to dust it with that final layer of cocoa powder until right before you serve it, otherwise, the cocoa can get a little damp from the moisture in the fridge air. Keep it covered tightly so it doesn’t pick up any other stray smells from your kitchen!
Now, about freezing—this is where things get a little tricky with tiramisu. Since we aren’t using eggs cooked to stiff peaks (thank goodness for the Thermomix speed!) and we have all that lovely dairy, freezing isn’t my top recommendation. The texture of the mascarpone cream can change slightly when it thaws, sometimes becoming a bit grainy or watery.
If you absolutely must freeze leftover squares, make sure they are cut first, wrap each piece incredibly well in plastic wrap, and then slip them into an airtight container. Plan on thawing them slowly in the fridge overnight before serving. But honestly, for the best texture, this Quick Thermomix Tiramisu truly shines when eaten within 48 hours!
Serving Suggestions for This Italian Dessert
Even though Tiramisu is the star of the show, a truly great dessert moment needs a perfect supporting cast! Since this flavor profile is so rich—heavy on the mascarpone, strong on the coffee—we want pairings that either cut through that richness with something bright or lean into the cozy comfort it offers.
This makes it a surprisingly wonderful inclusion in your lighter Autumn Recipes spread, especially Thanksgiving. We usually serve this after the big meal, and these additions really help round out the whole experience.
For something light on the palate, fresh berries are always an excellent choice. Not heavy sauces, just a few raspberries or thinly sliced strawberries on the side. The little pop of acid from the fruit is a fantastic refresher after a rich, creamy bite.
If you’re serving it as part of a larger Italian spread, keep the beverage pairing simple but bold. A small glass of Vin Santo alongside is traditional and lovely, especially if you are looking at Thanksgiving appetizer recipes, but if you want something non-alcoholic, a small, very strong, lukewarm espresso served alongside is the ideal palate cleanser.
I always avoid heavy, creamy side desserts. You’ve already got the best creaminess right there in the dish! A simple scoop of high-quality vanilla bean gelato alongside your slice is divine, but honestly, the cocoa dusting on top of this Quick Thermomix Tiramisu usually means it needs nothing extra at all!
Frequently Asked Questions About Quick Thermomix Tiramisu
When you’re making a classic like this, it’s natural to have a few questions pop up! I know when I first started tweaking my Italian Recipes for the machine, I had a million little worries—mostly about the cream staying perfectly smooth. Here are the things folks ask me most often about this Quick Thermomix Tiramisu.
Can I make this Quick Thermomix Tiramisu without alcohol?
Absolutely, yes! The Kahlua is certainly traditional and adds that wonderful coffee/chocolate depth, but it’s completely optional, especially if you’re making it for family or just avoiding alcohol for the day. If you skip it, just use a bit more strong espresso coffee in that soak! You might want to increase the espresso by 40ml to make up for the liquid you removed. It will still taste fantastic!
Is this recipe considered one of the healthier Thermomix Recipes?
That is such a great question, and one I get asked a lot! As a Registered Dietitian, I always focus on balance, right? Tiramisu is traditionally a rich dessert—it’s supposed to be indulgent! We are using full-fat ingredients like mascarpone because that’s what gives it that signature silky texture. However, by whipping the cream efficiently in the Thermomix, we avoid adding extra heavy cream or butter, keeping the structure true but avoiding unnecessary additions. It’s a mindful indulgence, not a guilt trip! If you’re looking for genuinely lighter options, check out some of my other mindful baking projects.
What is the best substitute for Savoiardi ladyfingers in this Italian Recipe?
Savoiardi (ladyfingers) are amazing because they absorb liquid quickly without immediately turning to mush, which is critical for our quick assembly! If you can’t find them, don’t panic. You can use a very dry, plain sponge cake—like a simple pound cake or even stale Madeira cake—sliced thinly enough to fit in your tray. Cut it into strips about one inch wide. Since these sponges are denser than ladyfingers, you might need to dip them for just a tiny bit longer, maybe two seconds instead of one, but watch them closely!
I hope these answers clear things up! Making these fantastic kitchen recipes should be fun, not stressful!
Share Your Quick Thermomix Tiramisu Creations
I honestly get so excited when I hear from you all after you’ve tried one of my recipes, and this Quick Thermomix Tiramisu is one I truly hope you dive into!
That moment when you dust the cocoa powder on top and see those perfect layers staring back at you? That deserves a shout-out!
Please, if you make this—and I really hope you do—come back here and leave me a rating and a comment. Tell me how quickly it came together for you or if you tried one of the flavor twists! Knowing that this recipe is saving you time in the kitchen while still delivering that rich, comforting Italian experience means the world to me.
And if you snap a picture of your beautiful, creamy coffee-soaked layers, tag me on social media! I love seeing your successes and sharing your amazing work with my followers. We’re all learning and eating deliciously together, so don’t be shy!
If you ran into any snags or have a question that wasn’t covered in the FAQs, please don’t hesitate to reach out via my contact page. Happy baking, everyone!
Quick Thermomix Tiramisu
Ingredients
Equipment
Method
- Make the espresso coffee and add it to a medium bowl. Add the Kahlua, if you are using it. Set this mixture aside to cool.
- Insert the Butterfly whisk into the Thermomix bowl. Add the egg yolks and sugar. Mix for 6 minutes at 37 degrees on Speed 4.
- Pregnancy-Friendly Variation: If you are preparing this while pregnant, set the temperature to 75 degrees Celsius. Insert the Butterfly whisk, add the egg yolks and caster sugar, and mix for 4 minutes at 37 degrees on Speed 4. Scrape down the sides of the bowl and mix for a further 2 minutes at 75 degrees on Speed 4. If the machine has not reached 75 degrees by the end of the cooking time, cook for an additional 1 minute at 75 degrees on Speed 4.
- Set the machine to mix for 3 minutes on Speed 3. While the blades are turning, slowly add the mascarpone and vanilla bean paste through the MC hole.
- Remove the Butterfly whisk from the Thermomix bowl. Place the coffee mixture, Savoiardi ladyfinger sponges, and your 18 X 29 cm tray on a counter, ready for assembly.
- Work quickly to assemble. Dip each side of a sponge finger into the coffee and Kahlua mixture. Dip for only 1 second on each side, as dipping too long will make them soggy.
- Allow any excess coffee to drip from the sponges. Assemble them in a single layer in the bottom of your dish. Cut some sponge fingers to fit if there are any gaps.
- Spread half of the mascarpone mixture evenly over the top of the sponge layer.
- Repeat this process with a final layer of coffee-soaked sponges. For the top layer, either spread or pipe the remaining mascarpone over the top.
- Cover the dish and refrigerate for at least 4 hours, or overnight for the best result.
- Top with a sprinkle of cocoa powder or some dark chocolate shavings before serving, if you prefer.