
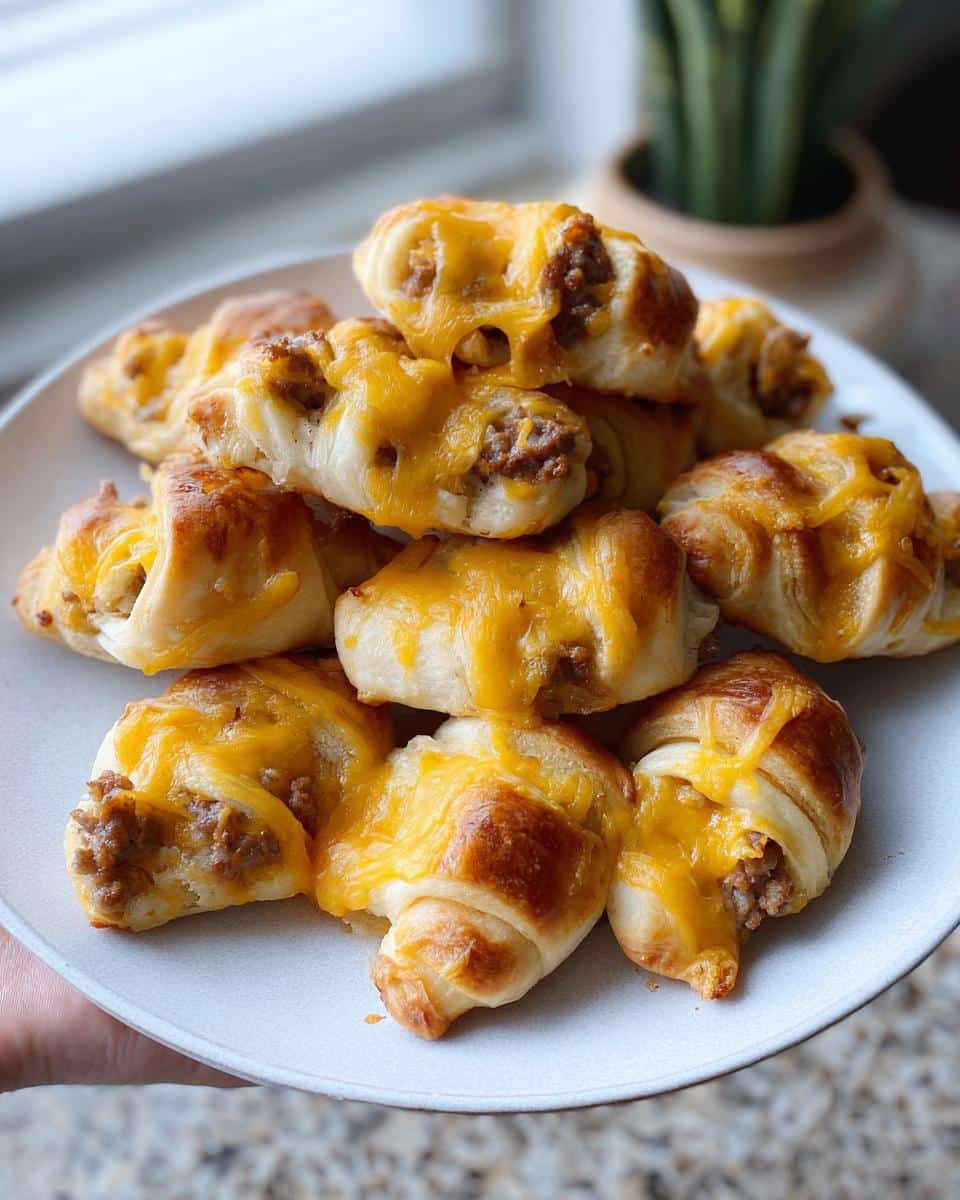
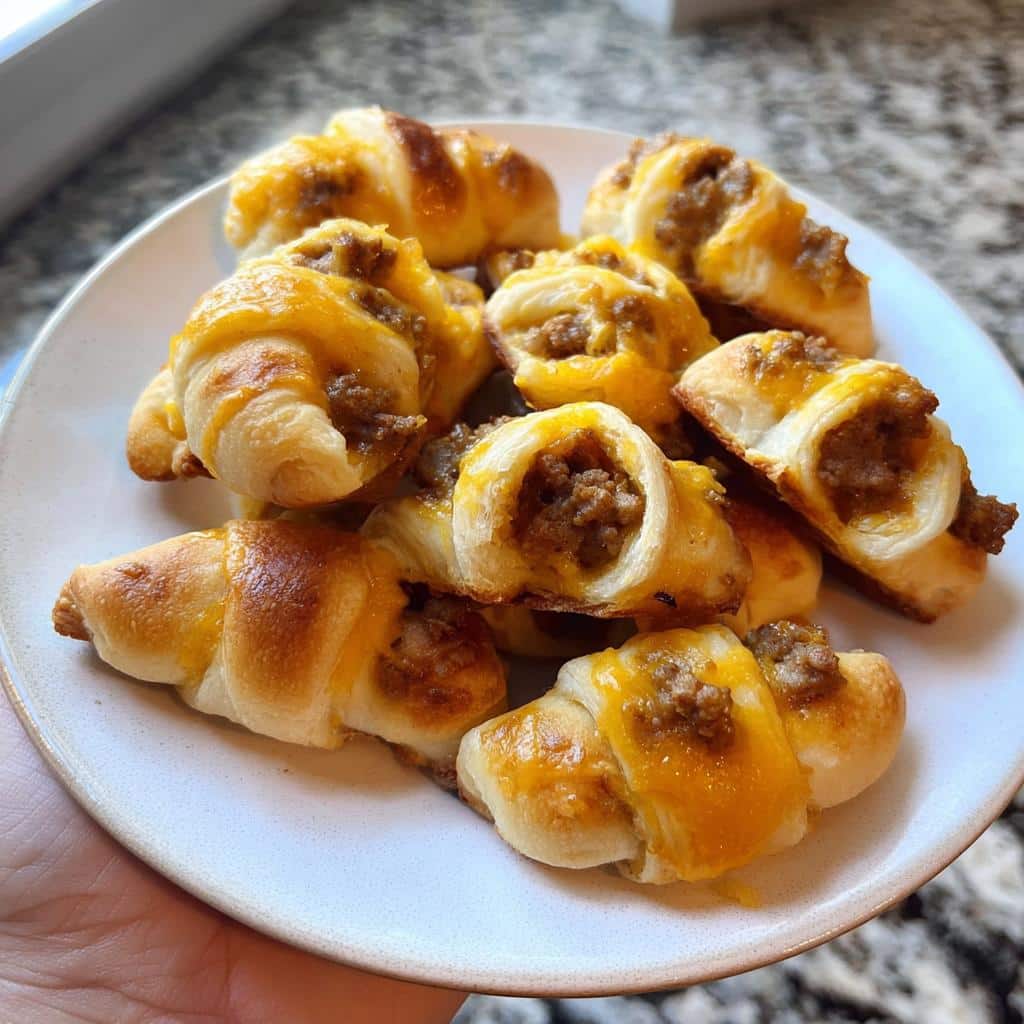
When party time looms, or you just need a savory treat that disappears way too fast, you want something reliable. Forget complicated pastry work! These Sausage & Cheese Crescent Bites are my go-to answer for easy, crowd-pleasing comfort food. Crescent rolls are practically magic; they take boring ingredients and turn them into these golden, flaky bites!
When I started teaching cooking classes, I always started folks off with simple dough recipes to build confidence. These bites came from that philosophy—taking the store-bought dough you already trust and transforming it. They’re forgiving, they taste amazing every single time, and they prove you don’t need hours in the kitchen to make something special that everyone will grab first.
Why You Will Love These Sausage & Cheese Crescent Bites
Honestly, these little pockets are the definition of a win-win situation in the kitchen. They solve that nagging problem of needing a quick appetizer that still feels special. I’ve never taken these to a gathering without wanting to double the batch because they vanish so fast!
- They are astonishingly fast. Seriously, the prep time is next to nothing, making them perfect for last-minute snack ideas.
- No fancy skills required here! We’re using store-bought crescent dough, so the hard work is already done for you.
- The flavor combination is pure comfort food: salty sausage mingling with sharp, melty cheddar cheese. It’s a classic for a reason.
- They’re perfectly portioned! These bite size appetizers are easy to handle, which means no mess and no need for extra forks.
- They look much fancier than they are, making you look like the rockstar host without the stress.
- They are incredibly versatile; serve them as party snacks, brunch ideas, or just an easy weeknight munchie.
Essential Ingredients for Perfect Sausage & Cheese Crescent Bites
You really don’t need much to pull these off, which is part of the magic! I keep these items stocked for impromptu baking sessions. When you grab your crescent roll package, make sure you read the note right on it—we need that dough whole, not separated into its little triangles yet!
For the best flavor payoff, I always insist on sharp cheddar. The milder stuff just gets lost when baked up in these little bites. Pay attention to the cream cheese, too; it needs to be softened just a bit so it sits nicely in the bottom of the dough cups.
- 1 package of Crescent rolls or puff pastry (Remember: keep the dough together, don’t separate the triangles!)
- 1/2 lb Breakfast pork sausage (Make sure it’s cooked and drained well beforehand!)
- 1 cup SHREDDED sharp cheddar cheese
- 8 oz Cream cheese (Softened is the secret here)
Step-by-Step Guide to Making Sausage & Cheese Crescent Bites
Alright, this is where the fun starts! I promise you, the assembly is faster than boiling water. The biggest thing I want you to remember is to work quickly once you start cutting the dough so it doesn’t get sticky. We’re turning a simple sheet of dough into sixteen unique little pockets for the oven!
Preparing the Oven and Crescent Dough for Your Sausage & Cheese Crescent Bites
First things first, get that oven humming at 350 degrees Fahrenheit. While it heats up, gently unroll your tube of crescent rolls onto a clean counter or cutting board. Very carefully, press down along the perforations so you have one solid, soft sheet of dough. That’s key! Next, you need to cut that sheet into 16 even little squares. Don’t try to get them perfect—we’re making rustic little bites, not tiny artwork, honest!
Assembling the Filling Inside the Dough Cups
Now that you have your squares, grab your mini muffin tin. This is the equipment that gives us the perfect, contained shape. Press one dough square gently into each well of the tin. Next, drop a small dollop of your softened cream cheese right into the bottom of the dough cup. Top that with a spoonful of your cooked sausage, and finish it off by burying it completely under a nice layer of that sharp cheddar cheese. Don’t be shy with the cheese; it creates that beautiful golden crust!

If you’re looking for fun techniques to get the kids involved with baking, check out some of my easy recipes for kids—they love helping layer these!
Baking and Serving Your Sausage & Cheese Crescent Bites
Slide that tray right into the preheated oven. They only need about 12 to 14 minutes in there. You’re looking for the crescent dough edges to be beautifully browned and crispy, and the cheese should be bubbly and melted, obviously! Once they look perfect, pull them out. Let them cool in the tin just for a minute or two—careful, they’re hot!—and then serve them right away while they are warm. These are best enjoyed fresh!

Tips for Making the Best Sausage & Cheese Crescent Bites
Making these is simple, but a couple of little tricks will take them from good to absolutely unforgettable! First, let’s talk sausage. If you are using raw pork sausage, you must cook and drain it thoroughly beforehand. Nobody wants soggy bottoms from unrendered fat!
When you’re pressing the dough into the mini muffin tin cups, try not to stretch it too thin, especially at the bottom. If you work the dough too much, it gets tough. A gentle press is all it needs. Also, cheat alert: if you want extra golden tops that really brown nicely, brush the exposed dough edges with a tiny bit of melted butter before they go into the oven.
Finally, to ensure maximum cheese melt, try mixing about half your cheddar into the sausage mixture before you top it. This helps bind the filling a little, and the rest sprinkled on top gives you that perfect bubbly crust. Trust me on the butter brush!
Variations for Your Sausage & Cheese Crescent Bites
While the classic combo of pork sausage and cheddar is absolutely foolproof, I love that these little bites are basically a blank canvas for flavor experiments! Don’t be afraid to switch things up, especially if you’re making them for a holiday party where folks might appreciate a little twist. I often rotate cheeses depending on the season.
If you’re planning ahead for winter gatherings, try swapping that cheddar for something smoky! A strong smoked Gouda melts beautifully and adds such a nice rustic depth. Or, if you’re leaning towards something a bit spicier for a crowd, Monterey Jack mixed with a pinch of cayenne pepper is my secret weapon. It keeps that great meltiness but throws in a nice little kick.
Another simple way to upgrade these is by adding texture and freshness to your sausage filling *before* you scoop it in. Try mixing in a tablespoon of finely minced green onions with the cooked sausage and cream cheese. The onion cooks down slightly but gives a nice freshness right in the middle of that savory bite. For those who like a real punch, a tiny dash—I mean just a few drops—of your favorite hot sauce stirred into the sausage mixture elevates these quickly. It’s shocking how much flavor a small addition can bring!
If you want to take them into that slightly more festive realm for Christmas recipes or other celebrations, consider adding dried cranberries finely chopped into the cheese layer. You get a little burst of tartness that plays so nicely against the saltiness. It sounds odd, I know, but trust me, it’s amazing!
Storage and Reheating for Leftover Sausage & Cheese Crescent Bites
Now, if you’re lucky enough to have any of these incredible little bites left over—which I highly doubt, because they disappear!—storage is super easy. Don’t just toss them in a bag! We need to protect that flaky crescent dough so they don’t turn sad and soft.
Once they’ve cooled completely, pop them into an airtight container. They keep really well in the fridge for about three or four days. I’ve tested this many times when I try to portion them out for quick lunches the next day, and they hold up great!
The rule for reheating? Avoid the microwave if you can. Microwaves are the enemy of crispy dough! We want to bring back that golden flakiness we worked so hard for.
Your best bet is the oven or even a toaster oven. Preheat whatever you use to about 325 degrees Fahrenheit. Lay the bites out on a baking sheet—no need to cover them—and warm them through for about 5 to 7 minutes. You’ll know they’re done when the crust is crisp again and the cheese inside is melty again. They come out tasting almost perfectly fresh! That simple reheat method keeps these easy snacks tasting exactly how they should.

Frequently Asked Questions About These Easy Snack Recipes
Got questions rattling around about making these simple little pockets? That’s totally normal! I get asked about substitutions and timing all the time. Here are the most common things people wonder about when they’re planning to make these Sausage & Cheese Crescent Bites. Hopefully, this covers everything you need to know to make these the best small bites recipes you’ve ever whipped up! If you want to know more about my general approach to simple cooking, you can always check out my info page right here.
Can I prepare the Sausage & Cheese Crescent Bites ahead of time?
You absolutely can, which makes them ideal for serving up those fantastic party snacks! Here’s what works best: you can assemble the bites completely—dough cut, filled, and pressed into the mini muffin tin—and then cover the whole tray tightly with plastic wrap. Keep them refrigerated for up to 24 hours before baking. When you’re ready to bake, just pull them out, let them sit on the counter for about 15 minutes to take the chill off, and then bake them following the regular instructions. They might need an extra minute or two if they are coming straight from a very cold fridge.
What makes these great Party Snacks?
Honestly, they are the ultimate party snacks because they tick every single box a good appetizer needs! First, they are totally portable. Thanks to that mini muffin tin molding them into little cups, they hold their shape perfectly, so guests can easily grab one while mingling. Second, no fuss! No dipping sauces needed, no plates or forks required—they are true finger foods. Finally, the flavor is a universal hit. Sausage, cheese, and buttery crescent dough? Come on, what’s not to love? They are designed to be crowd pleasers meant to disappear fast!
Can I use puff pastry instead of crescent rolls?
Yes, you certainly can swap them out! If you use puff pastry instead of the standard crescent dough, you’ll get an even flakier, lighter result. Puff pastry tends to puff up a bit more dramatically. The main thing to watch for is the size—you might need to cut your squares slightly smaller than the crescent ones, or alternately, you might only get 14 or 15 bites instead of 16, depending on how thick your puff pastry sheet is. Keep an eye on the bake time; puff pastry sometimes browns a little faster on the edges!
What kind of sausage should I use for the best flavor?
My recipe calls for standard breakfast pork sausage because it’s easily available and has that perfect blend of sage and pepper flavor that pairs so well with cheddar. Importantly, make sure it’s fully cooked and drained really well before you mix it with the cheeses! However, if you want to mix things up because you need different easy snack recipes for variety, turkey sausage works great too. Just boost the seasoning a bit since turkey is milder, maybe adding a pinch of dried thyme or a dash of dried sage to compensate.
How should I adjust baking time if I use standard muffin tins instead of mini ones?
That’s a smart question! If you use regular, full-sized muffin tins, you are essentially doubling the volume in each cup. Because the heat needs more time to reach the center of that larger dough pocket, you should automatically add about 5 to 8 minutes to the baking time. Start checking them around the 18-minute mark. The dough should look deeply golden brown, and the cheese should be bubbling merrily. You might need to reduce the oven temperature slightly to 325°F if the tops look like they are browning too quickly before the centers are done!
Author Expertise and Trust in These Bite Size Appetizers
Sarah Bennett is a Culinary Educator and Visual Storyteller at Top Chicken Eats. From her Seattle kitchen, she blends teaching and photography to make cooking approachable, creative, and full of heart. I truly believe that anyone can whip up amazing food, and recipes like these **bite size appetizers** prove it.
My whole goal is to show you that cooking shouldn’t be intimidating. Having taught so many home cooks over the years, I know the secret is breaking things down into simple, achievable steps. That’s exactly what we did here for these easy bites. If you ever need to reach out with questions about ingredient swaps or anything else, feel free to contact me here!
Nutritional Estimates for Sausage & Cheese Crescent Bites
Now, listen up! I always want to be super honest with you about the numbers, but when we’re dealing with delicious, cheesy, savory things like these Sausage & Cheese Crescent Bites, take these figures with a little grain of salt. I’m not a registered dietitian, and every brand of sausage or crescent roll has different fat content, you know?
These estimations are based on using standard full-fat ingredients as listed in our recipe and are calculated for one individual bite since we made 16 of them. Think of this as a fun guideline rather than a strict rule, okay? For the most precise data, you’d have to plug in the exact brands you use into a scanner app!
For a deeper dive into why nutritional facts matter on my site, you can always check out my general disclaimer page here. But seriously, when these come out golden brown, calories are the last thing on my mind!
- Estimated Calories: 110-130 kcal per bite
- Estimated Total Fat: 8g – 10g per bite
- Estimated Protein: 5g per bite
- Estimated Carbohydrates: 5g per bite
Enjoying one or two of these fantastic **finger foods** at your next party is totally worth every little bit!
Share Your Experience with These Quick Appetizers
Okay, now that you’ve made these incredible Sausage & Cheese Crescent Bites, I absolutely need to hear about them! Honestly, seeing how you all customize these simple little bites is one of the best parts of sharing these recipes.
Did you go with smoked Gouda? Did the kids get involved in pressing the dough into the mini muffin tin? Please, don’t be shy! Head down to the comments section below and tell me everything. I love reading your feedback, seeing your photos, and answering any little questions that popped up while you were baking.
If you snap a picture of your golden-brown creations, tag me on social media! I try to check in often. When you share your photos, think about those awesome Pinterest tags like #easybites or #crowdpleasers—it helps other folks find this amazing, simple recipe!
And hey, if you want to know more about how I handle data and connections around here, you can always check out my privacy policy. But honestly, the best connection is seeing these cheesy, savory appetizers sitting proudly on your own party spread!
Sausage & Cheese Crescent Bites
Ingredients
Equipment
Method
- Preheat your oven to 350 degrees Fahrenheit.
- Lay out the crescent rolls on a flat surface. Press the creases together so you have one continuous sheet of dough.
- Cut the dough into 16 even squares. You should get 16 squares total.
- Place each dough square into a mini muffin tin cup.
- Add a piece of cream cheese to fit into the bottom of each dough cup. Top the cream cheese with the cooked breakfast sausage and then cover completely with shredded cheddar cheese.
- Bake for 12 to 14 minutes, or until the crescent dough has browned.
- Remove from the oven and serve warm.